
4 WAYS TO DESTROY SOUTH ASPEN HIGH
Quick Links to Posts:
April 6th, 2026 - Explosions and Void Progress
March 25th, 2026 - Explosions and Screen Replacement
March 8th, 2026 - Superheros and Invisible VFX
February 17th, 2026 - First Large Shot Finals and Deep Progress
February 8th, 2026 - Deep into Post Production
January 27th, 2026 - Assembly Cut
January 16th - 19th, 2026 - Production
January 11th, 2026 - Void Growth and Veins
January 6th, 2026 - Social Media and Pipeline
November 9th, 2025 - Speed Trail Iteration Test Comp
November 2nd, 2025 - Speed Trail Variation
October 24th, 2025 - Set Extension Test Breakdown and Further Improvement
October 19th, 2025 - Set Extension Test
October 13th - Shadow Pre-Vis and Test Shooting
October 3rd, 2025 - Speed Test Renders and New Animatic
September 28th, 2025 - Speed Trail Render (Version 01) and Test Shooting
September 23rd, 2025 - Fresh Animatic and Speed Trail Test Render and Comp
September 16th, 2025 - Preliminary Shot List and 3D Plan
September 13th, 2025 - Animatic Pre-vis and AI Match Move
September 9th, 2025 - Speed Trail Test and Quick Render
September 8th, 2025 - Rough Animatic and Storyboards
August 19th, 2025 - Shadow Monster and Speed Trail Previs/Proof of Concept
April 6th, 2026 - Explosions and Void Progress
We are approaching deadline, and for comp we have been in full on crunch mode. The only shot we seem to be having issues with as of now is the Full CG Drone shot, due to limitations and issue that the SCAD Render Farm is giving us. The ancient spaghetti code that the farm is run on has been nothing but a headache. However, we are working the problem, and the shot will be complete.
Beyond that, I have been busy on both the void scene with Eve as well as the Post explosion aftermath comp.
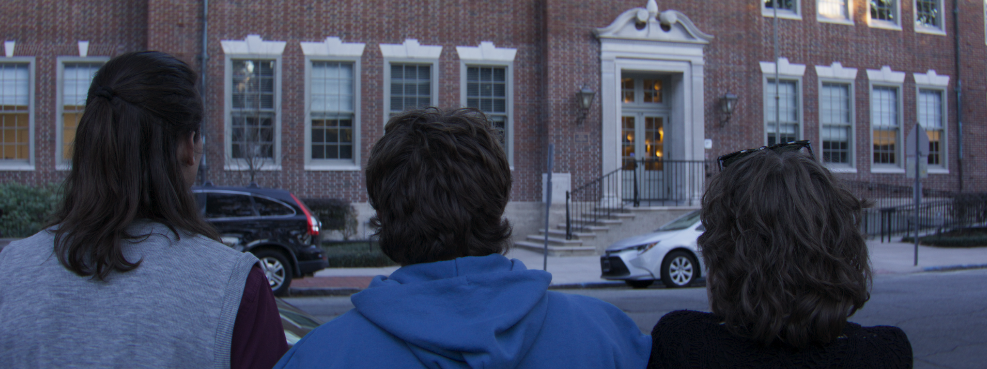
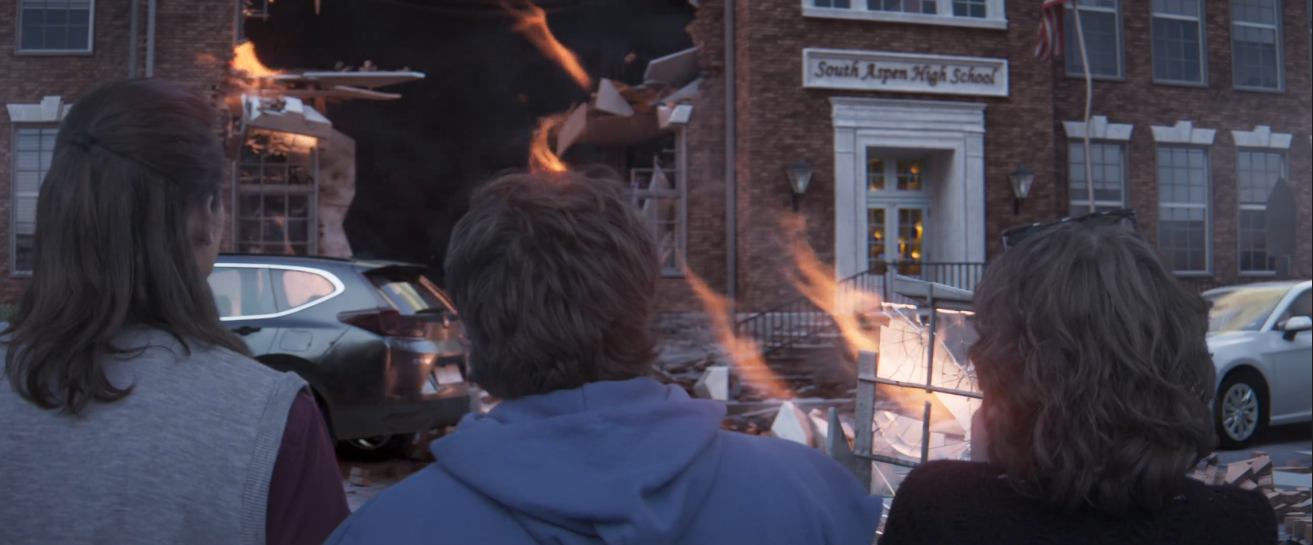
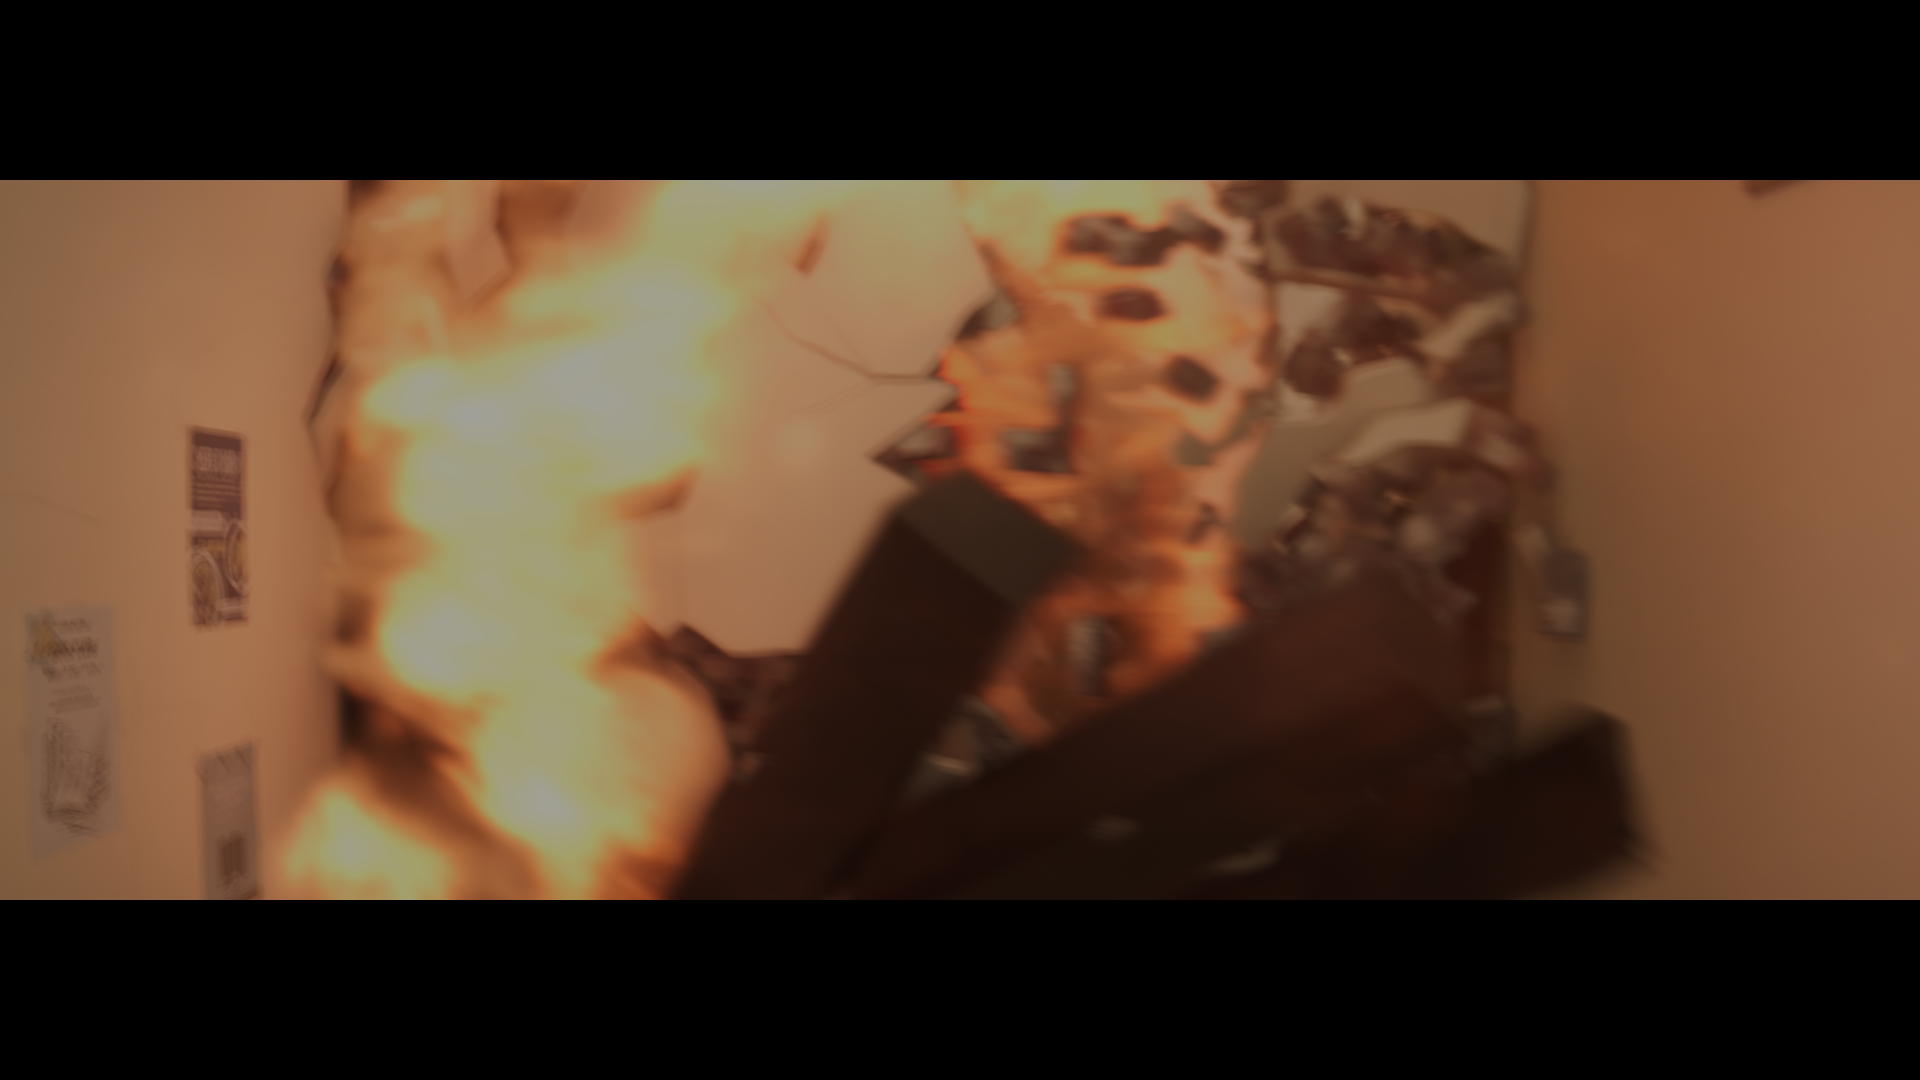
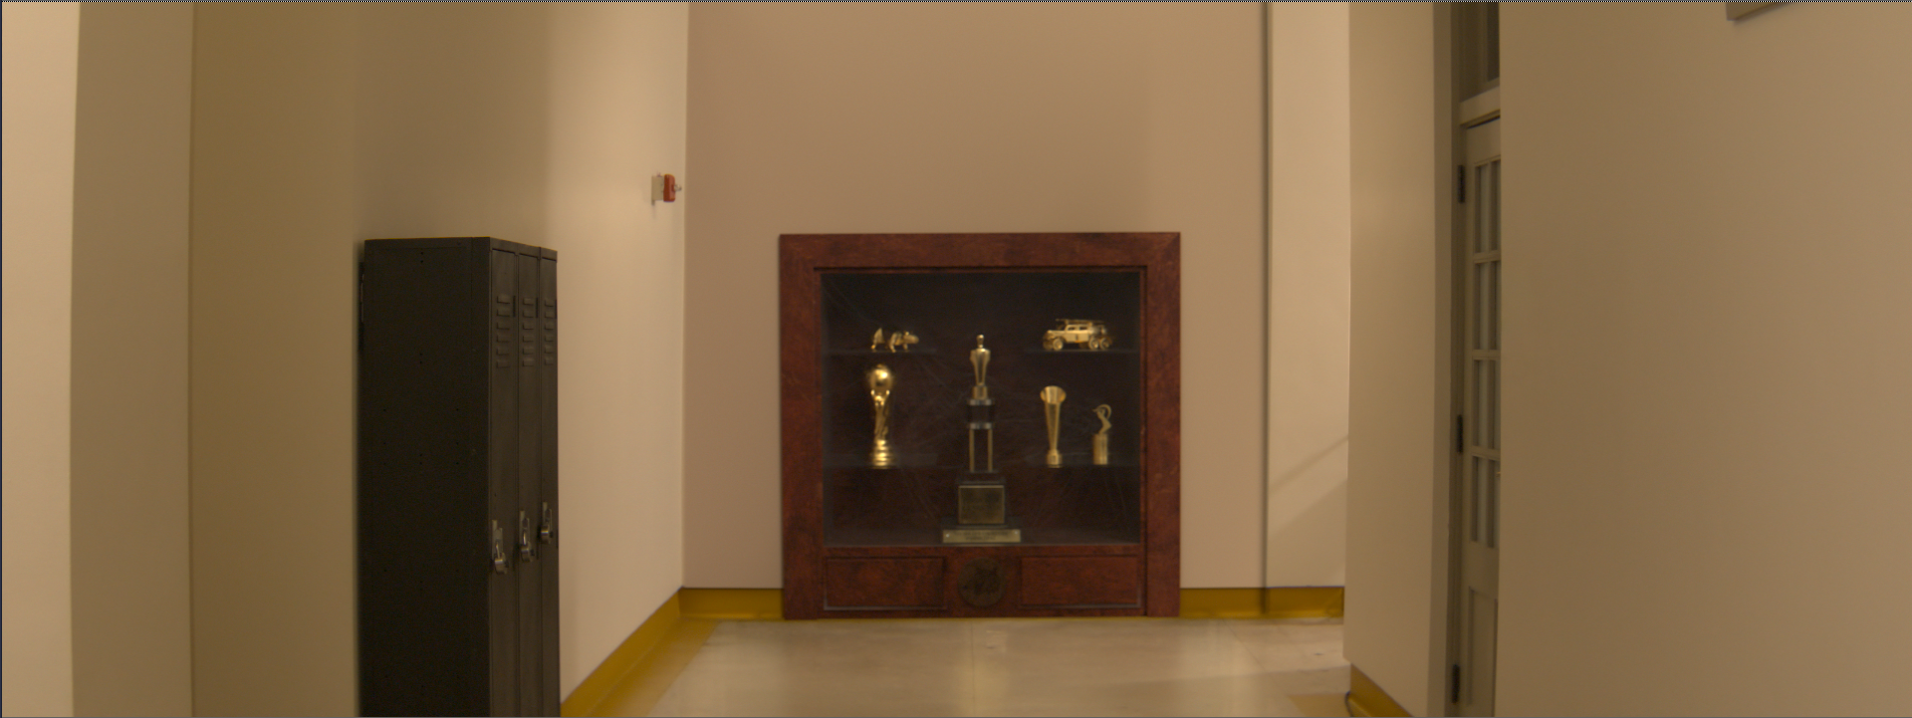
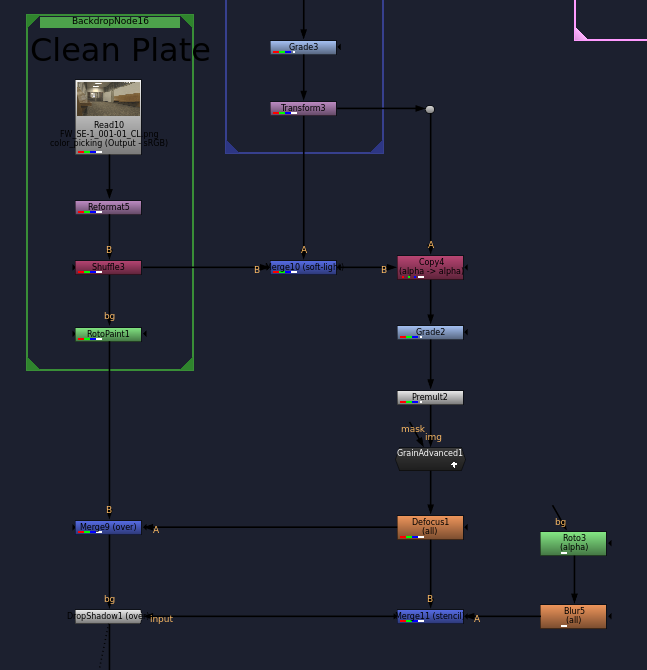
This past weekend, I focused heavily on these shots of the crew looking at the explosion aftermath of the school. When first looking at this shot, I figured I could use a fair bit of the plate in my comp, but after the simulation and the amount of destruction. I decided it would be best to fully replace the school entirely. This shot has been particularly enjoyable to work on ad overall I am very happy with the result.
Here is the current pass for this composite. The one thing I worry about it roto for our actors, because I can get it close, but truly it wont be perfect with the time we have. In hindsight, I wish we would have used a blue screen, but here we are. There is still some work to be done, but we push forward.
Here is the side by side of the original and full comp shot.
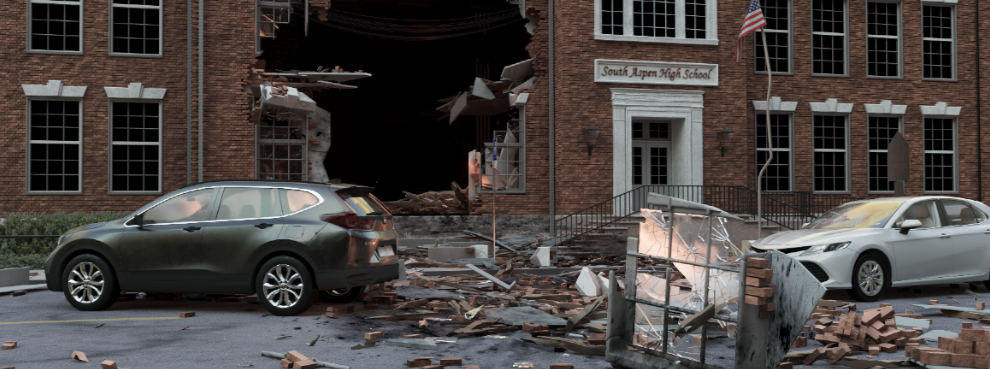
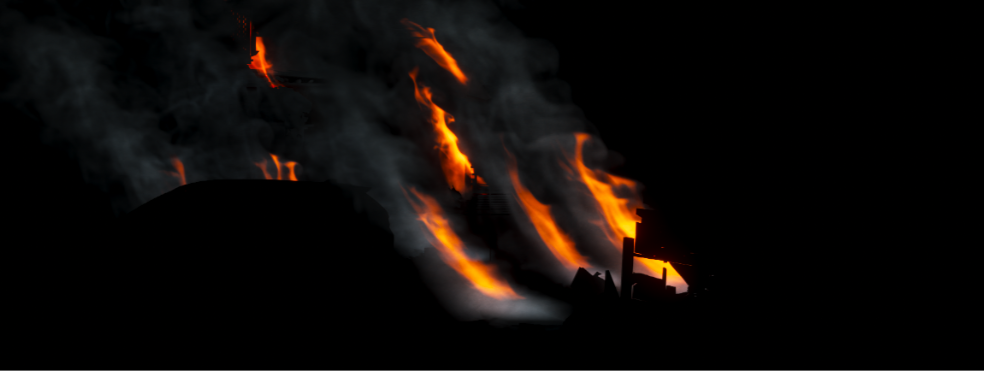
Here are the CG elements rendered out of Hounini Karma. Both of these are post comp, adding in some soot, scene continuity fixes, and color. Following these is teh current state of the ever growing nuke script, just to shot the amount of comp work being done.
Beyond these shots I have been working on the void scene. These shots are predominately comp. The last step for these shots are to refine the roto a bit but that will just take a bit of time. Here are some of the current passes.
For the reverse shot, I am still working on the overall crawl and look of the void. This one below is likely the final look and size of the void for the reverse of Eve and Taylor. The two shots below haven’t been changes yet, but that is to come soon.
March 25th, 2026 - Explosions and Screen Replacement
Not much has changed between my last post and this current one in terms of major leaps forward. We all took spring break as an opportunity to step away from school, reset, and truly take a break. However, even during the break, I remained active in communicating with our Editor, Amelia, Director, Marina, and Producer, Chelsea. We have been working on setting things up to ensure a smooth transition from VFX back to editorial and color.
Our current deadline is set for April 20th, which will be the day our drive of EXRs is mailed to our editor and colorist. We are also in the process of scheduling a meeting with the entire post-production team, as picture lock is approaching and we are moving into sound, motion media, and color.
We plan to send some current EXRs to our colorist soon to confirm that the pipeline is properly set up and ready for final pixels. As of now, we are making great progress: 11 shots are ready for review and director approval, 8 shots are fully ready for delivery, and the remaining shots are in progress. The only shots that have not been heavily worked on yet are the exterior building scenes, as we are waiting for final layout and FX from Tripp and Aaron, as well as the skin subsurface work, since we still need value ranges for that.
In total, we have 45 VFX shots (with approximately 84 cuts in the edit). Below is our current sheet setup, where you can see the full progress of each shot. We have four weeks to complete everything, so as Deadpool would say, it’s time to make the chimichangas!
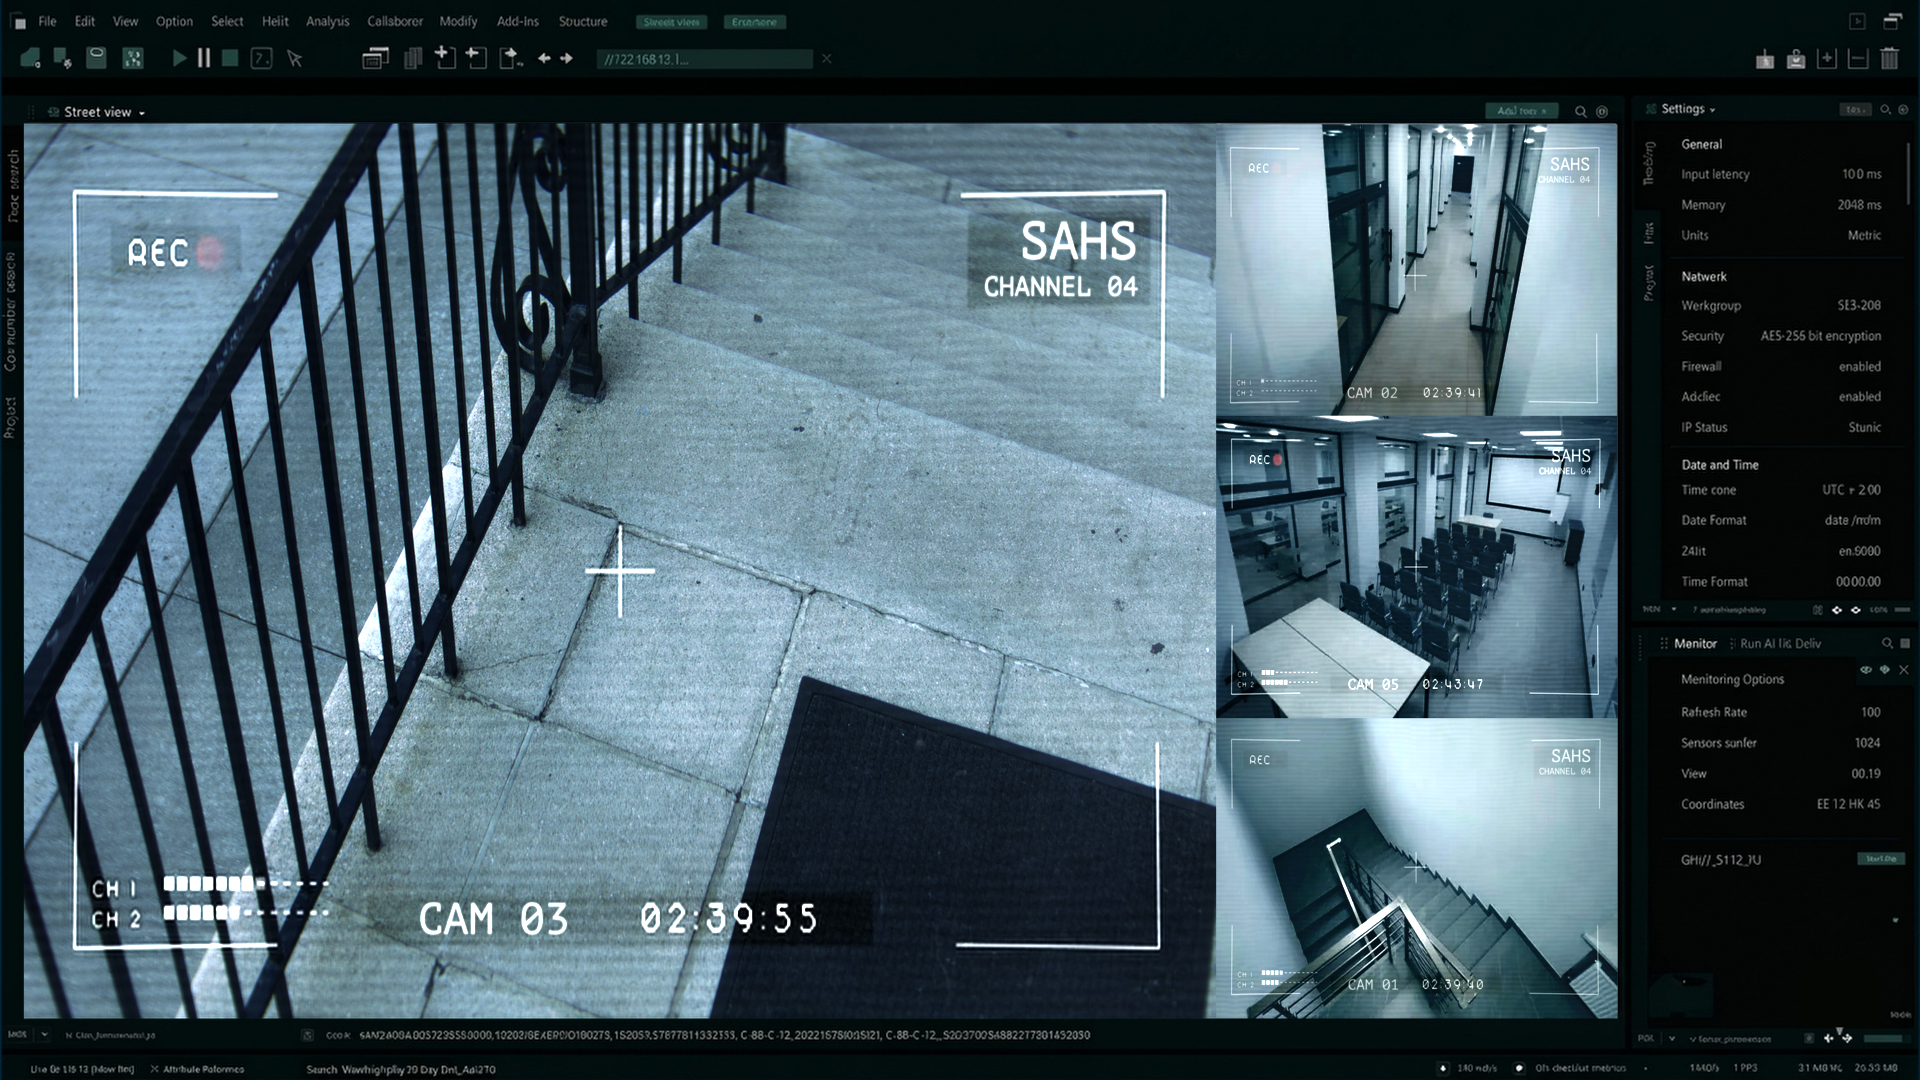
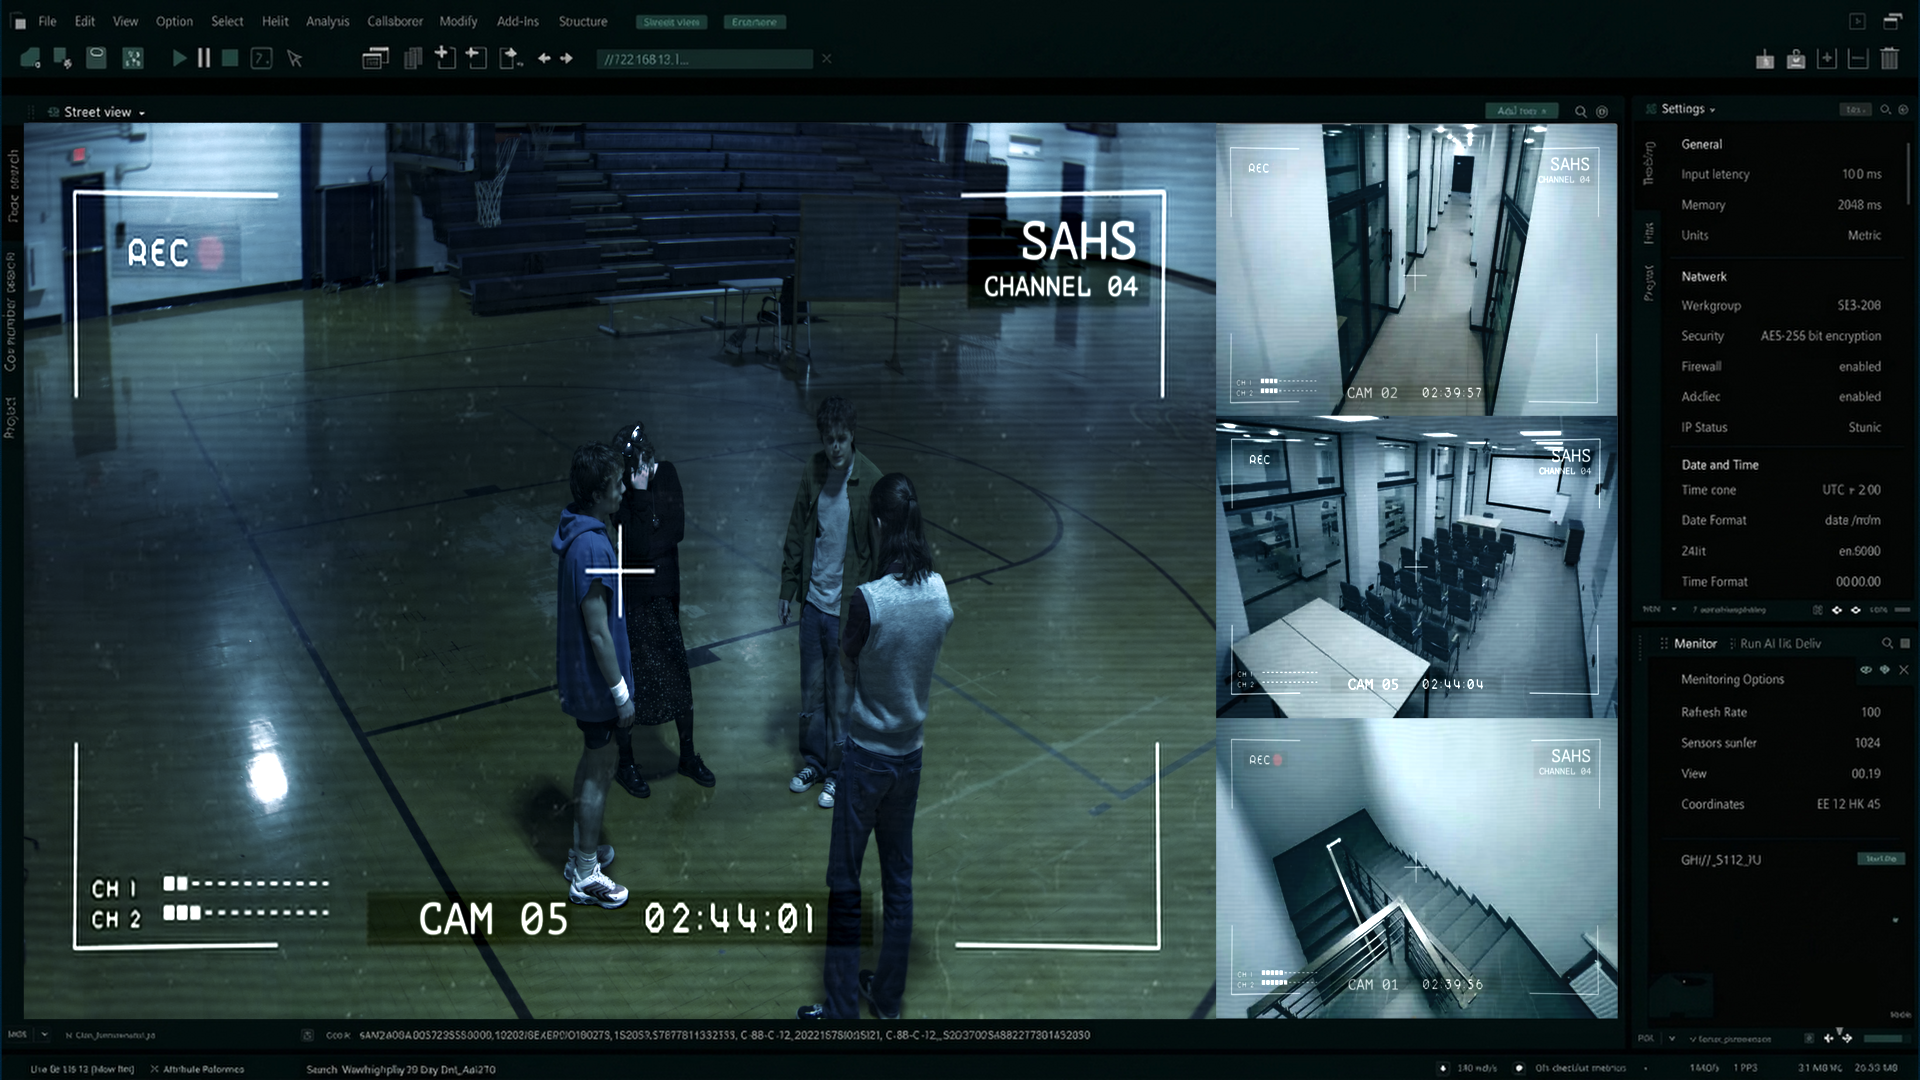
Moving on, here is some of the work I have been focusing on recently, both over spring break and after returning. First, here are the security camera screens that we will be using for screen replacement on the computer in Clarkson’s office. I created these in After Effects, they could be a bit better, but the setup works, and we are already moving forward with compositing them.
Here is my screen replacement comp with the over the shoulder of Fenster. For the roto I used a combination of AI rotoscoping tools to get good edges, especially around his hair.
I also complete another Banner shot, marking my final one assigned to me. This shot was fairly straight forward and had simple roto and comp. Here is the before and After as well as in motion.
This one is a rather small adjustment. For this shot, I added a very subtle warp to the trail that we see during the slow motioned as well as removed the odd flare artifact that flew across the screen in the original. Here is the final pixels for this shot as this is marked ready for delivery.
I have also begun working on the Speed and Void FX in the art room. Here is the current pass of the Taylor super speed during his conversation with Eve. This shot was pretty tricky overall, but I enjoyed the challenges that it provided. I think the Speed wont change much beyond this, so now I am moving on to the void FX for this scene.
Finally, I have been working on my second Explosion shot using rendered FX and and misc. assets from our FX artist, Aaron (https://aaronlinde.com/). This particular shot has a build up of Subsurface and Glow on his face and eyes. I had a lot of fun compositing and with some final touches the shot is just about ready to send to Editorial. Here is the current pass. as well as the before and after.

March 8th, 2026 - Superheros and Invisible VFX
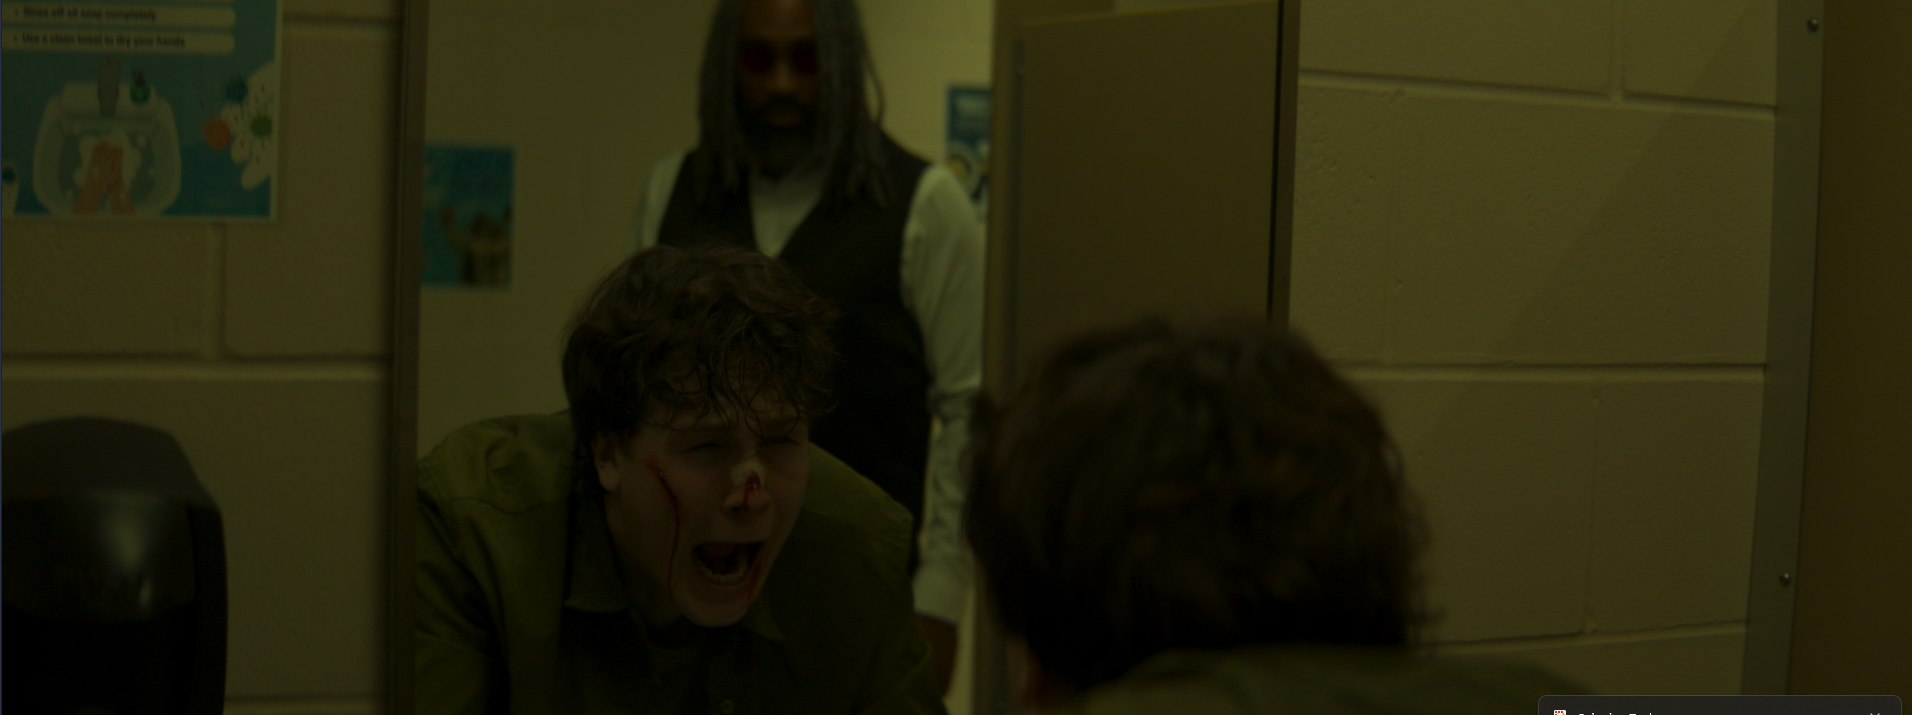
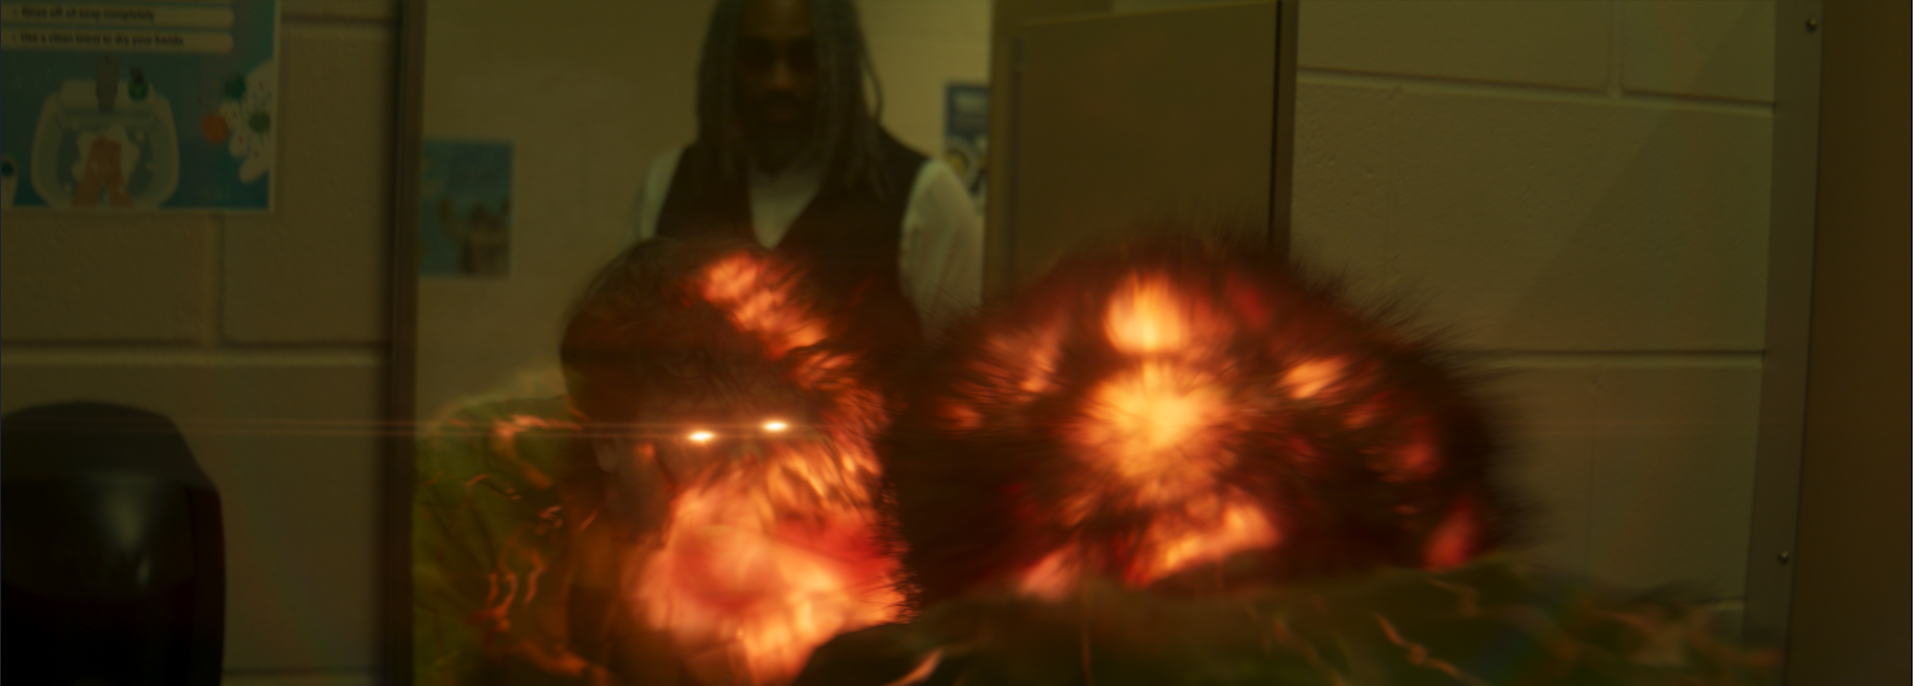
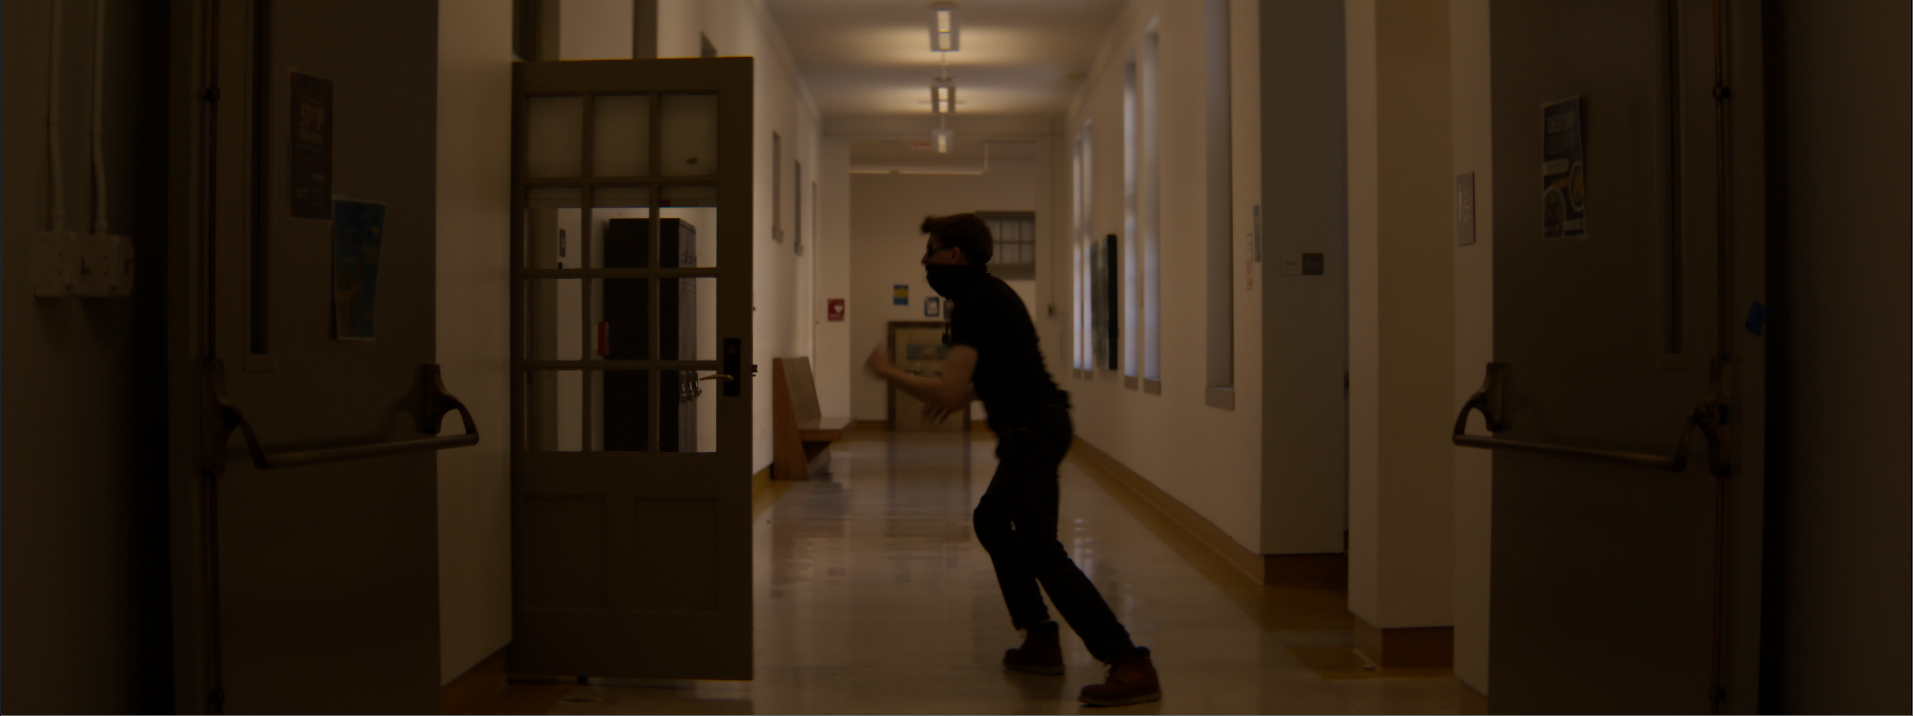
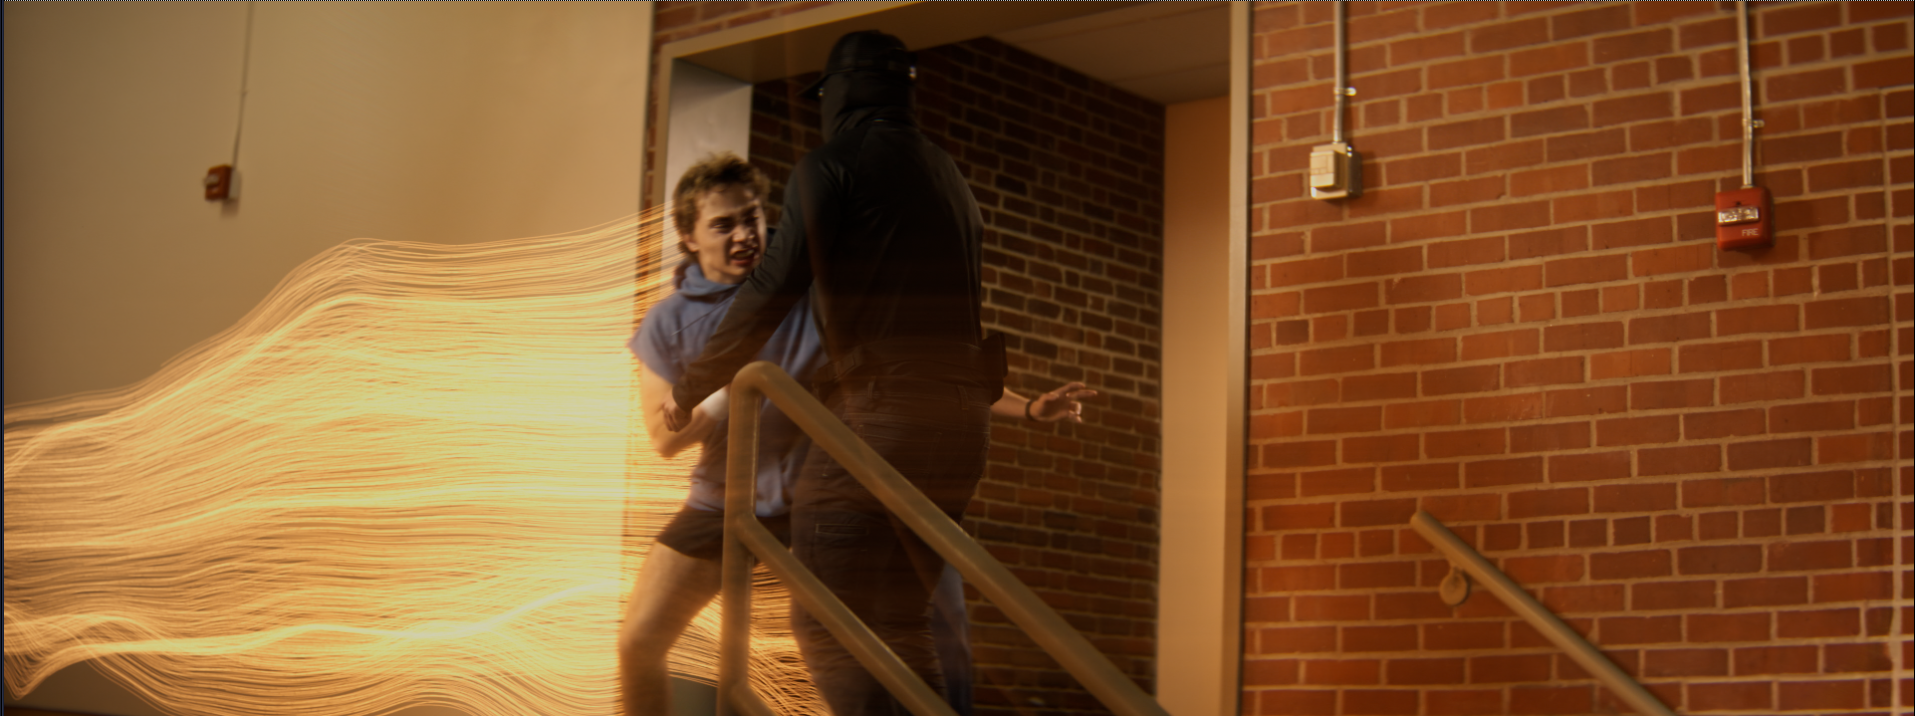
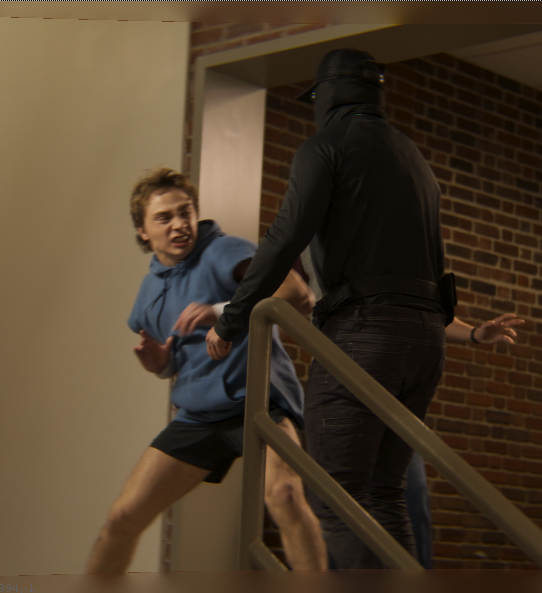
I have been hard at work doing a multitude of shots, all with different needs and VFX. To start, we have been working together as a team to find the right approach for this void shot in the film. To fix my issues with the shot, as well as the directors, we decided to pivot to this disintegration of our actor as opposed to him throwing himself into the door. This aligns better with the shot the other goon dies in closer. The void look has changed since my last update, and the overall comp has come a long way. Here is the current side by side as well as the current pass. There are some changes that are still needed, but I am happy with the current pass.
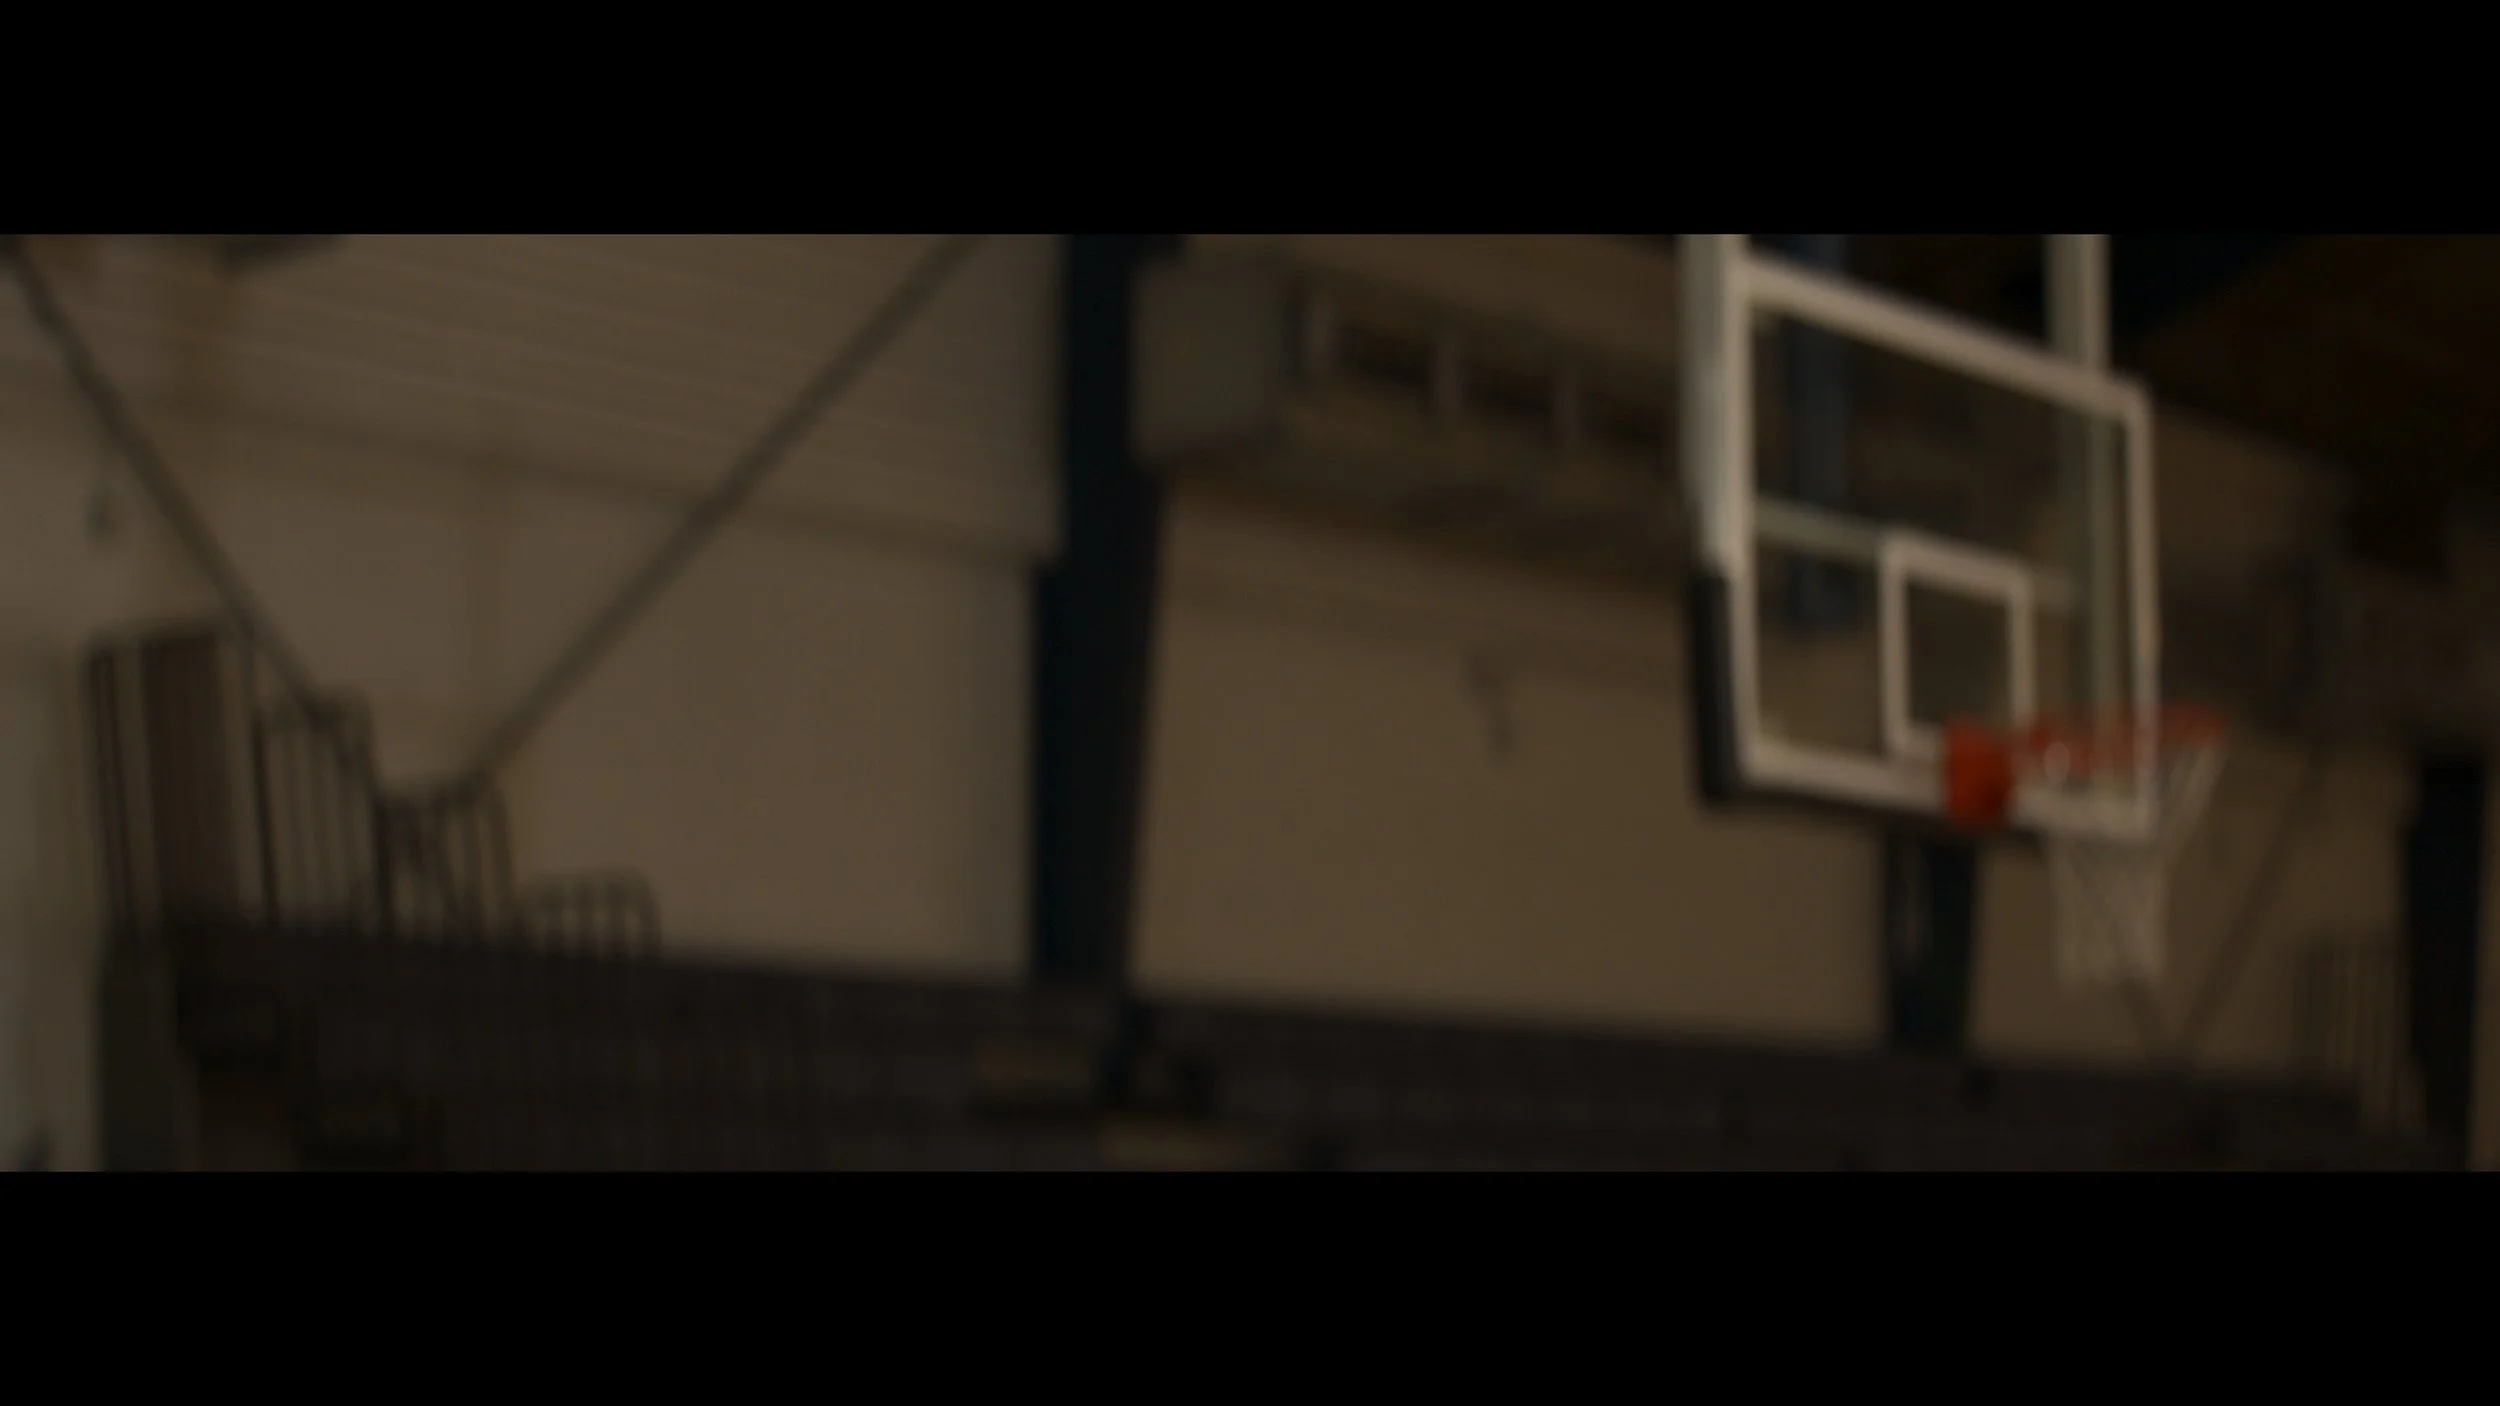
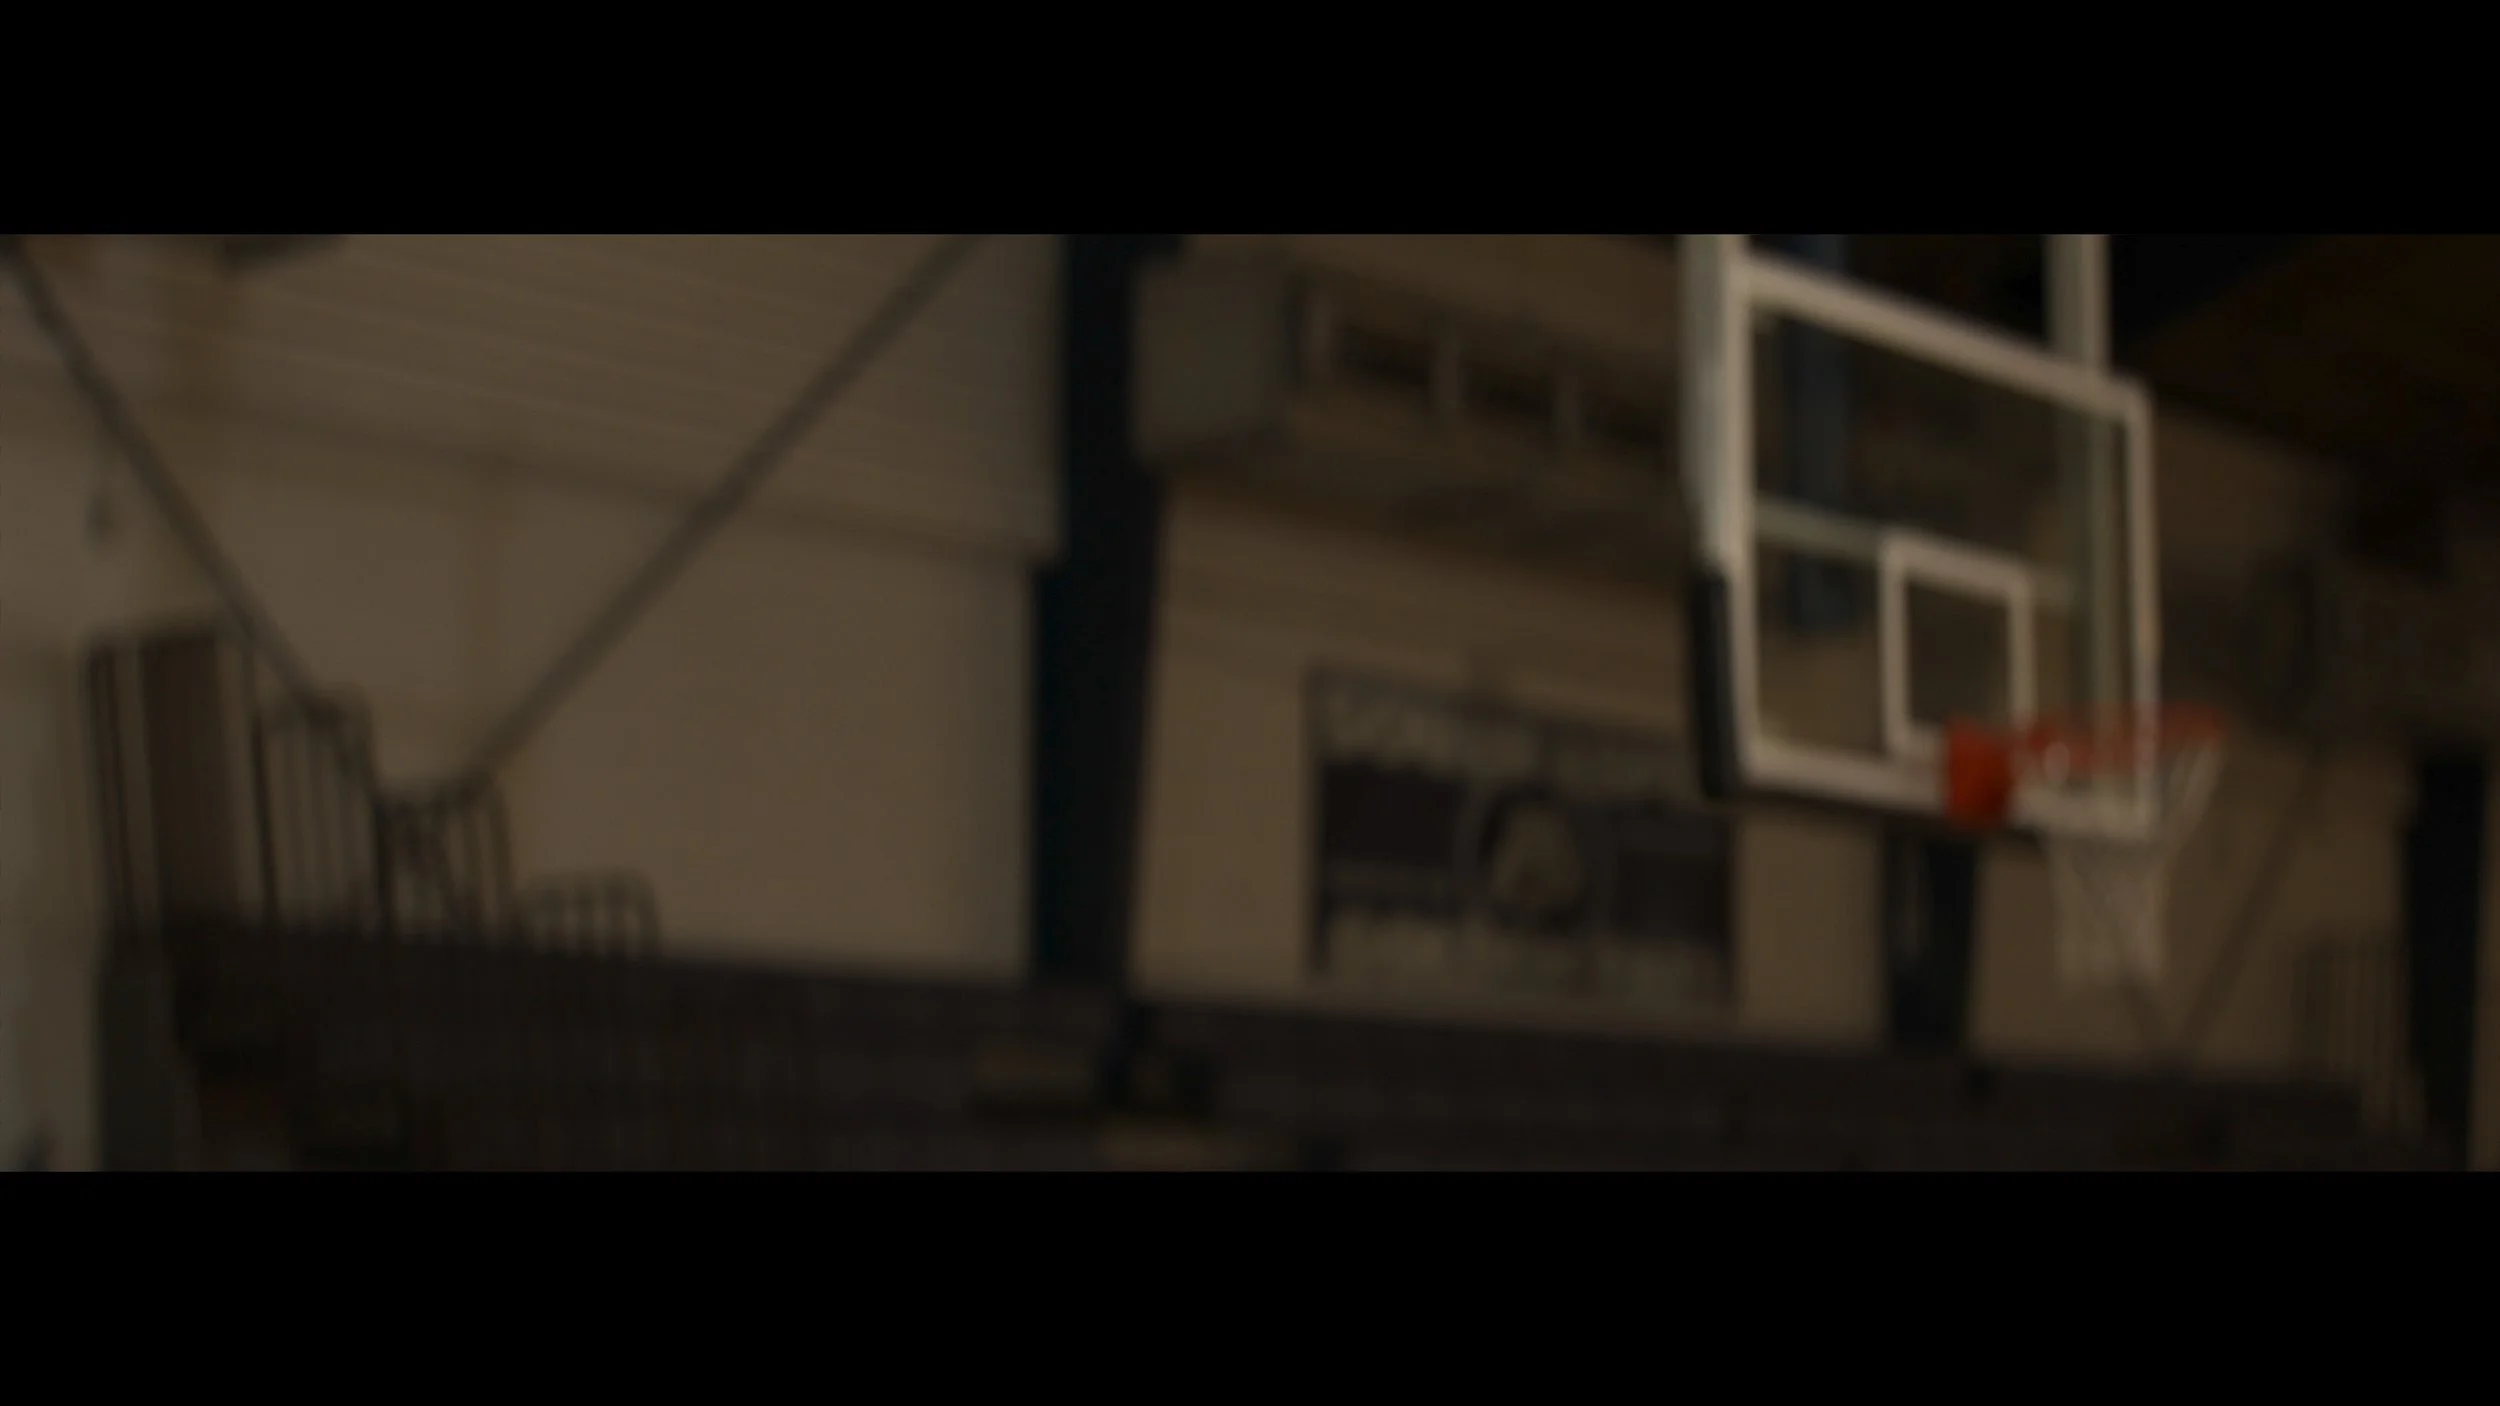
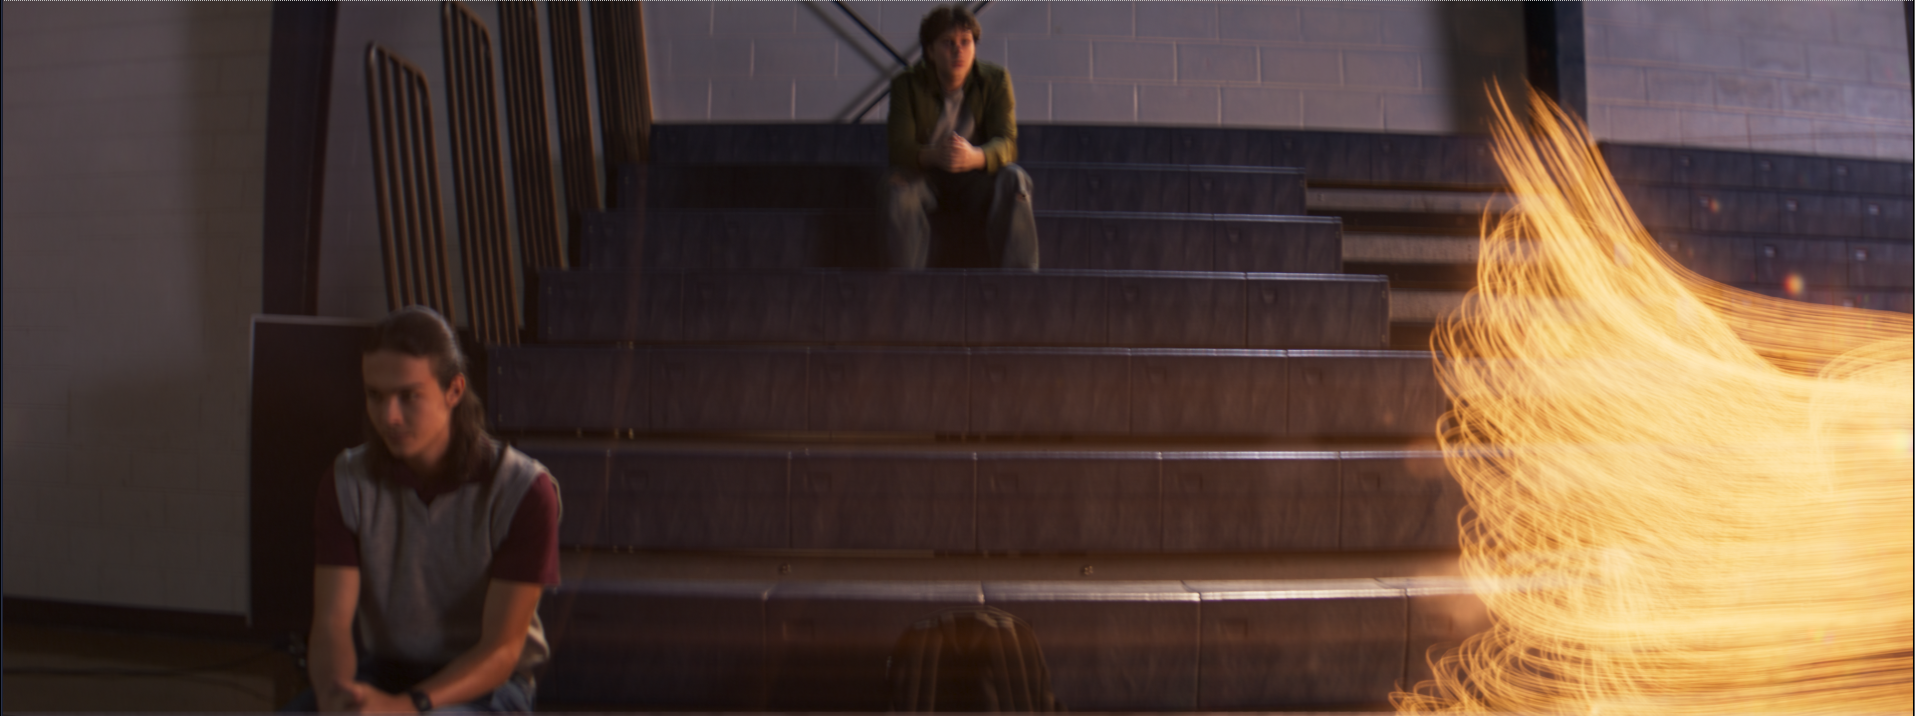
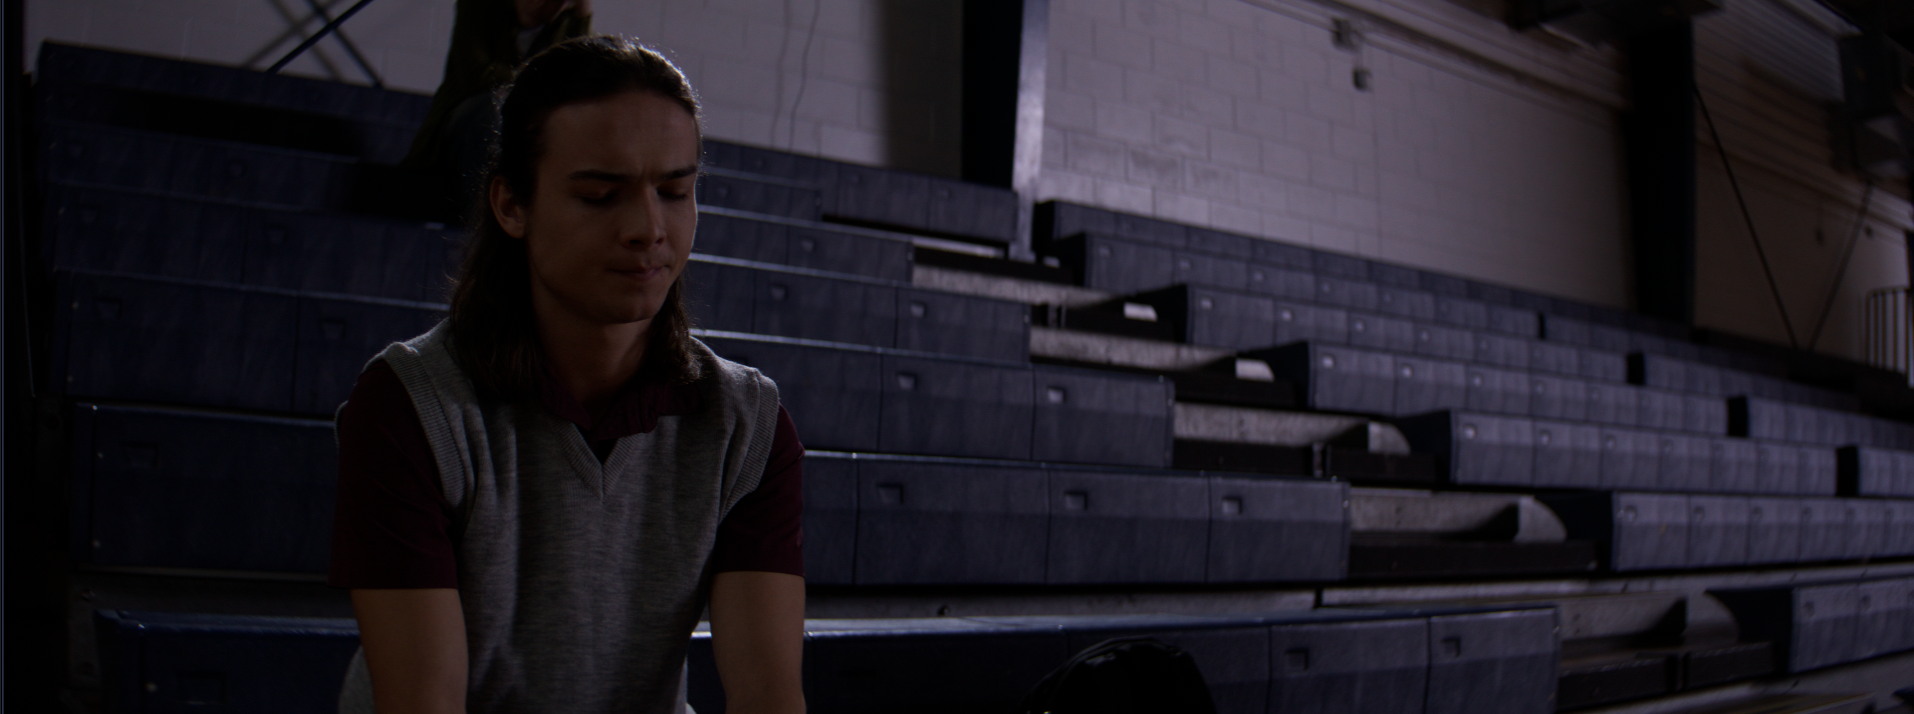
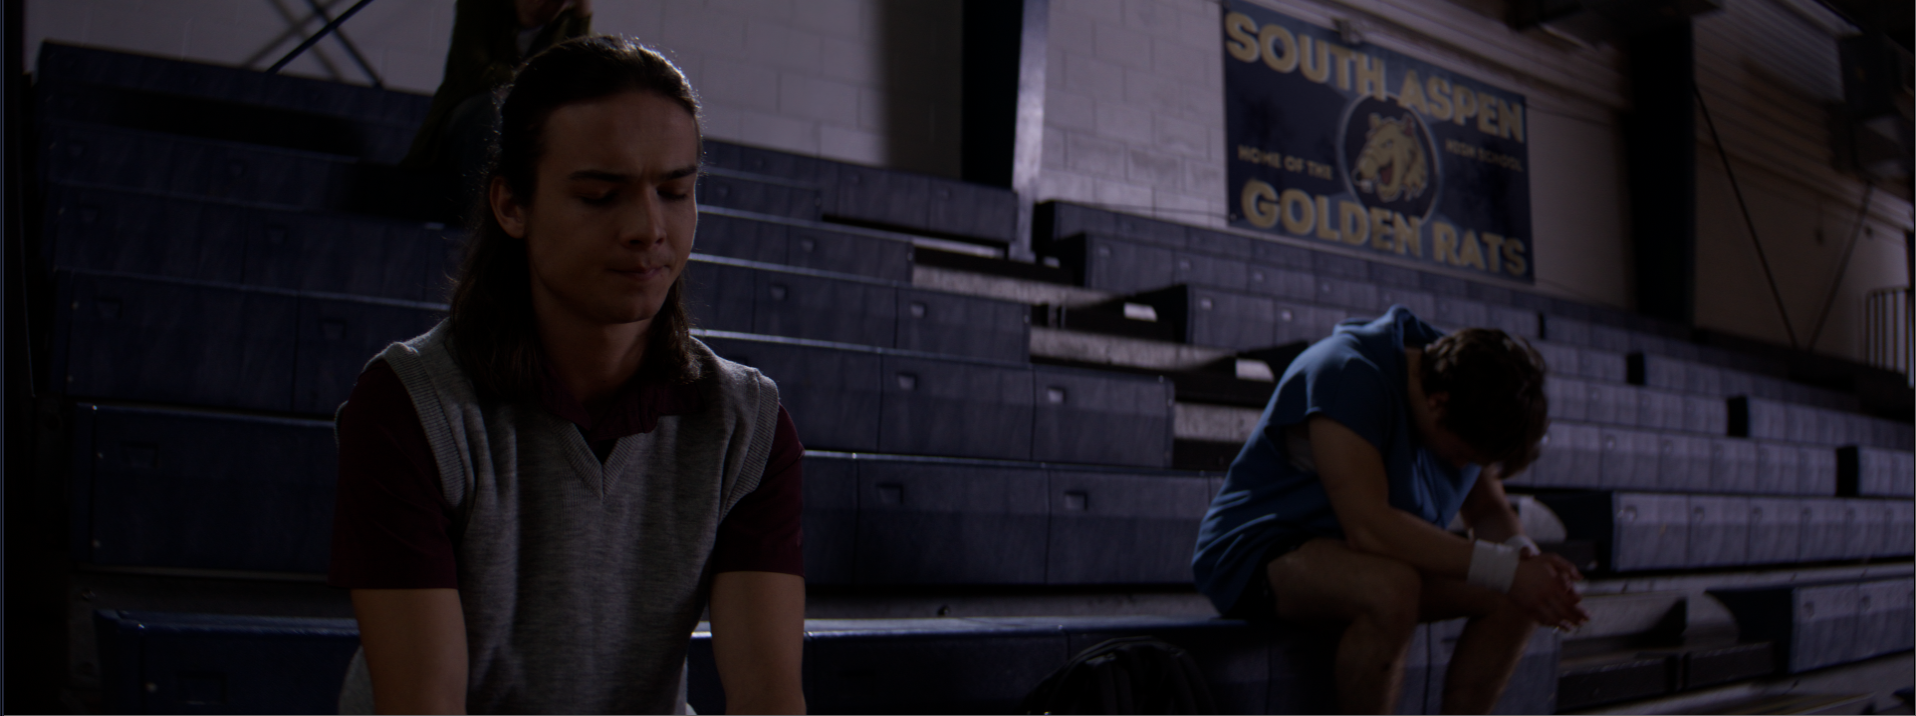
Furthermore, I have been working on many of the gym shots we have for the film, as there are a number of them. This one below, where Taylor uses his speed, is one of the bigger ones in the set. I have been working on this comp for quite a bit to nail the right look to give the true look of super human speed. This is the first super power shot in the movie with Taylor, so we want to really sell it. Here is a current side by side as well as the current comp. Beyond the speed, I also added the banner to the back wall, as a hidden element to the scene.
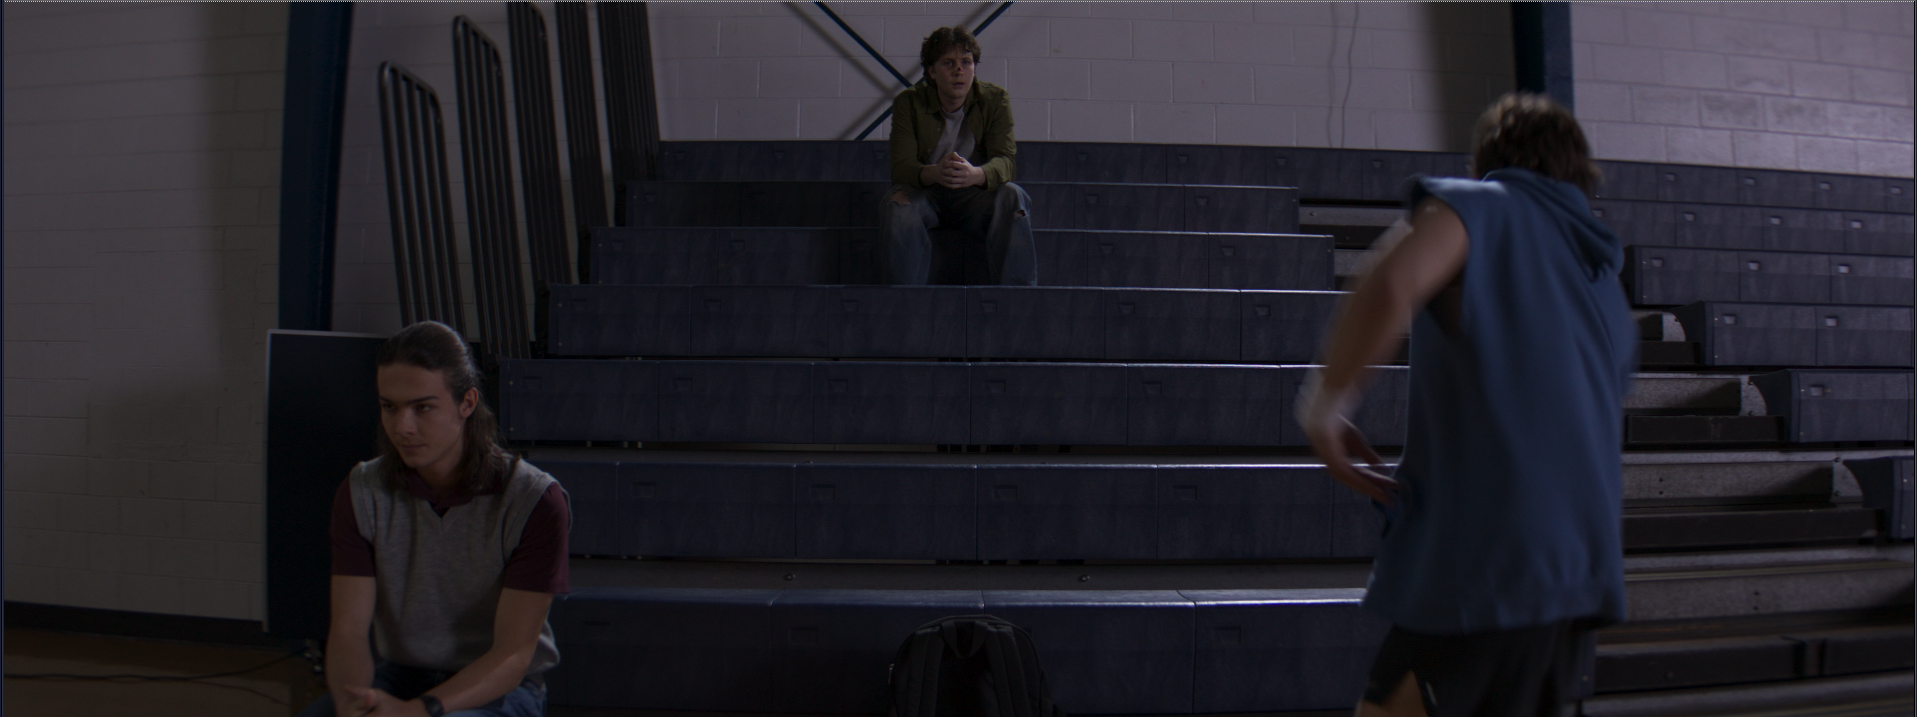
For all of these coverage shots, I have been working on some invisible VFX, as well as adding CG components. For instance, we didn’t have an actual gym banner, so we opted to add it in post. This banner was built by our production designer as well as Tripp, our CG artist on the film. For this specific shot, I also needed to comp Taylor back in from another shot, to help with continuity. It is these invisible shots that add so much to this movie in VFX.
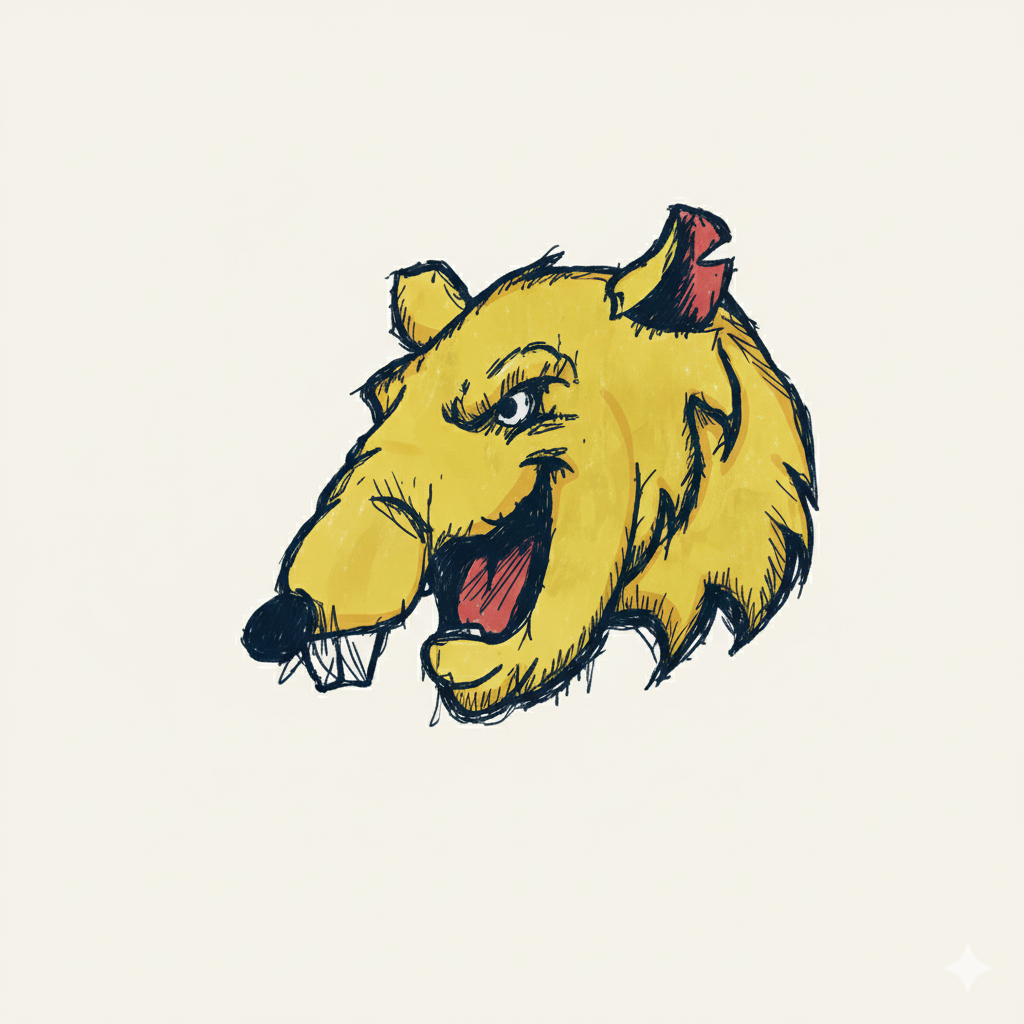
Here is another invisible VFX shot. I added out school logo to the center of the gym to add more to the world building of our film.

This final shot is a larger one I have been working on. This is the slo mo shot that included both a tricky wire removal as well as adding the speed trail to the proper movement of the actor. The most difficult part so far is keeping the edge of my actor realistic with the added trail. This was done with a combination of manual and ML root, as well as some BeeleAi Normal Pass Relighting. Here is a current side by side of this shot as well as the current pass.

February 24th - First Explosion and Speed
For this shot, I have been putting off the final touches of roto and edge cleanup as my attention has been elsewhere currently. However I have been exploring some innovative ways to deal with faking the light interaction of the trail on the live action plate. After some testing, I have found that BeebleAI’s (https://beeble.ai/) Normal Map generation is a good way to go. Though the other utility passes it gives you aren’t the best, the Normal Map Gen seems to be their best tool. I fed it my plate and it gave me all the passes I needed to relight my scene. Using their Nuke relighting nodes, I was able to physically place my light in the scene, that followed the quick movement of the trail. Full on plate relighting doesn’t work great as it can’t quite get Subsurface to look accurate, but multiplying the light onto my plate and them merge it on using plus gave me a decent result. Here is the Normal Map that I was able to get out of the generative AI.
Here is a Before and After for the Beeble AI relight. Though it needs a little tweaking, I think this is going to be a good solution for this shot.
Further more, I have gotten my render off of the render farm and did a quick slap comp on Taylor speeding into the scene. This shot is definitely coming along nicely and I am excited to keep pushing forward.
February 17th, 2026 - First Large Shot Finals and Deep Progress
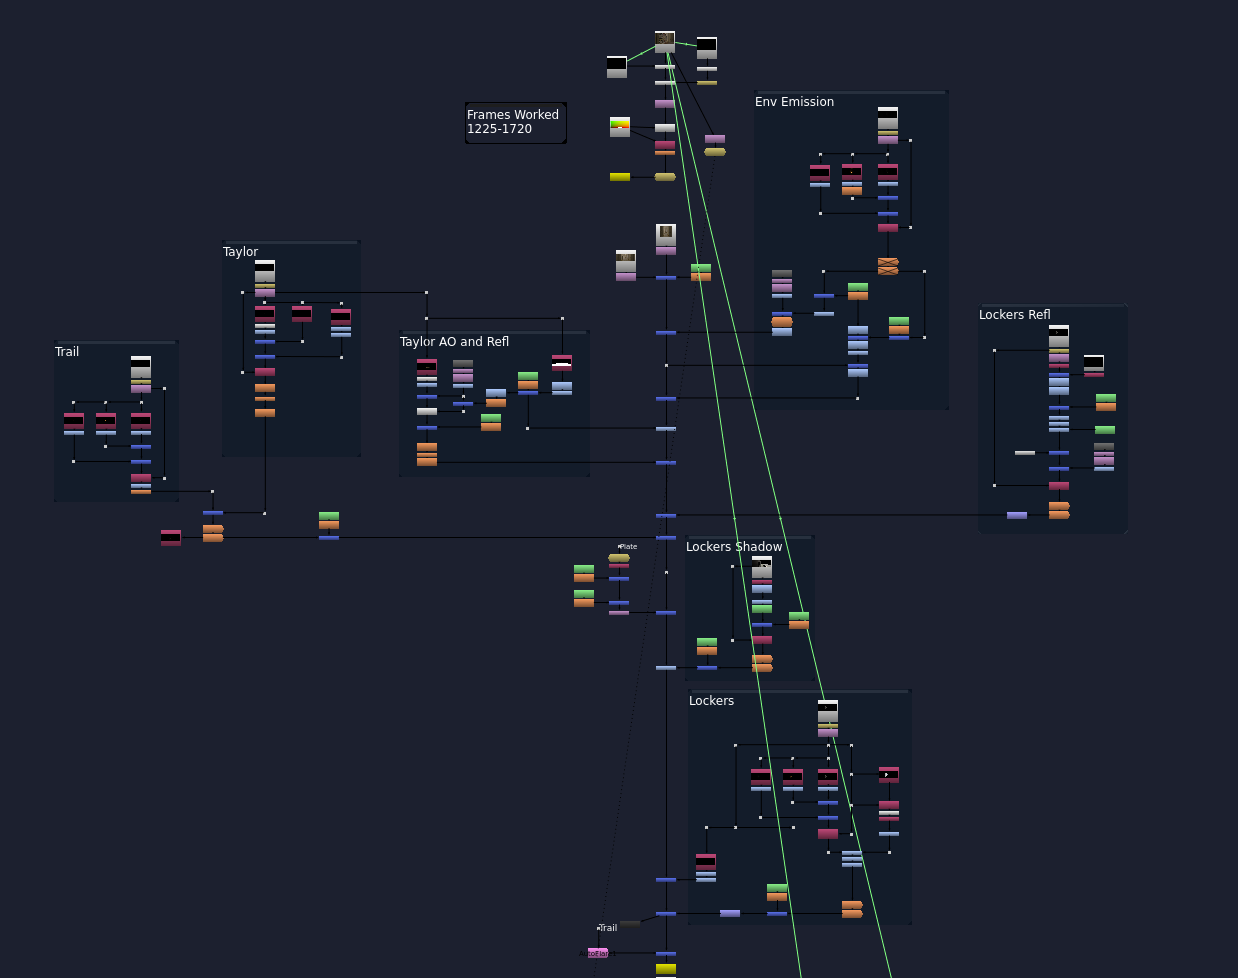
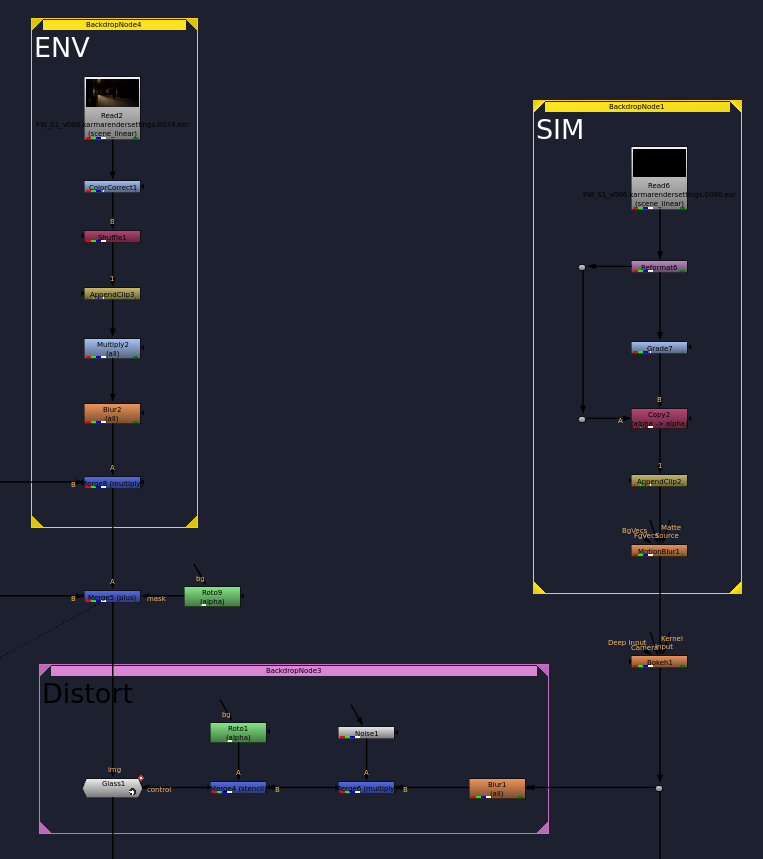
Another shot, that while isn’t final yet, I have been making big strides on. Currently, the wire in this shot has been fully painted out and the speed in Pre Comp for Taylor has been set. The next steps to be taken is cleaning up the Rotomation that I have been work on, and doing the sim for his trail. Here is that side by side as well as the breakdown for the current comp.
Here is the node tree currently set. For the clean up, I am using a tracked alembic camera that Zach got a good solve (<0.8 Pixel Error) on. I am projecting the still frame that I am using as the cleanup tool, and doing roto from there to mask around the proper area, in this case, where the wire is in frame. Here is a visual of what I am doing in 2.5 in Nuke.
For his back, I initially tried manually cleaning up the hook, but this proved a lot more work than it was worth, and after 30 minutes here and there on miscellaneous tactic, I landed on training a copy cat model to clean the plate for me. I took 9-10 frames, at different time slots, and cleaned them up in Photoshop before feeding them into the ground truth of CopyCat. After a few changes here and there, I got a good result in my training model, that gave me exactly what I needed. While not quite perfect in spots, it gets the job done and isn’t very noticeable. Here is the breakdown view in my node tree as well as the cropped result.

February 8th, 2026 - Deep into Post Production
Since my last update, we have gotten deep into our Post Production for Four Ways. I have been having a lot of contact with out post production supervisor, making sure our handshake and understanding of the pipeline was mutually understood and accepted. We have tested giving worked plates to make sure the pipeline is sound and everyhting worked perfectly. Thanks to Zach’s Anamorphic workflow, this made it a breeze.
Further on post, I have set hard deadlines for every single shot, separated by difficulty and knowledge of the current edit. Some shots we have to hold off until we get ranges, but until then, there is still a lot we can do. For instance, we have locked our ramp for the big slo motion shot and have begun painting out and match-moving the camera so I can add the speed trail to this.
Zach is currently working the match-move, so until that is set, I have been working on another speed shot, leading up to the big slo-motion sequence. Since we didn’t film our actor, I am creating him a digital double to follow a desired animation. Currently, the animation is off and needs further work. In our critique held on the 8th, I am going to workshop the wall running animation, and if it still look off. I will scrap it and do a simpler rounding the corner path. However, I feel it is going in the right direction and I can get the proper ramp and timing set to the animation.
Here is some playblast of the current cloth simulation as well as a test comp with the proper retime.
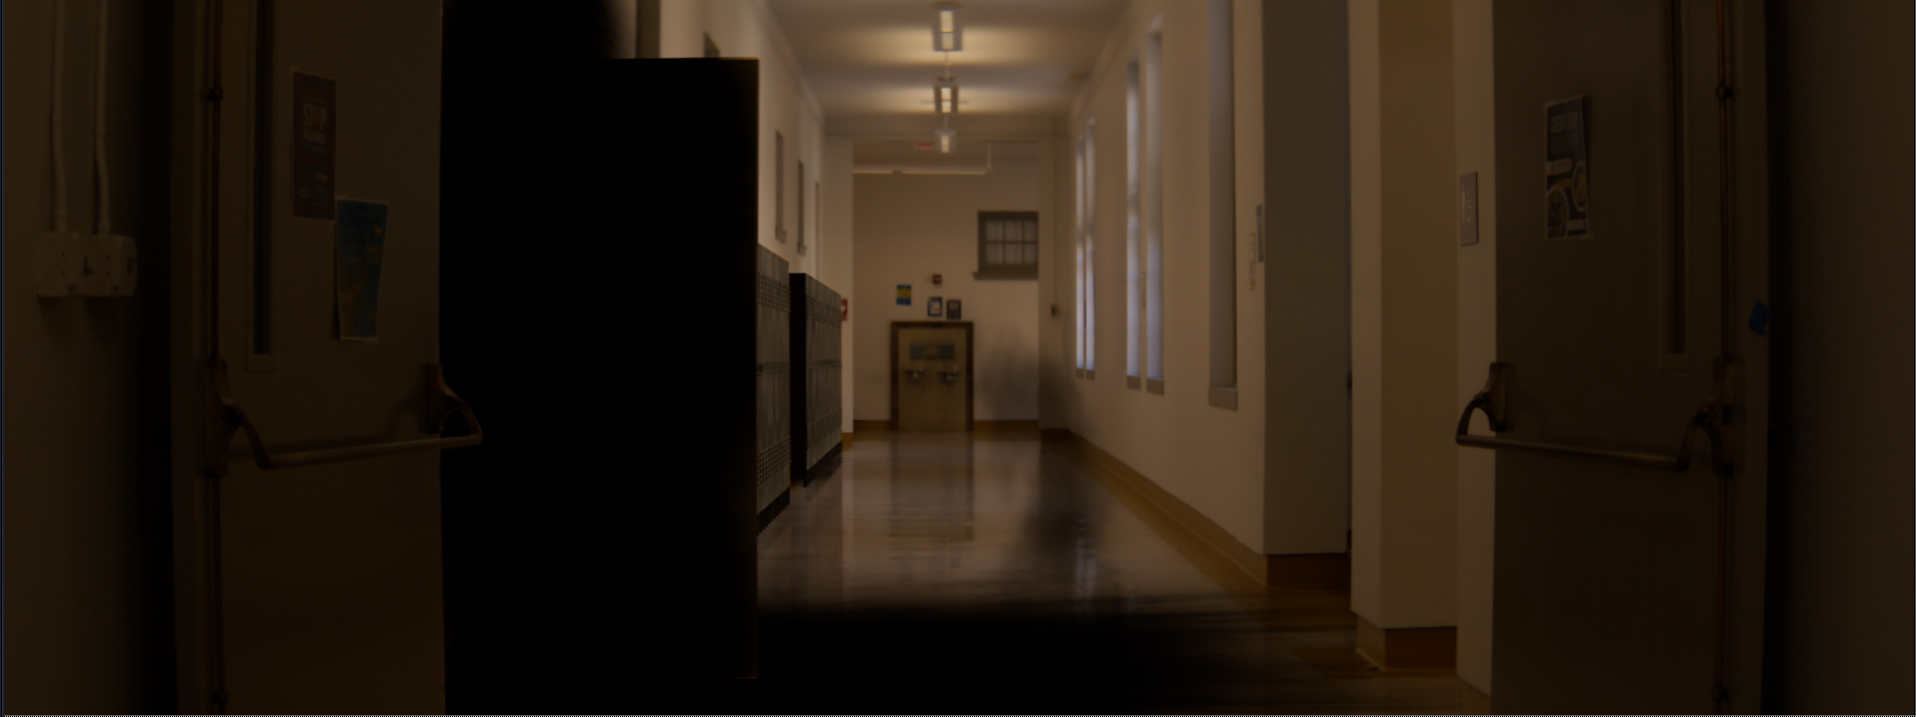
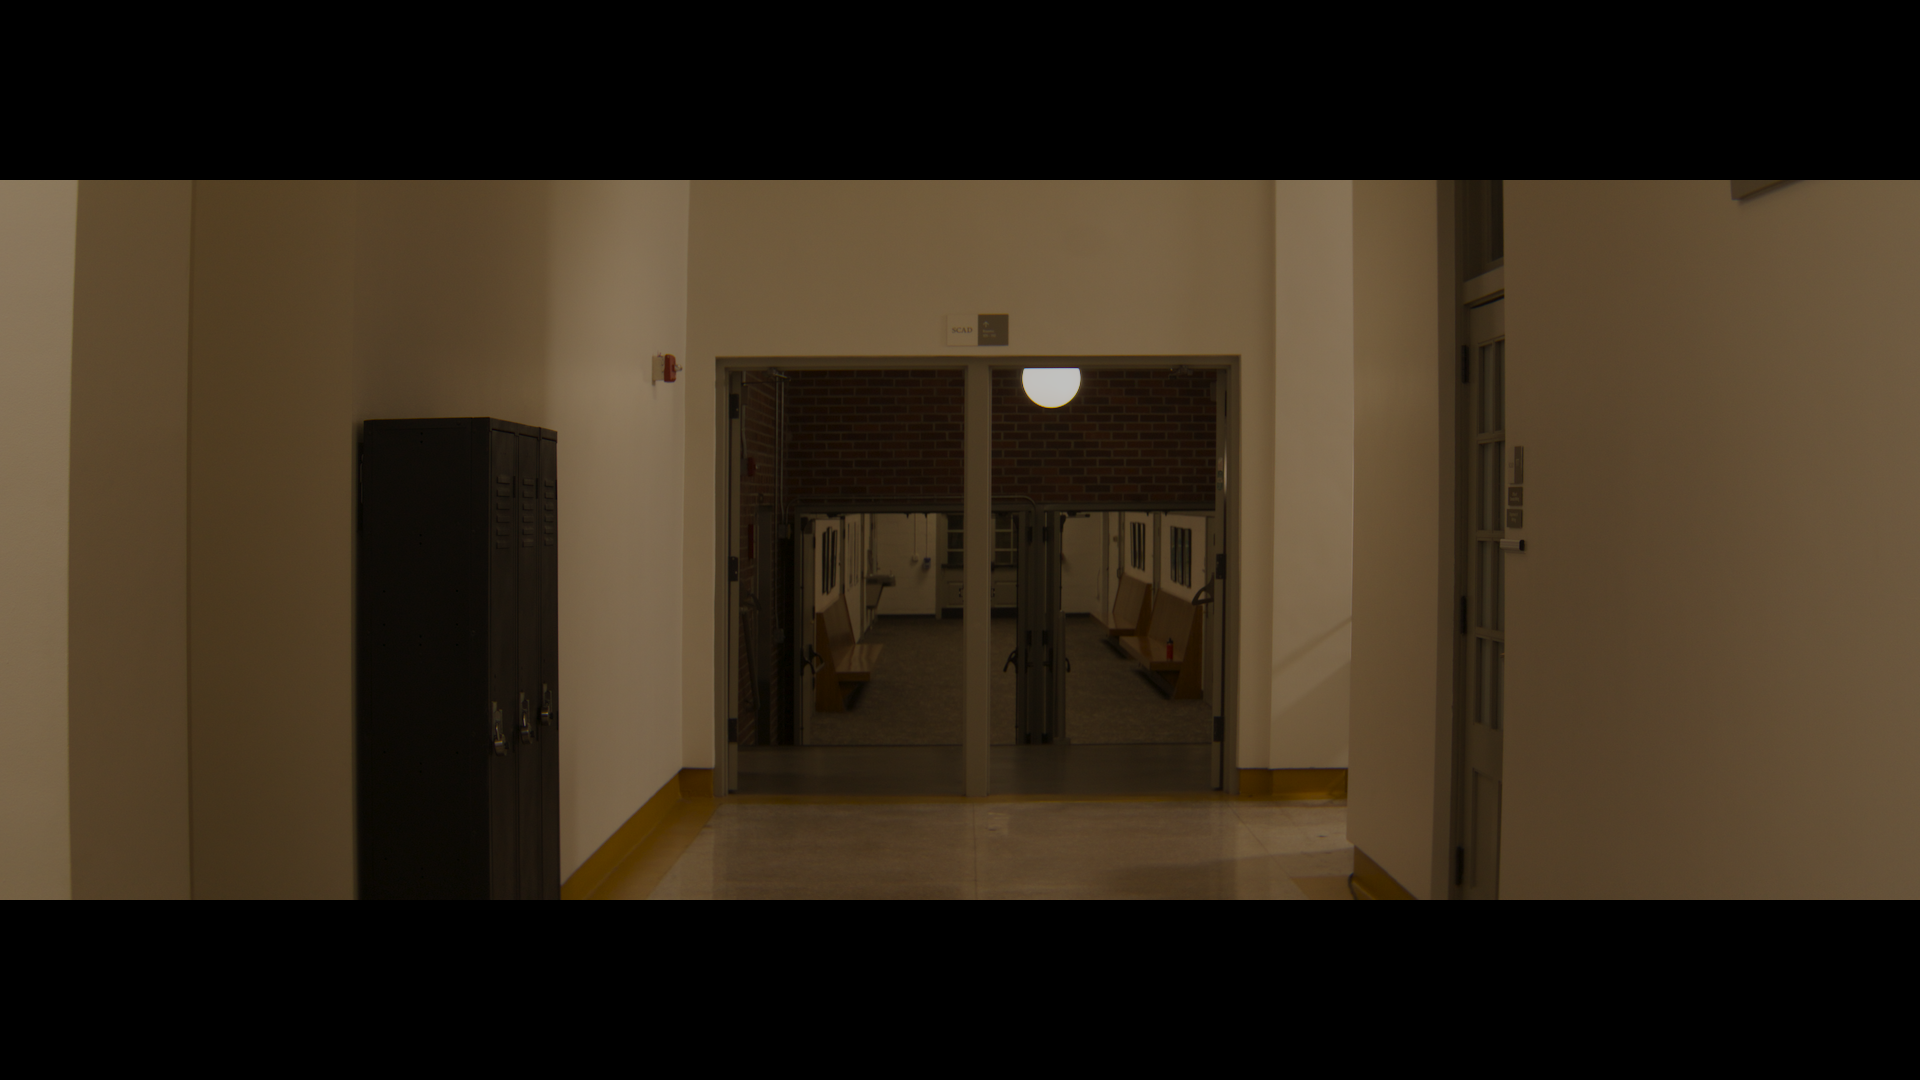
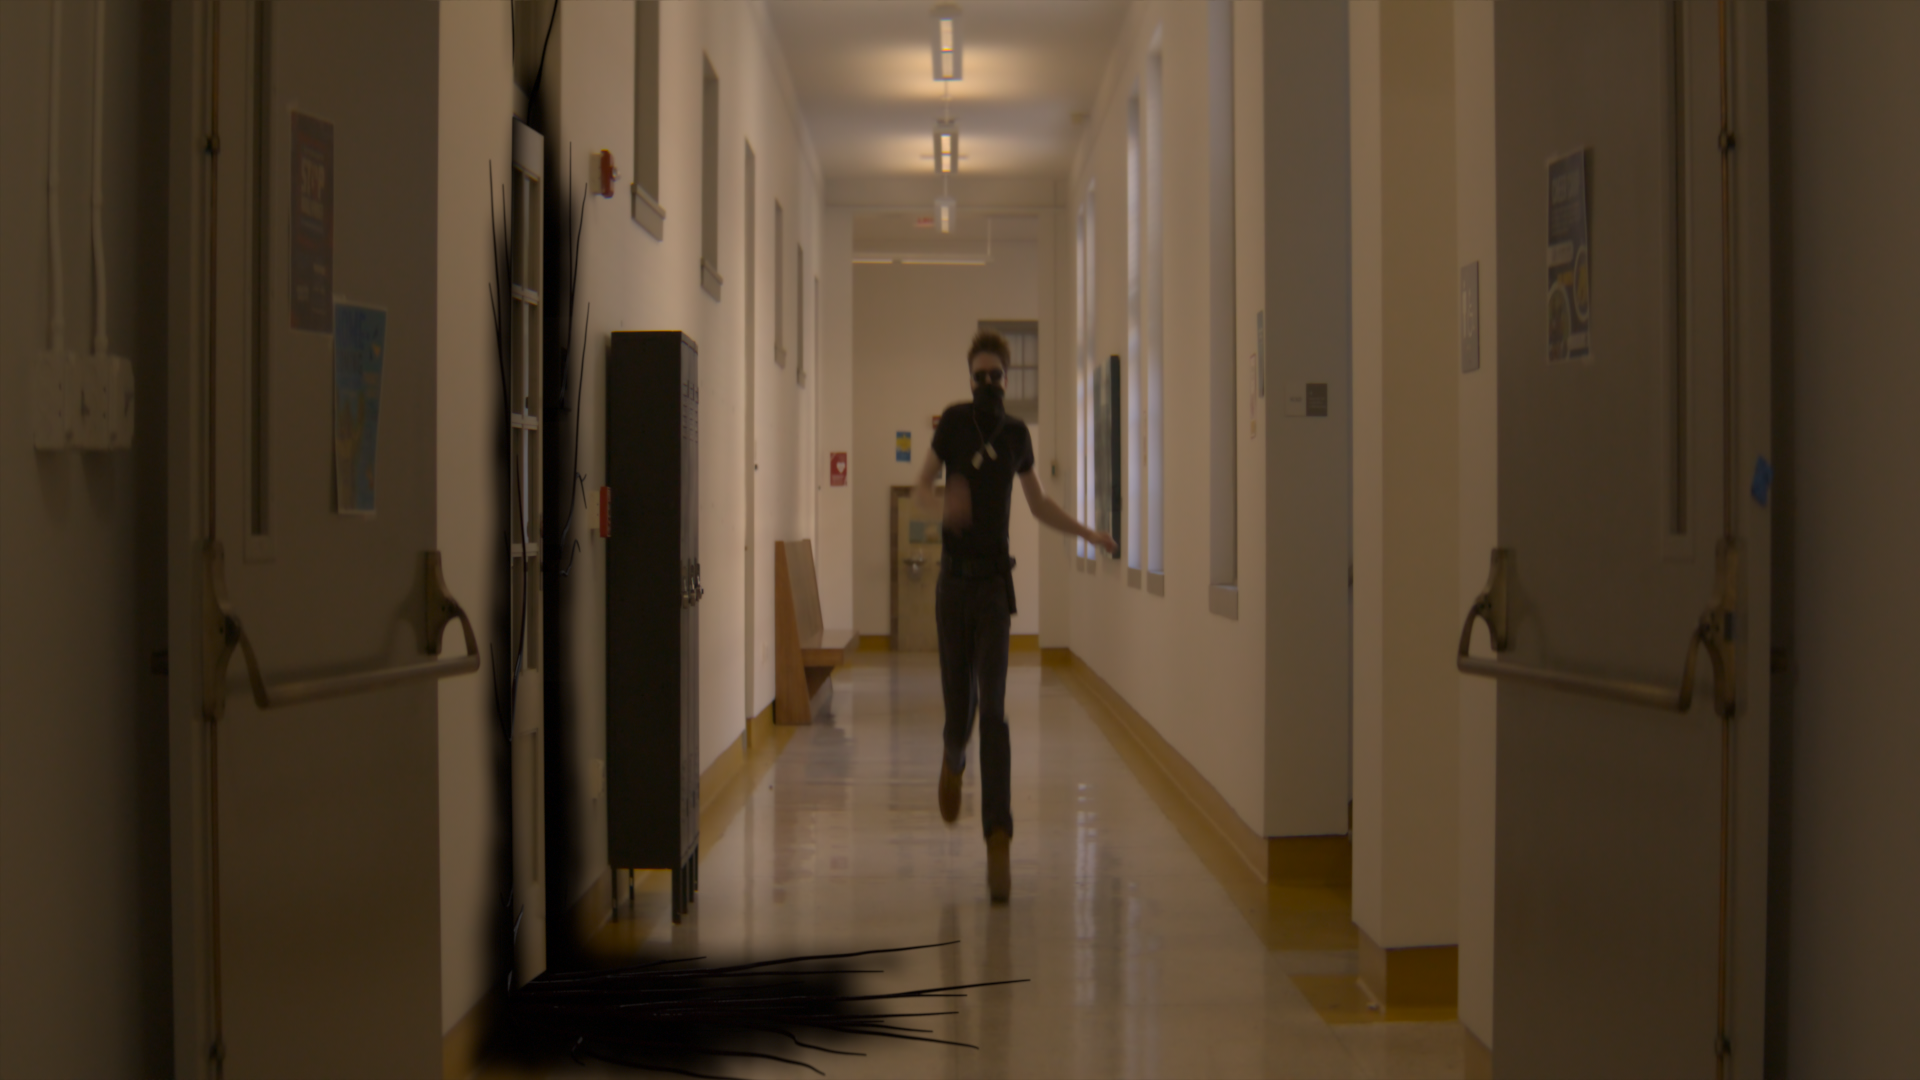
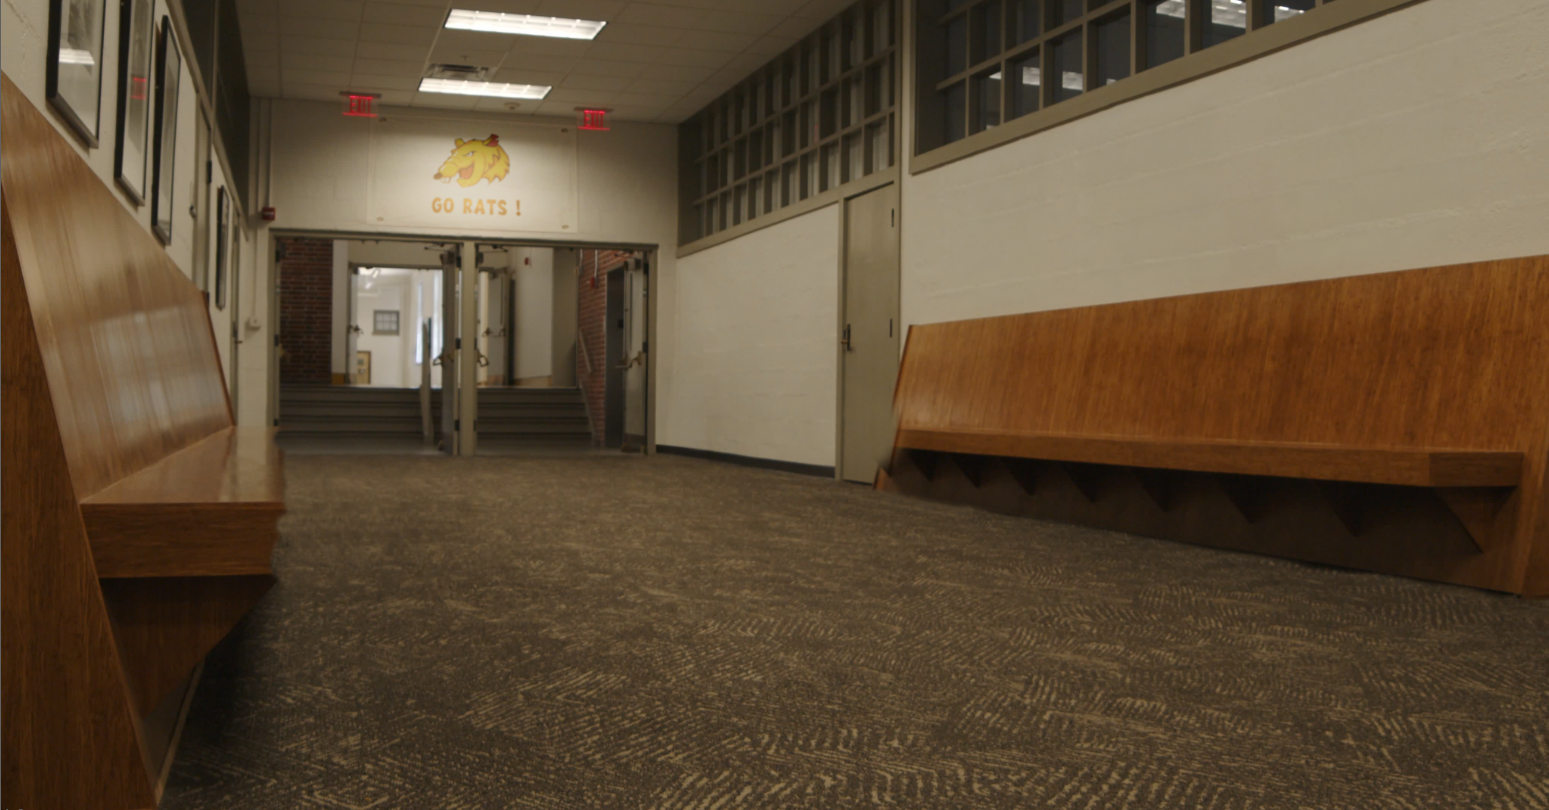
Beyond, this shot, I have been working on some Invisible effects for another hallway shot, which is the explosion. Here is the set extension before after after to close off the wall. This shot will also consist of an explosion coming through the left wall.
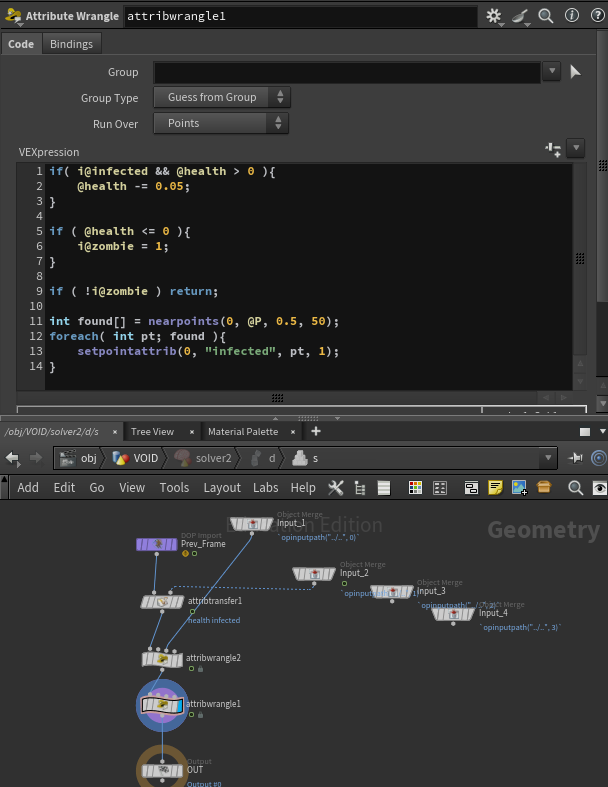
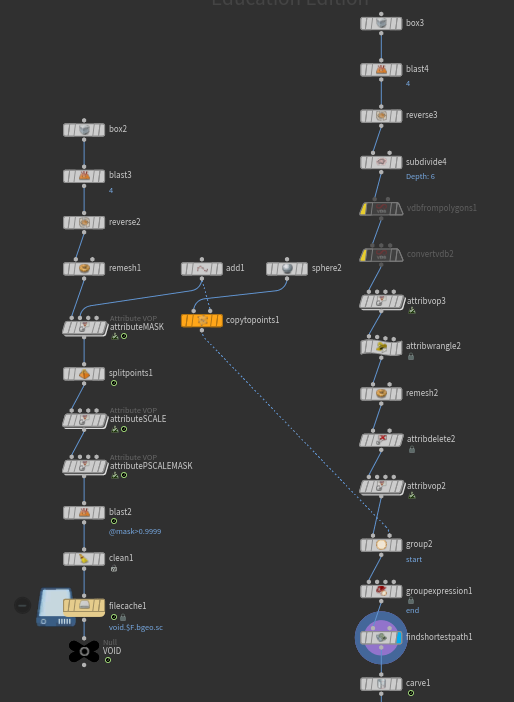
The last big big shot I have been working on is the first void shot in the hallway where the Goon gets sucked into the classroom which has become a void. Here is that current playblast I have been working on. This was created using an infection solver following the path of the veins created. Here is that breakdown as well.
Here is the solver I used to create the infection as well as the health mask I built. The health mask drove the speed and distance the infection would take over.
This comp is early stages and need major work, but after our critique we know the direction we want to take it.
There is much work to be done, so we will continue forward.
January 27th, 2026 - Assembly Cut
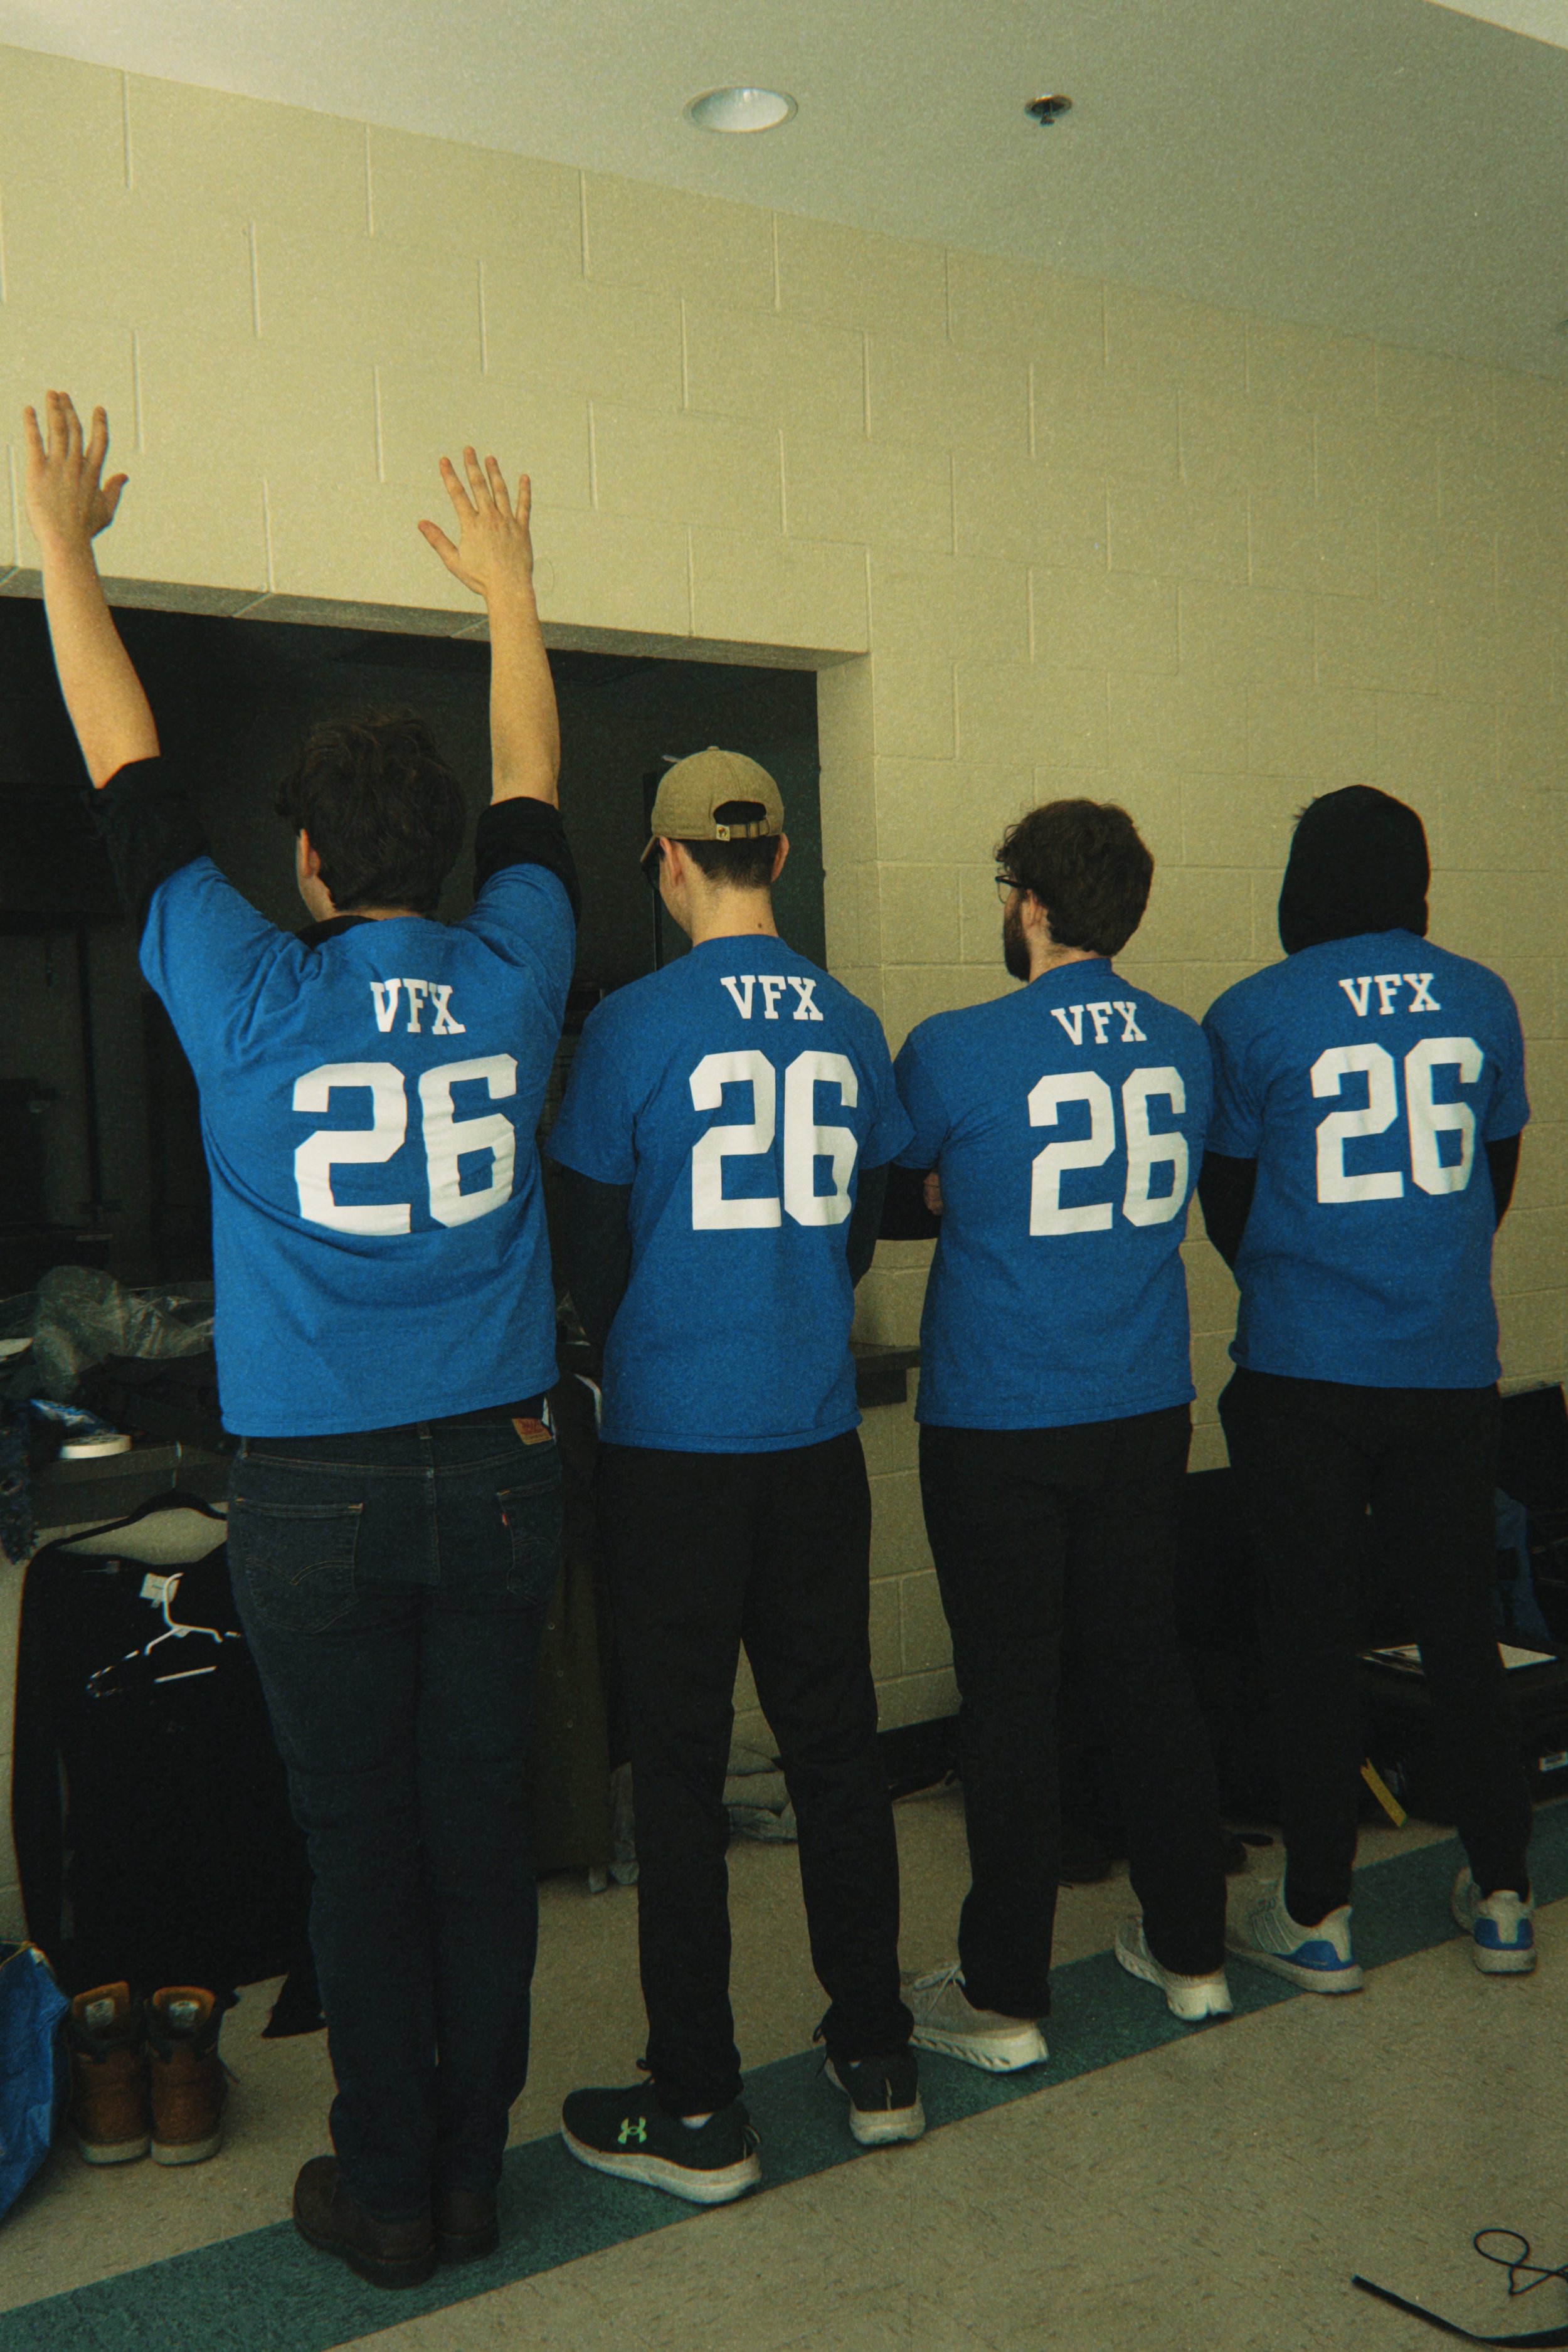
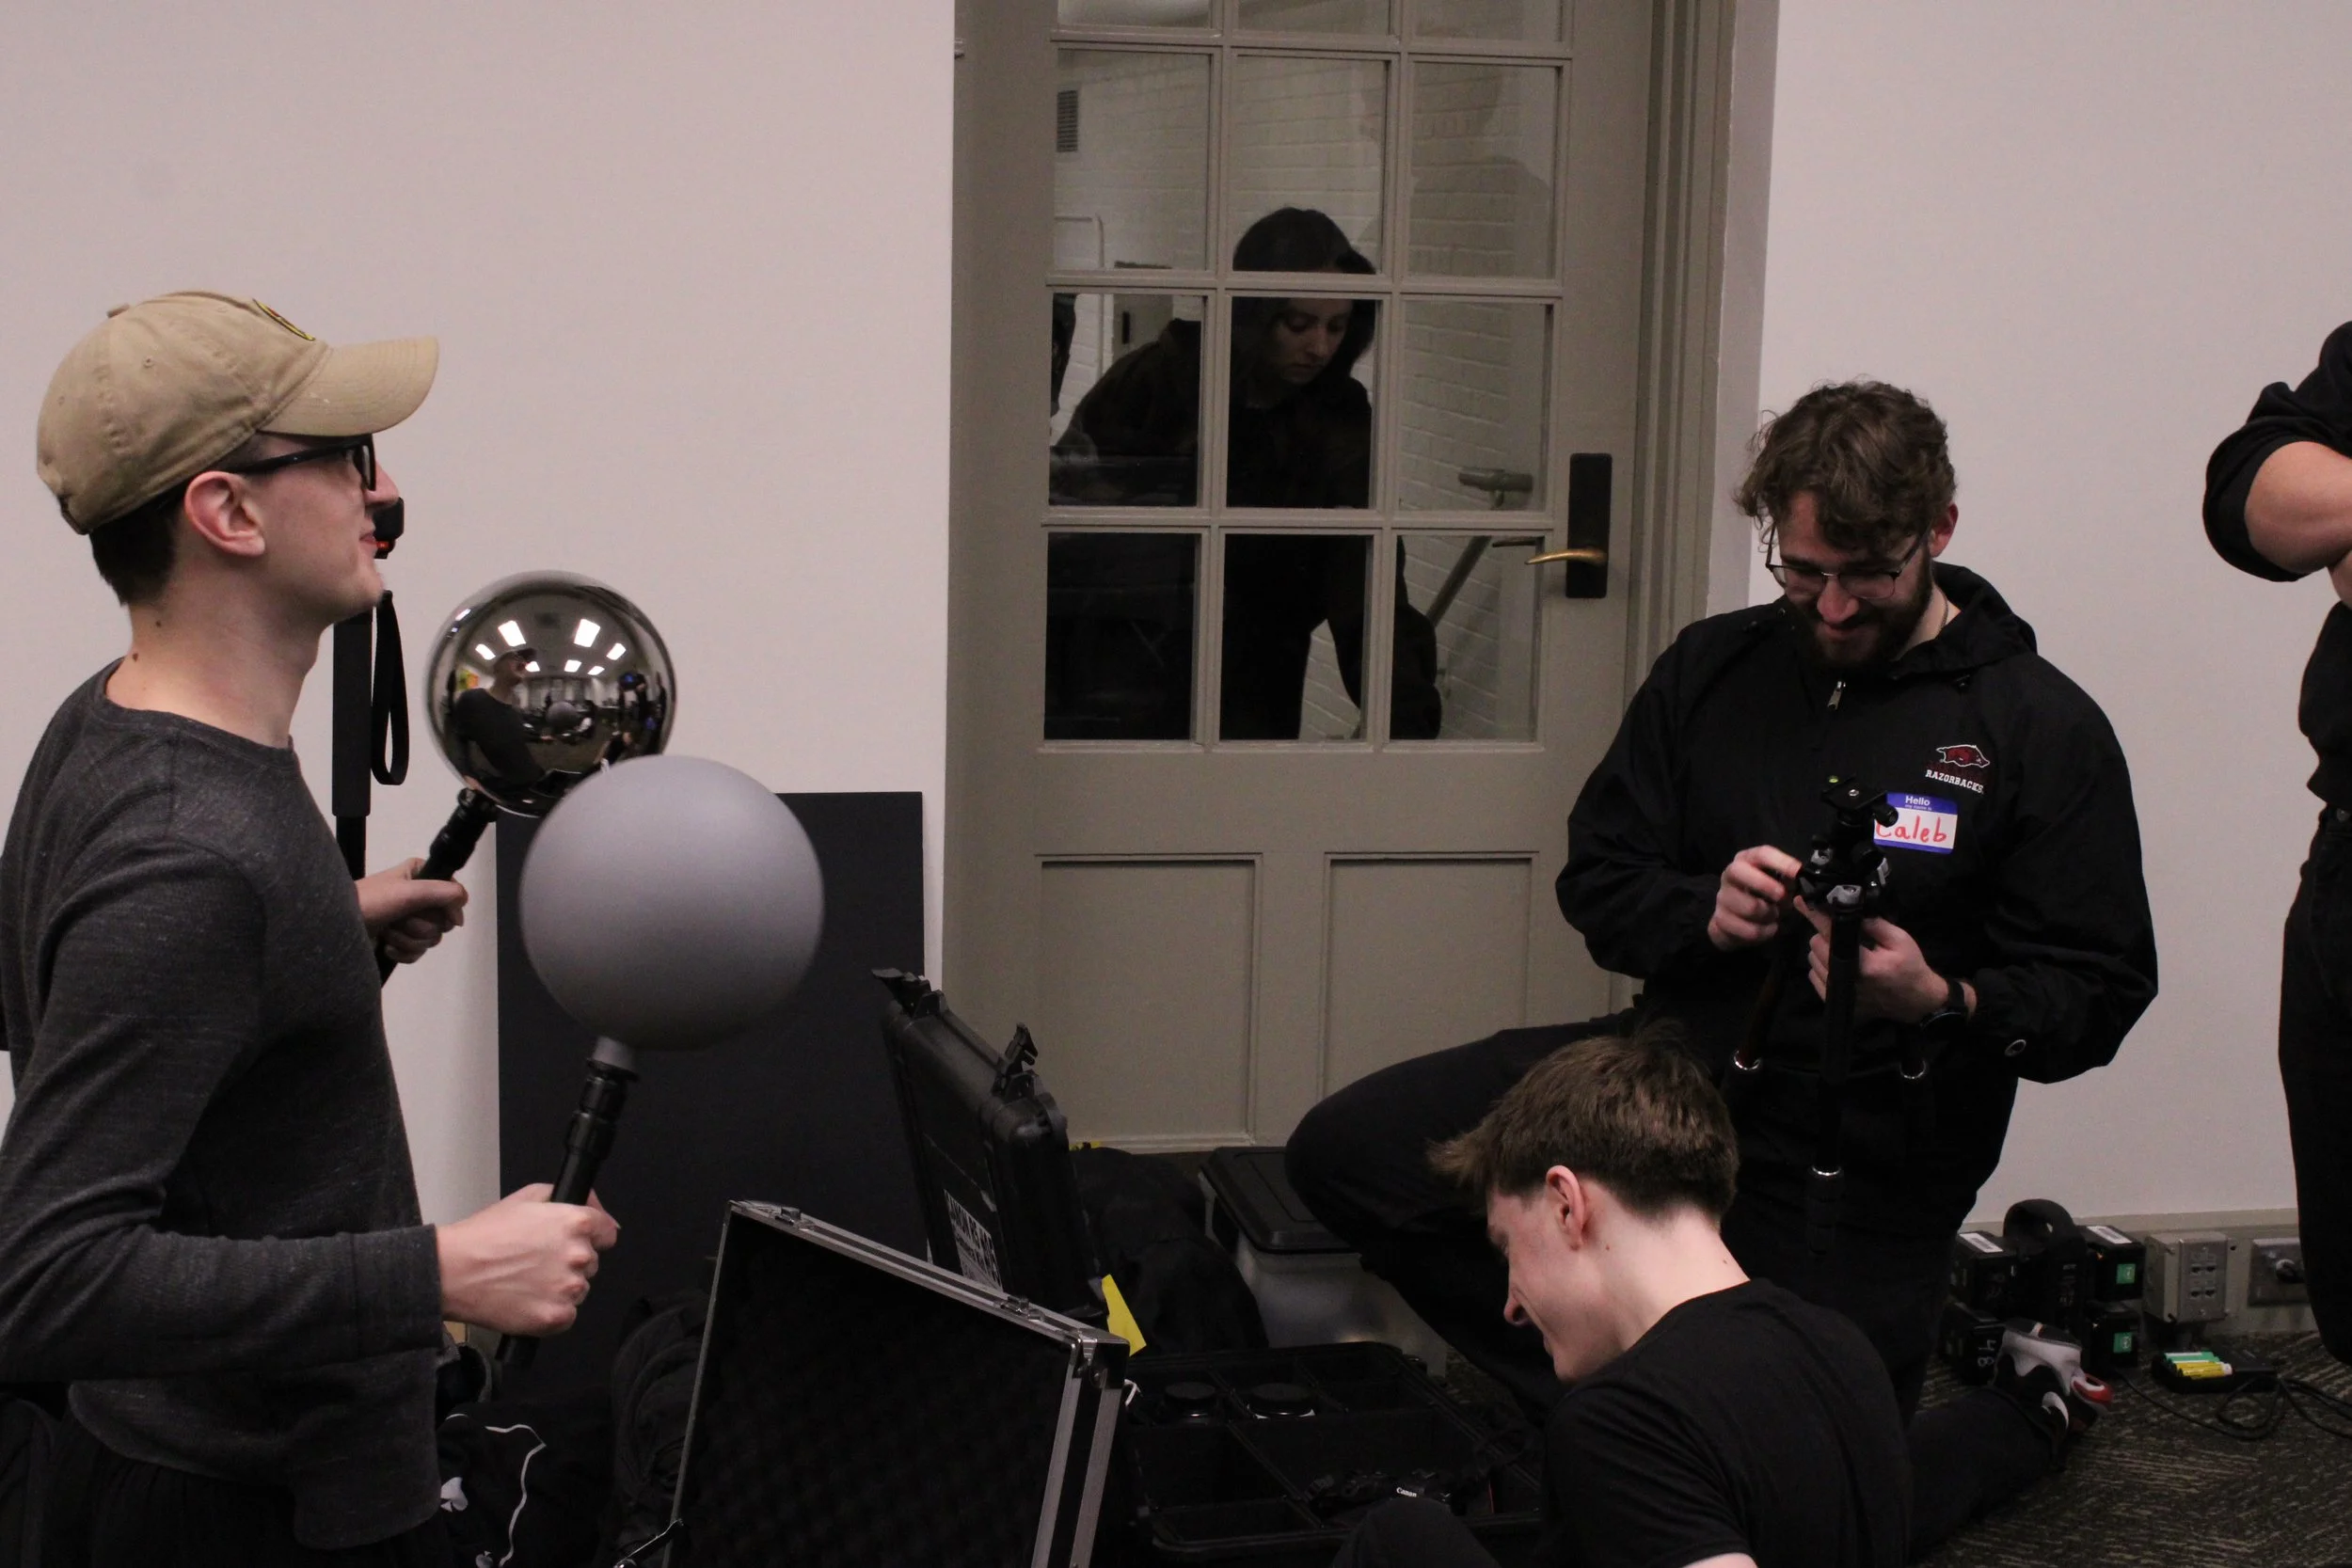
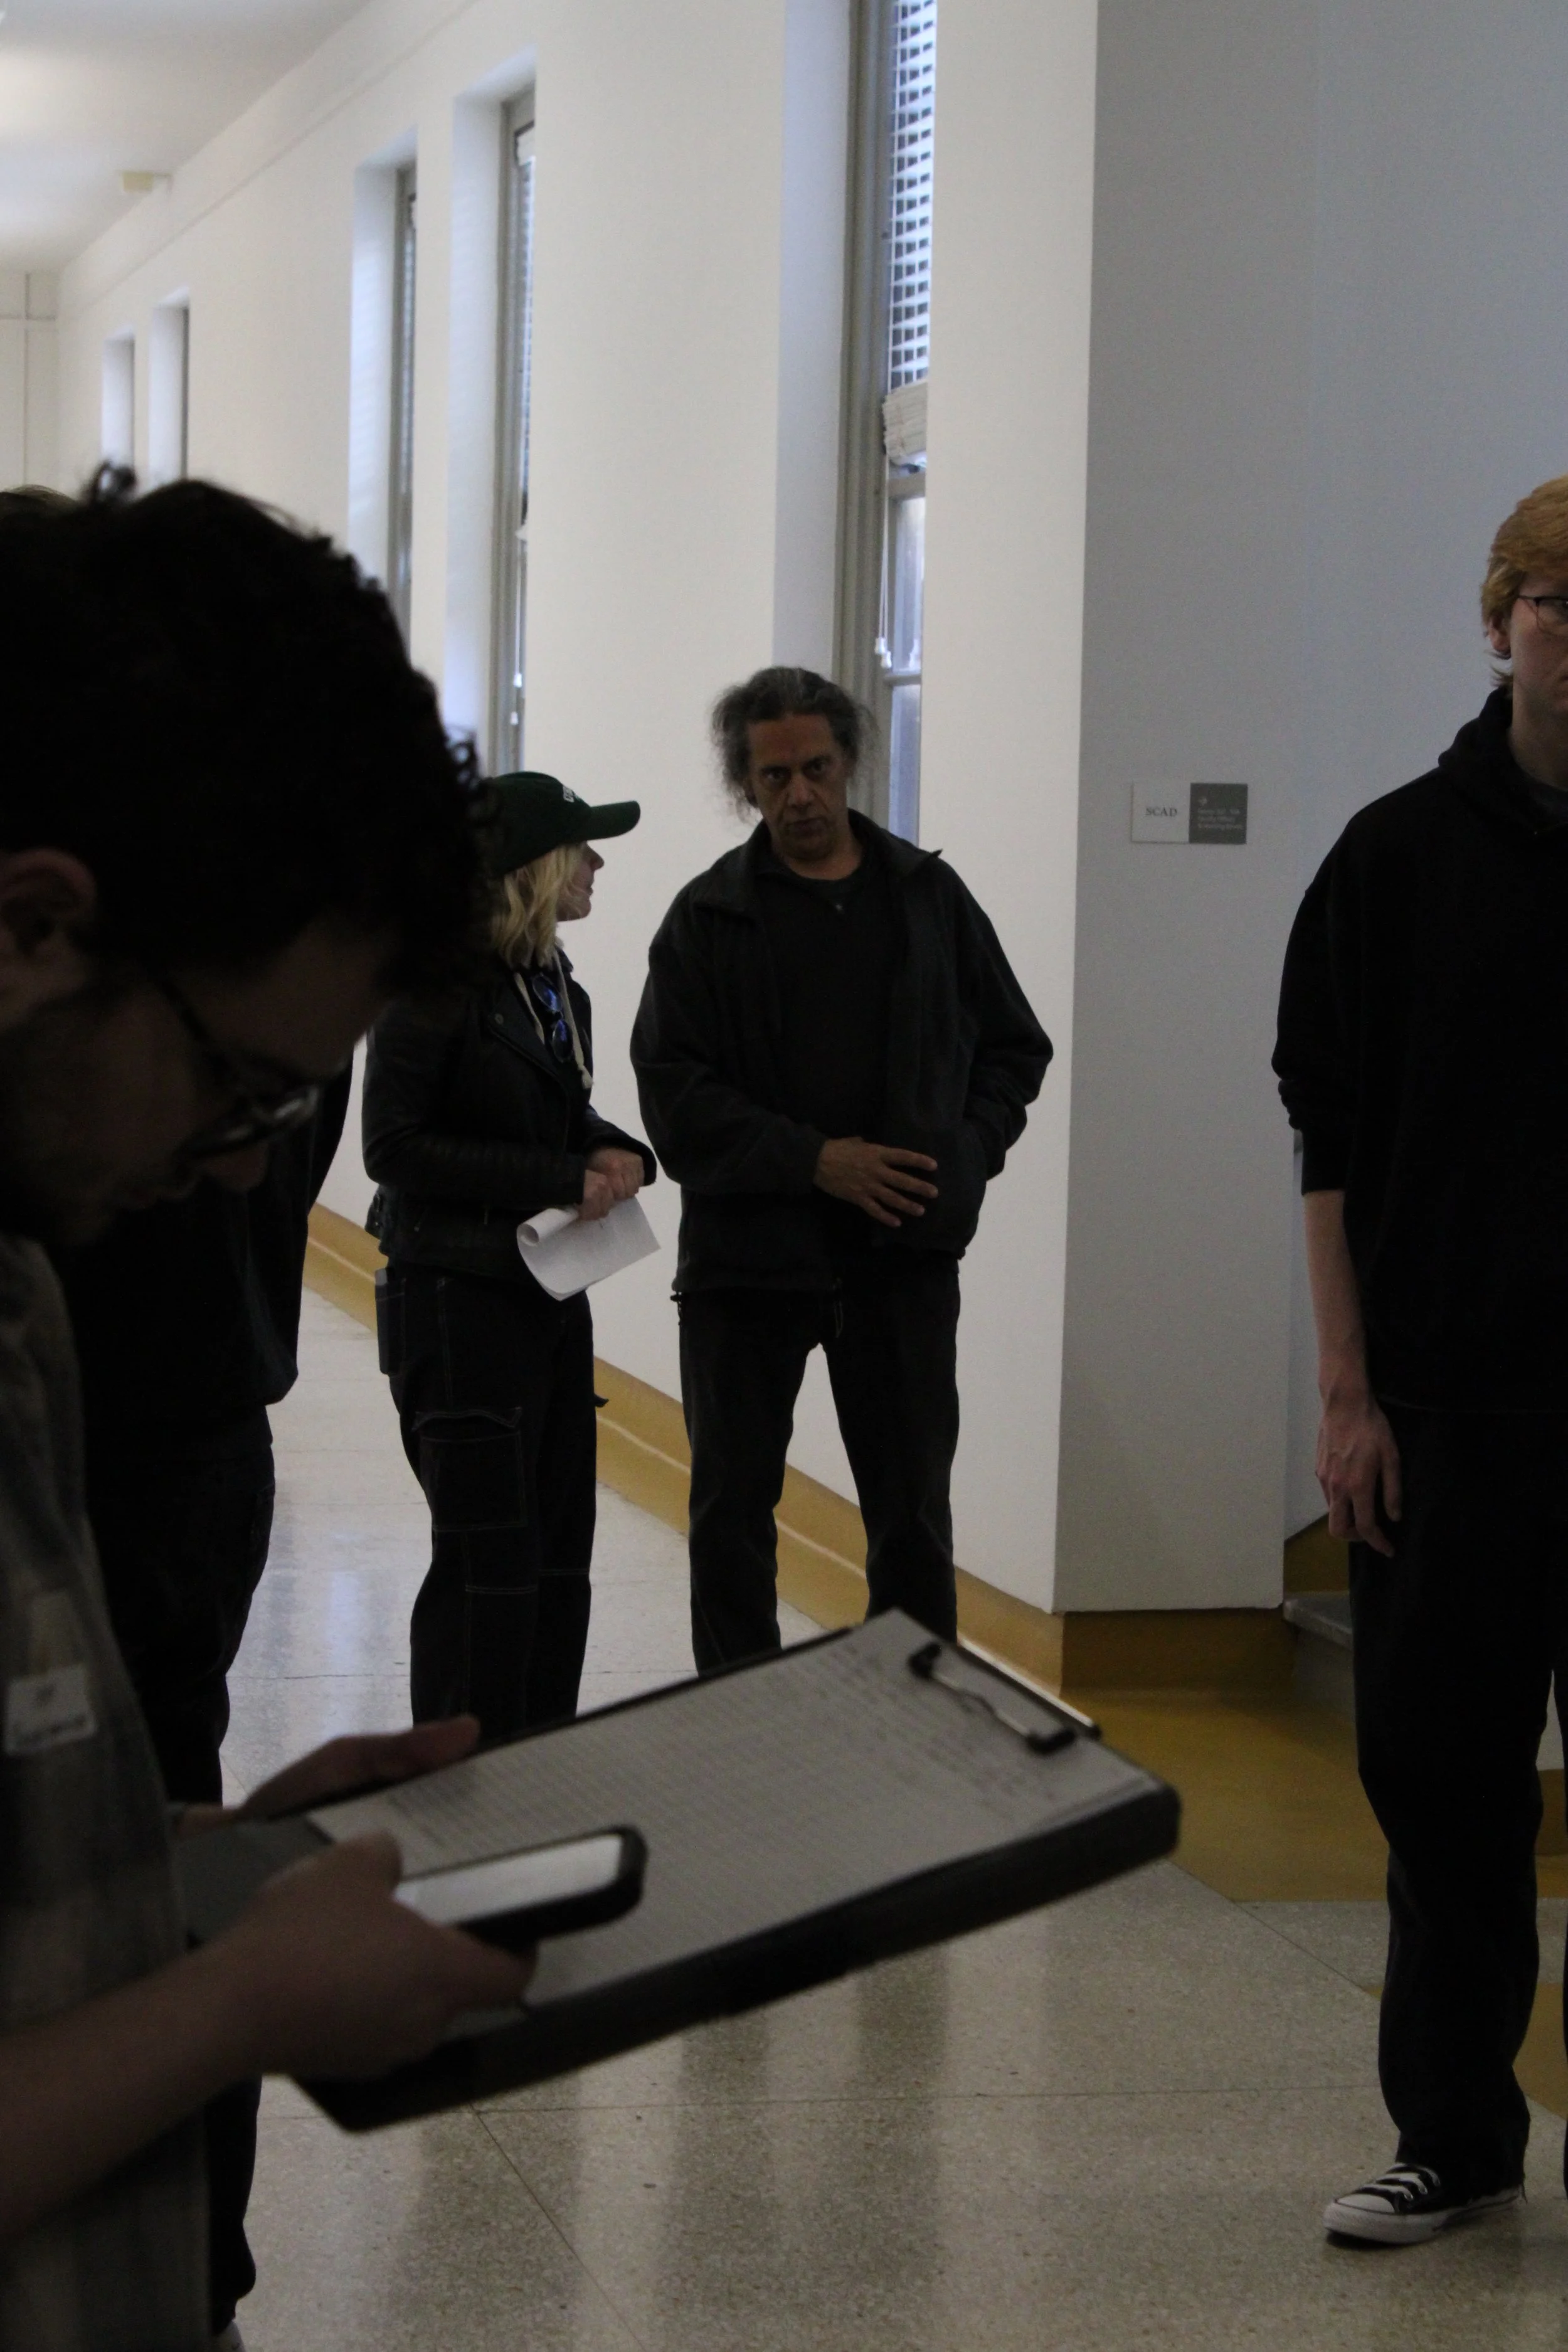
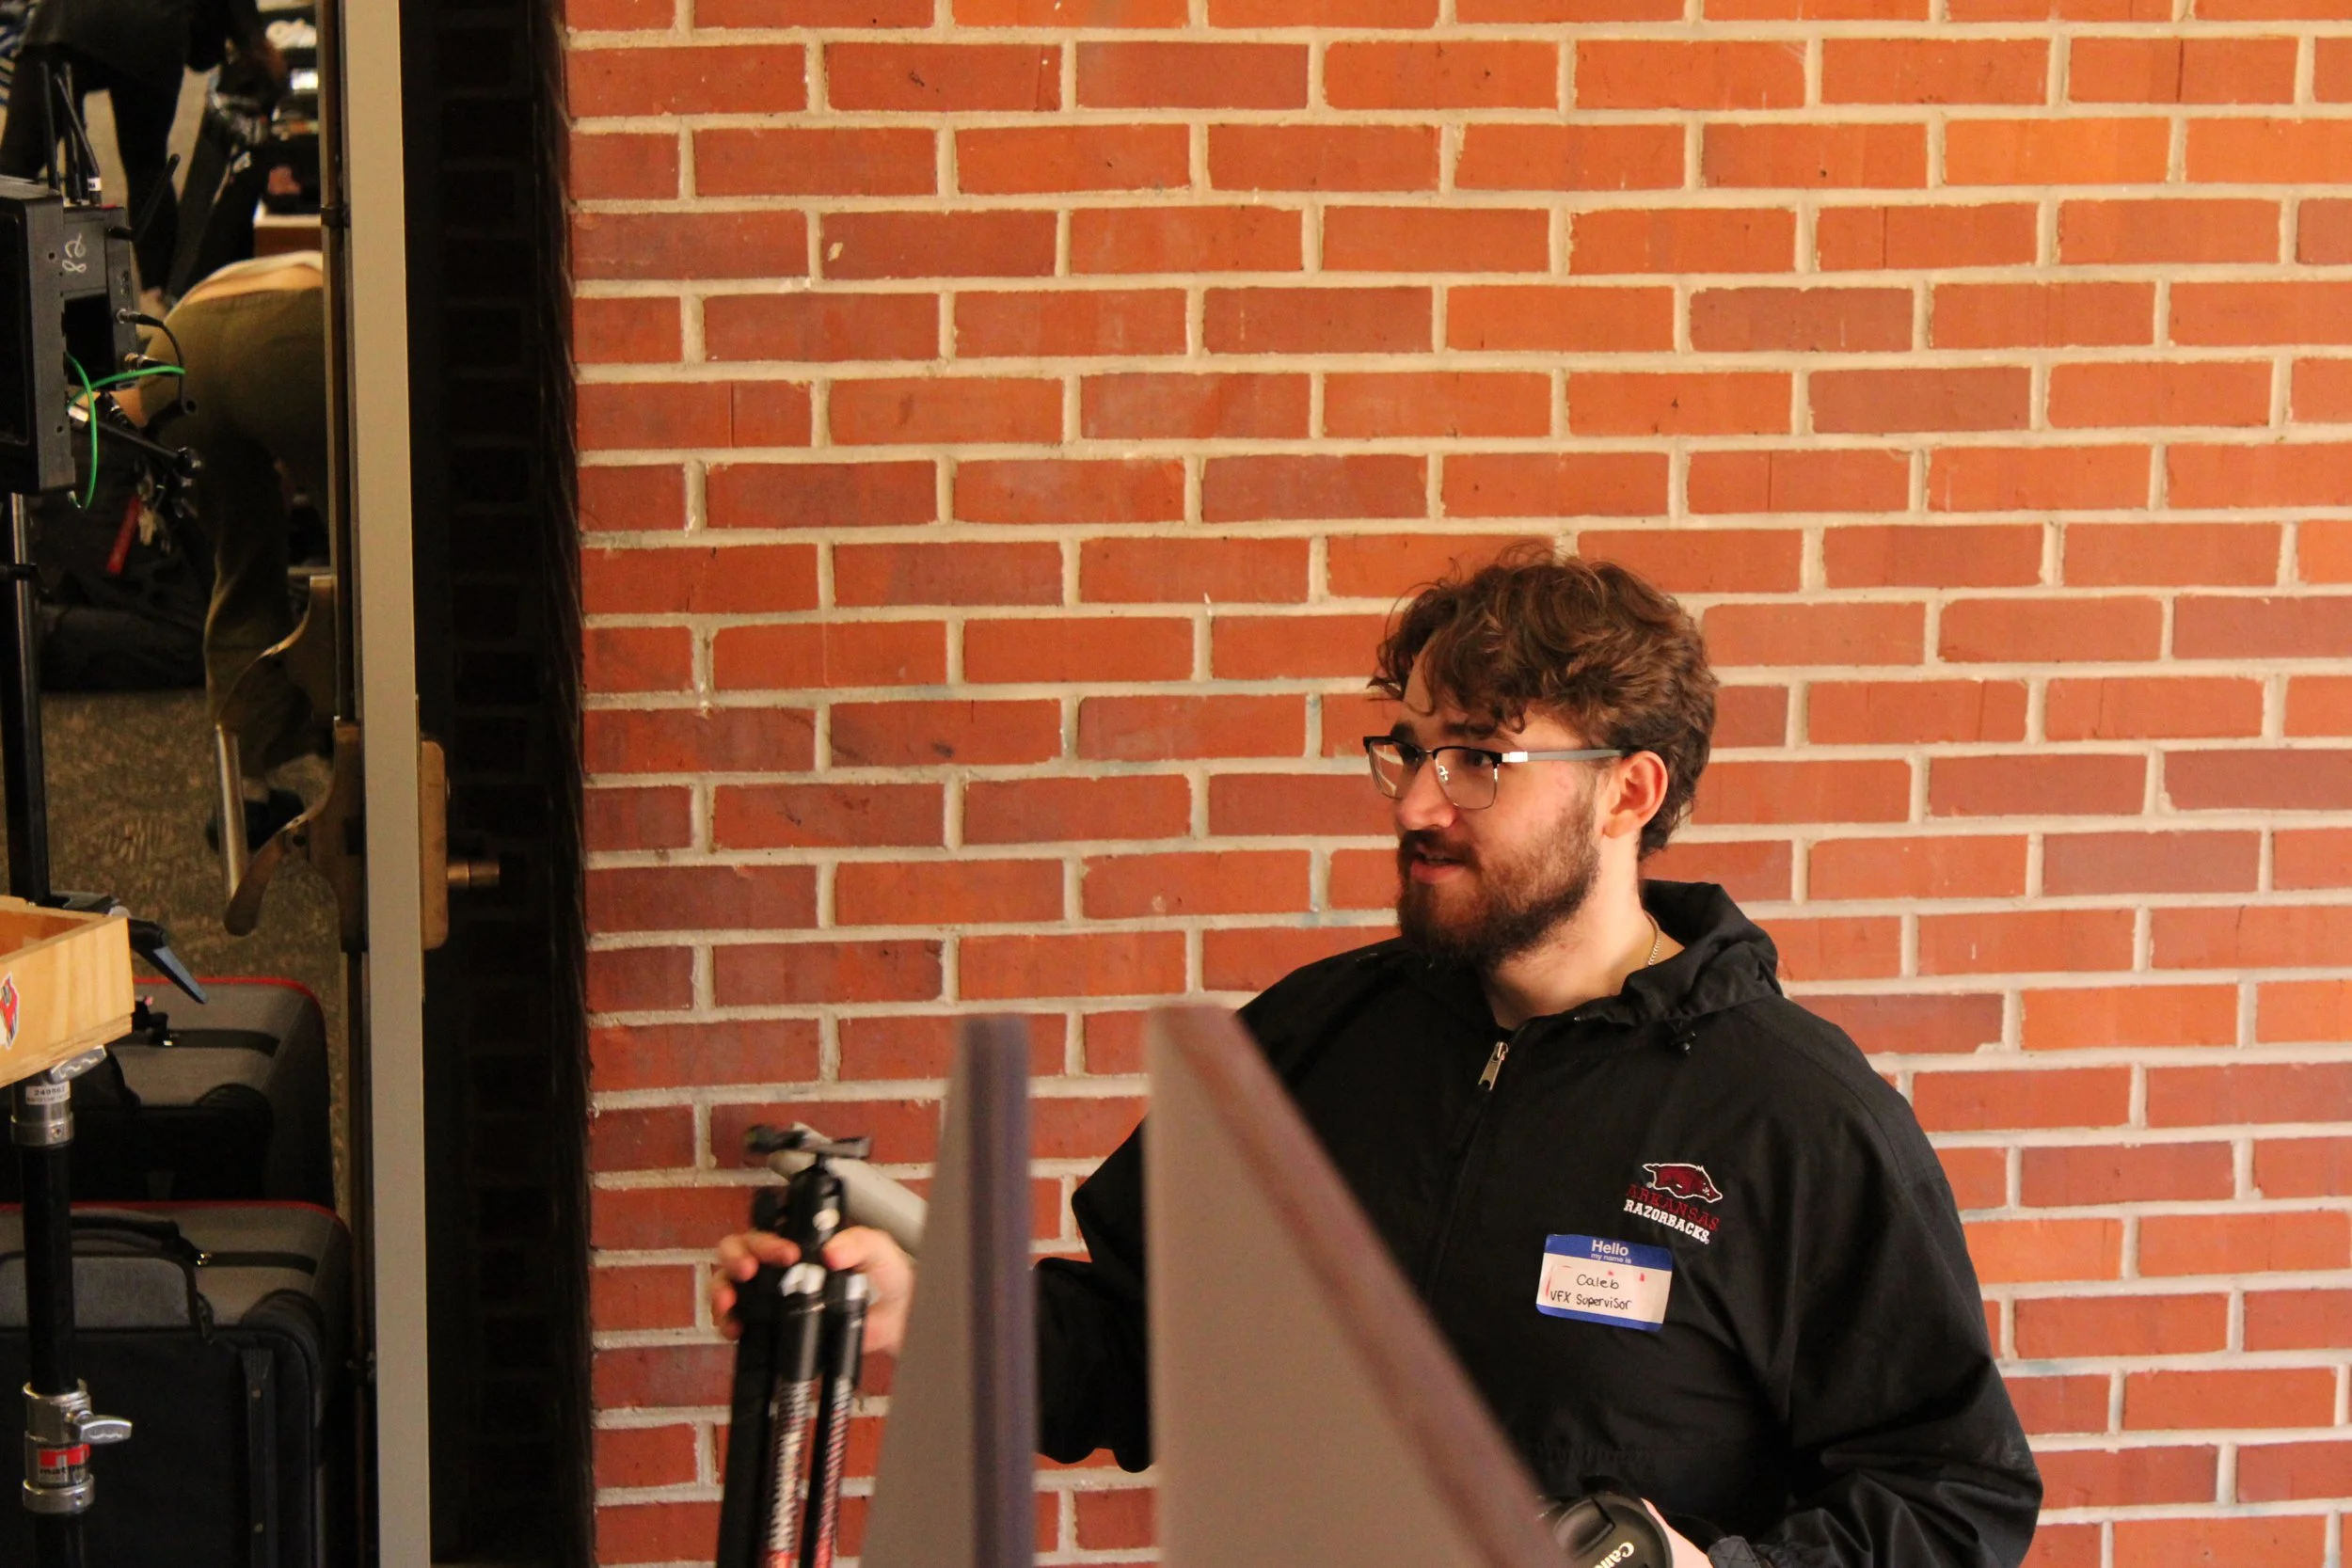
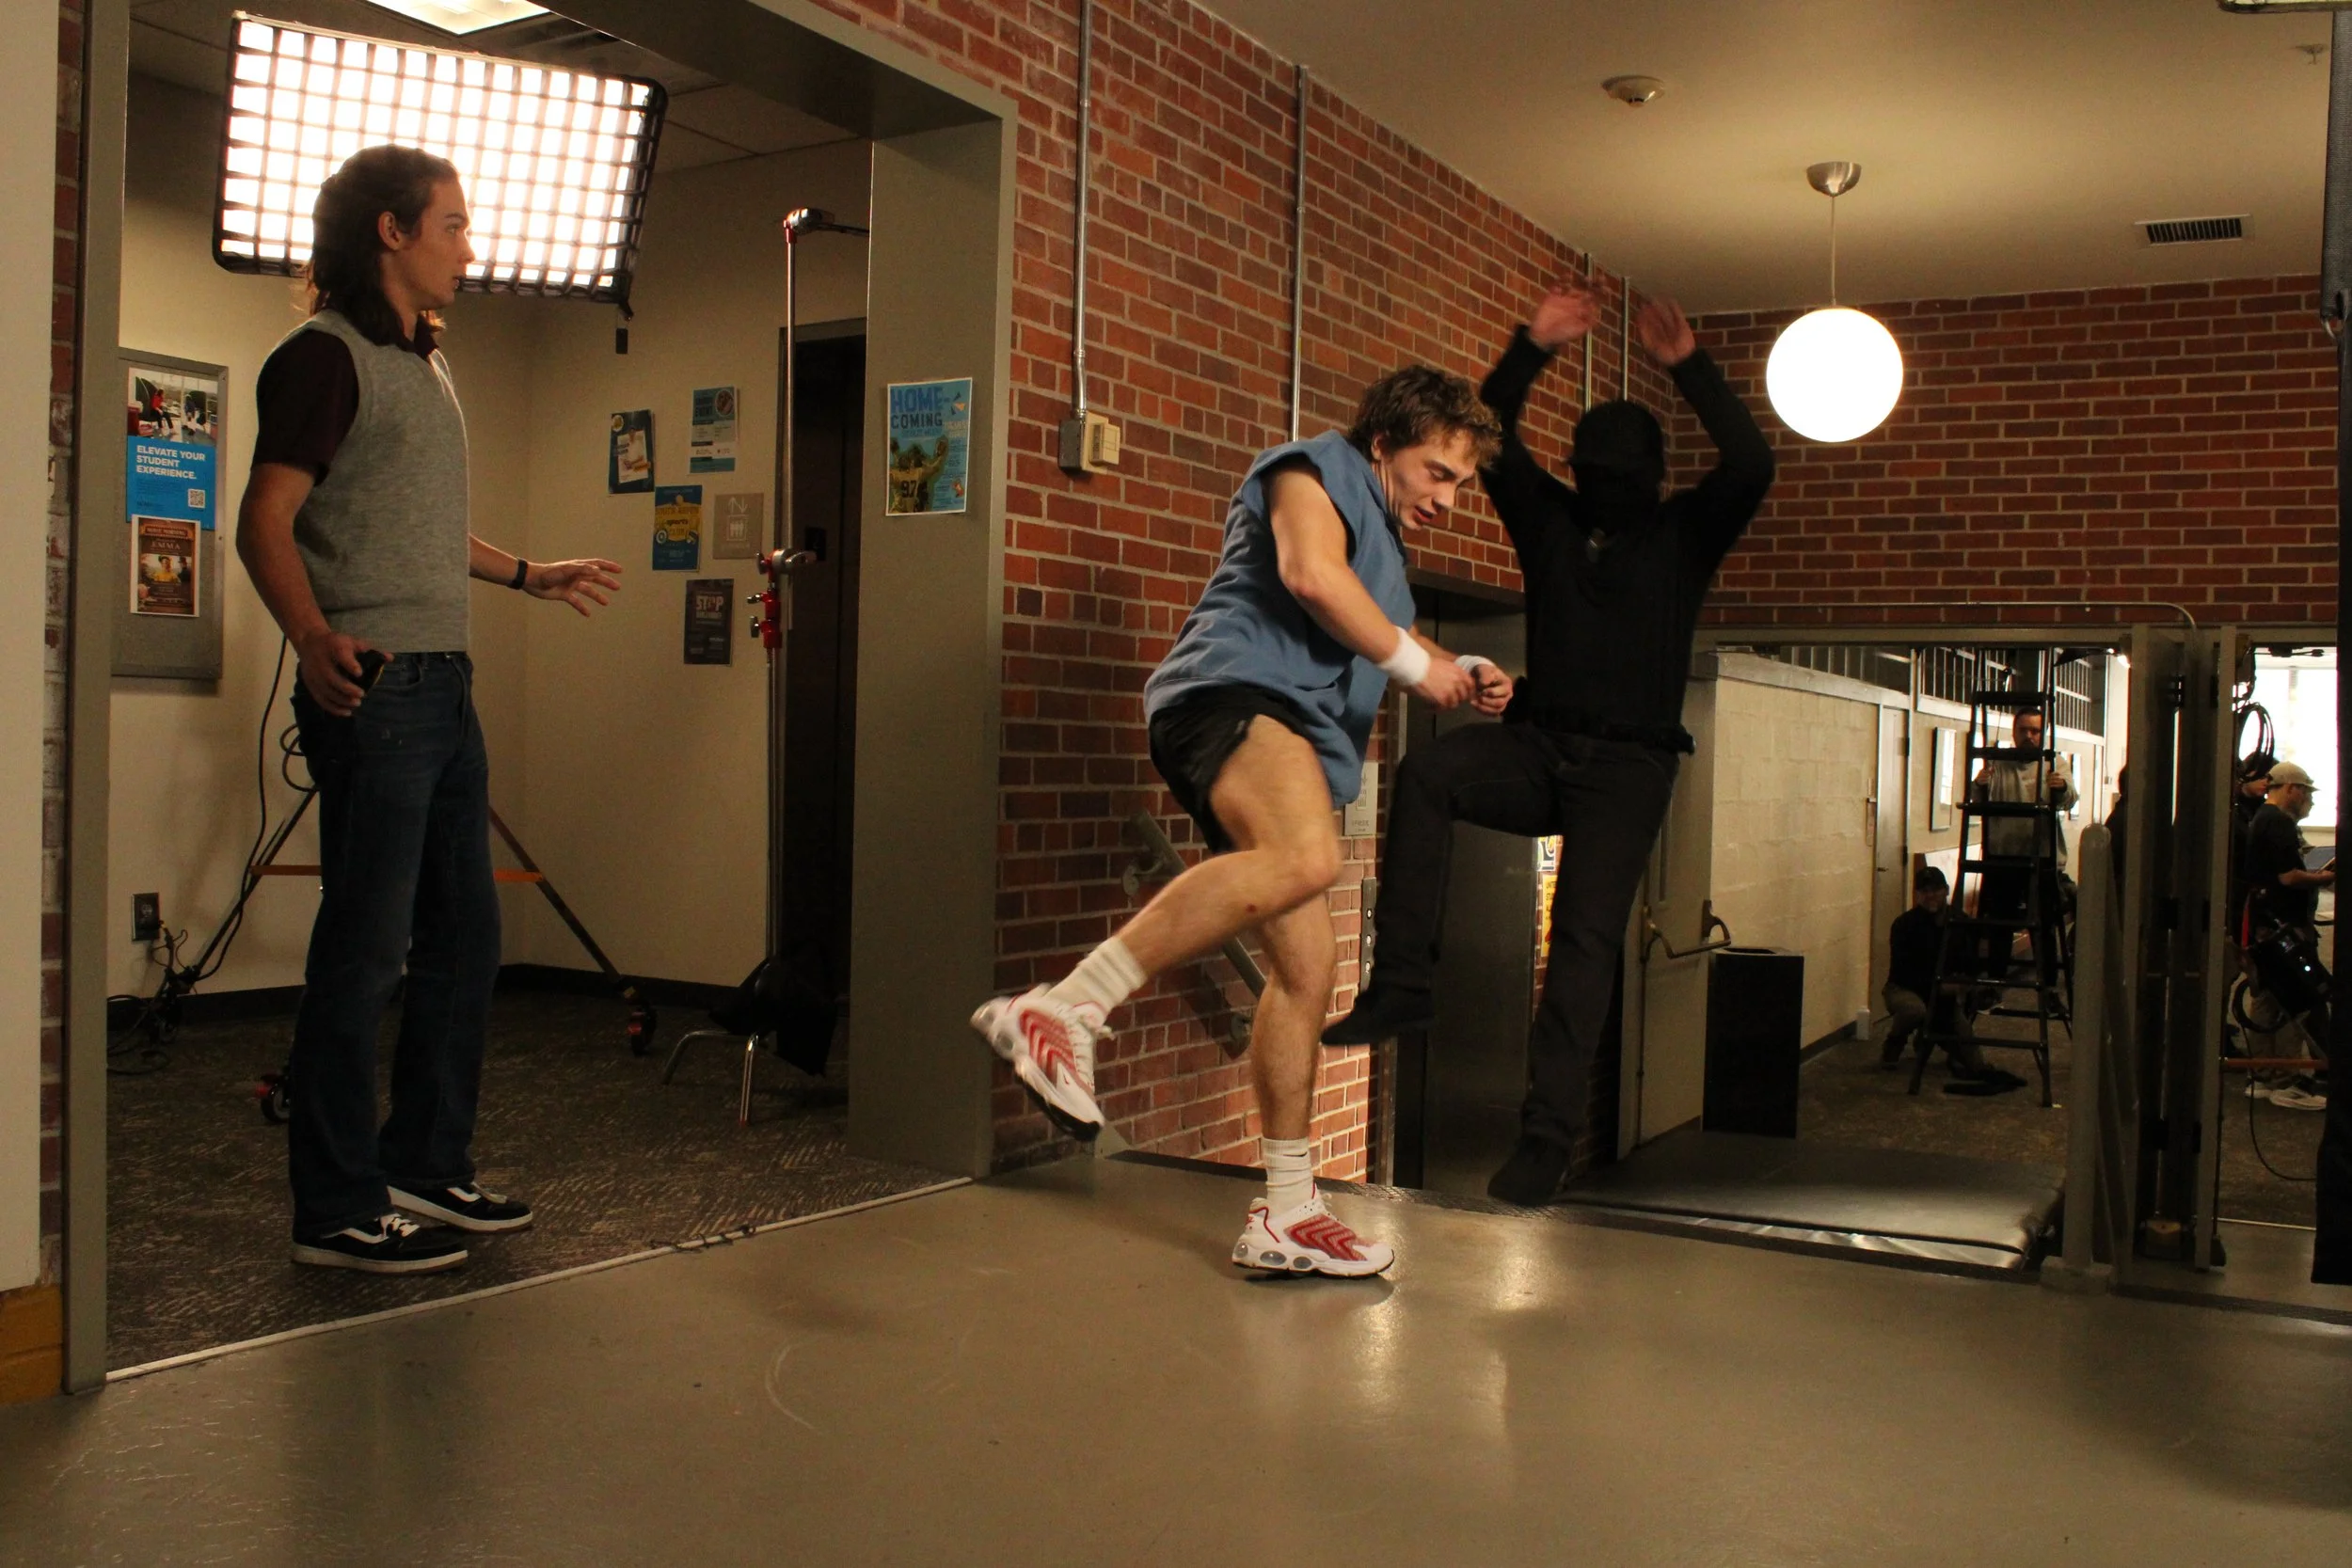
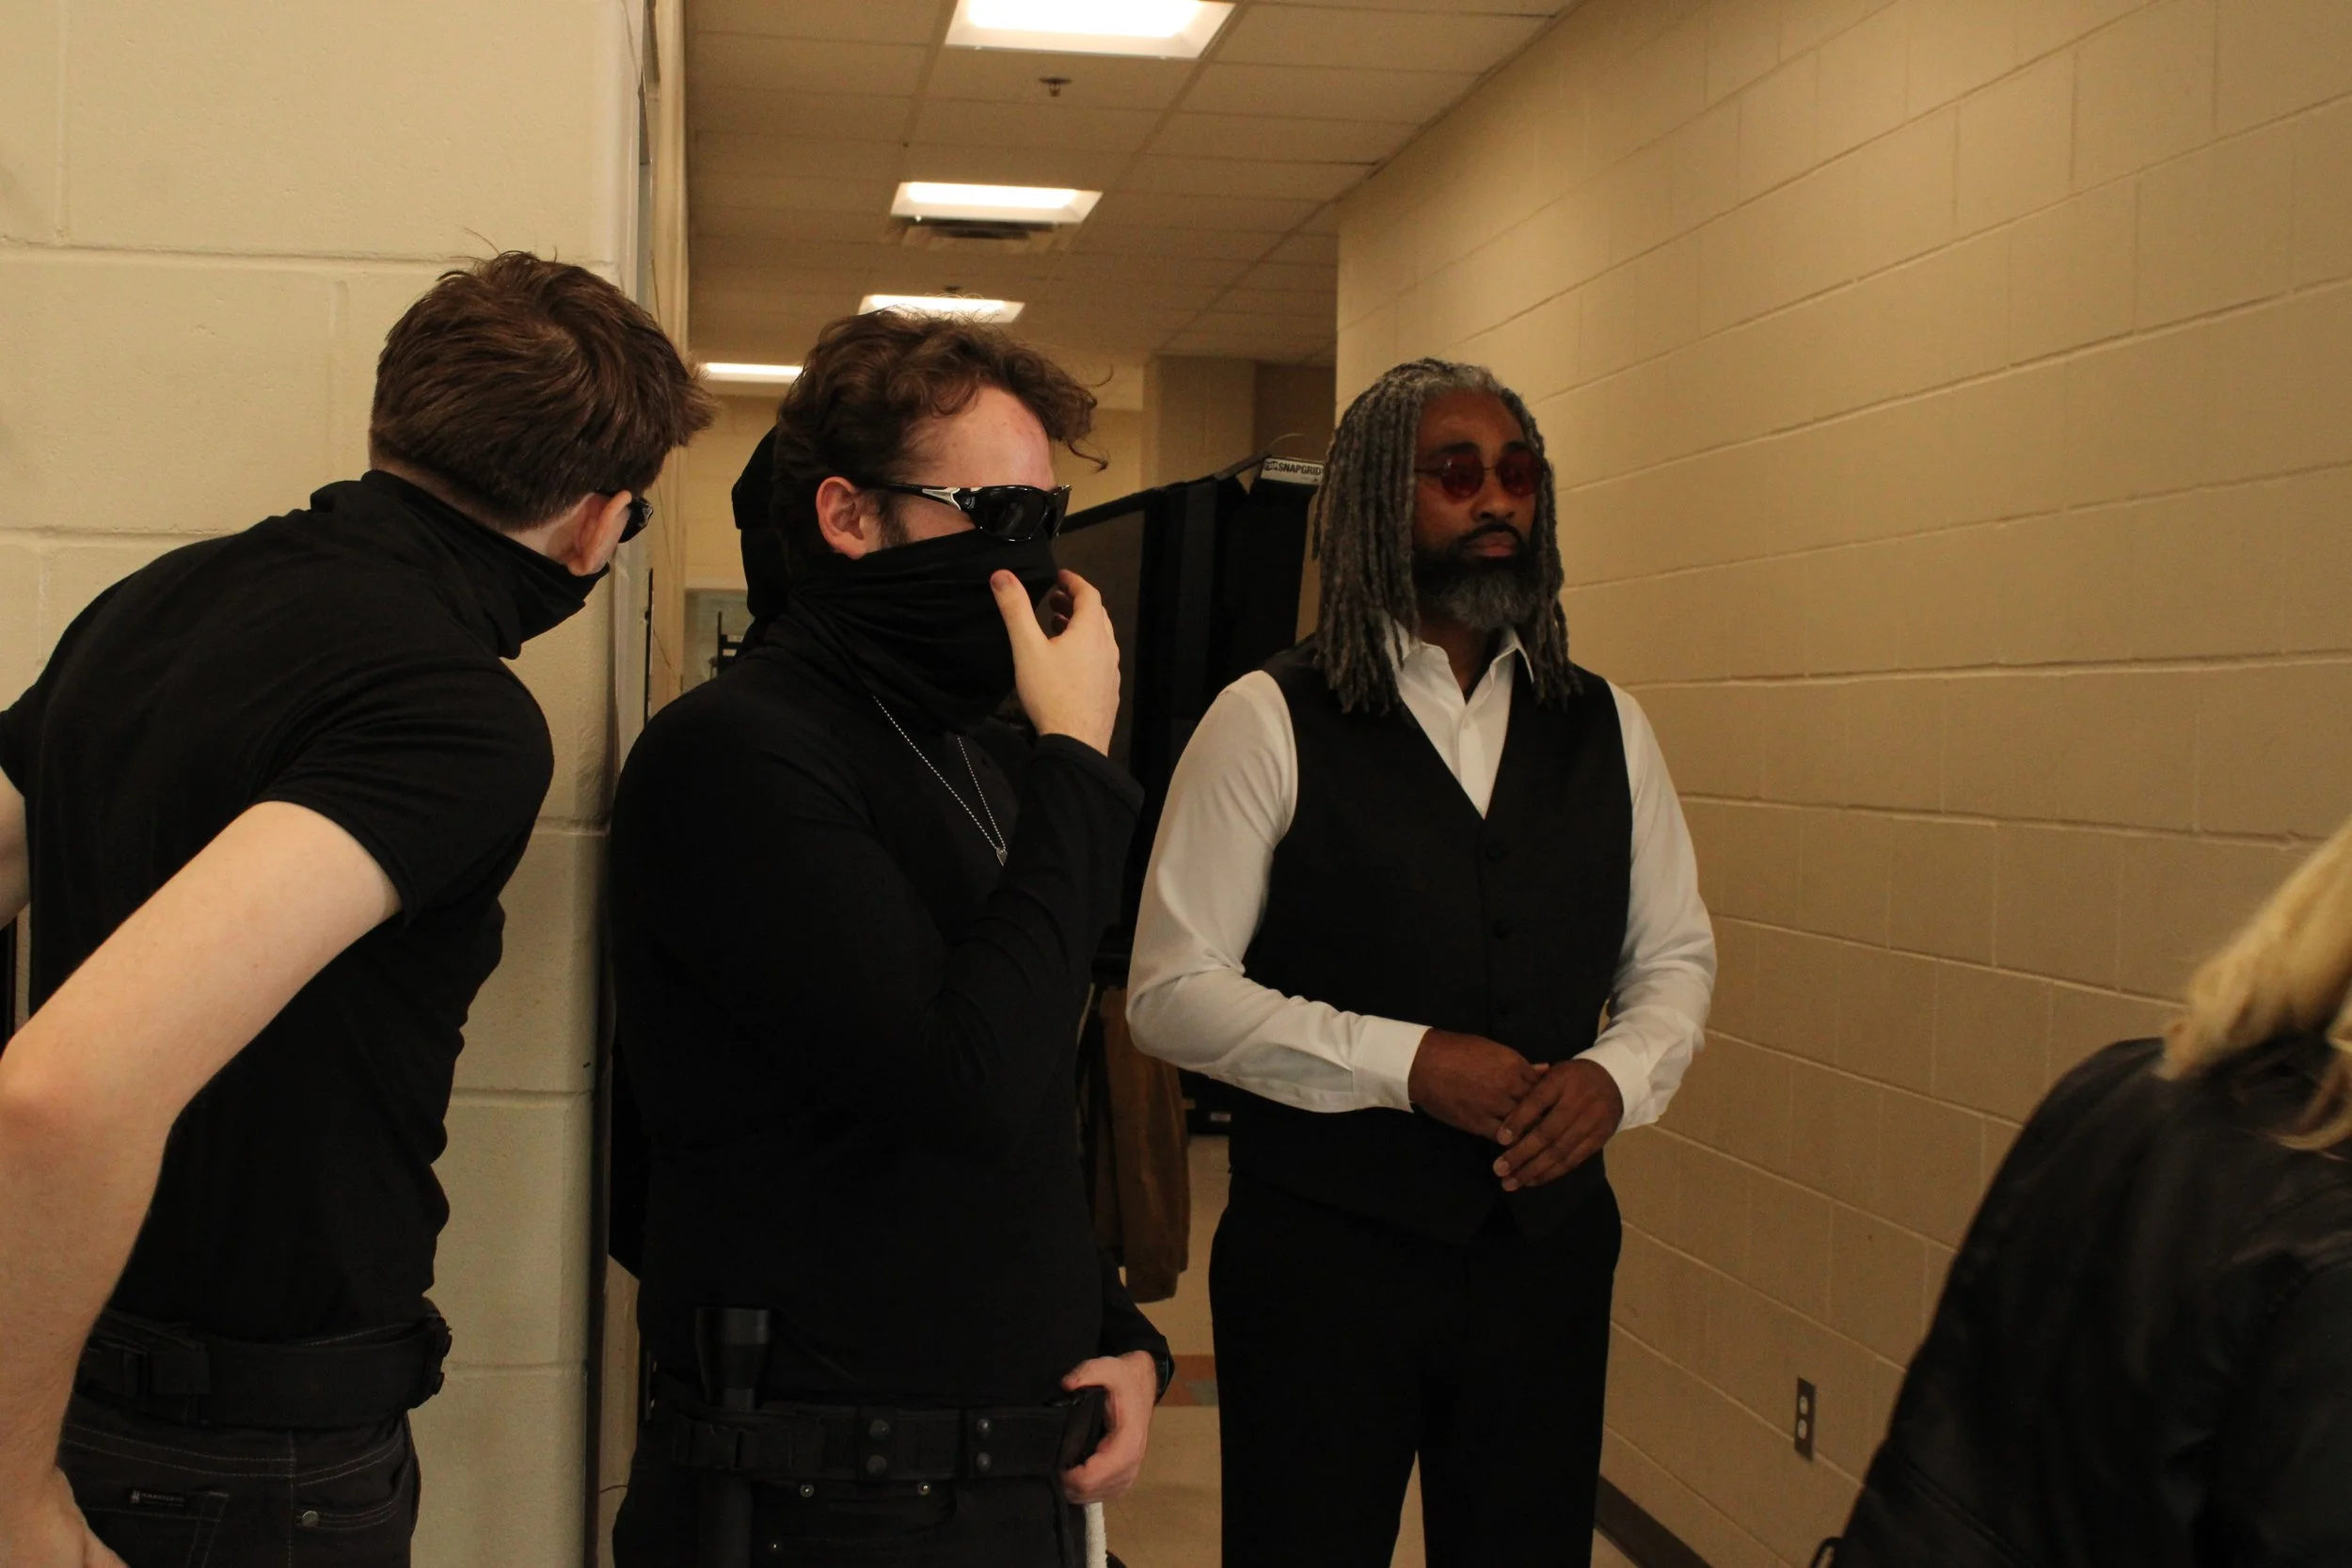
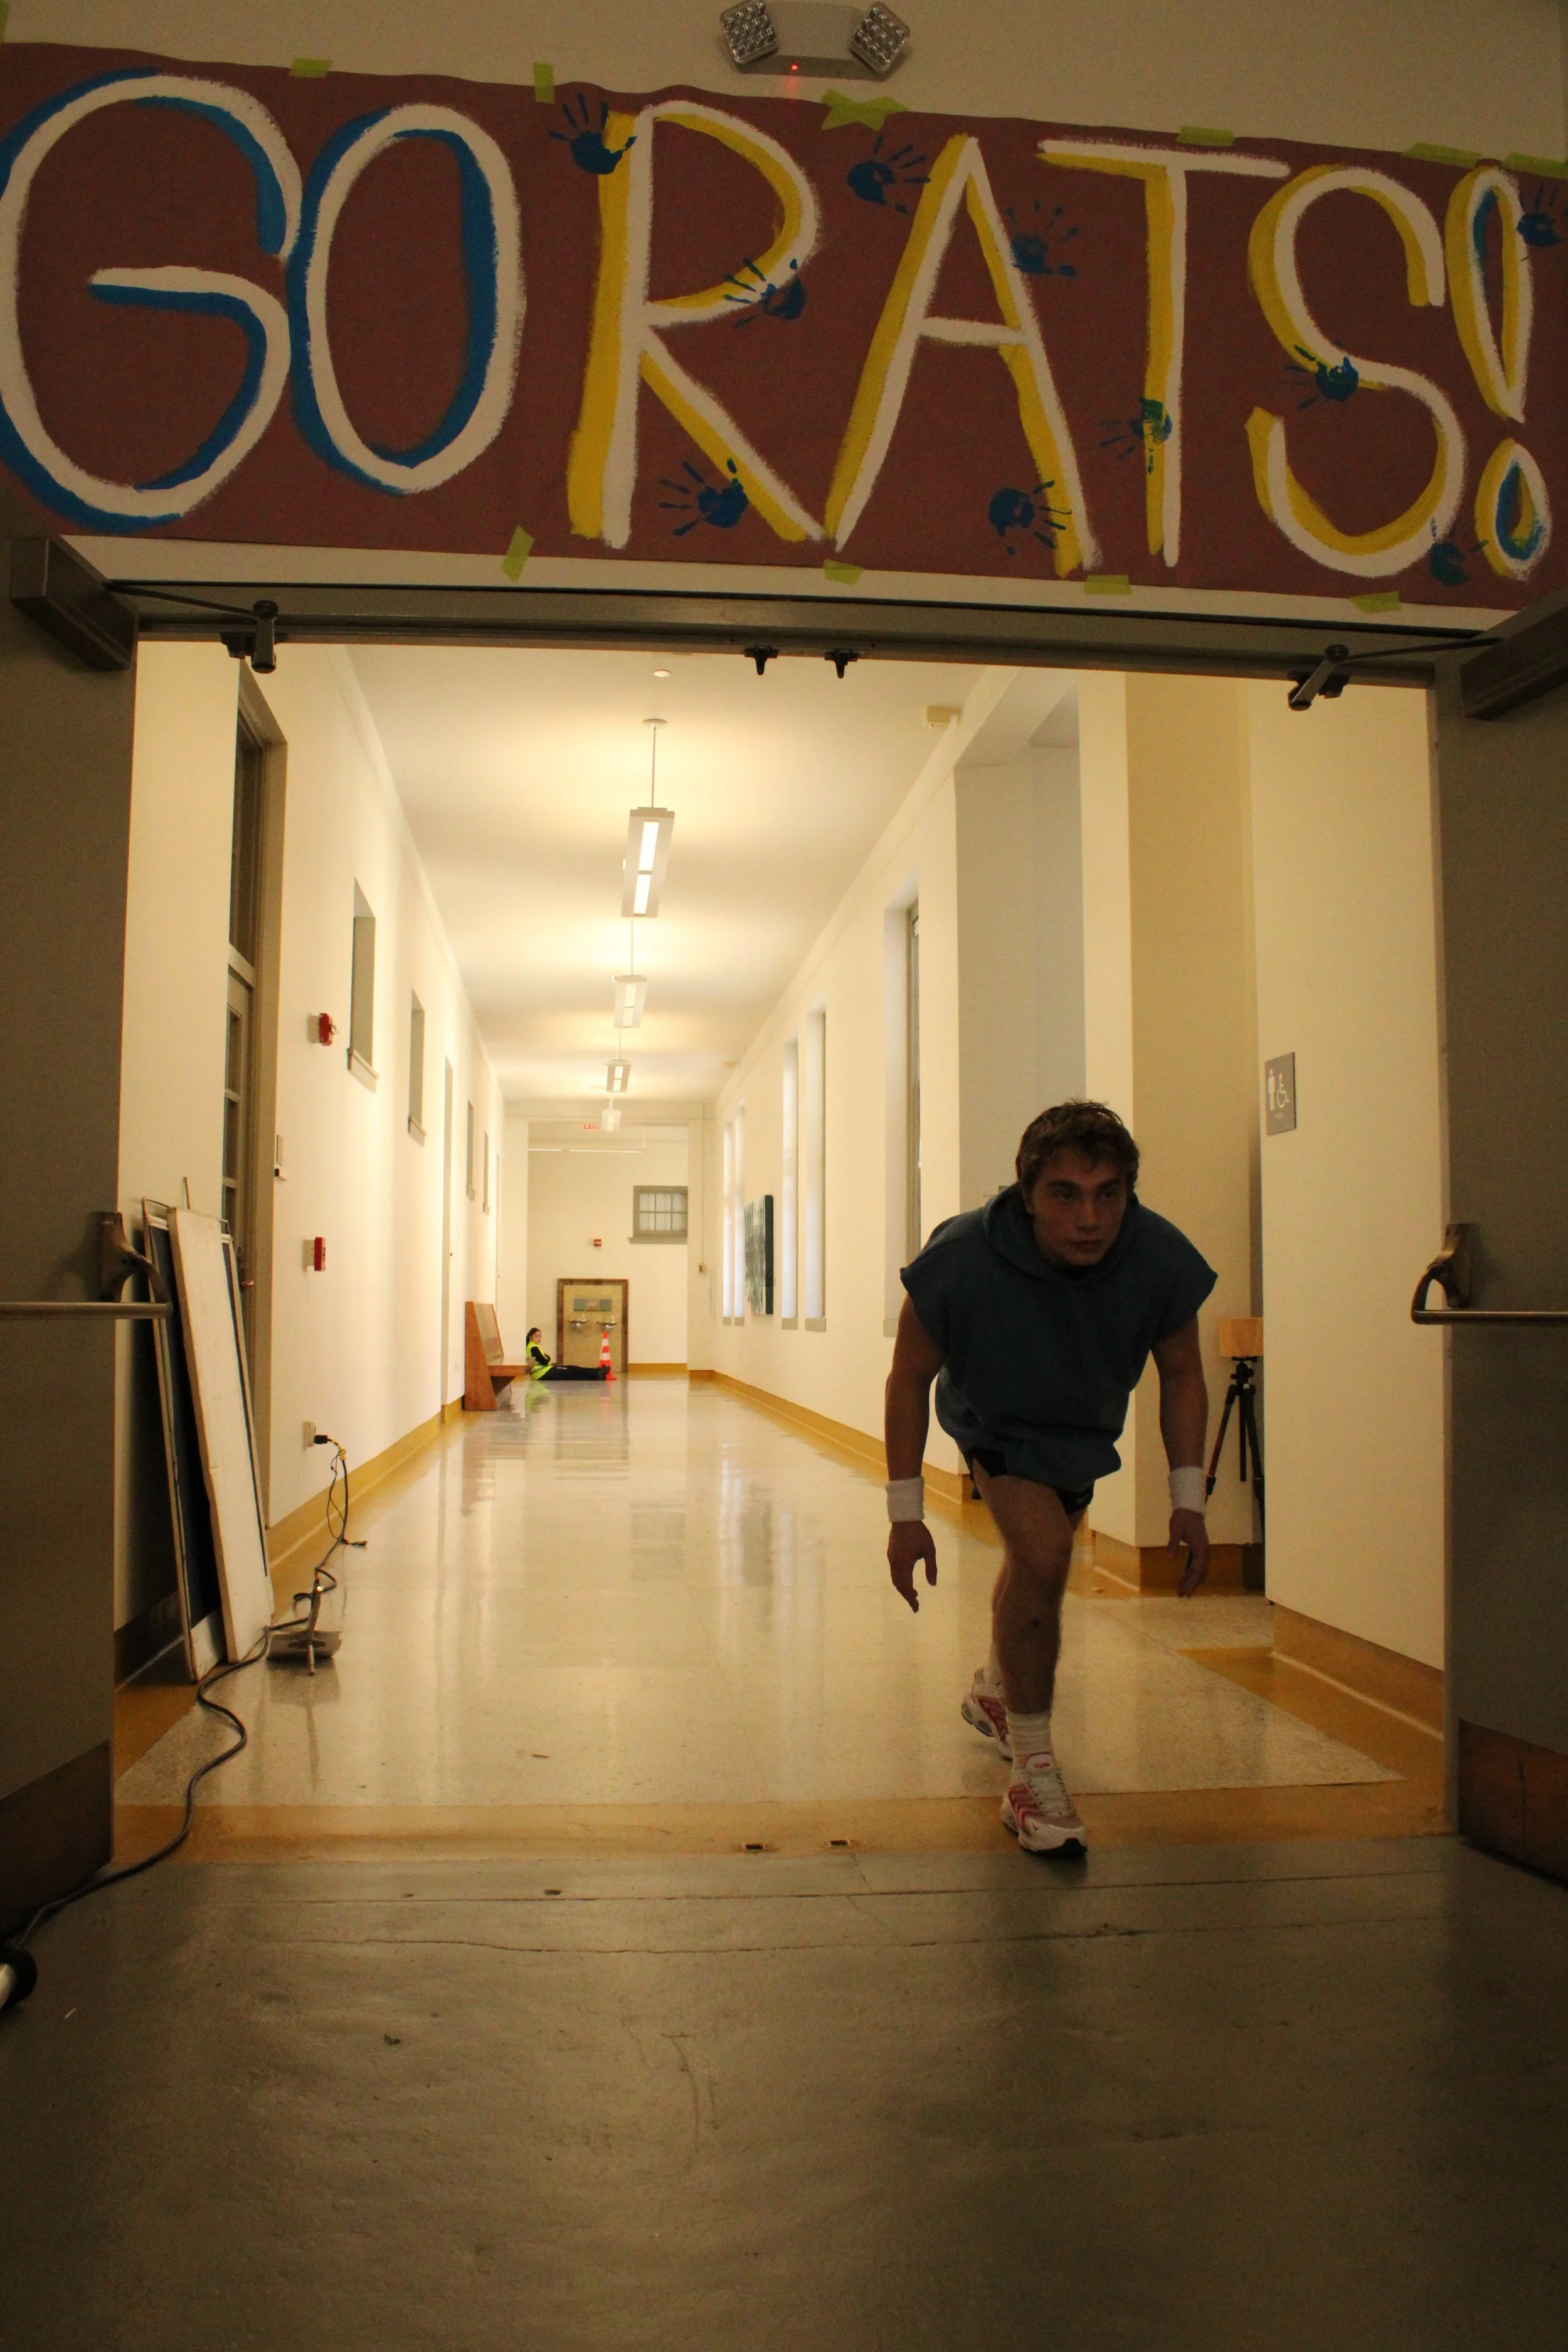
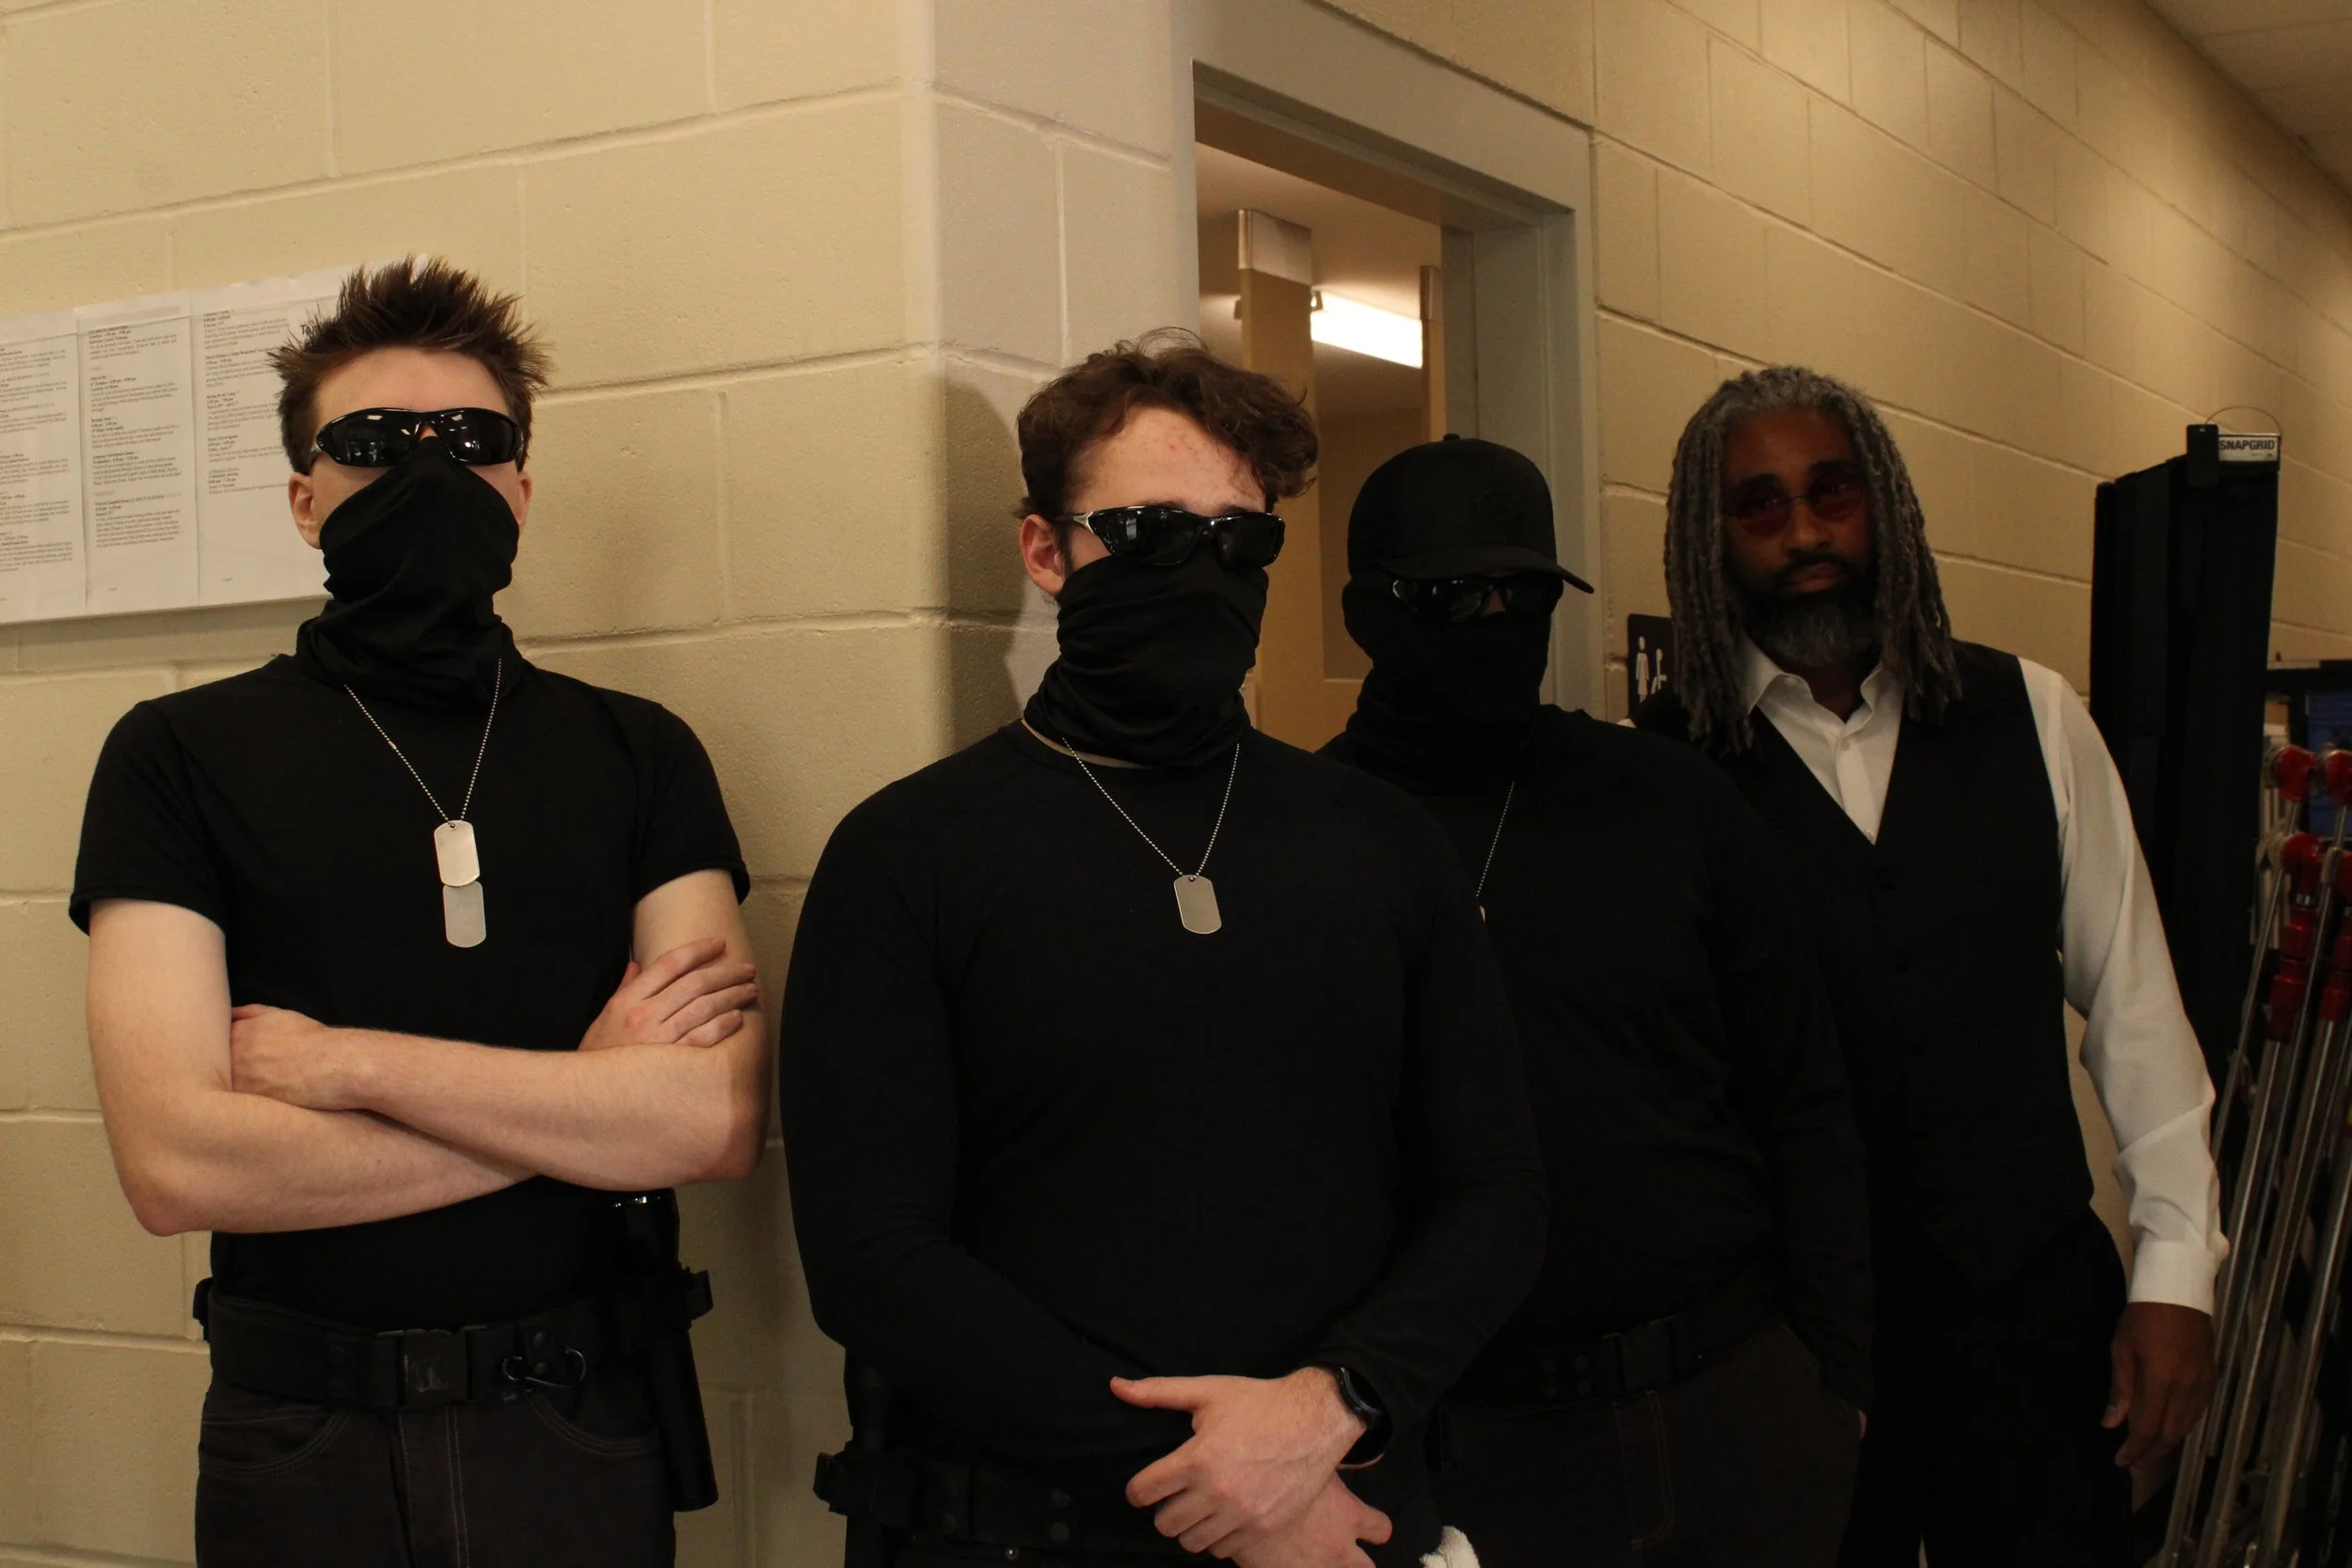
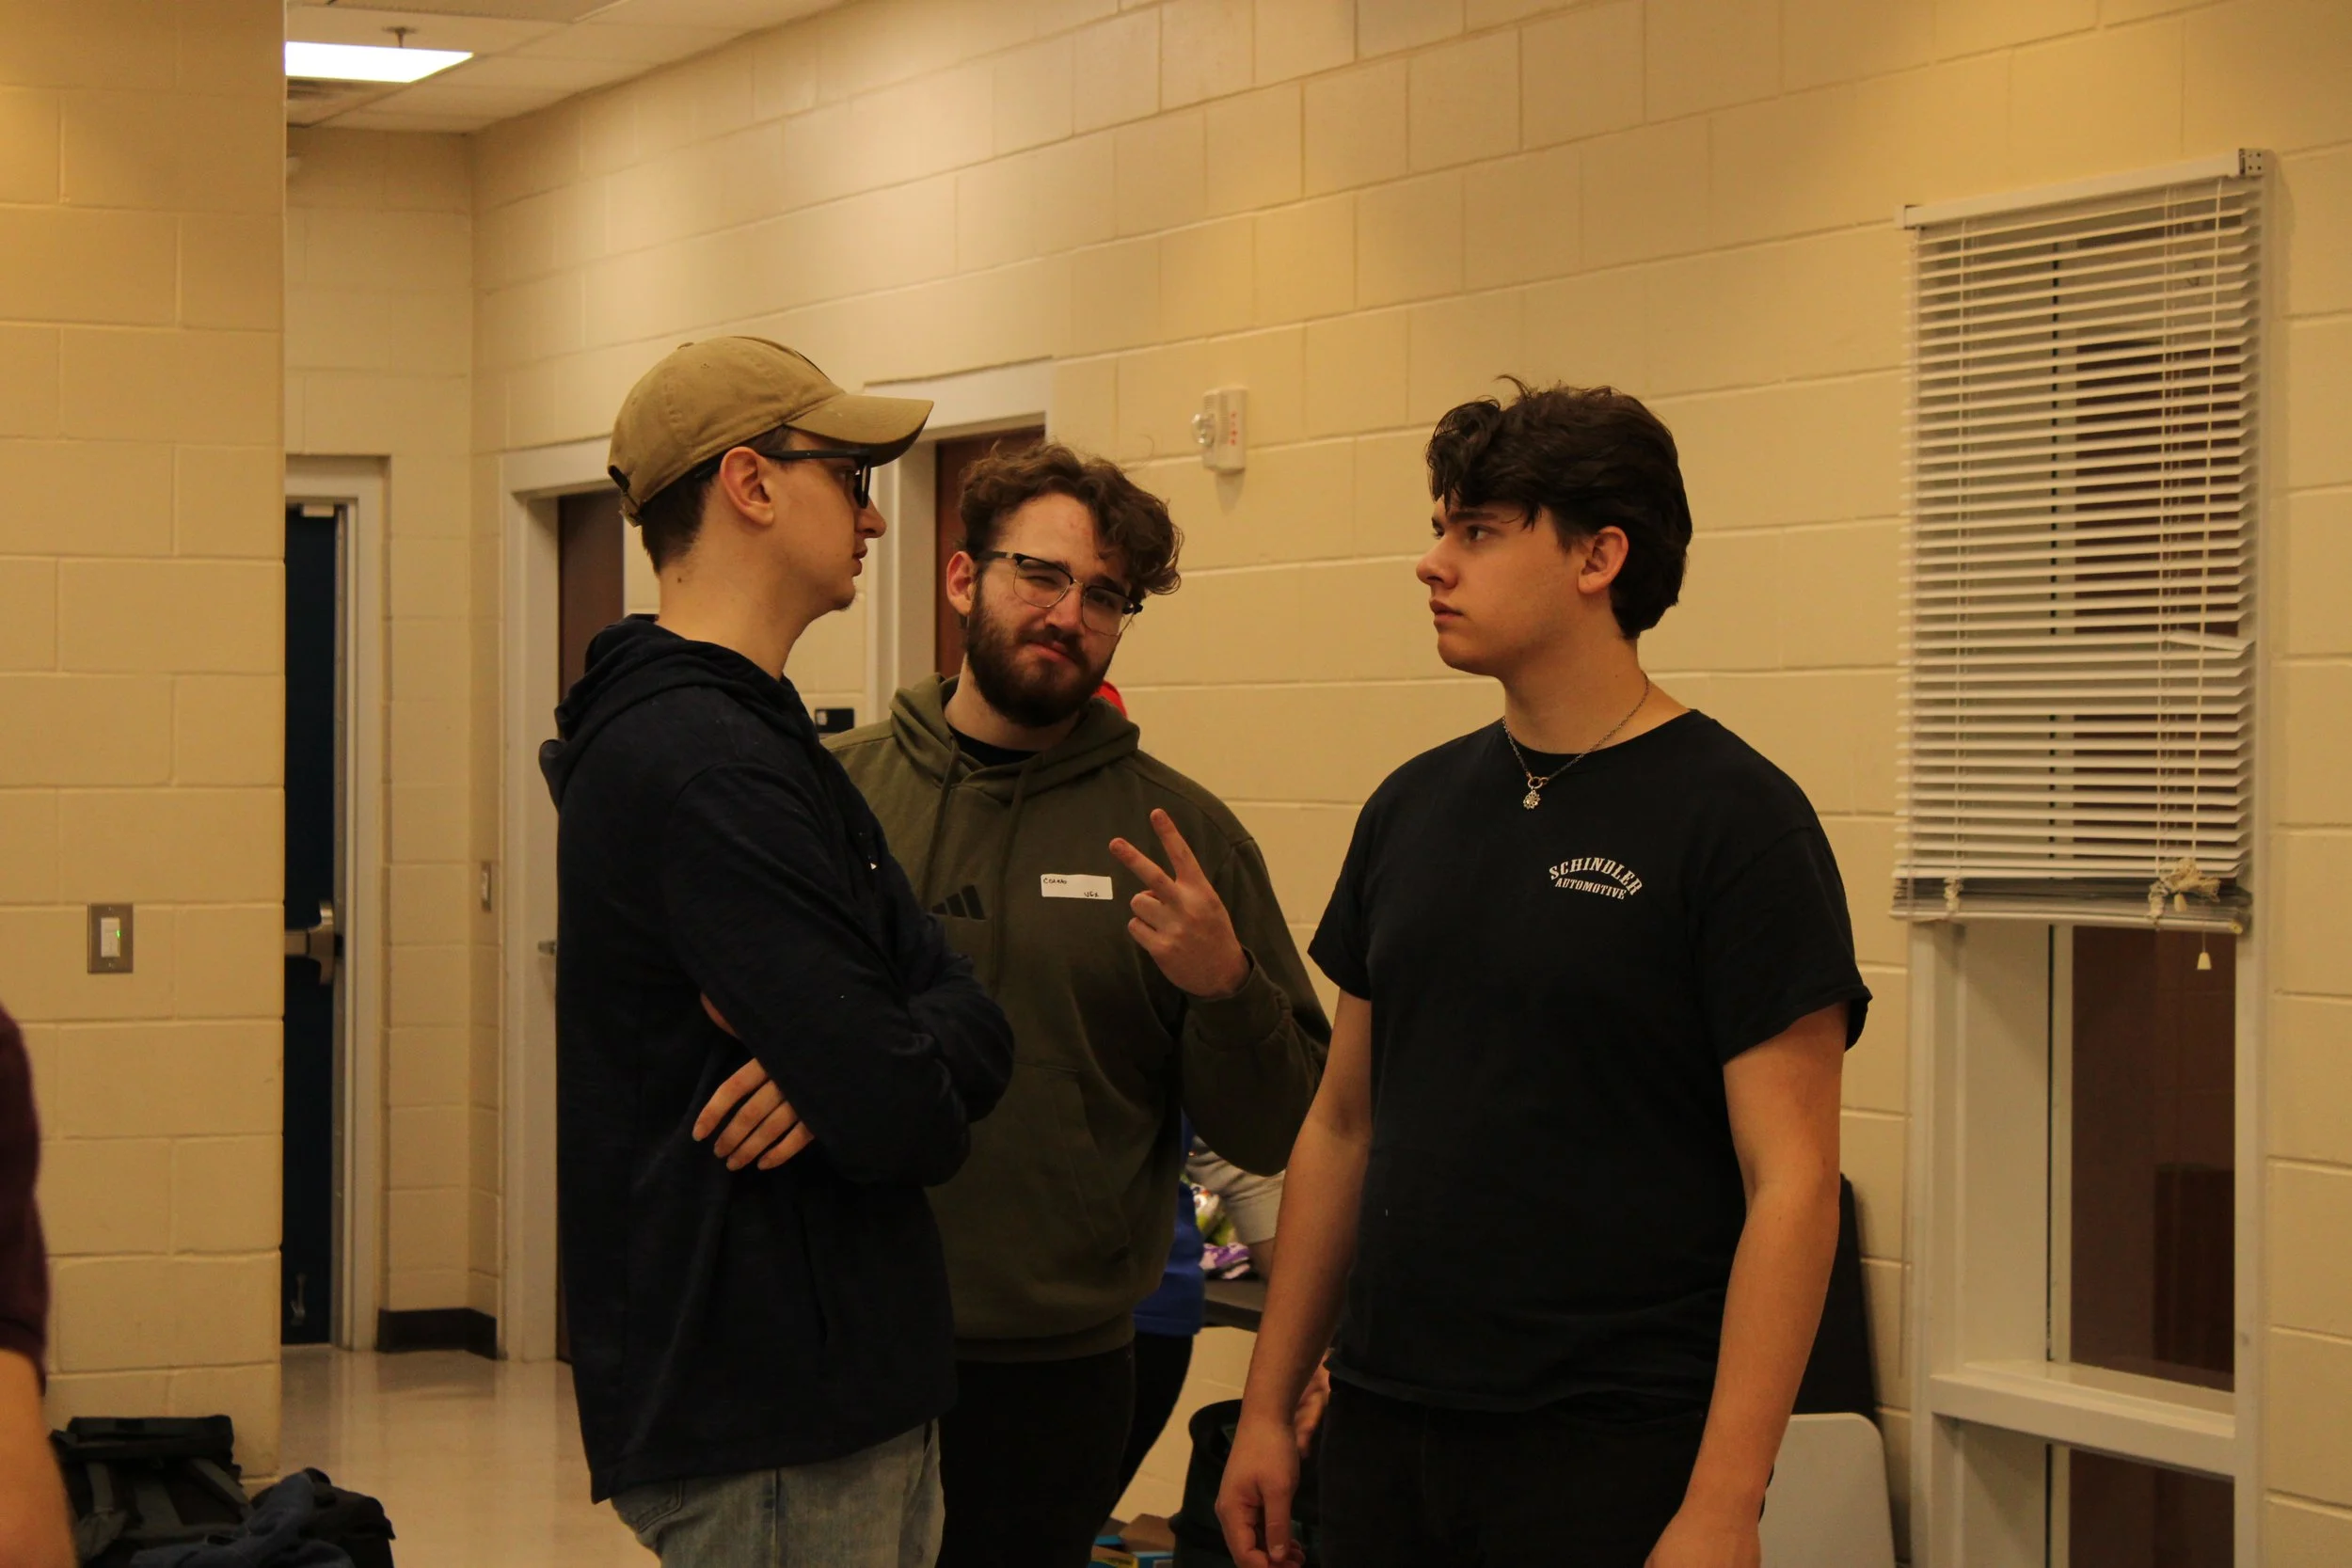
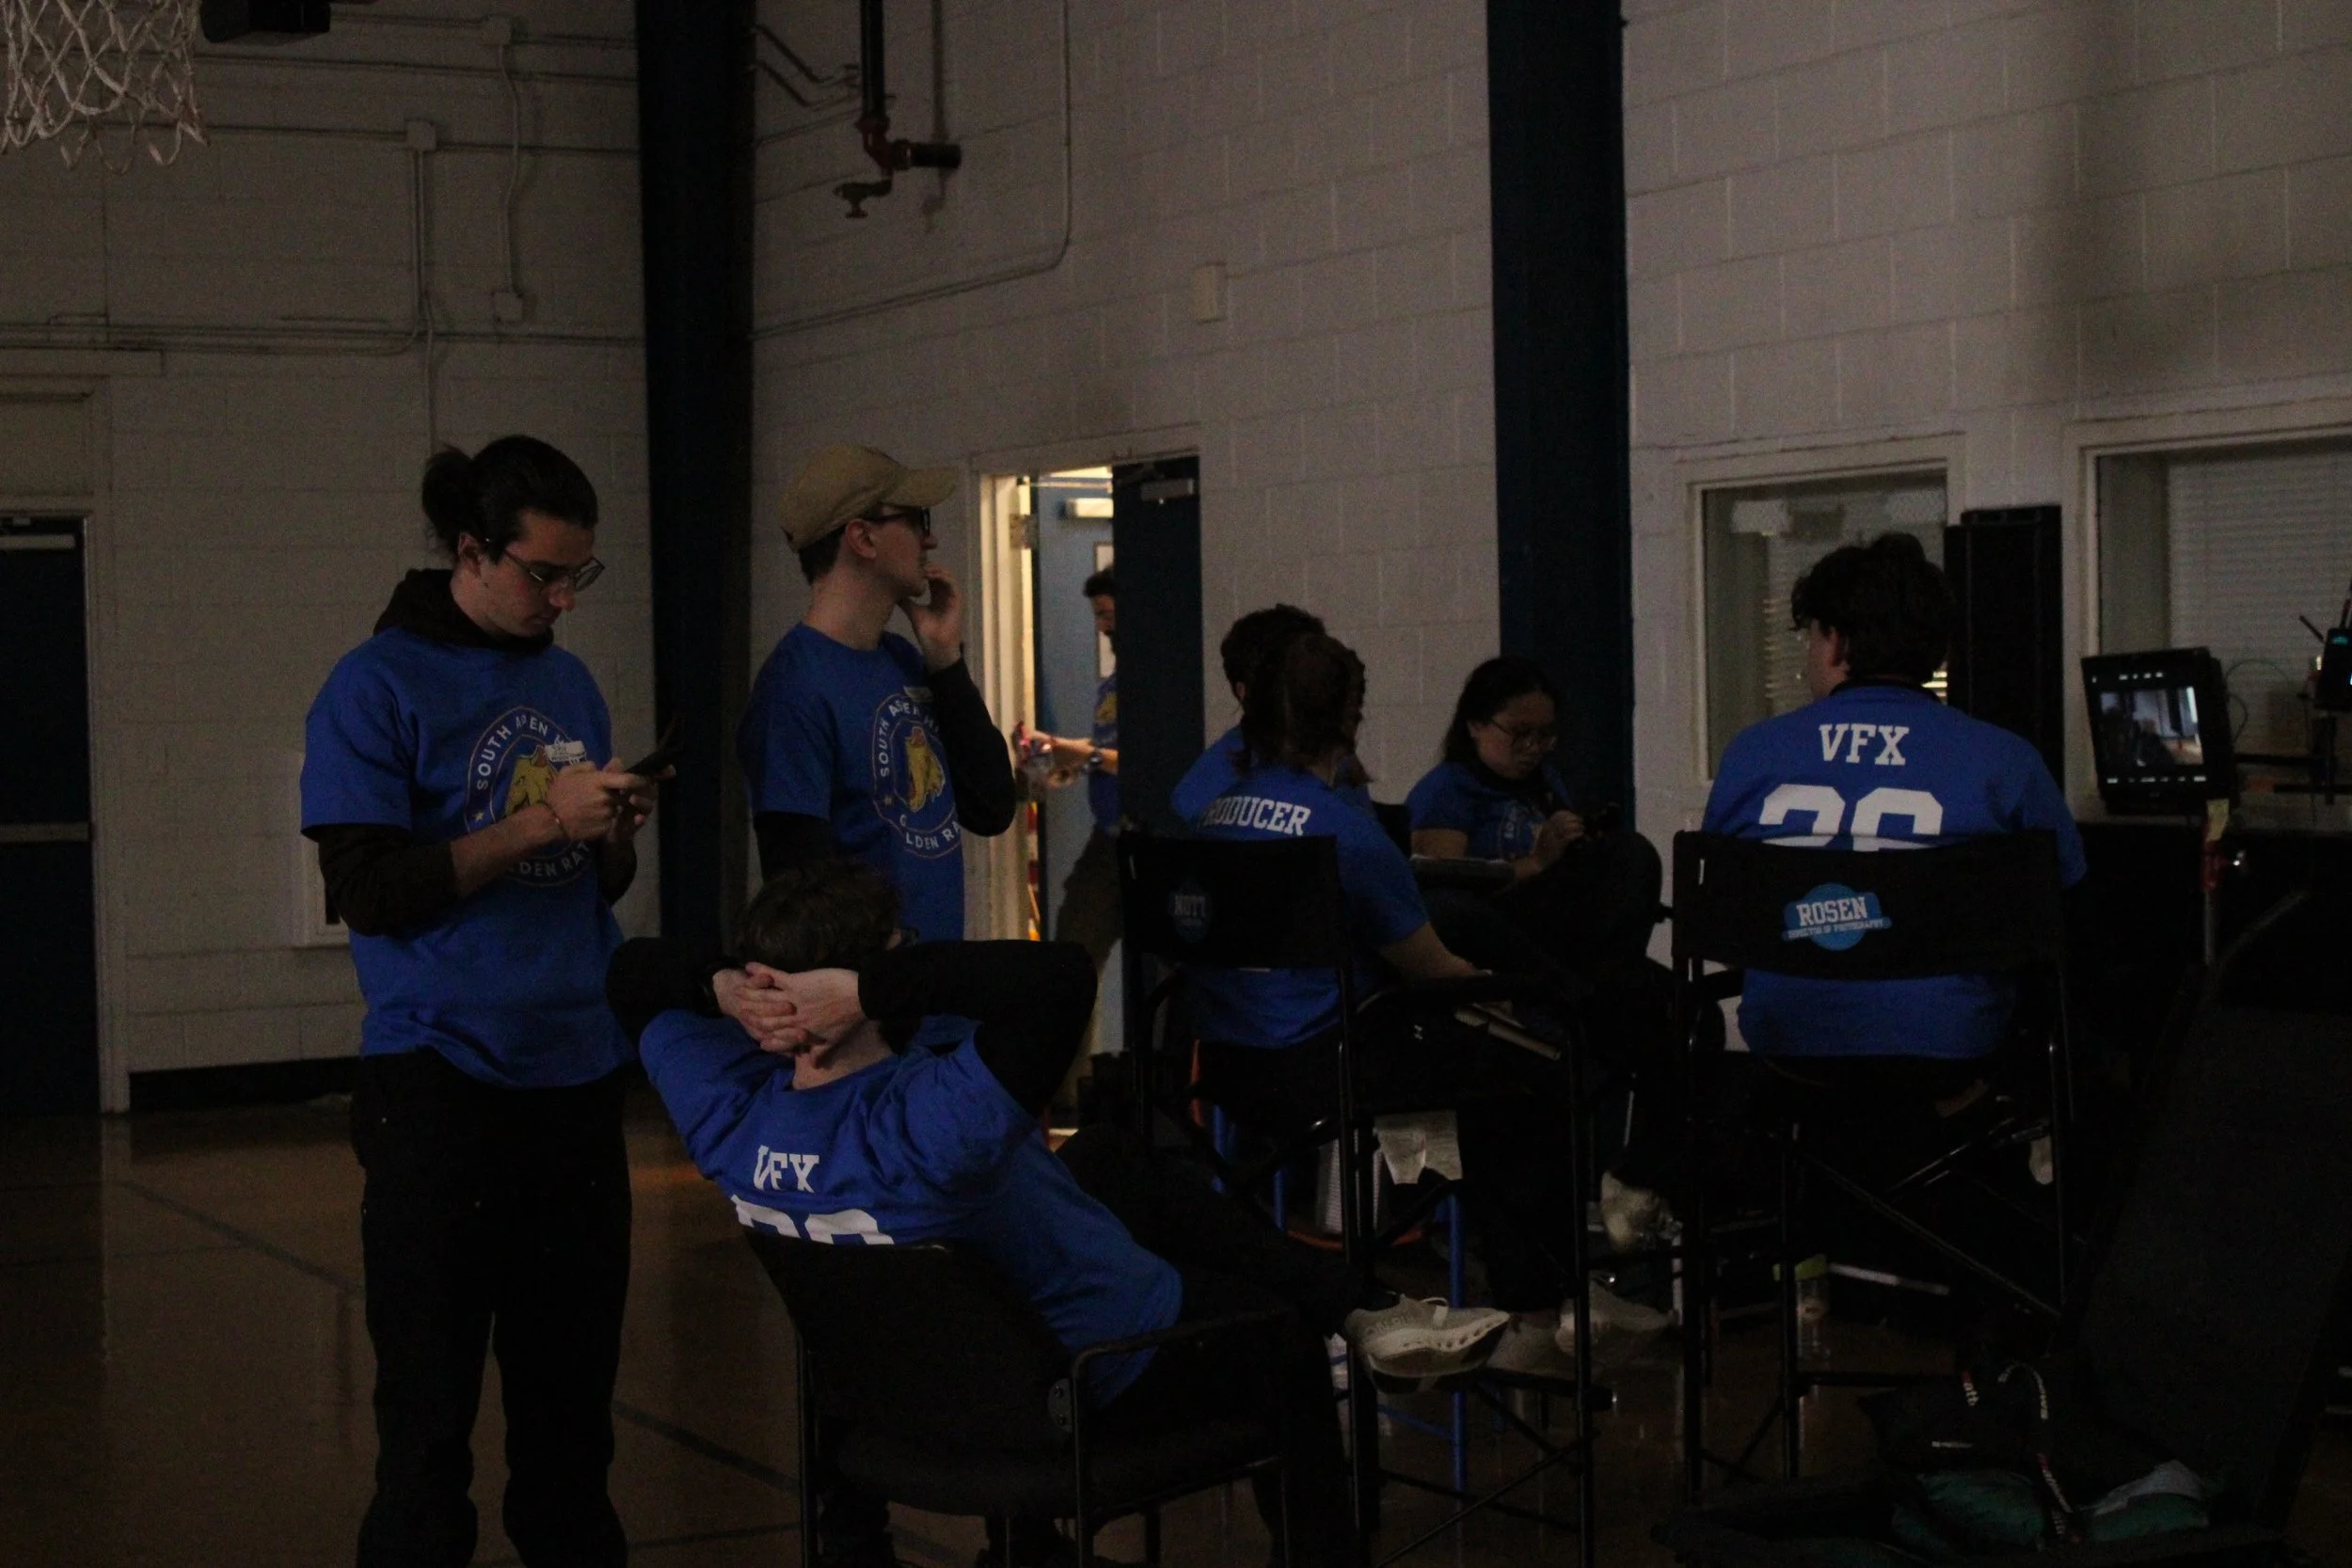
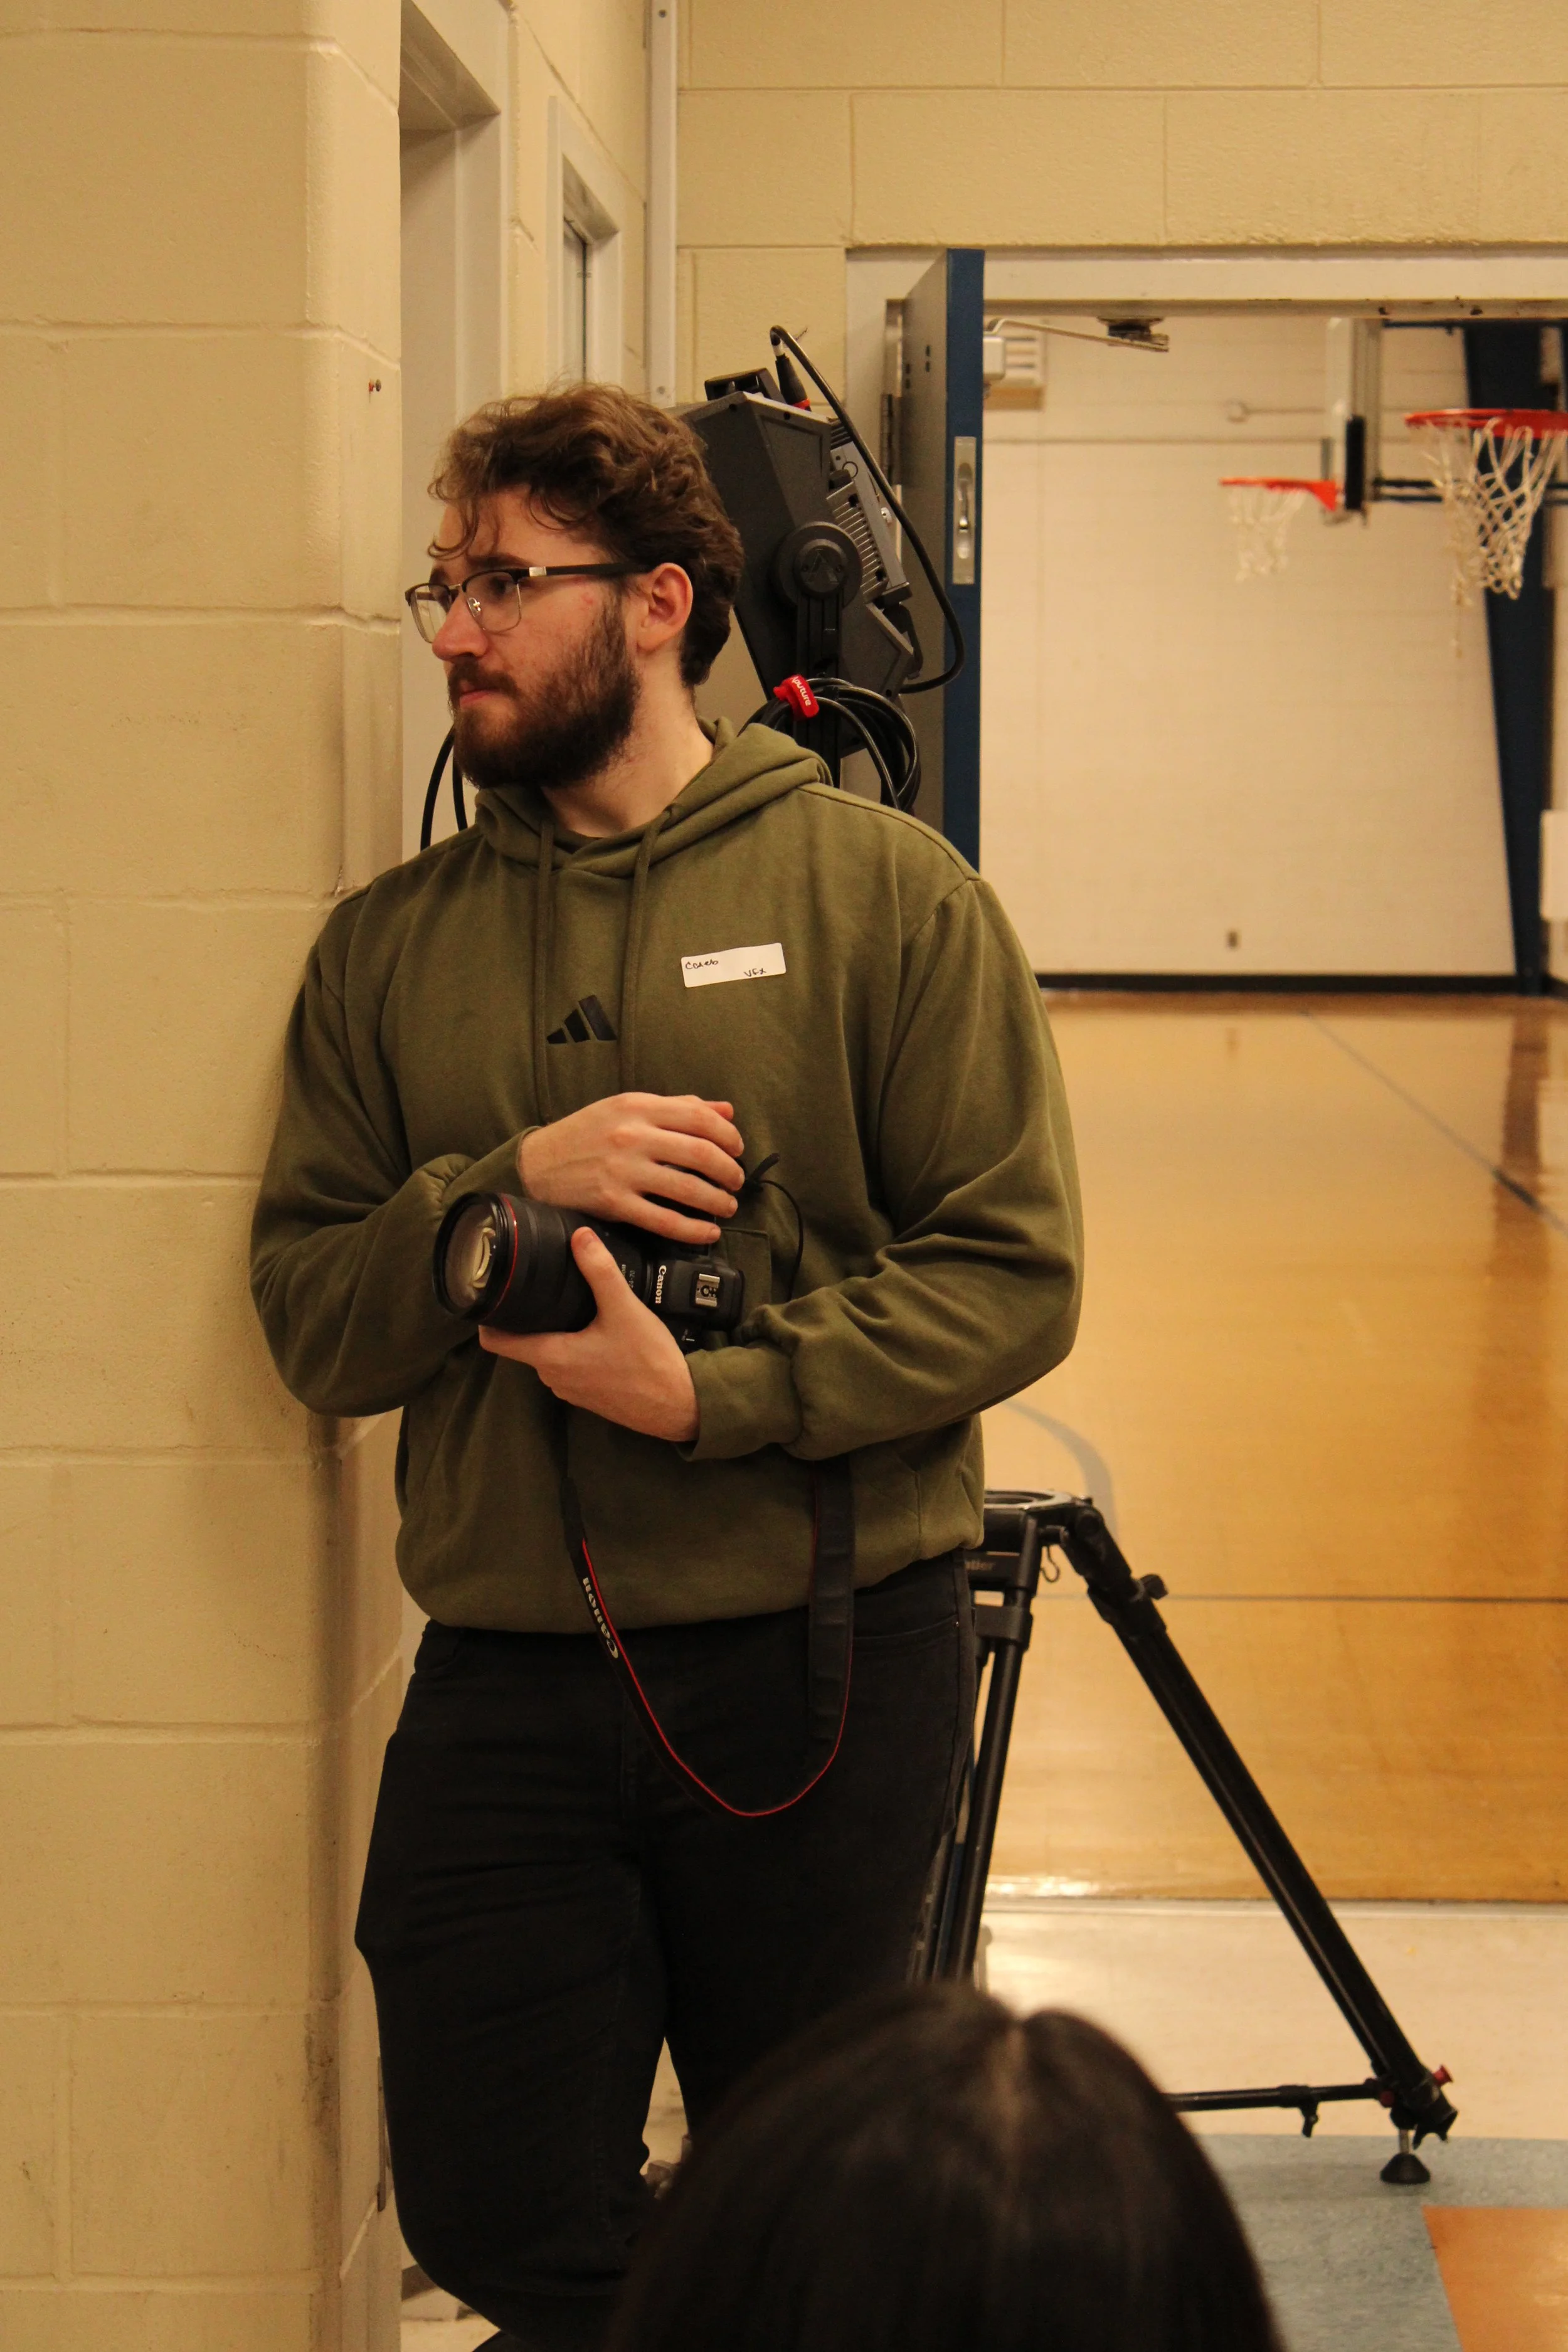
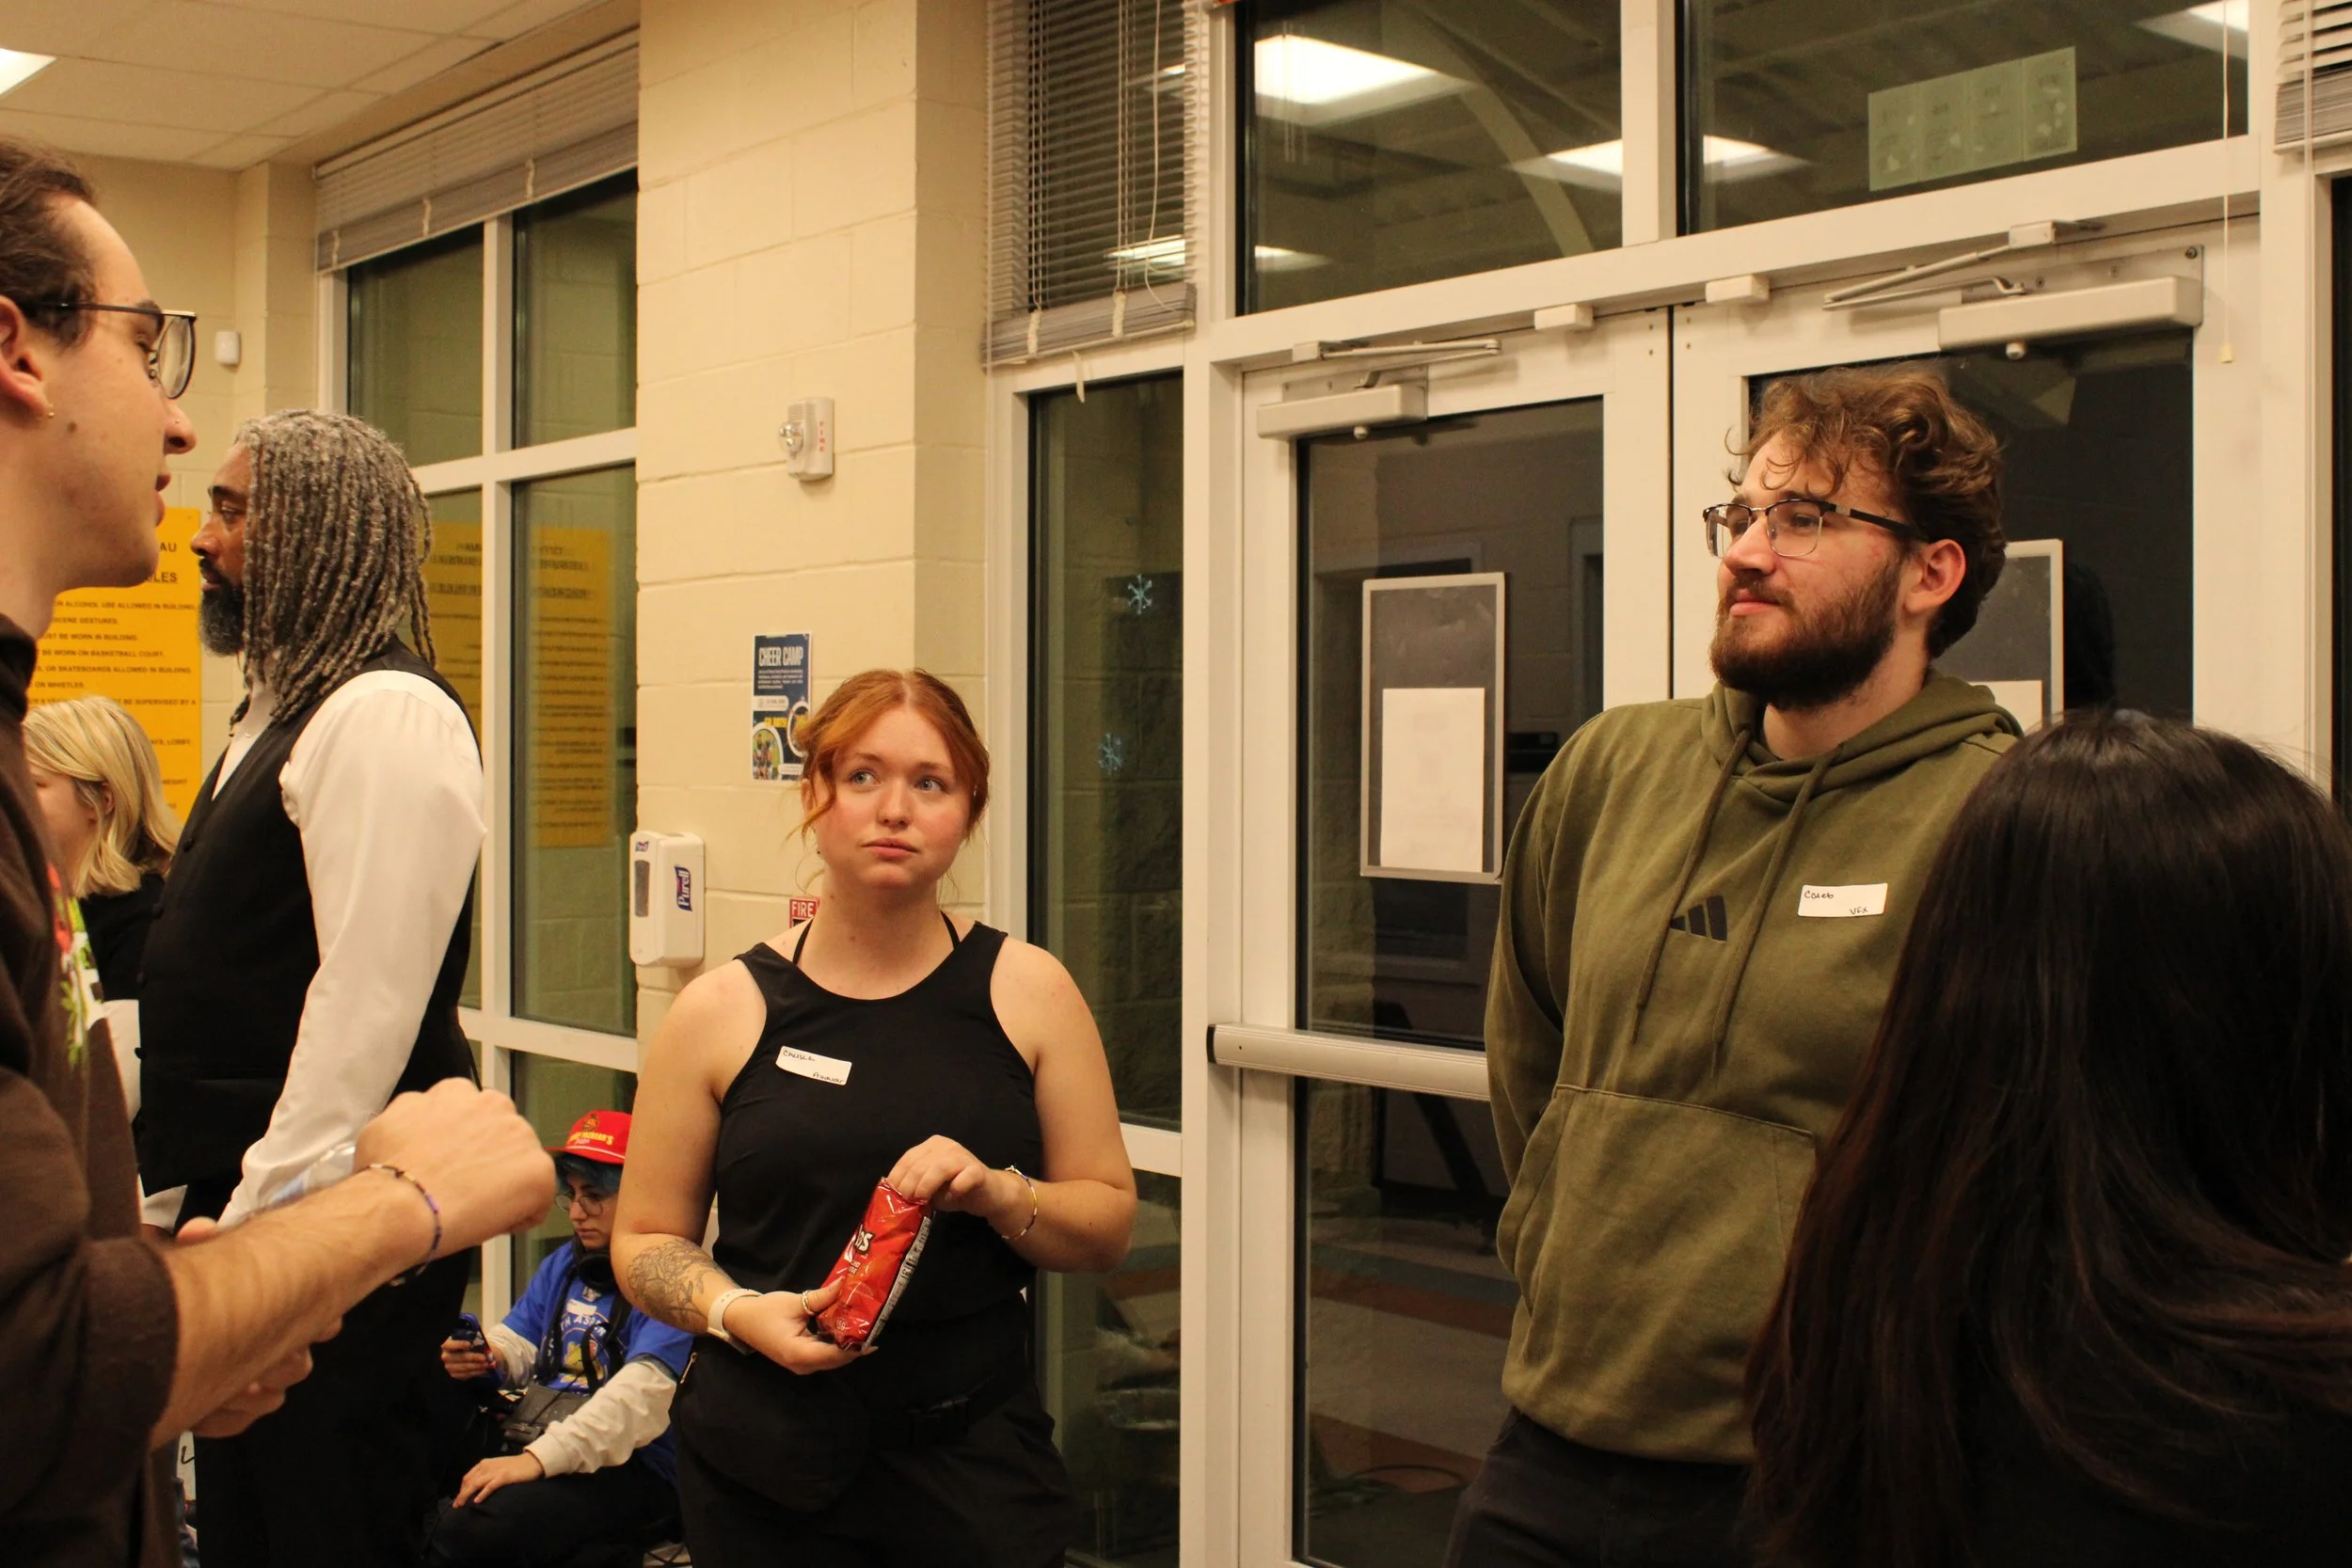
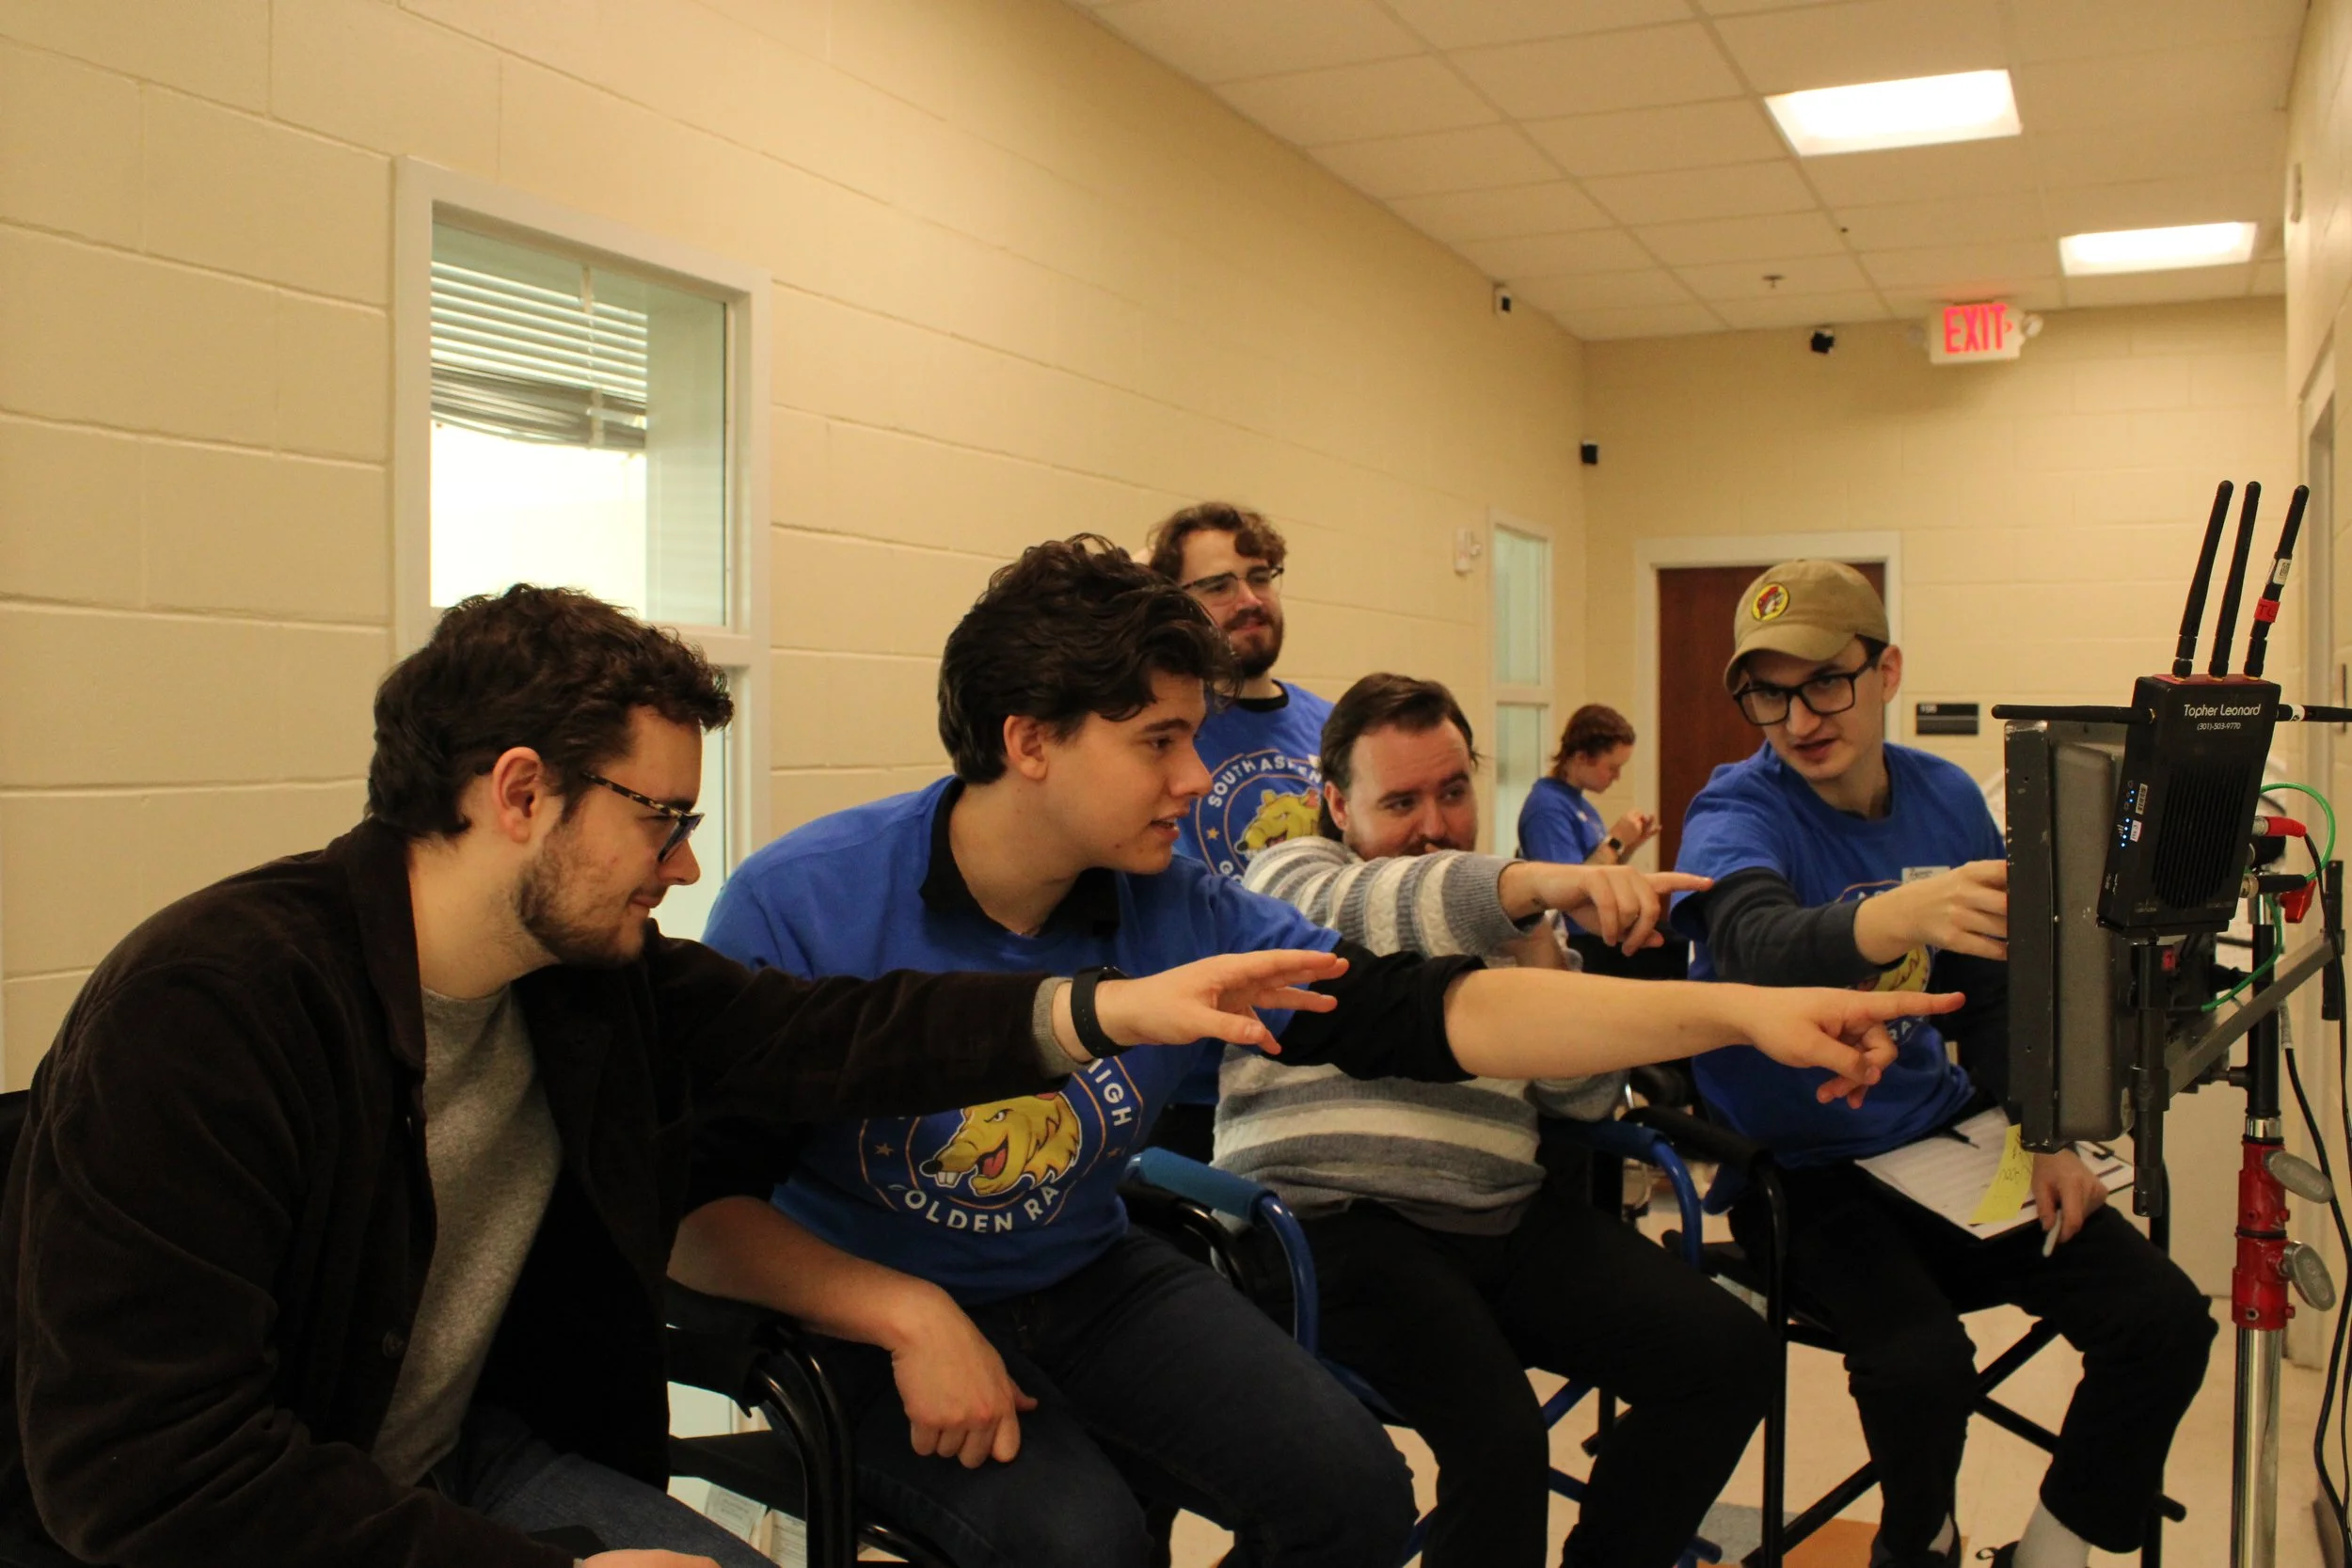
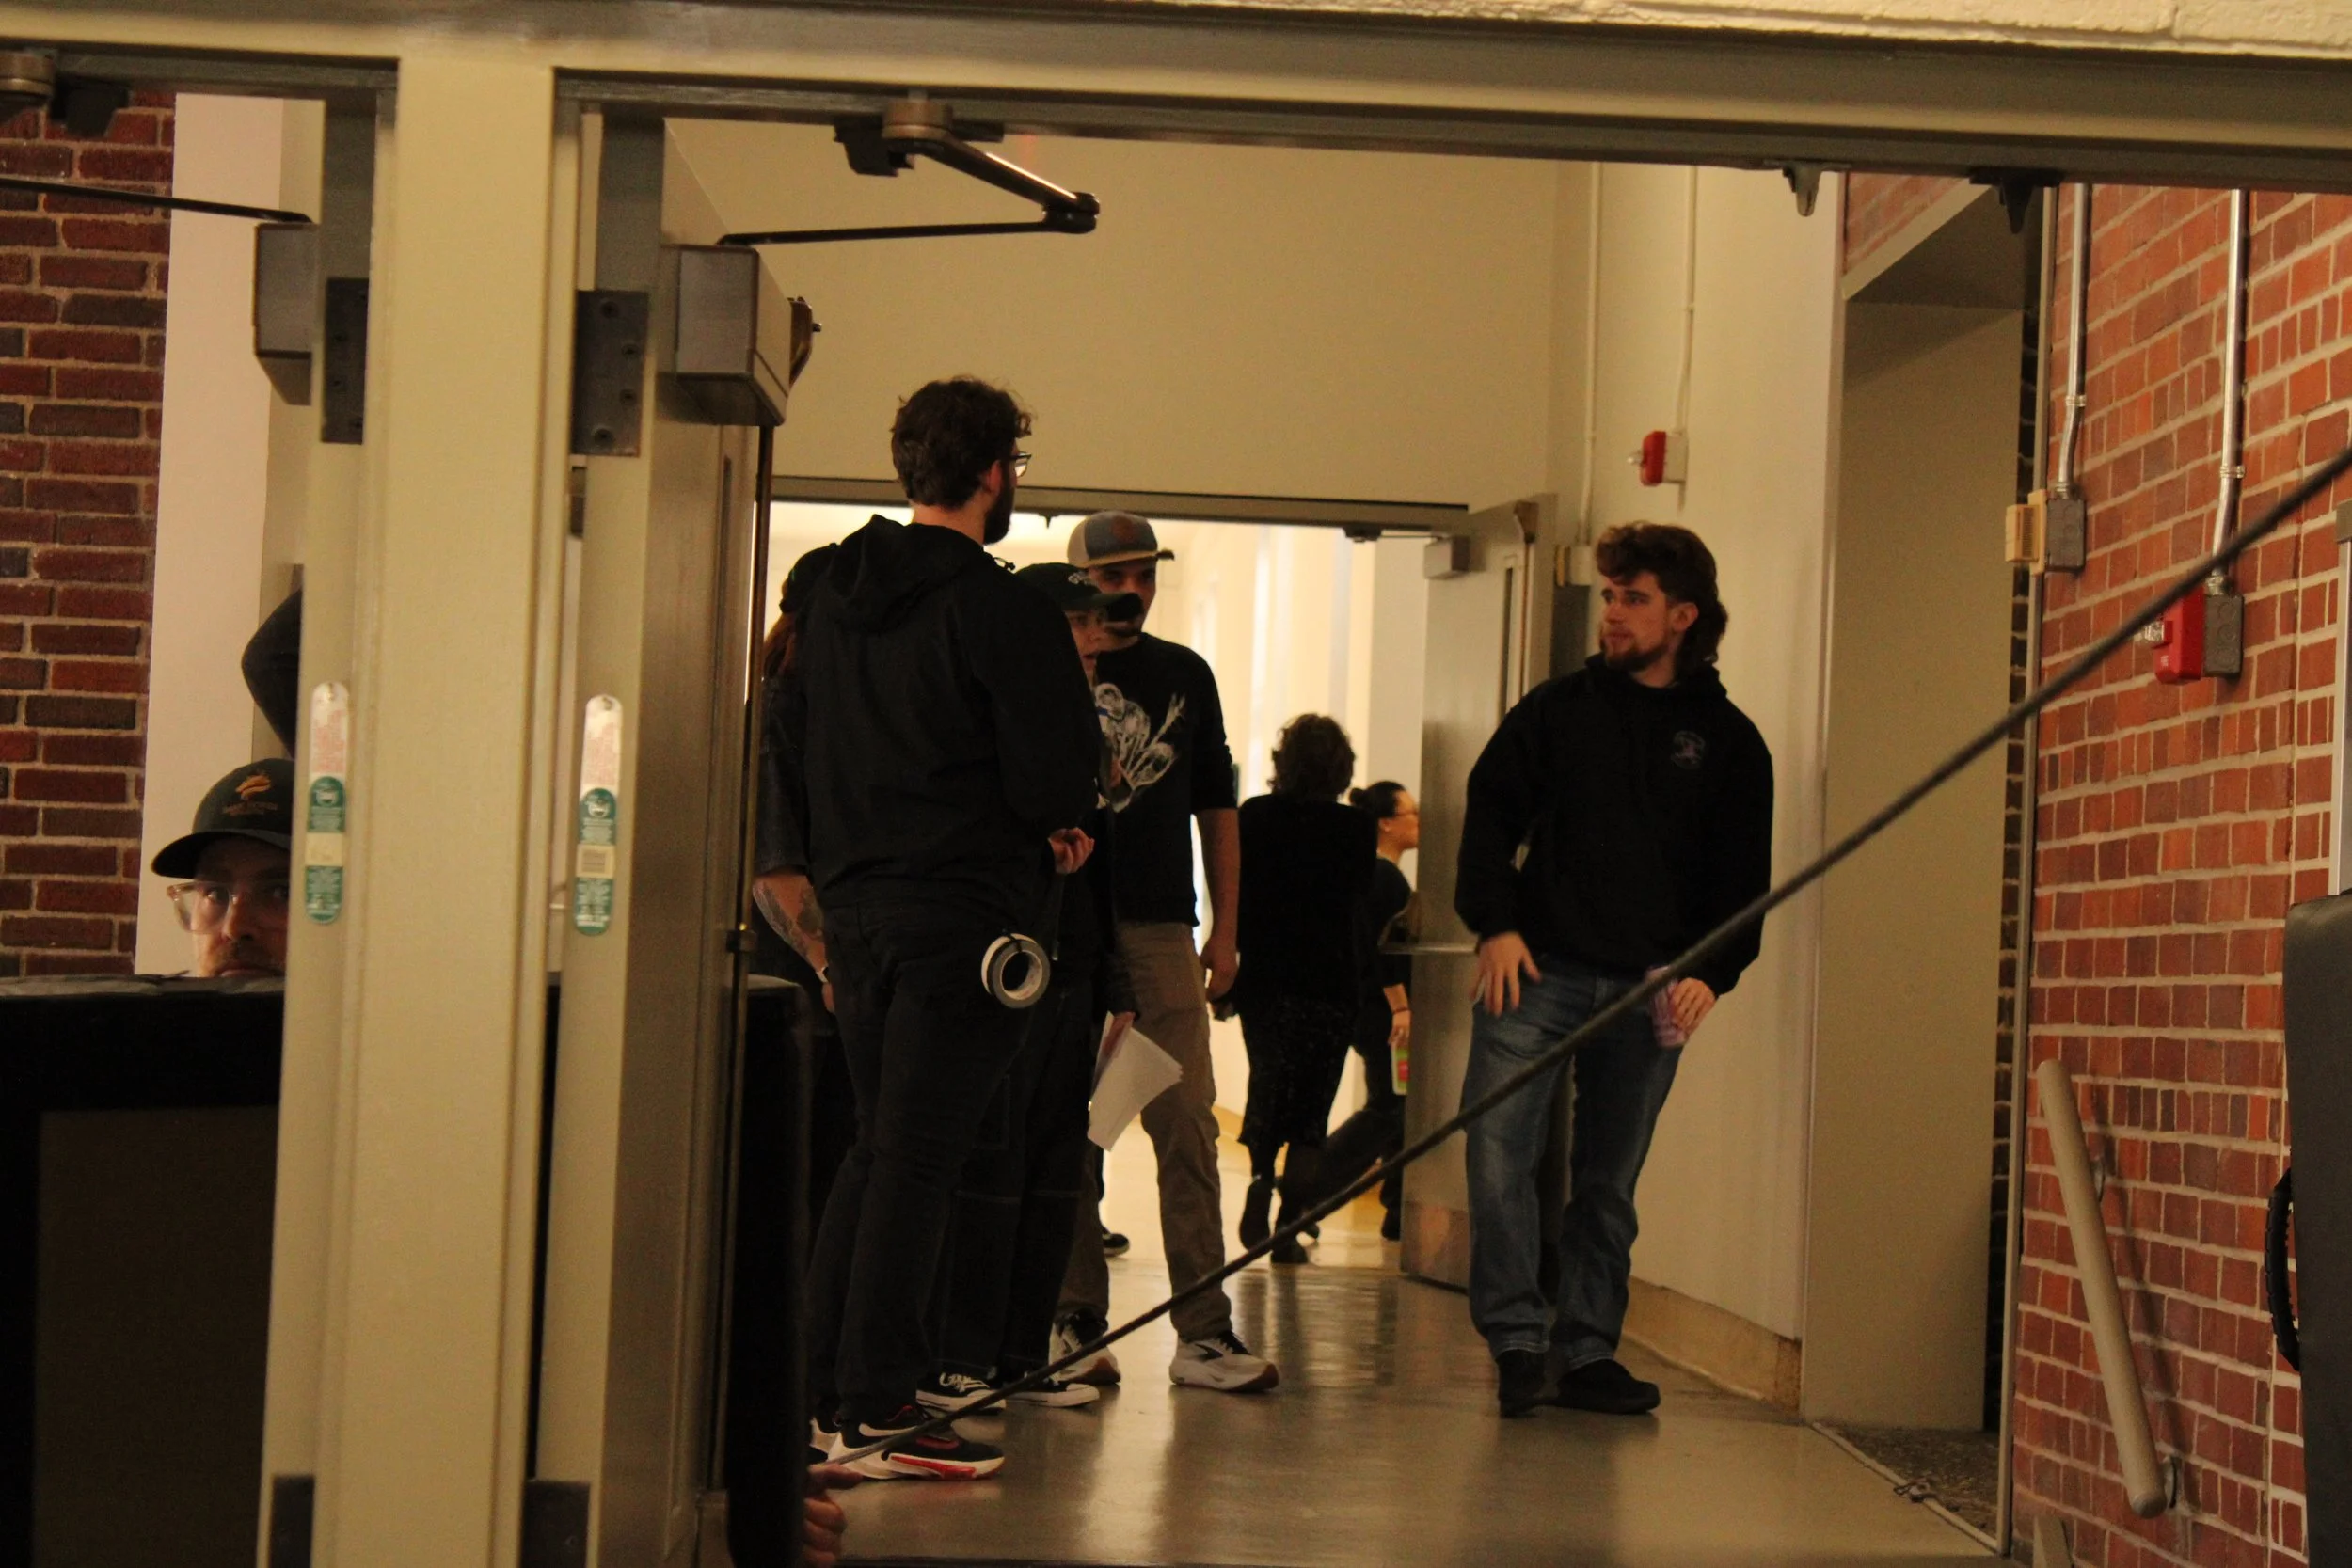
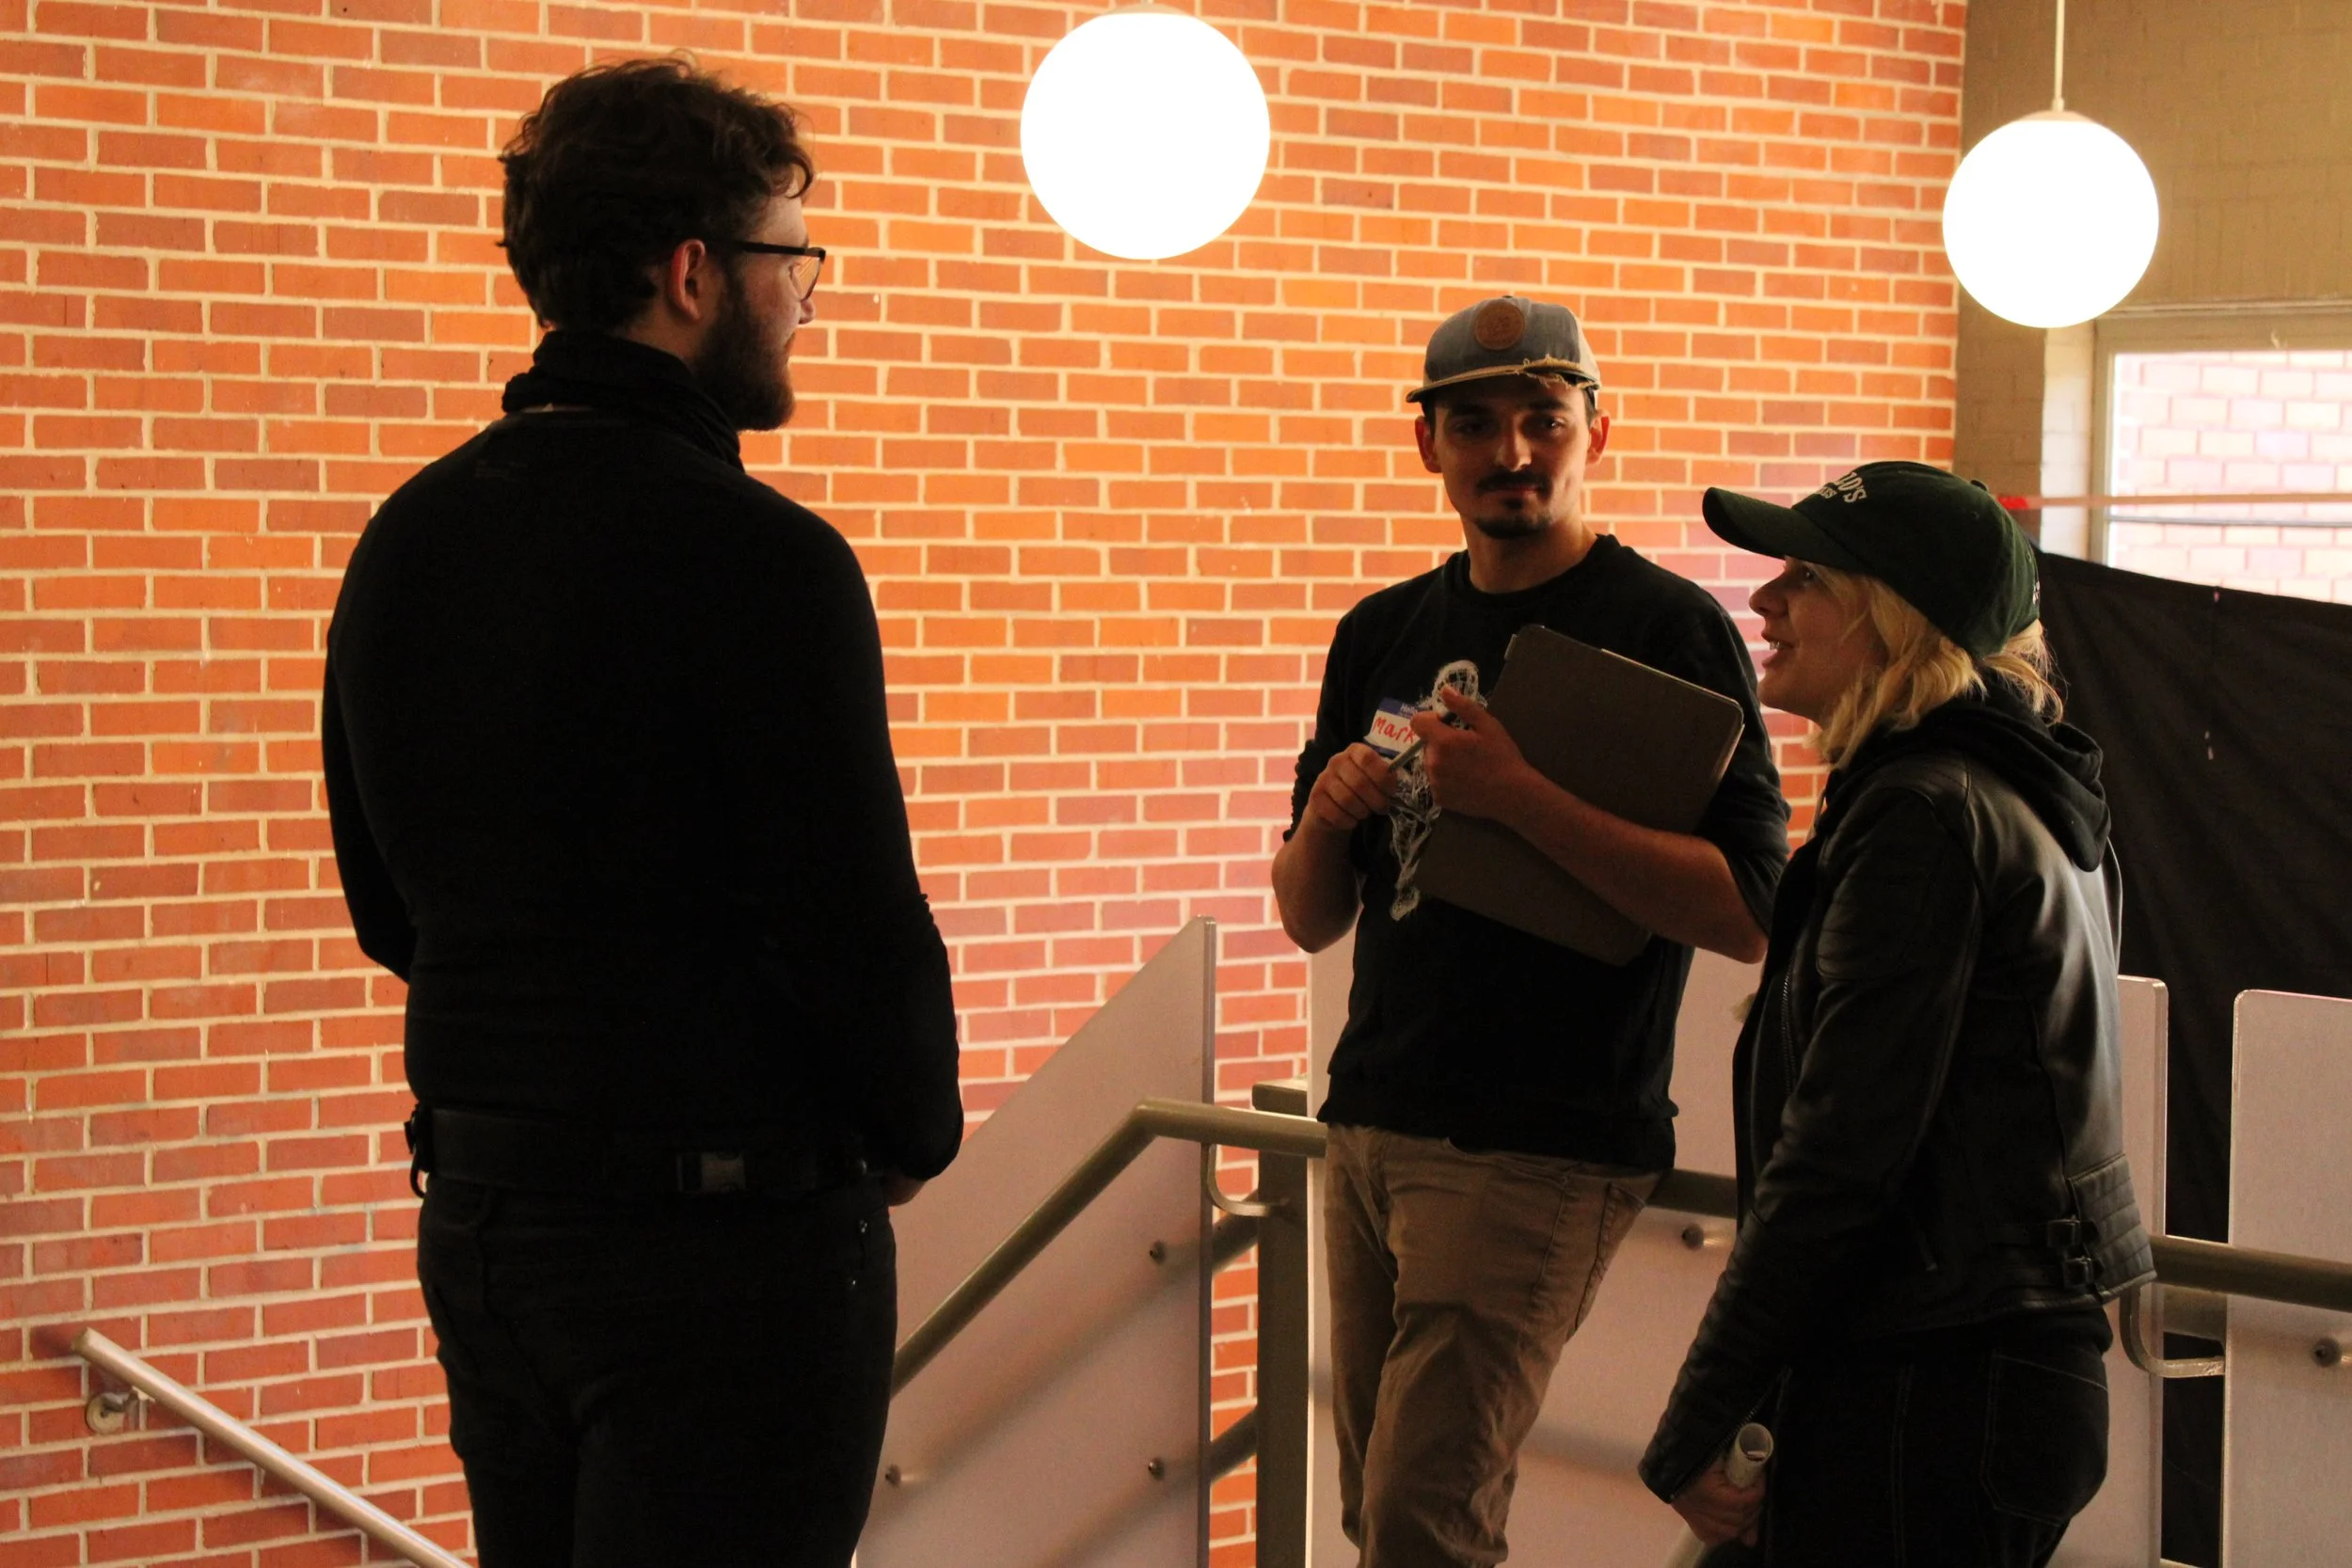
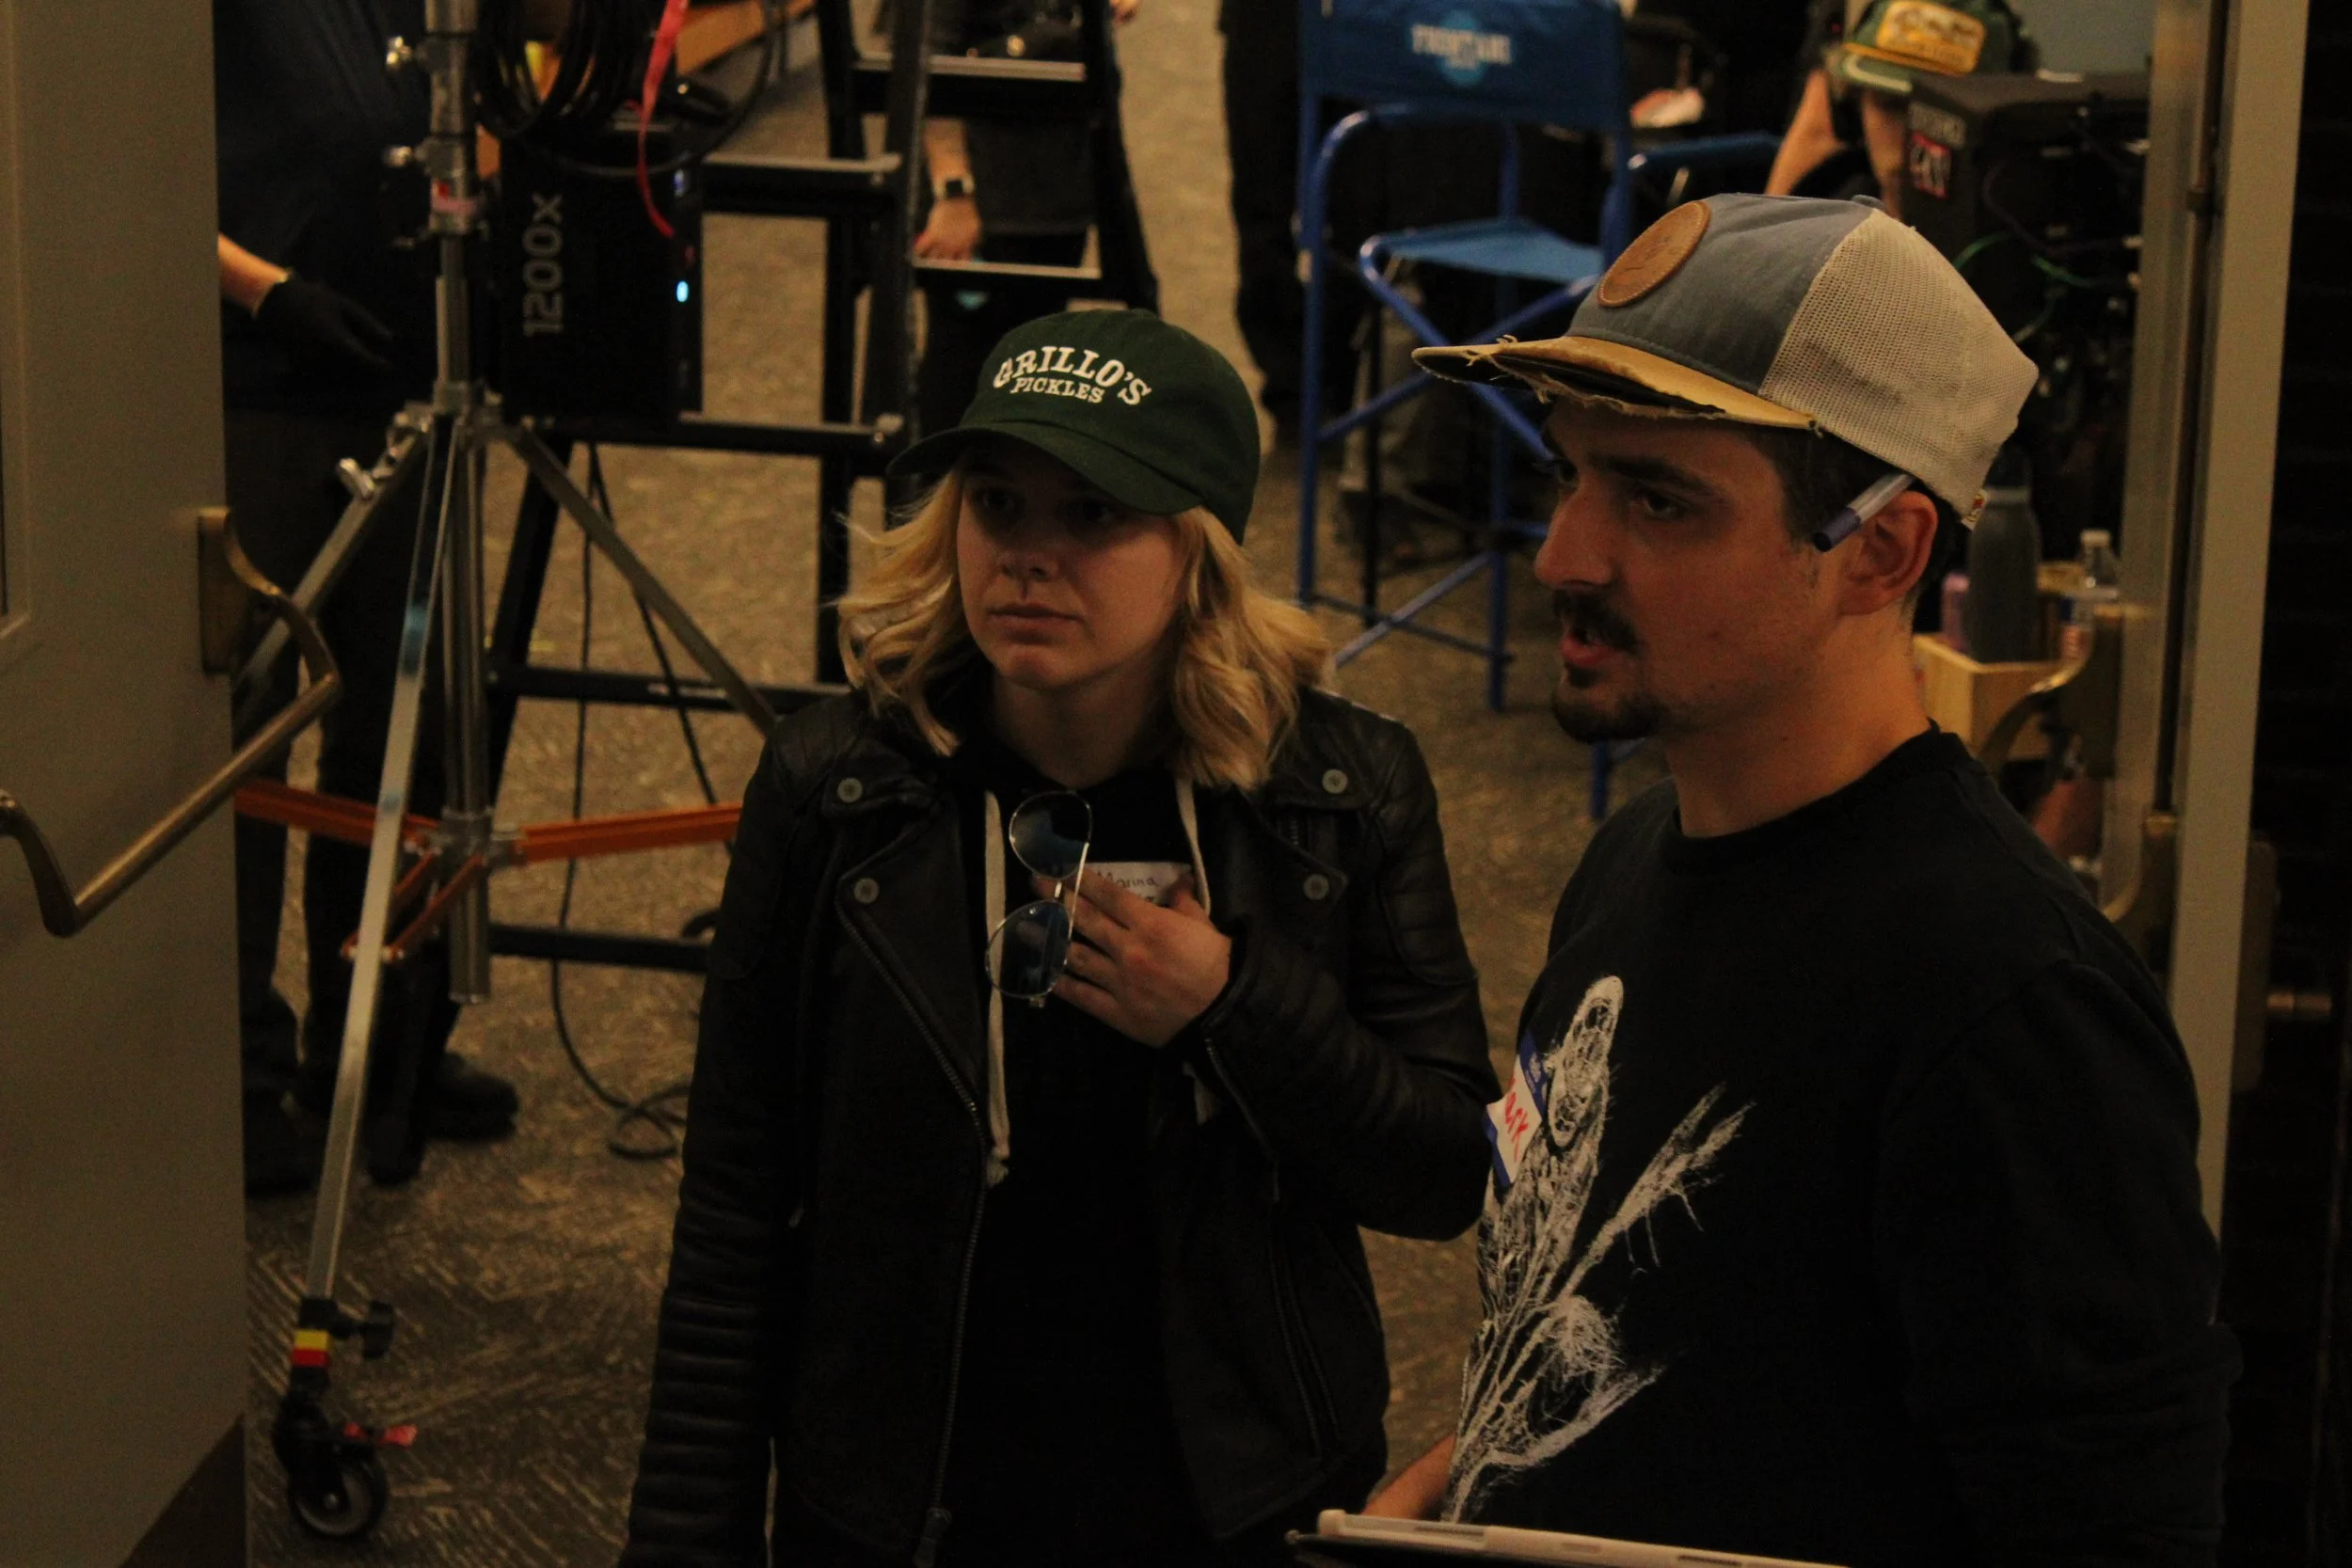
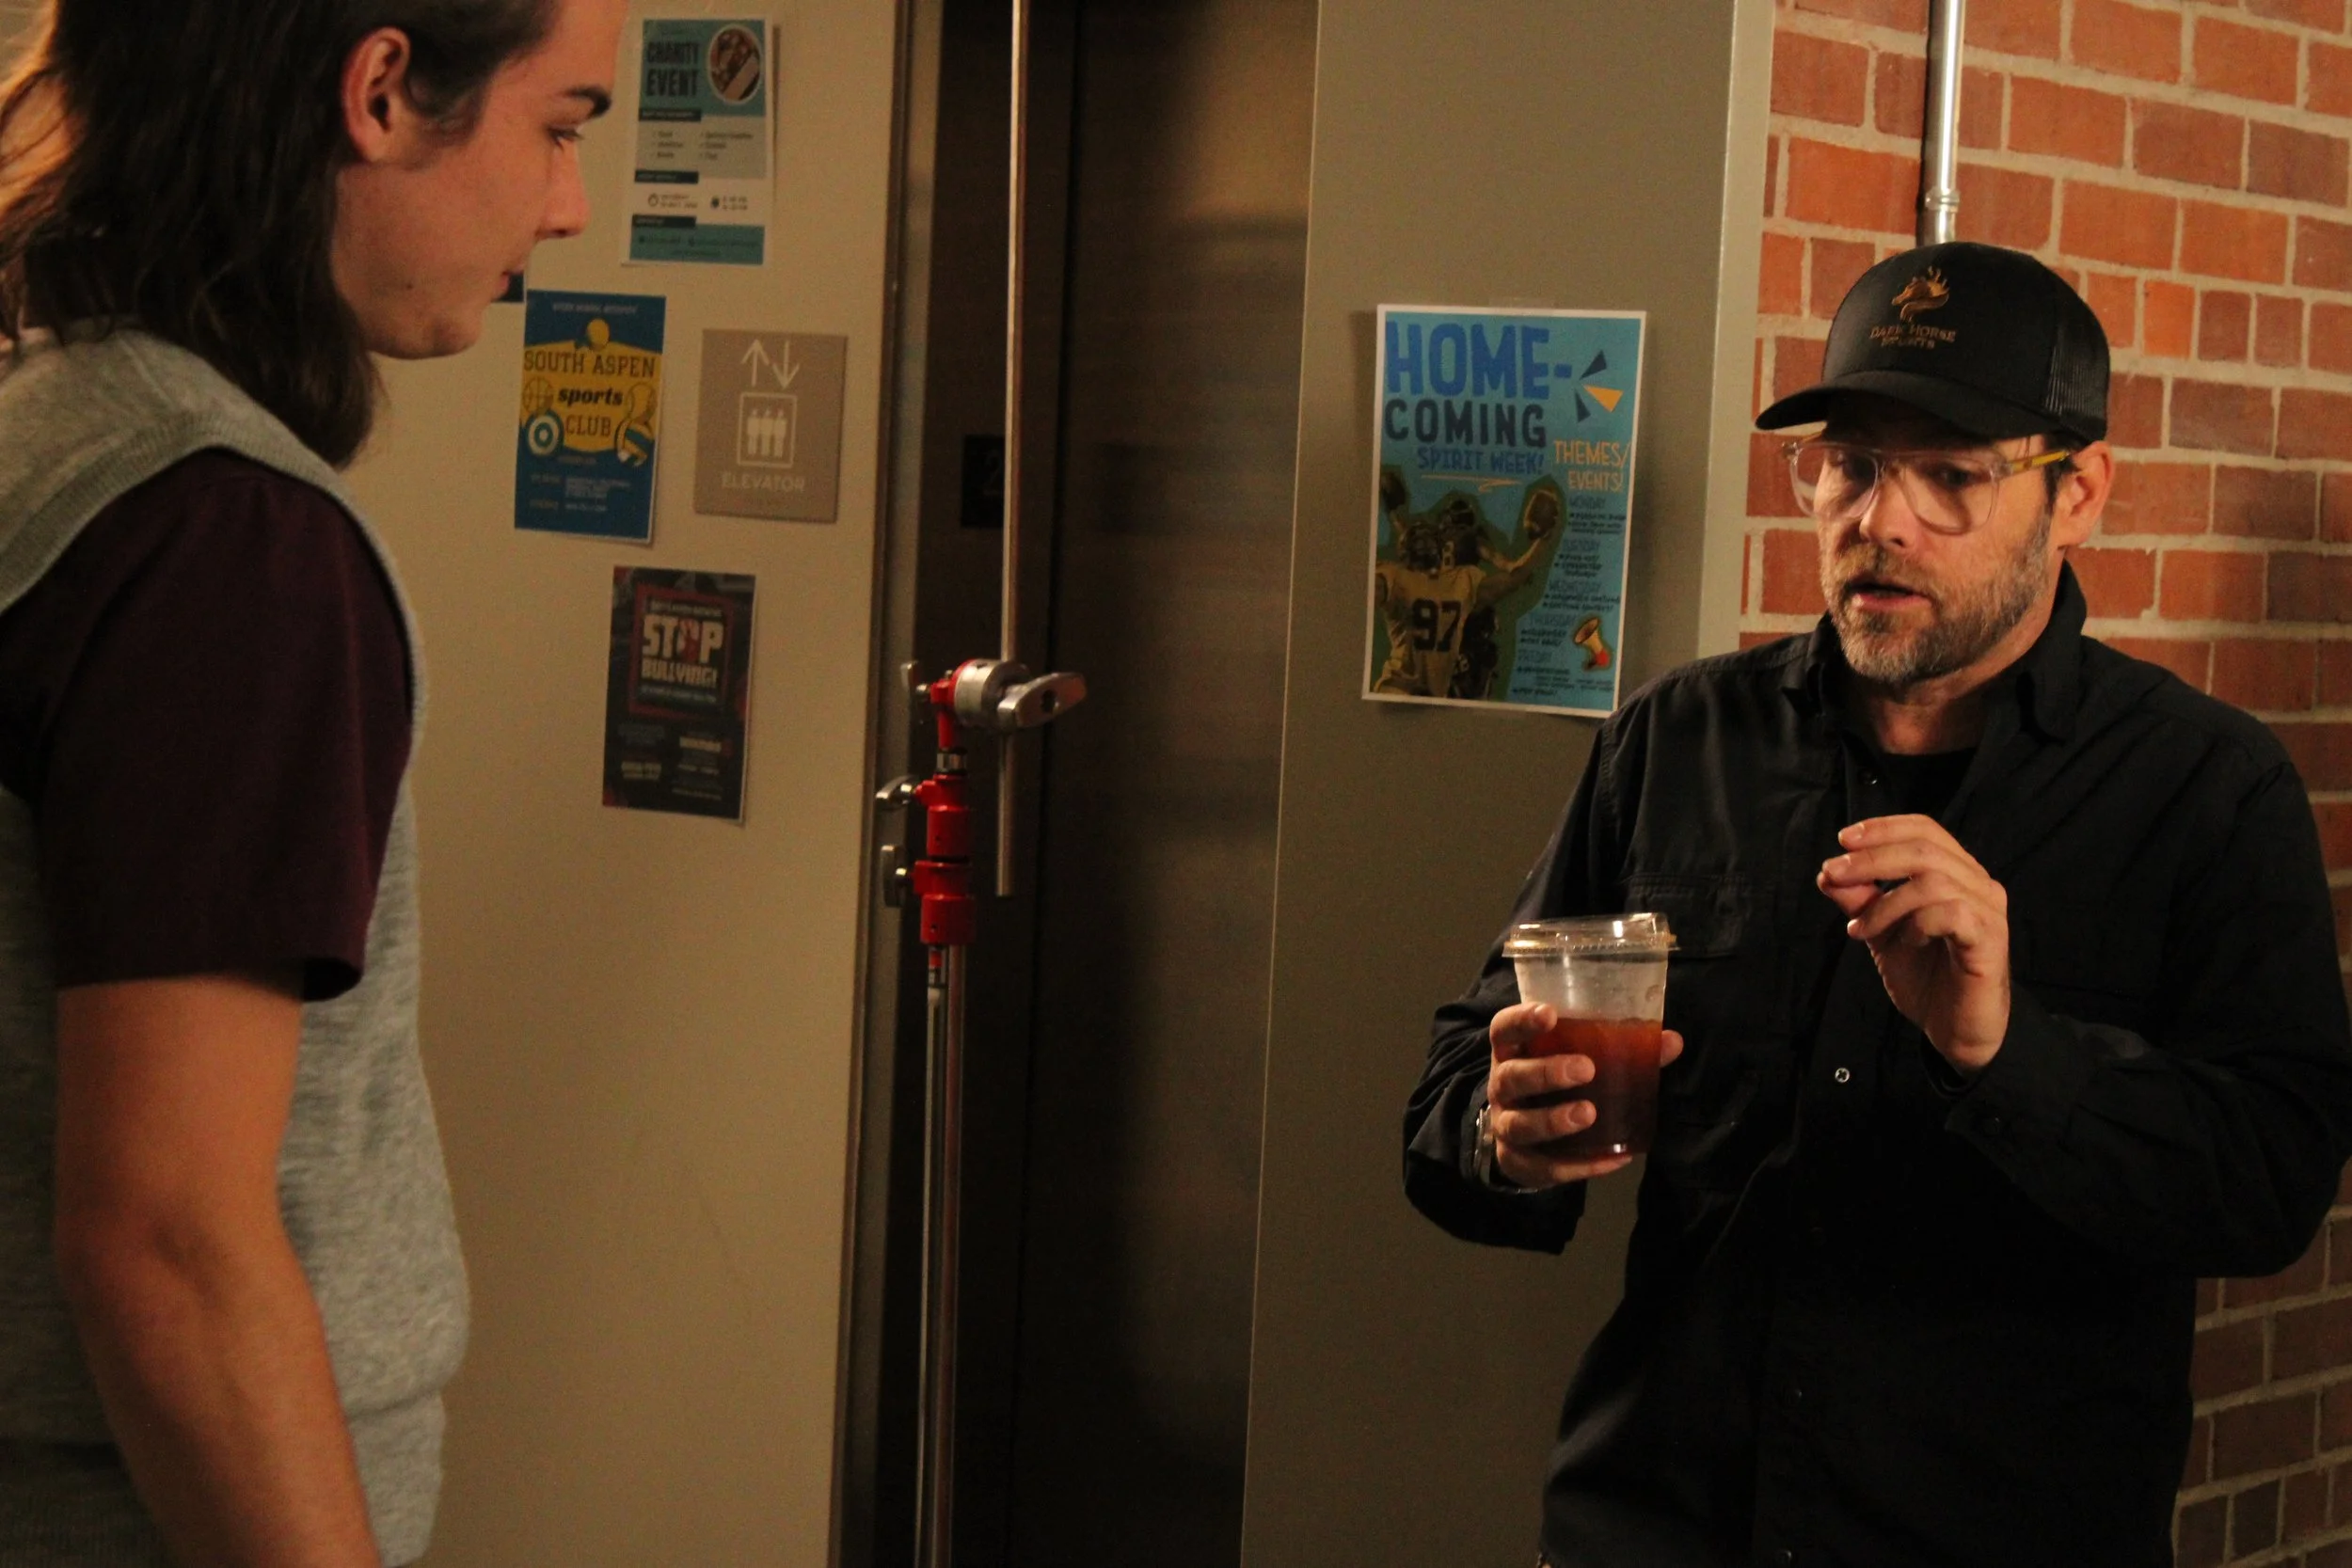
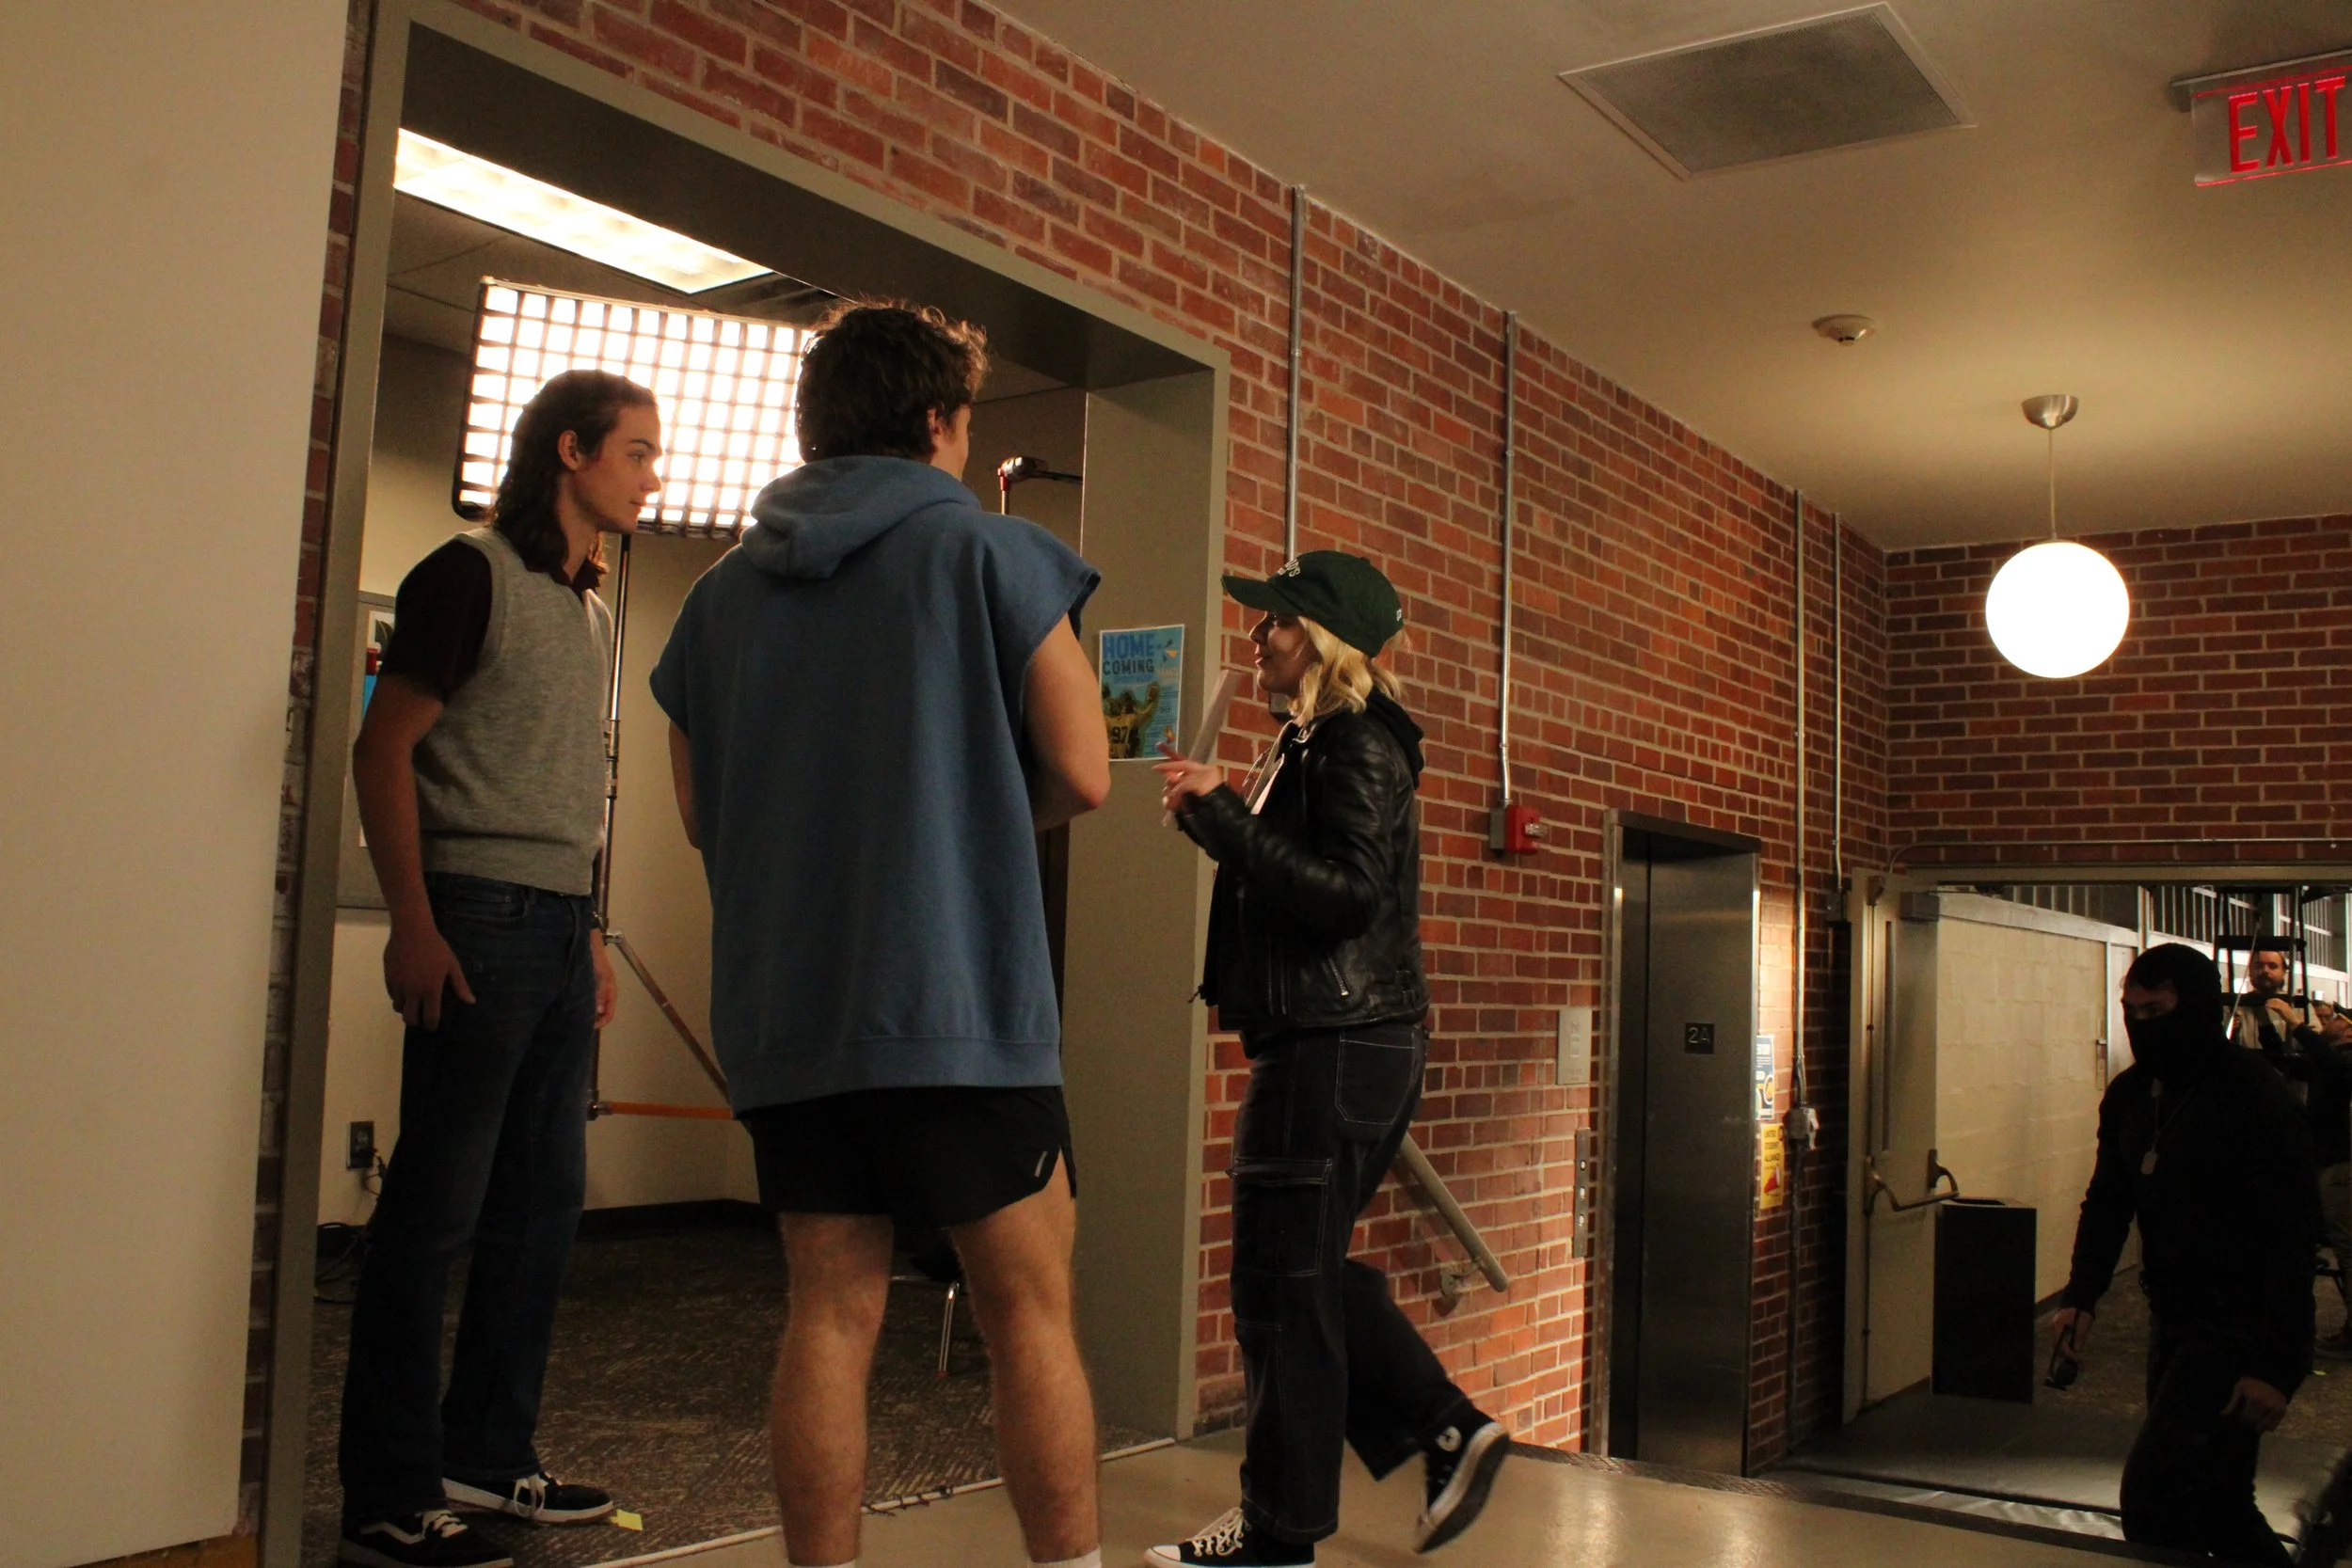
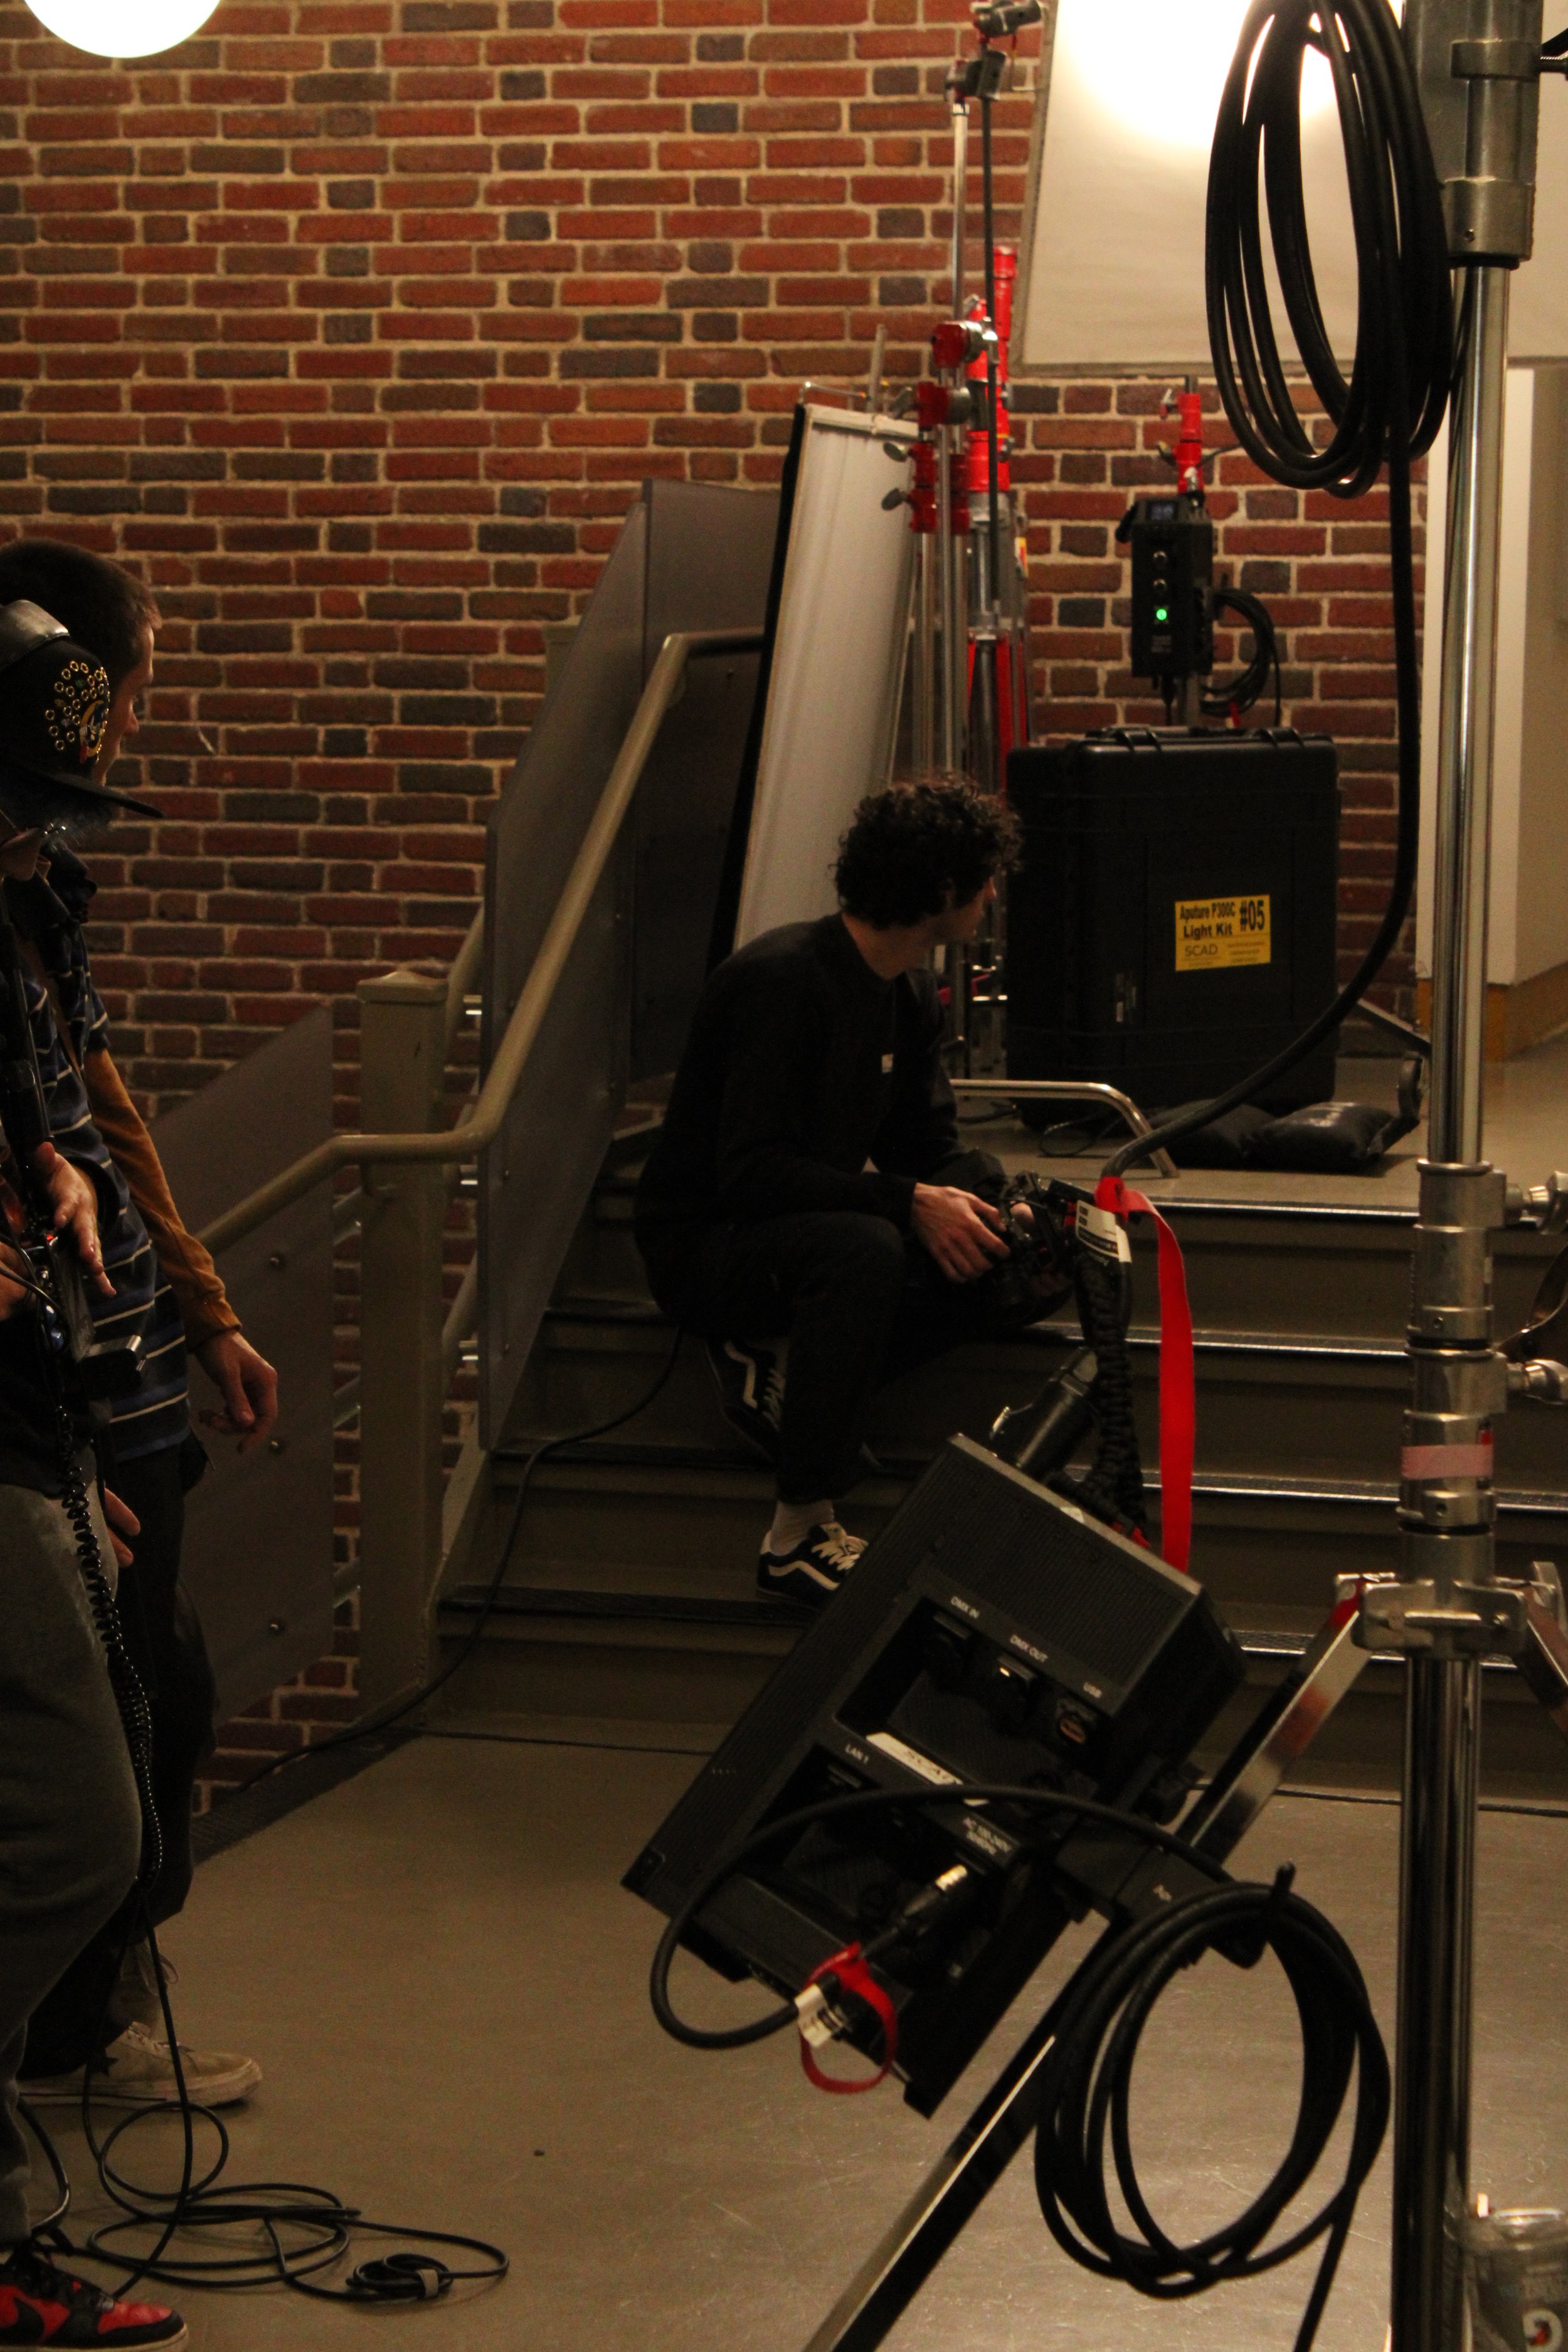
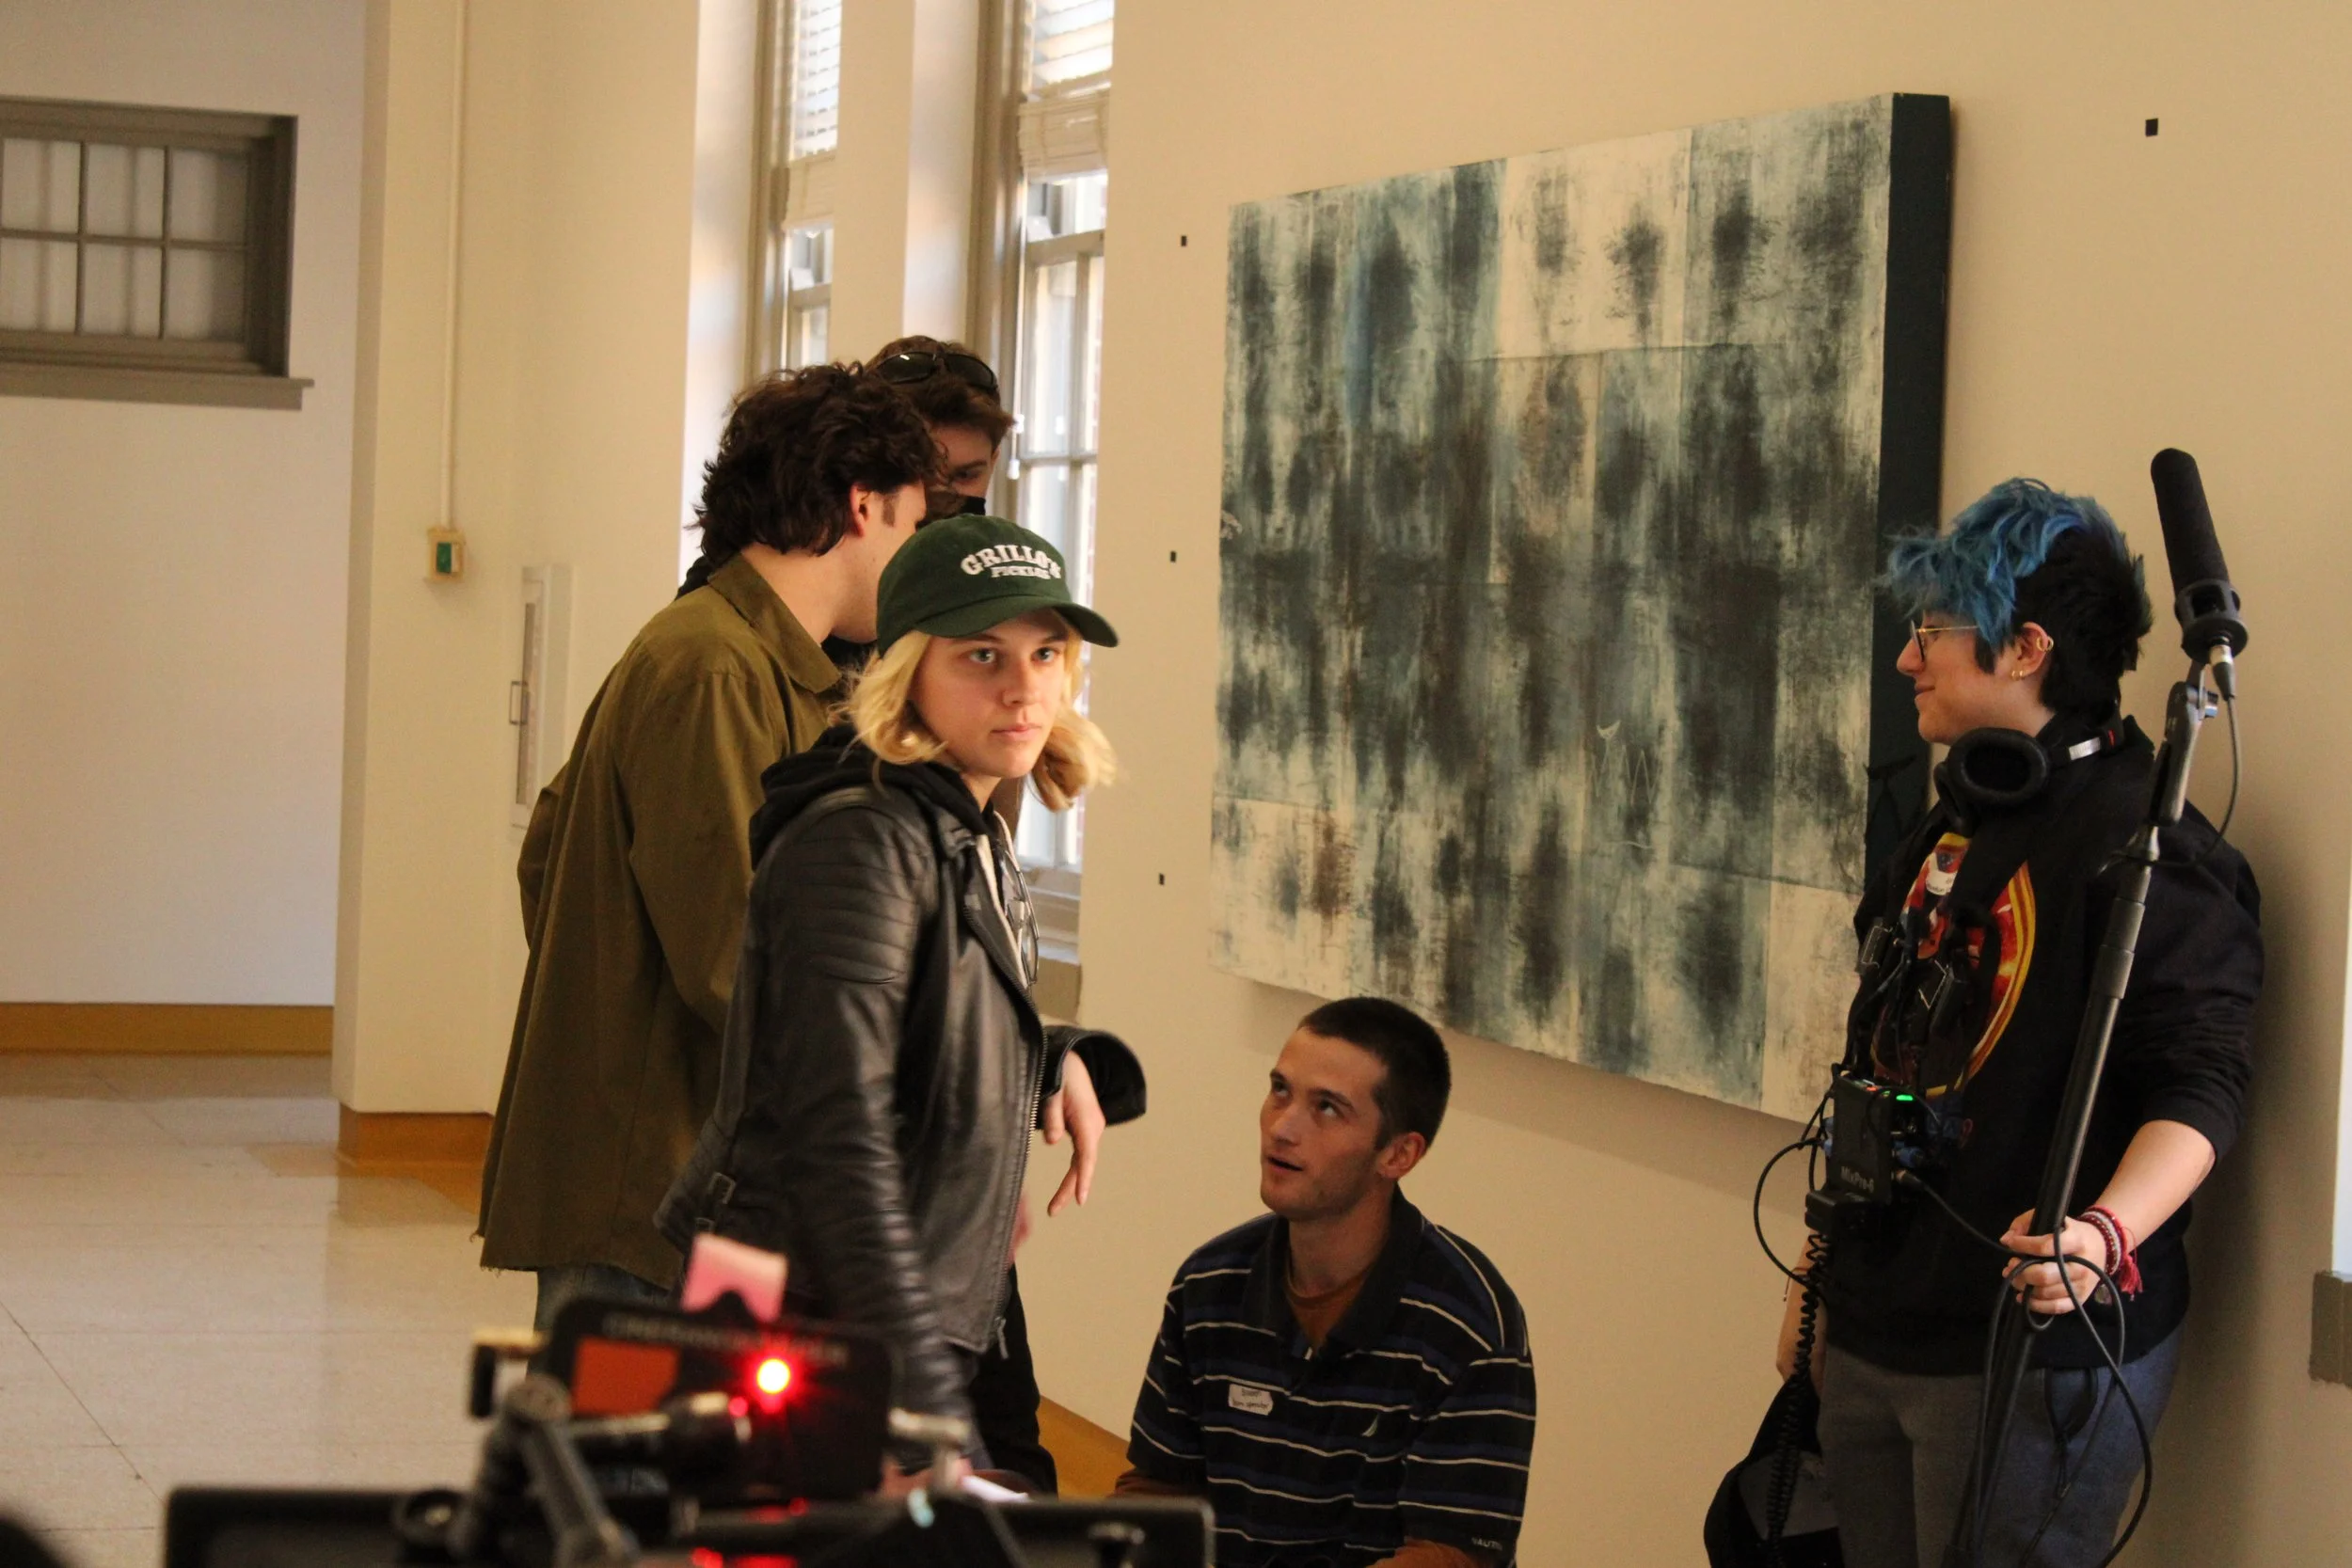
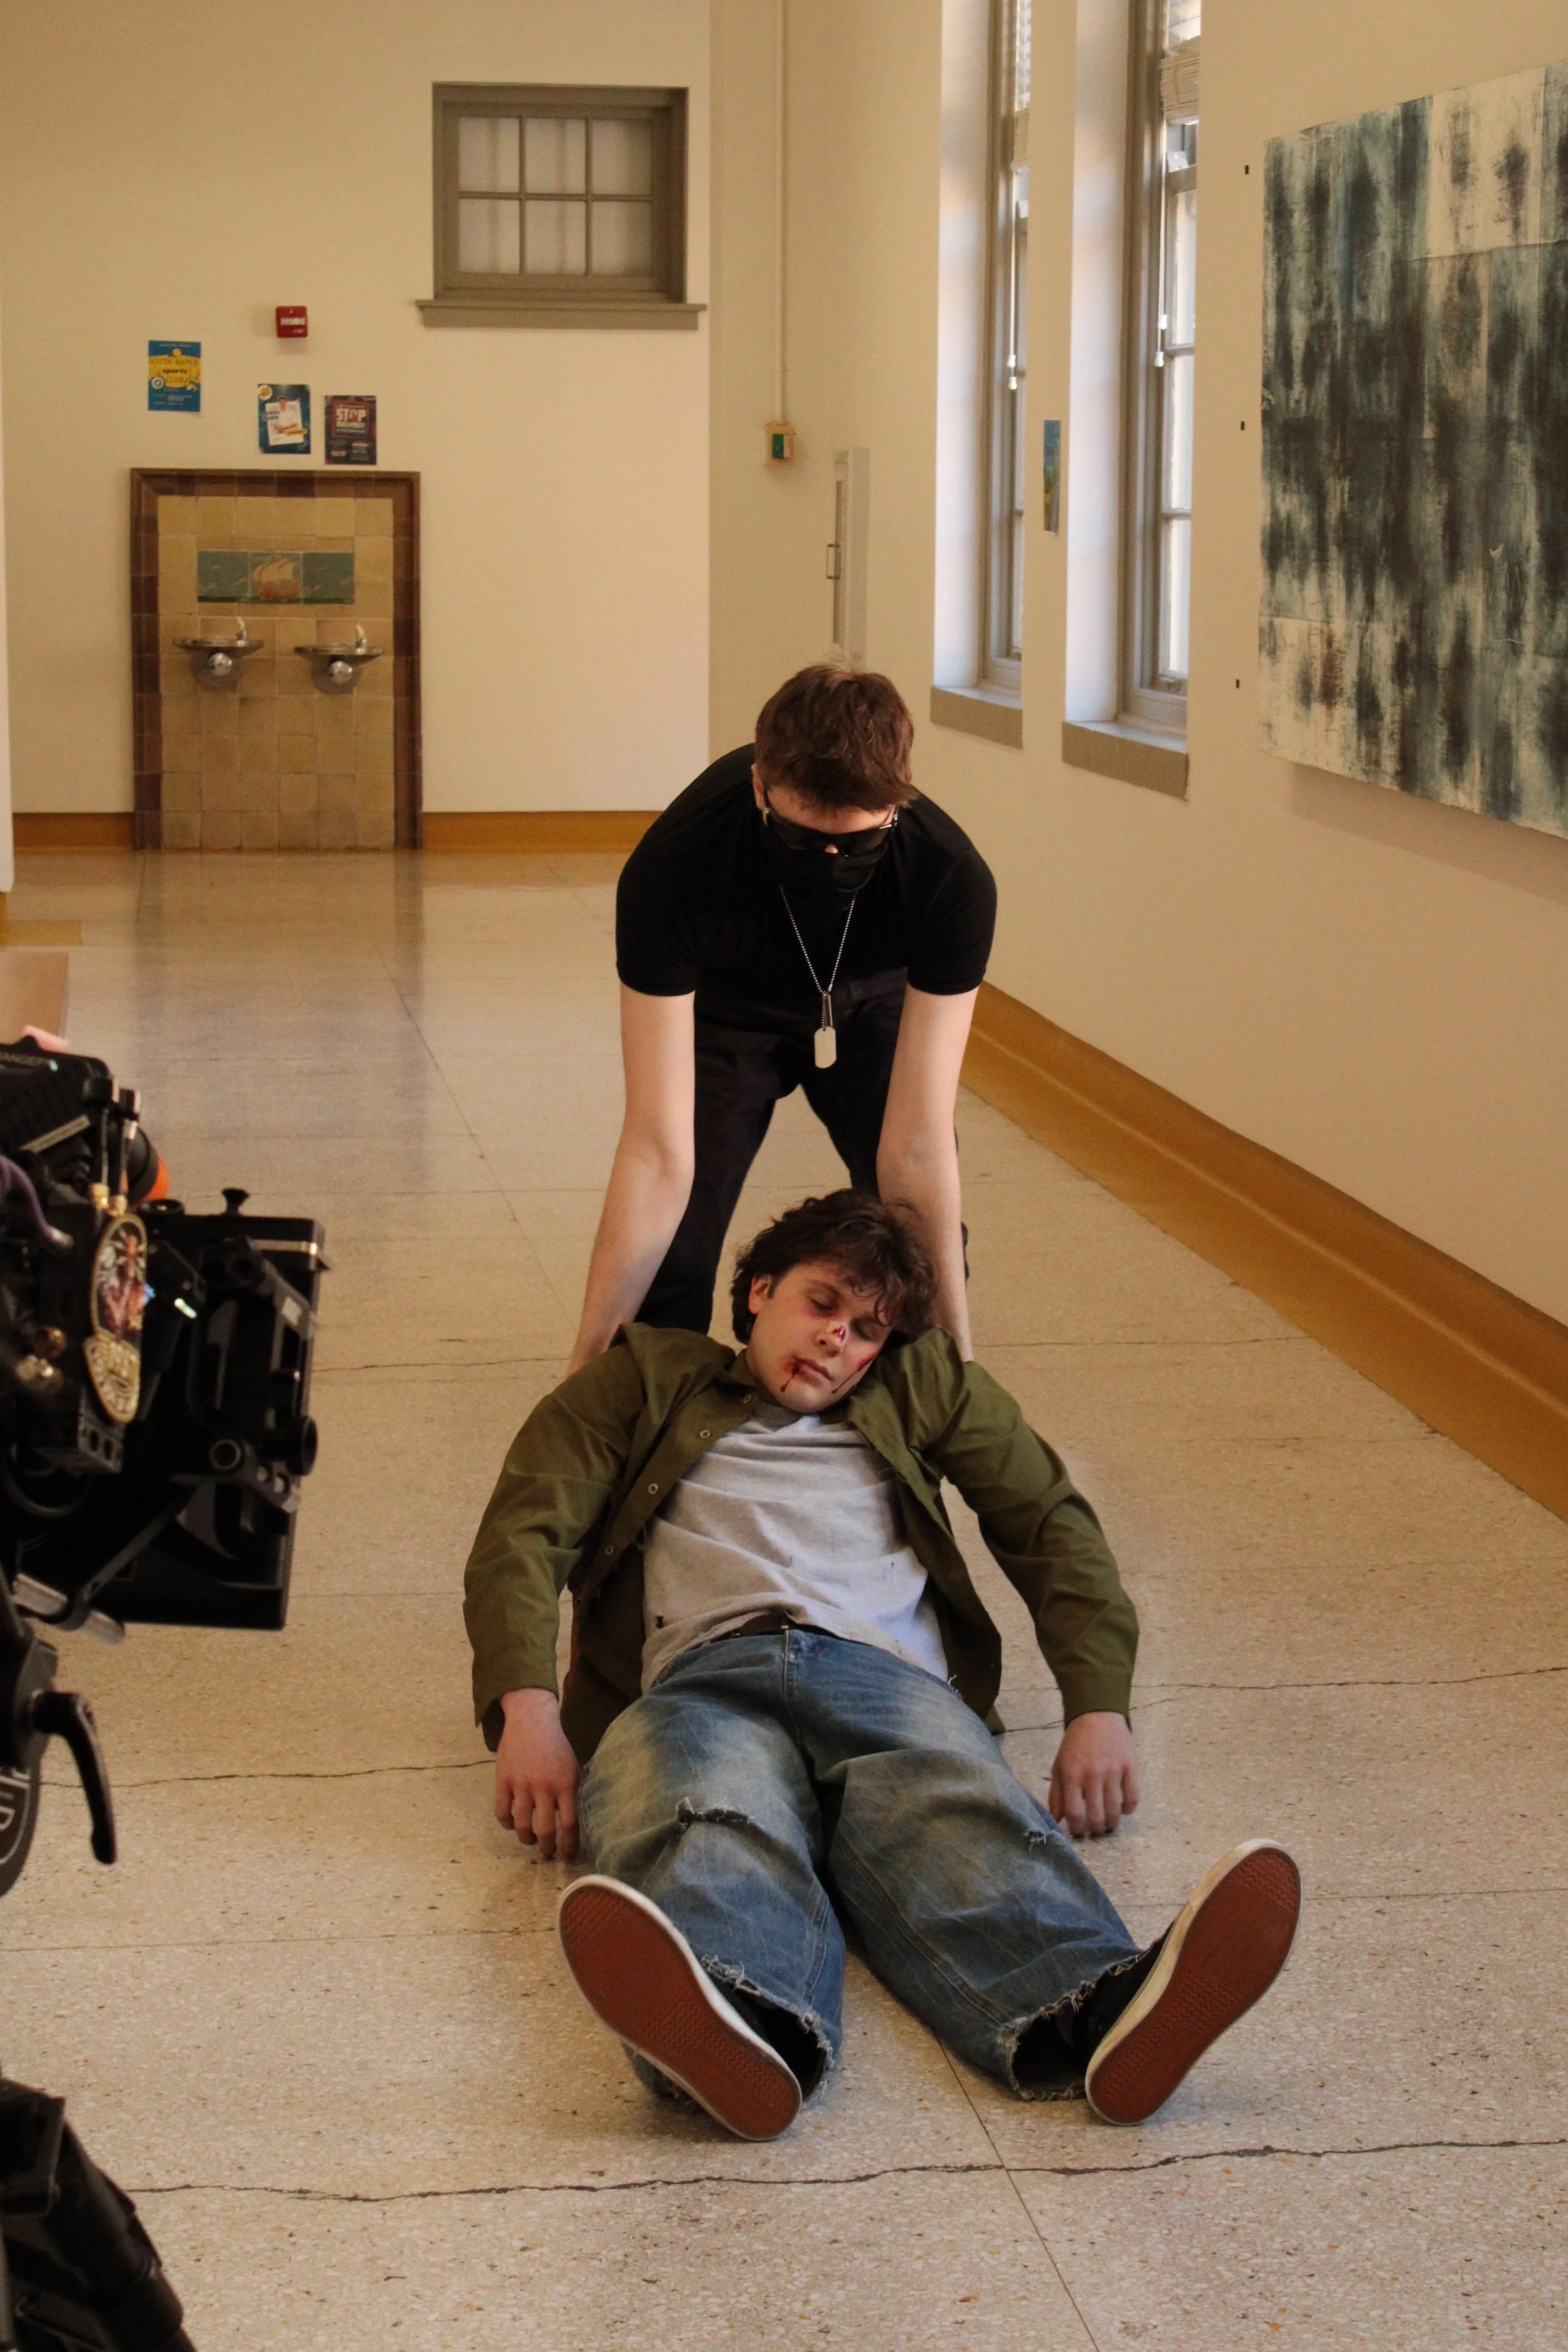
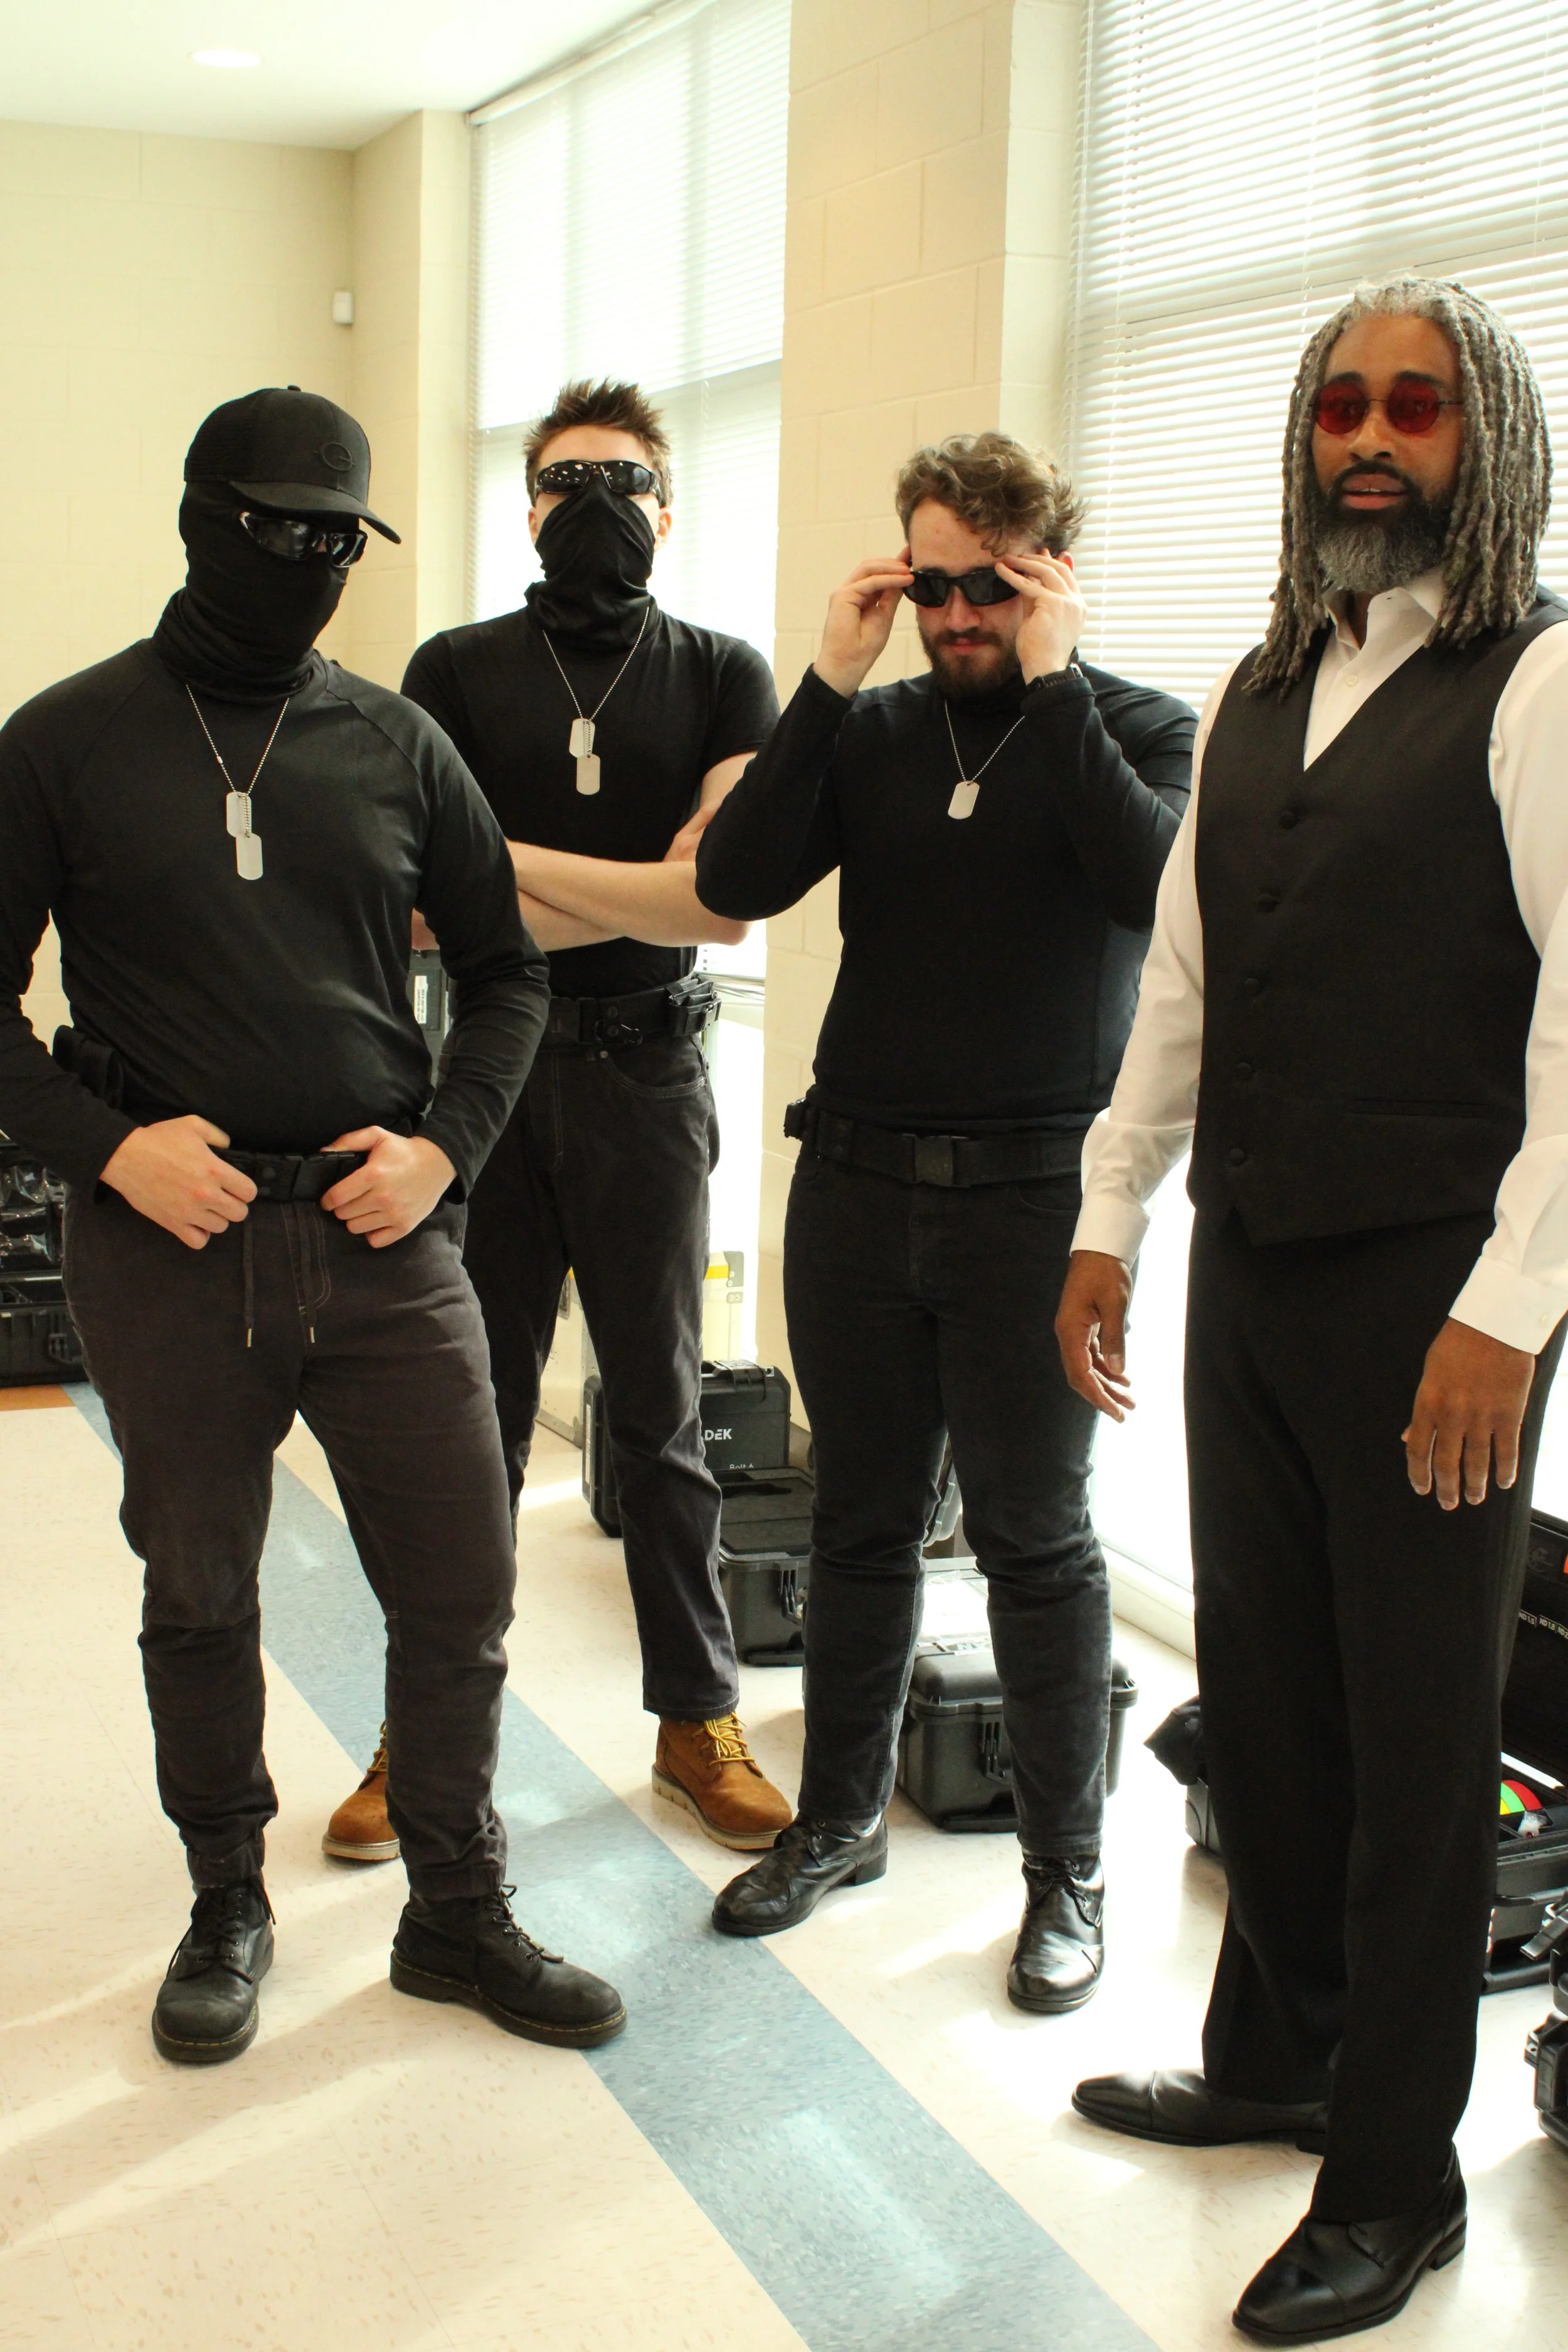
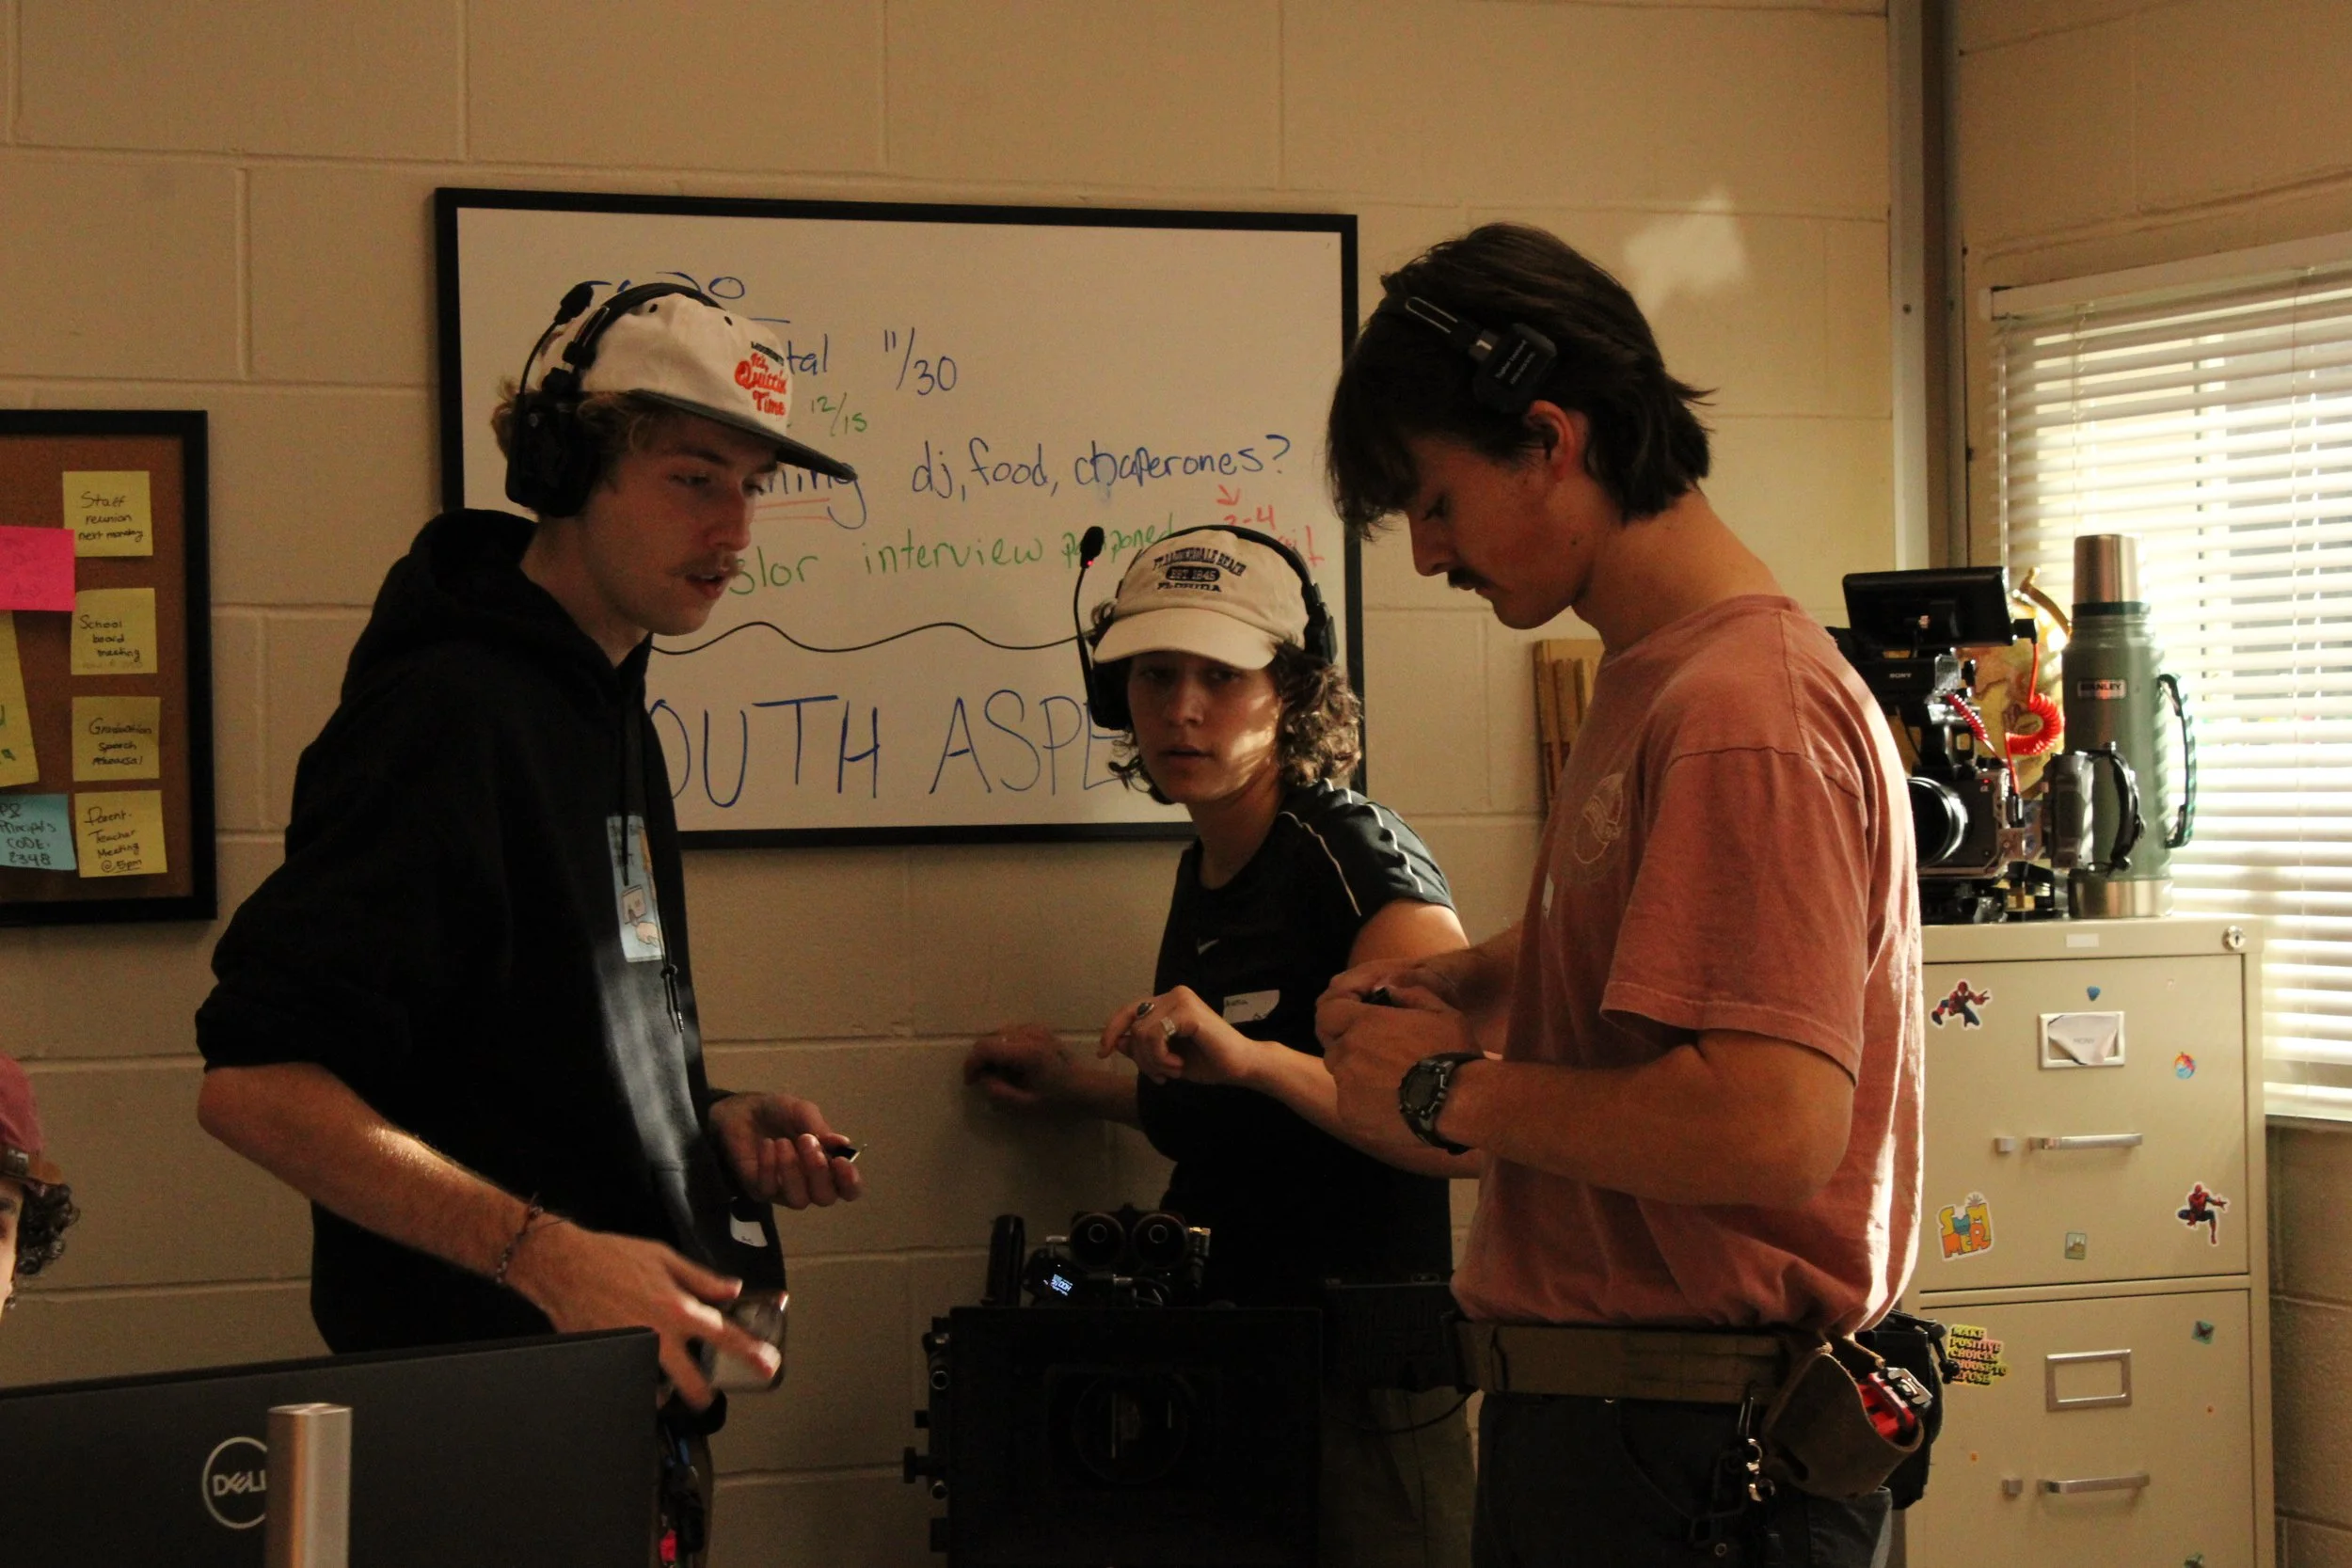
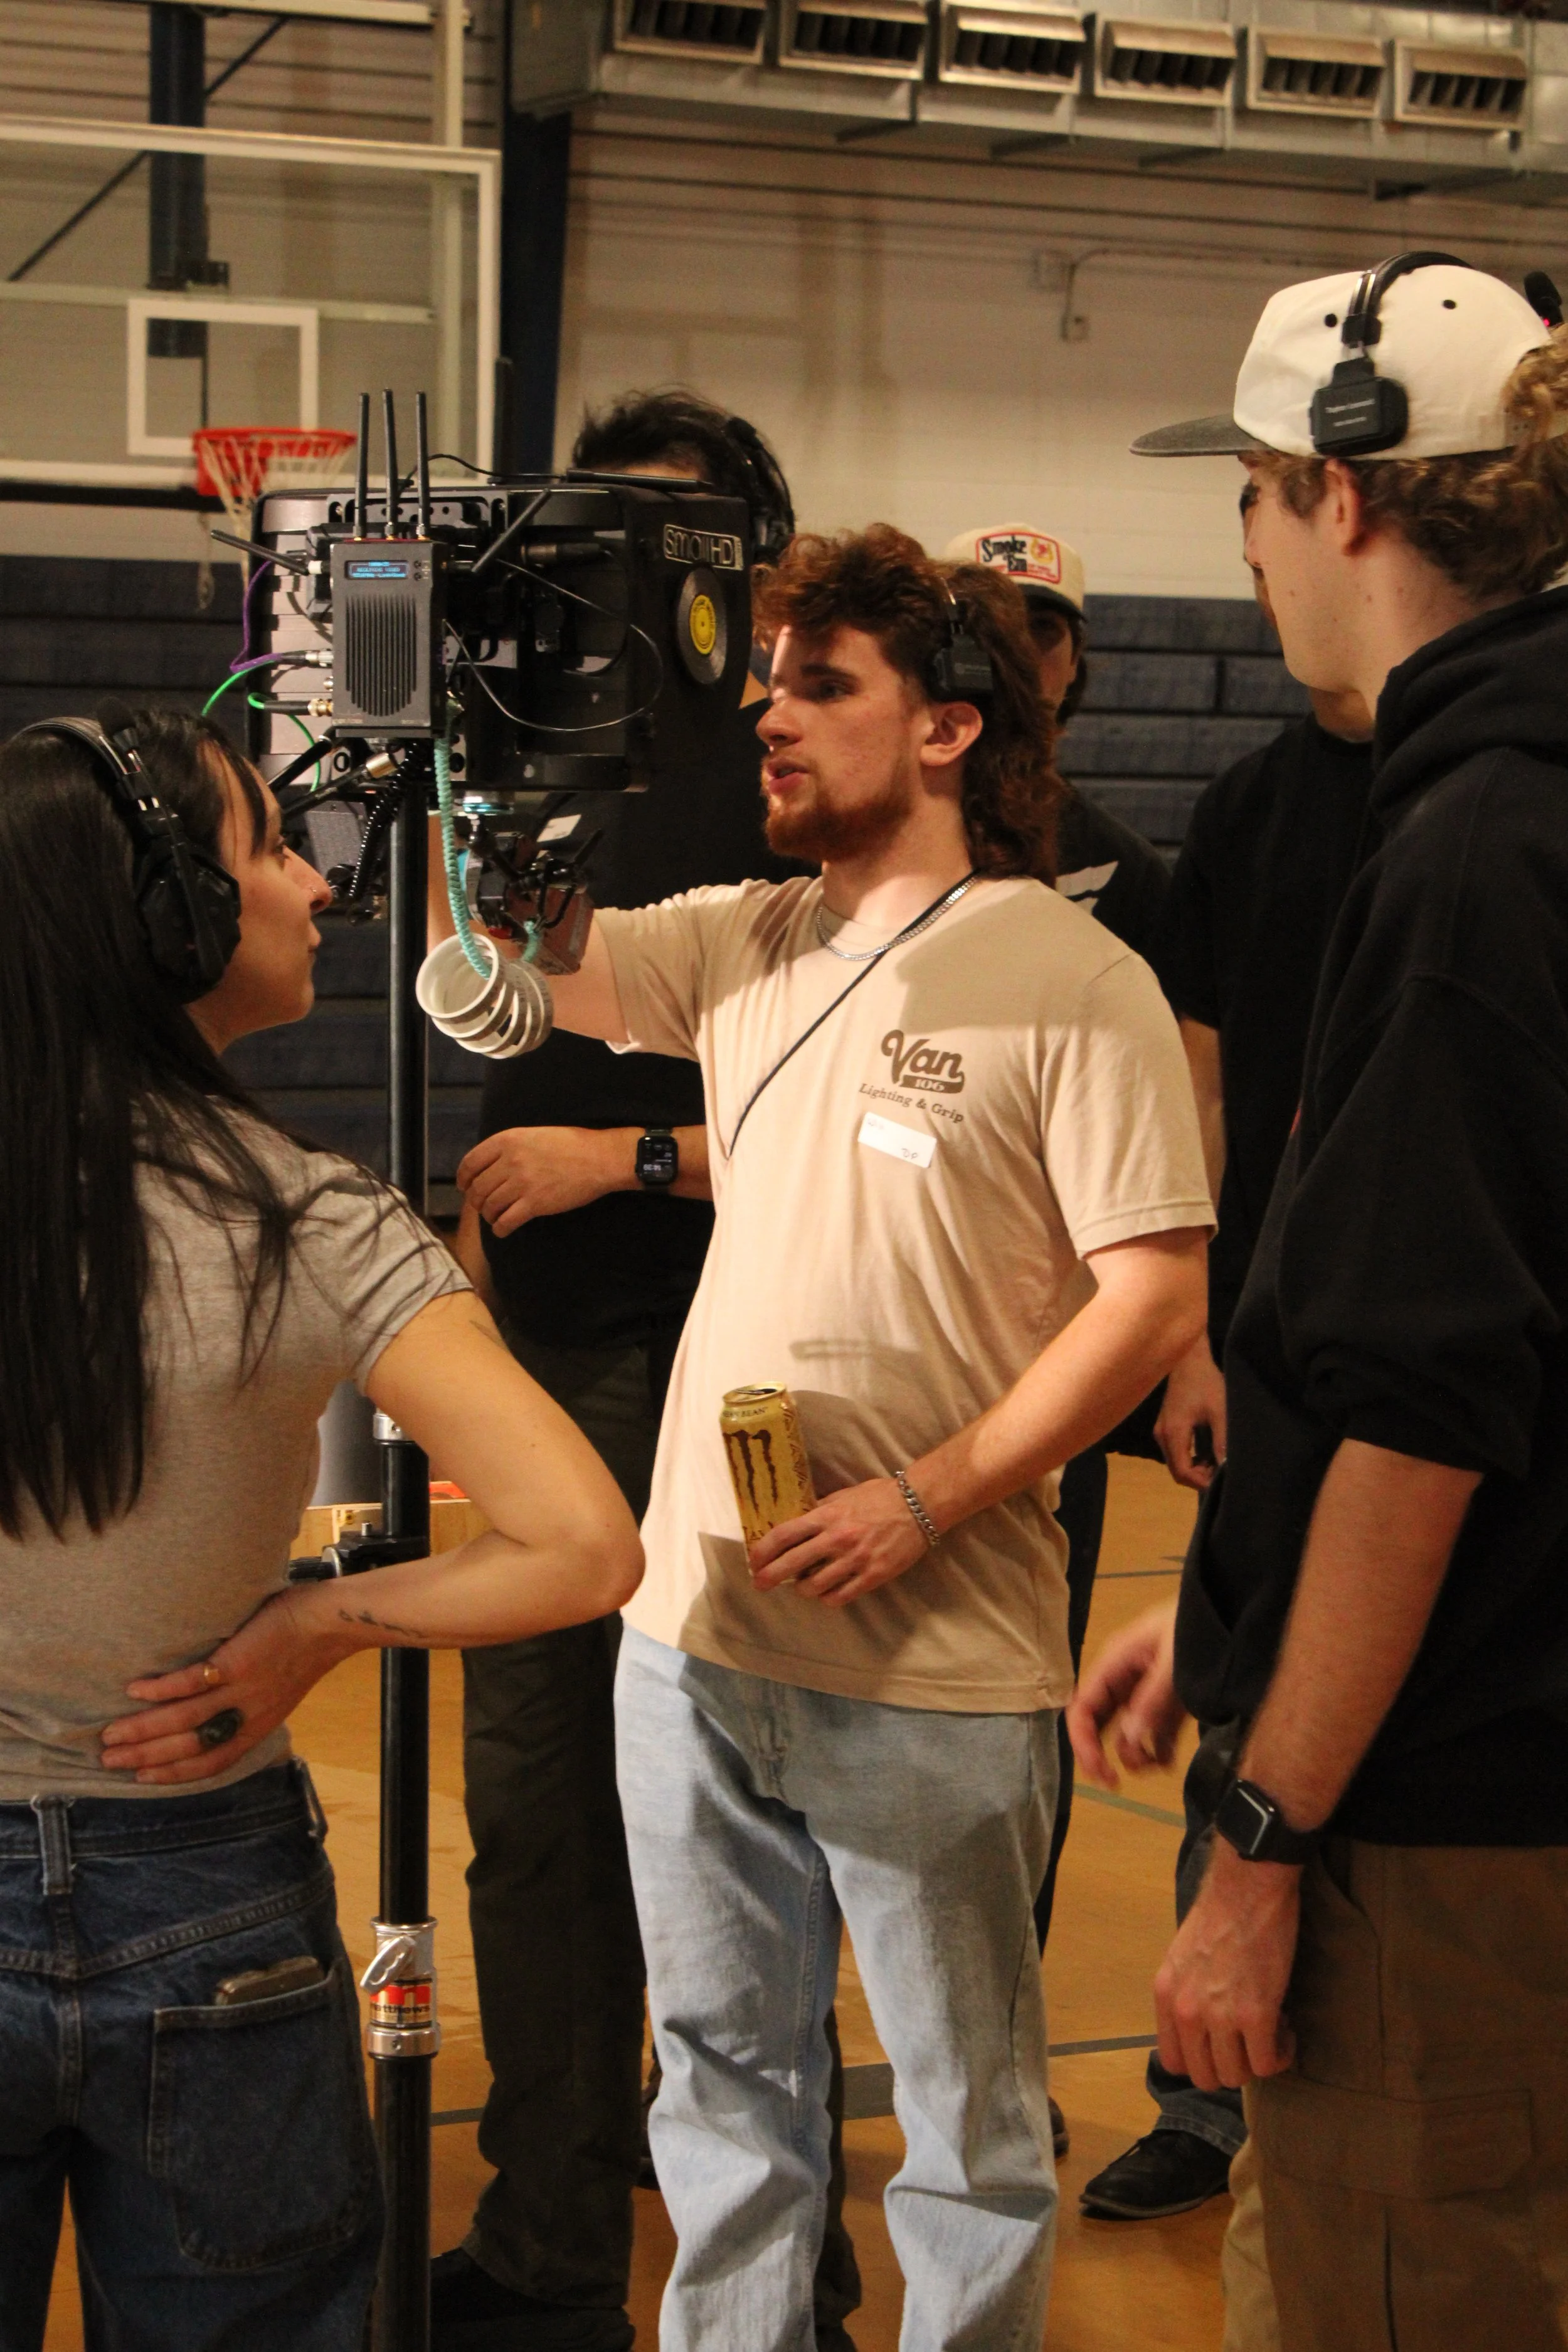
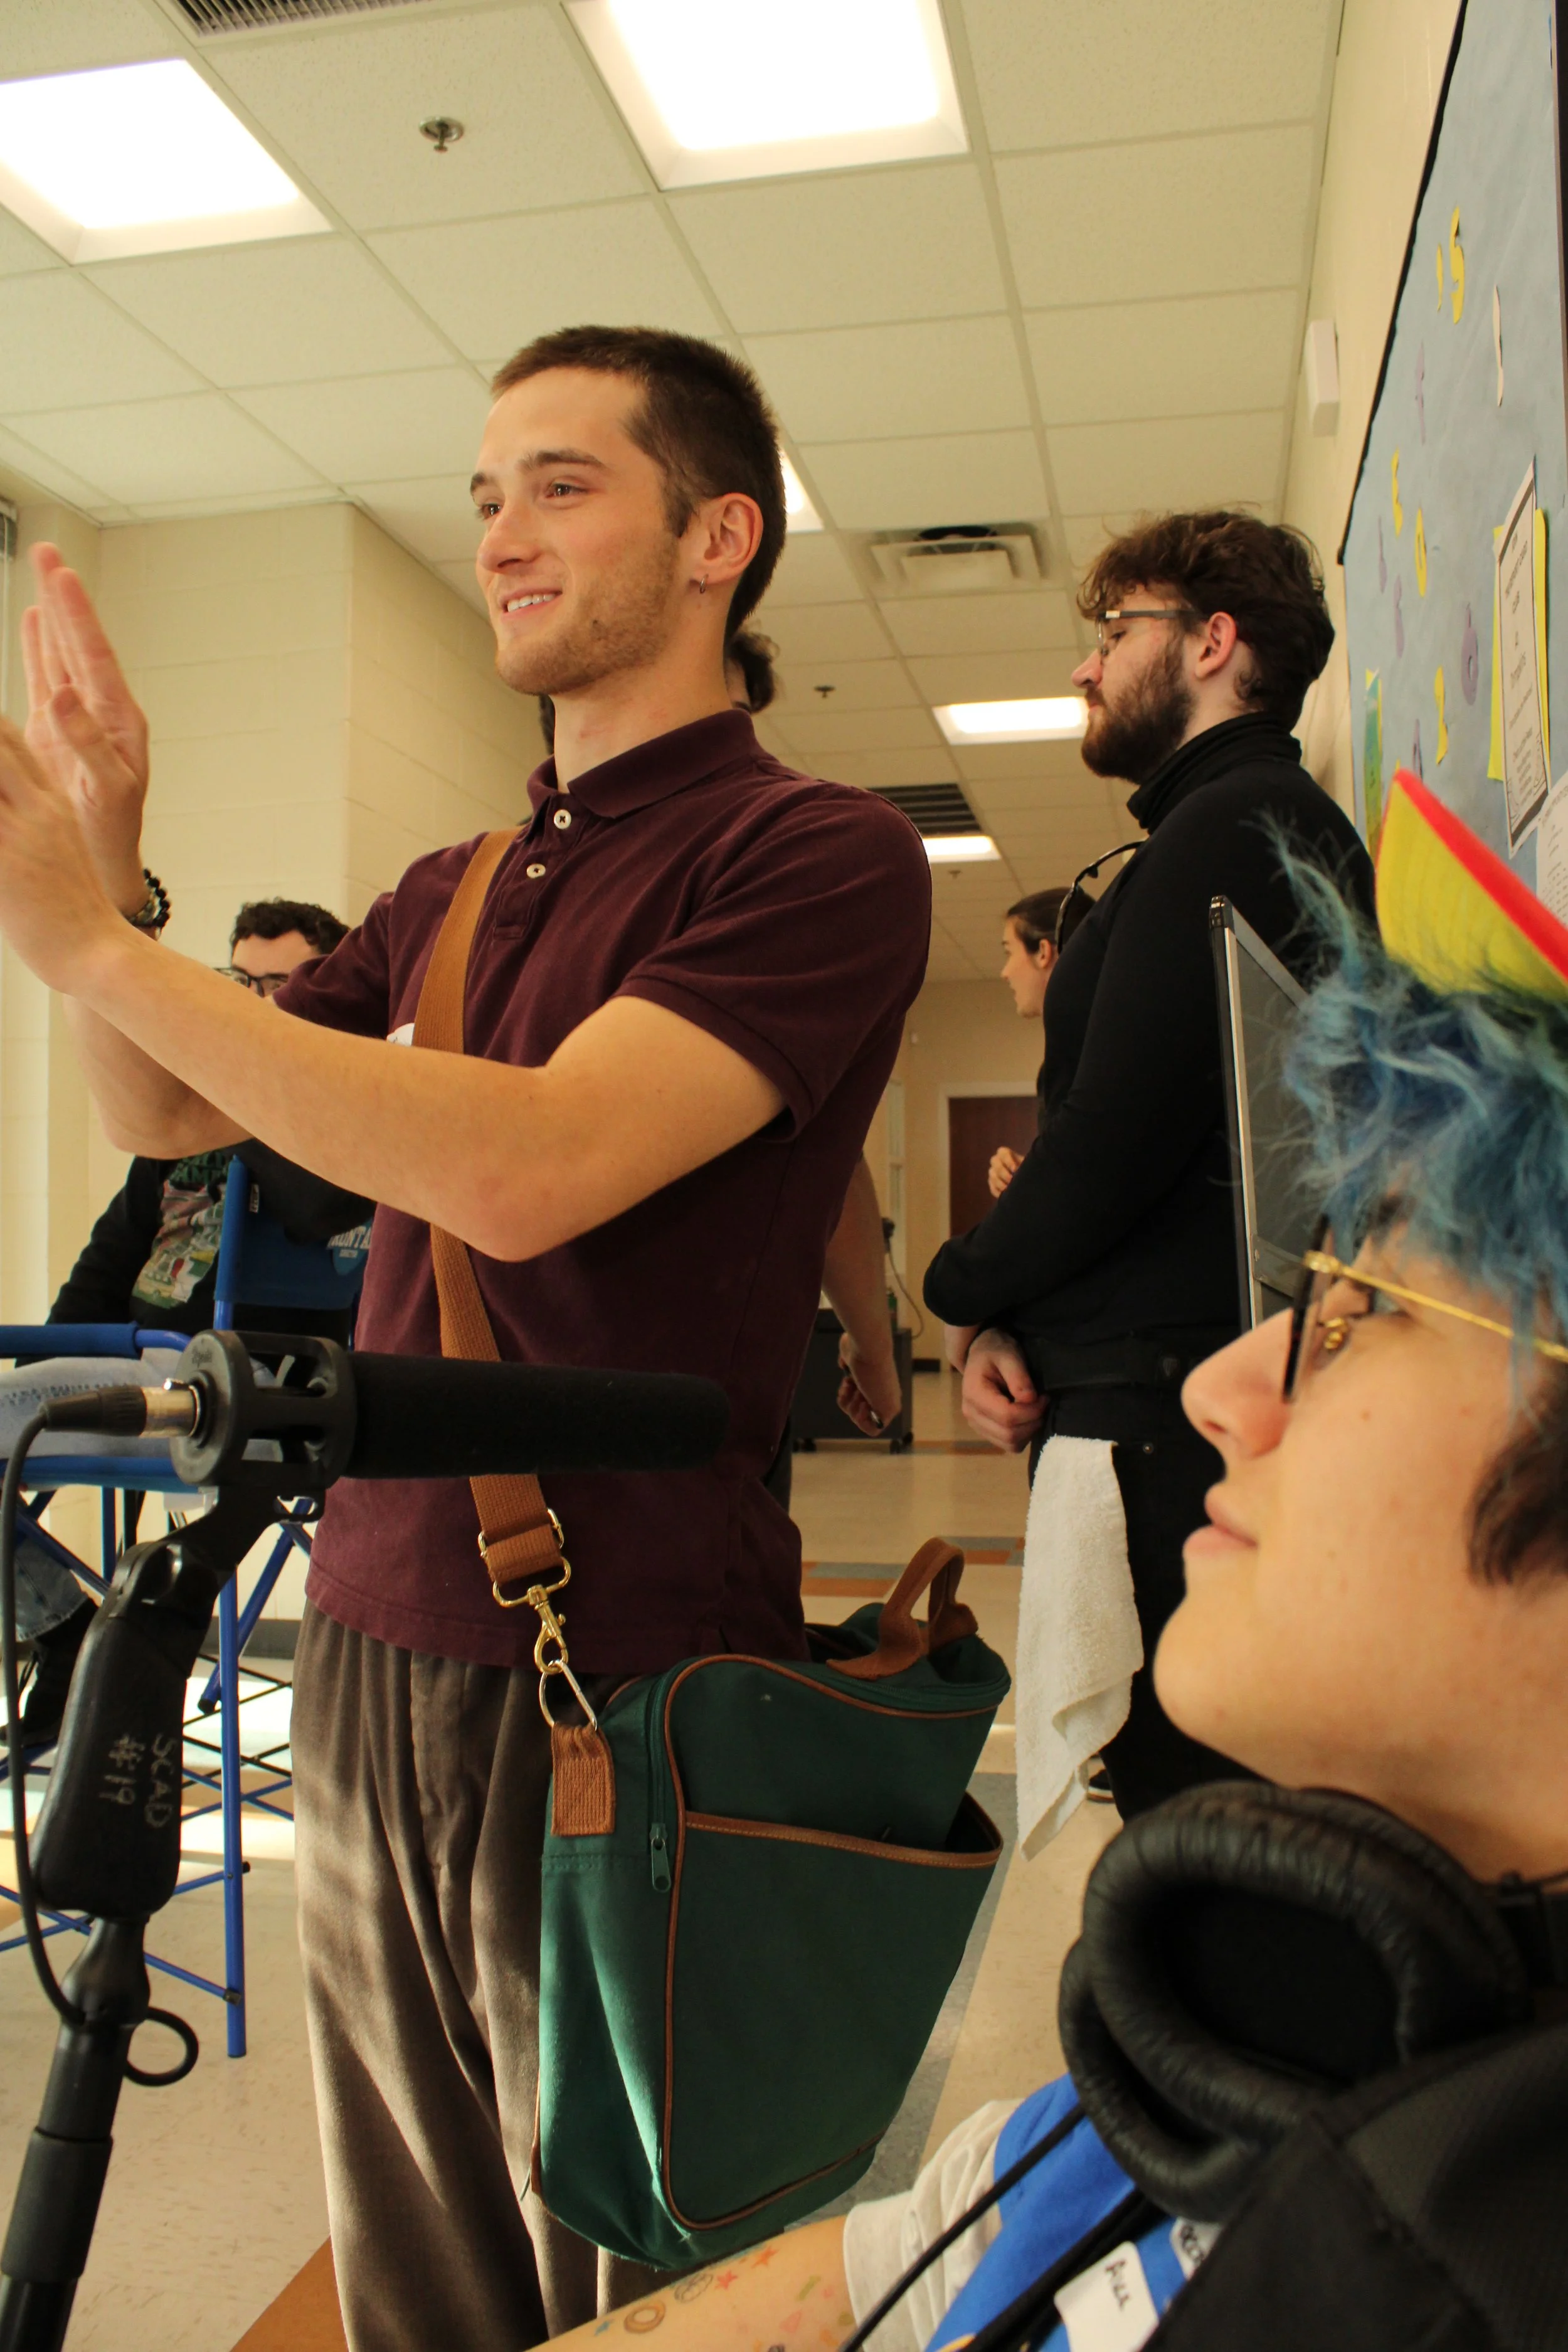
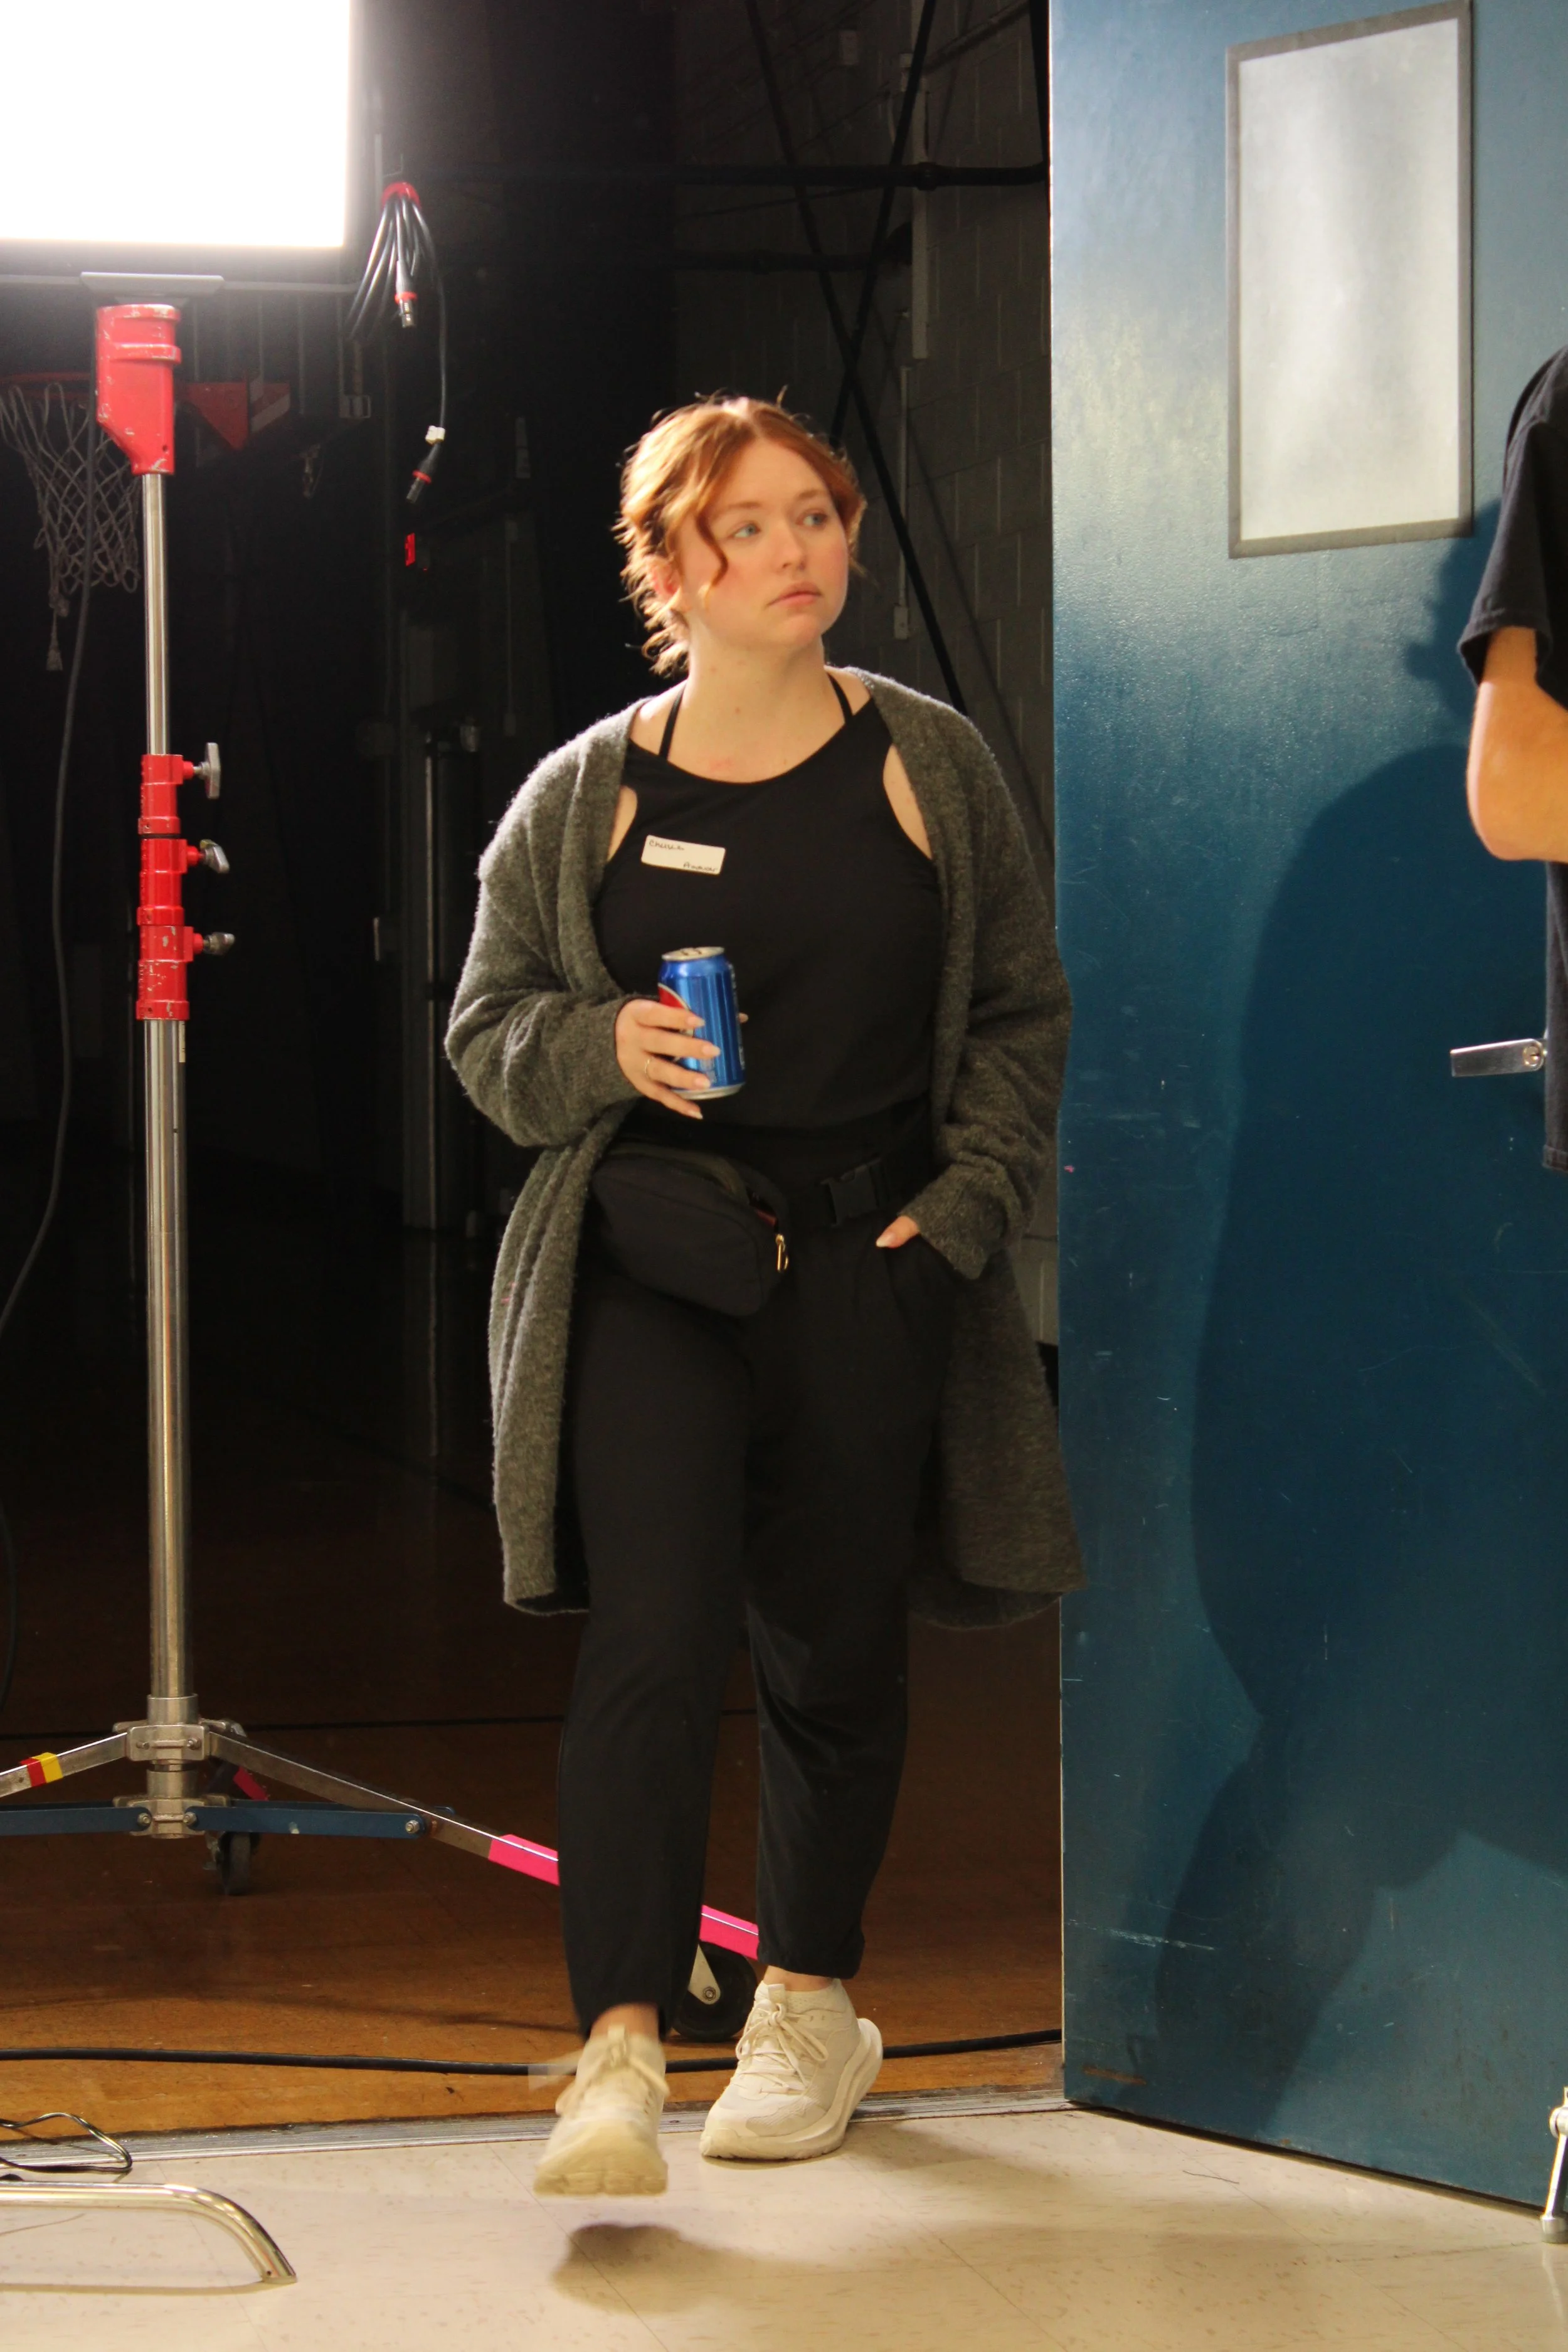
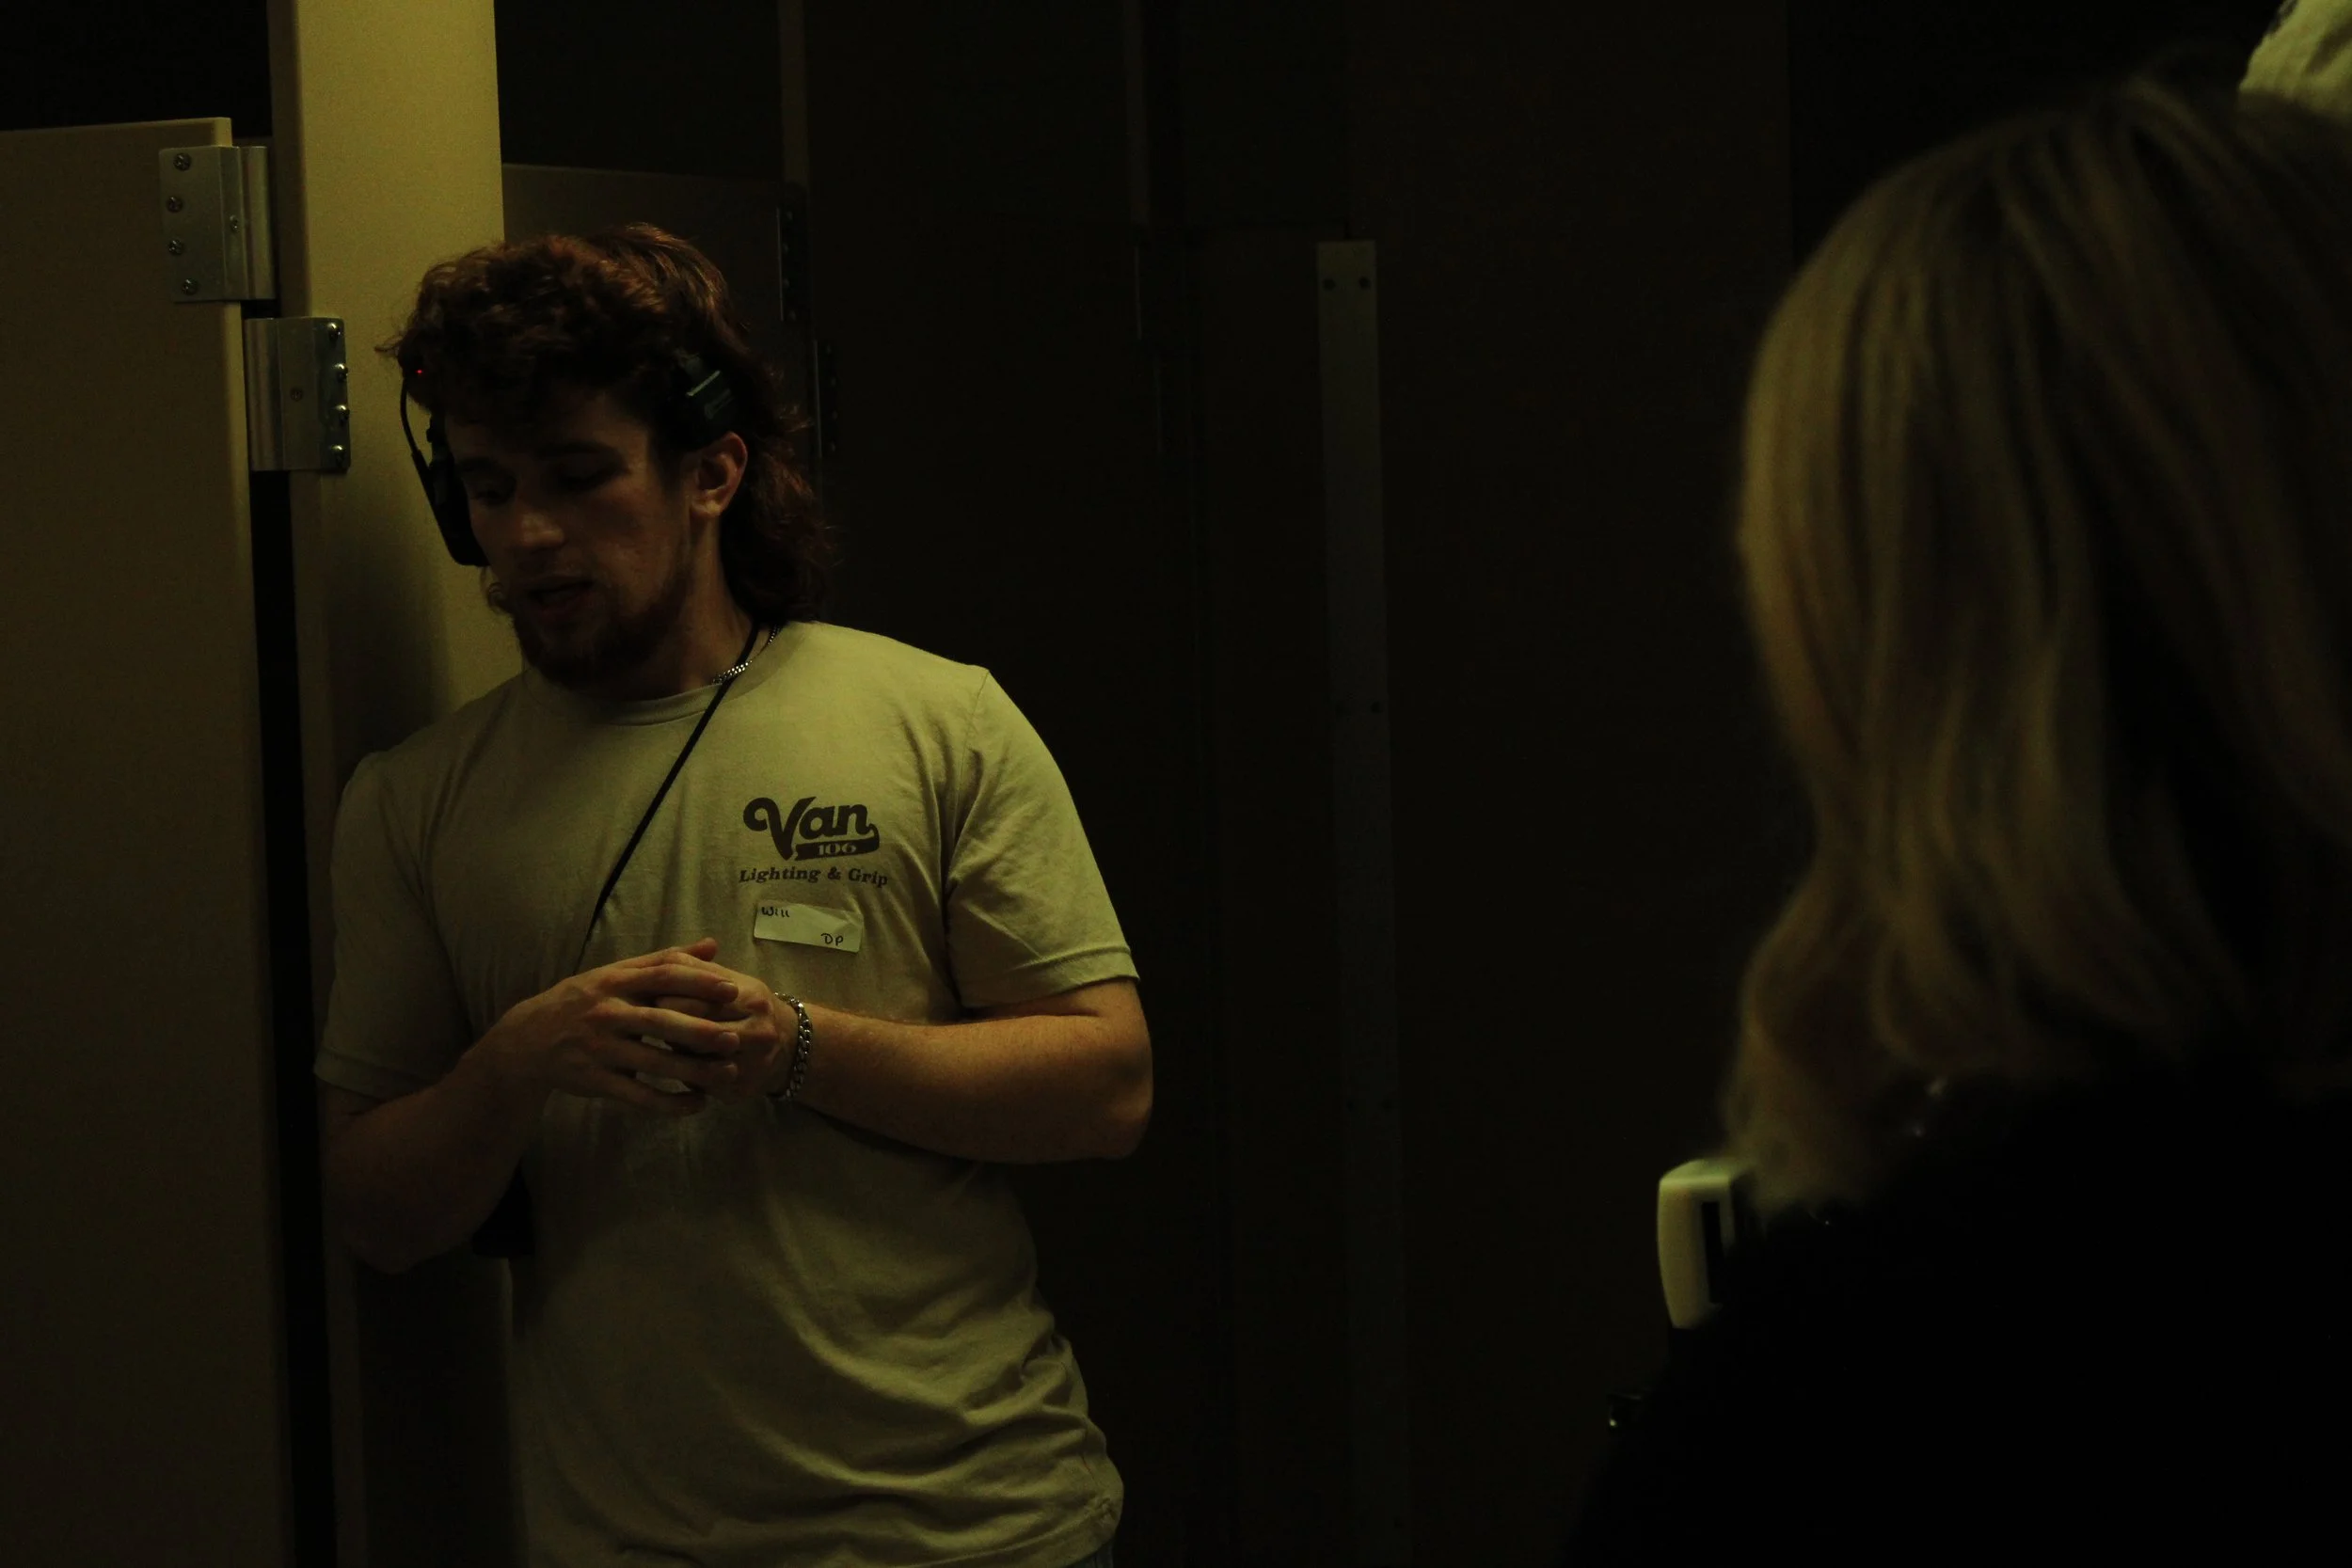
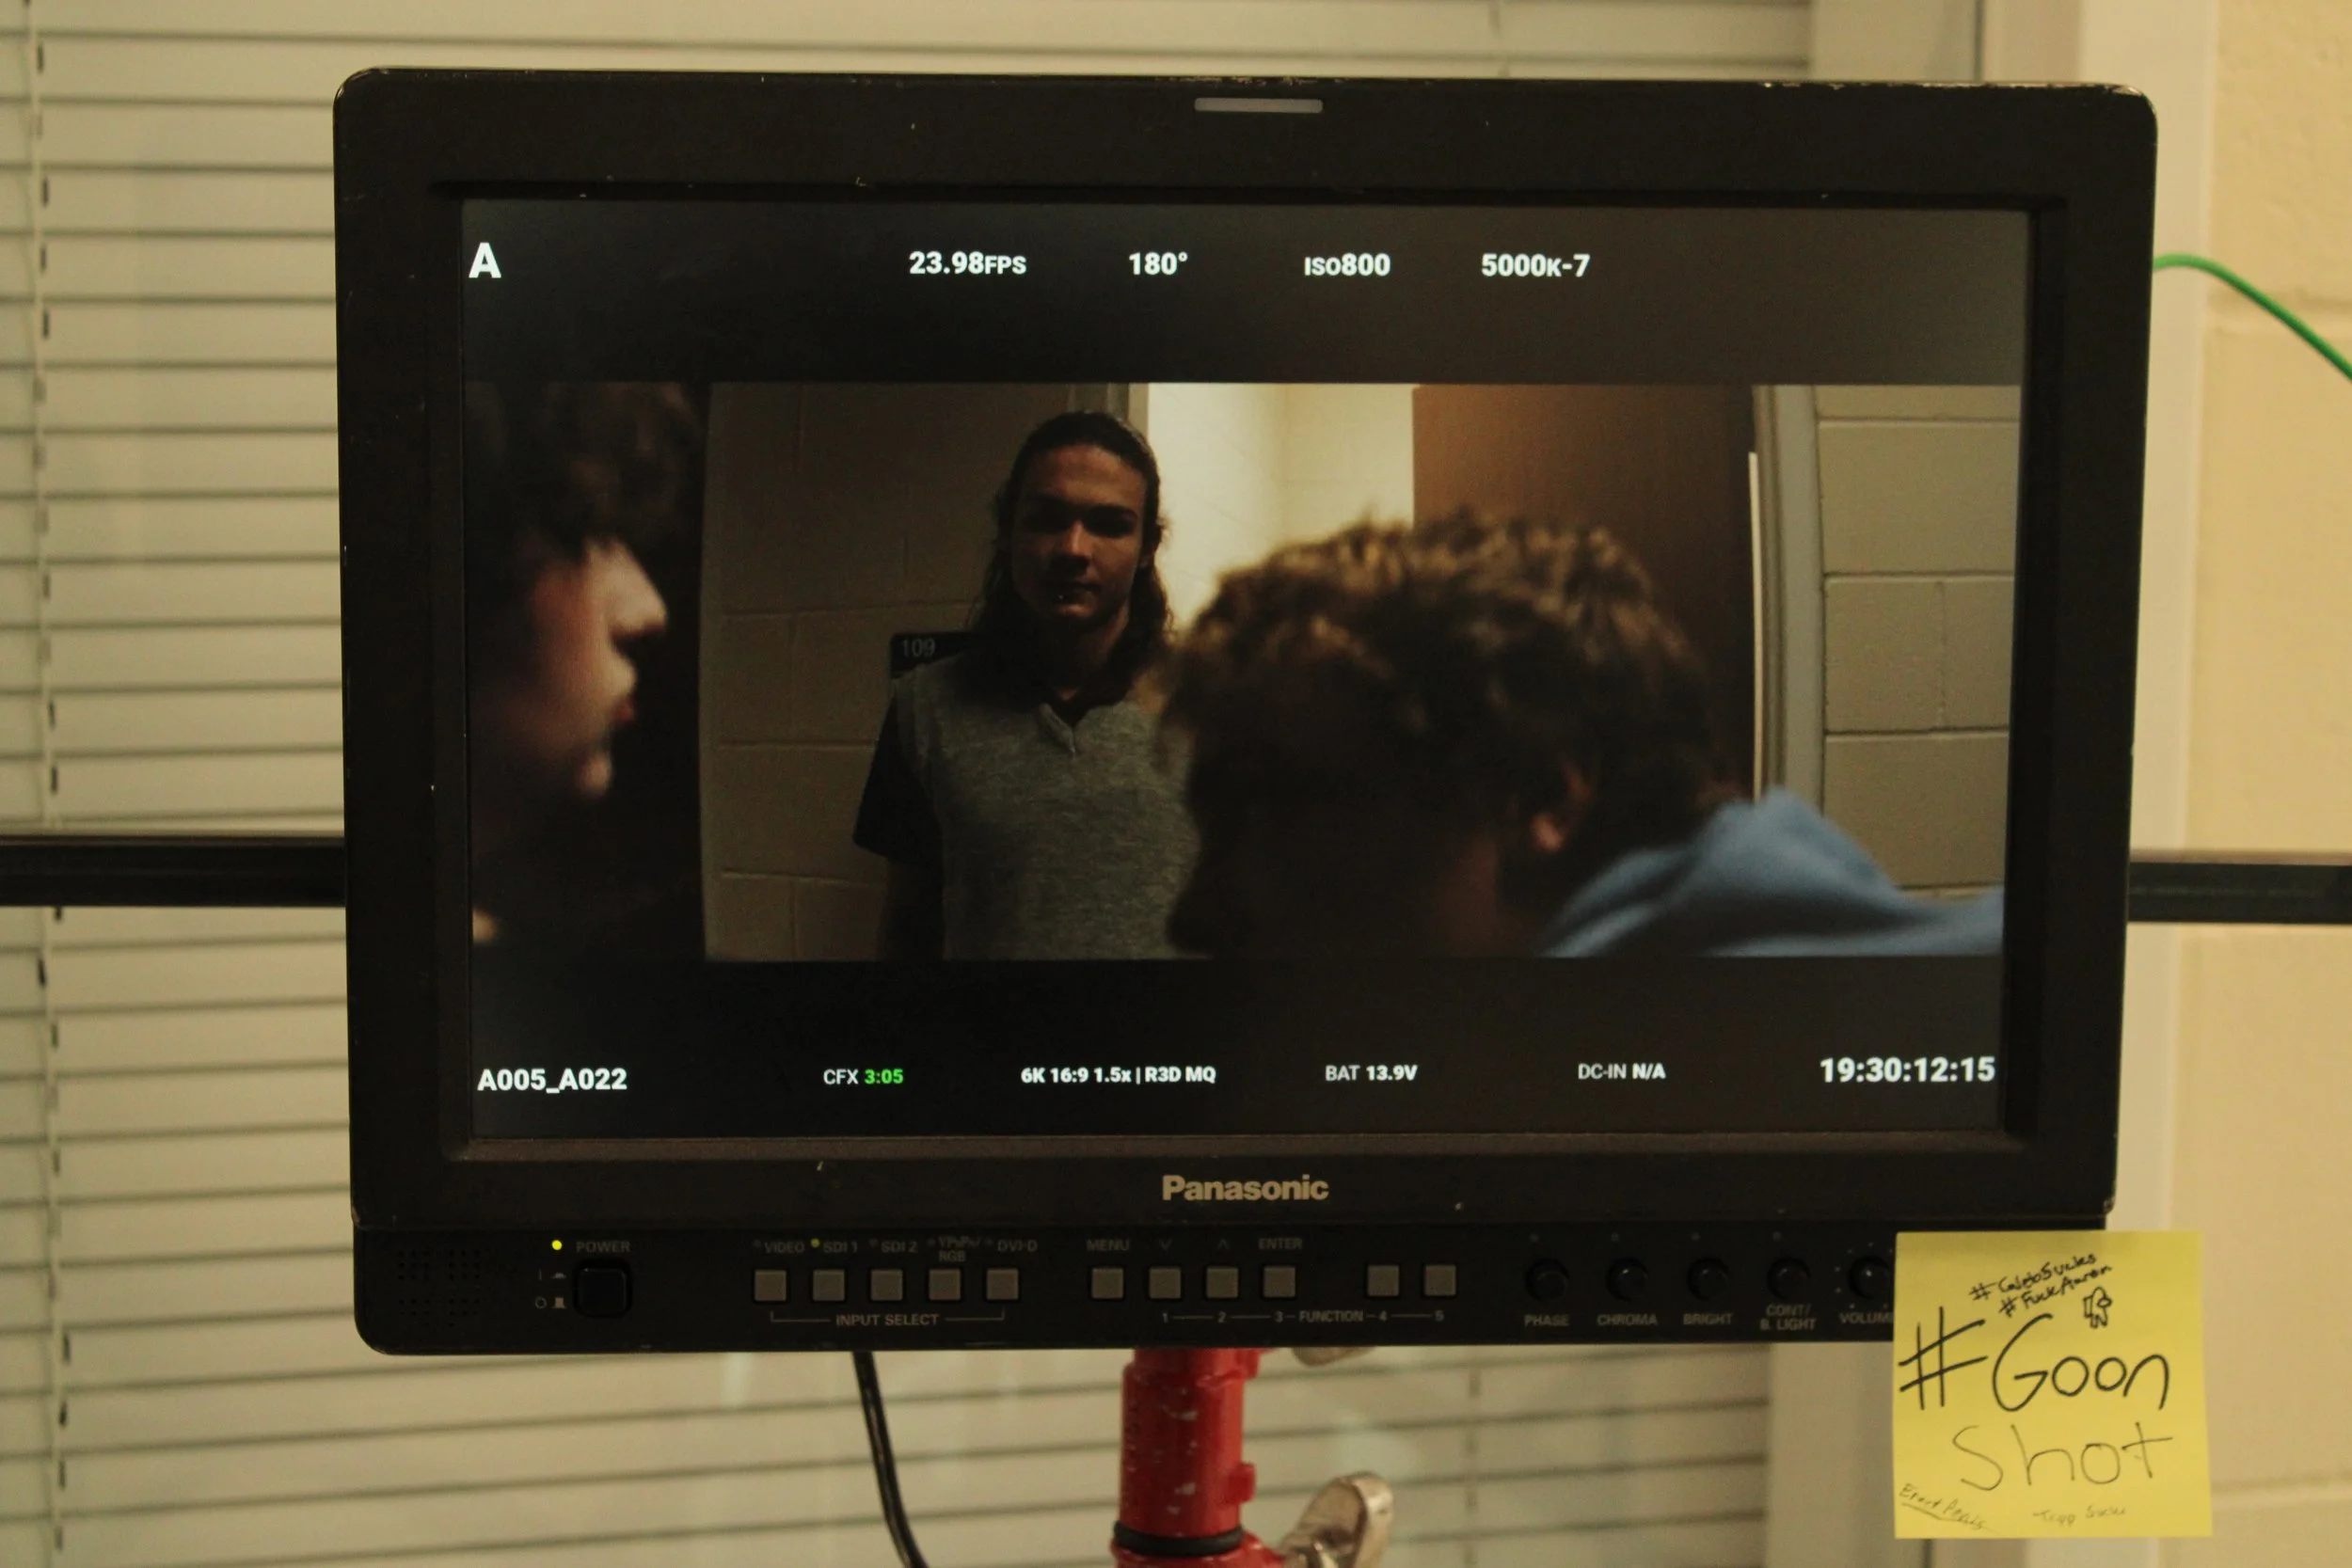
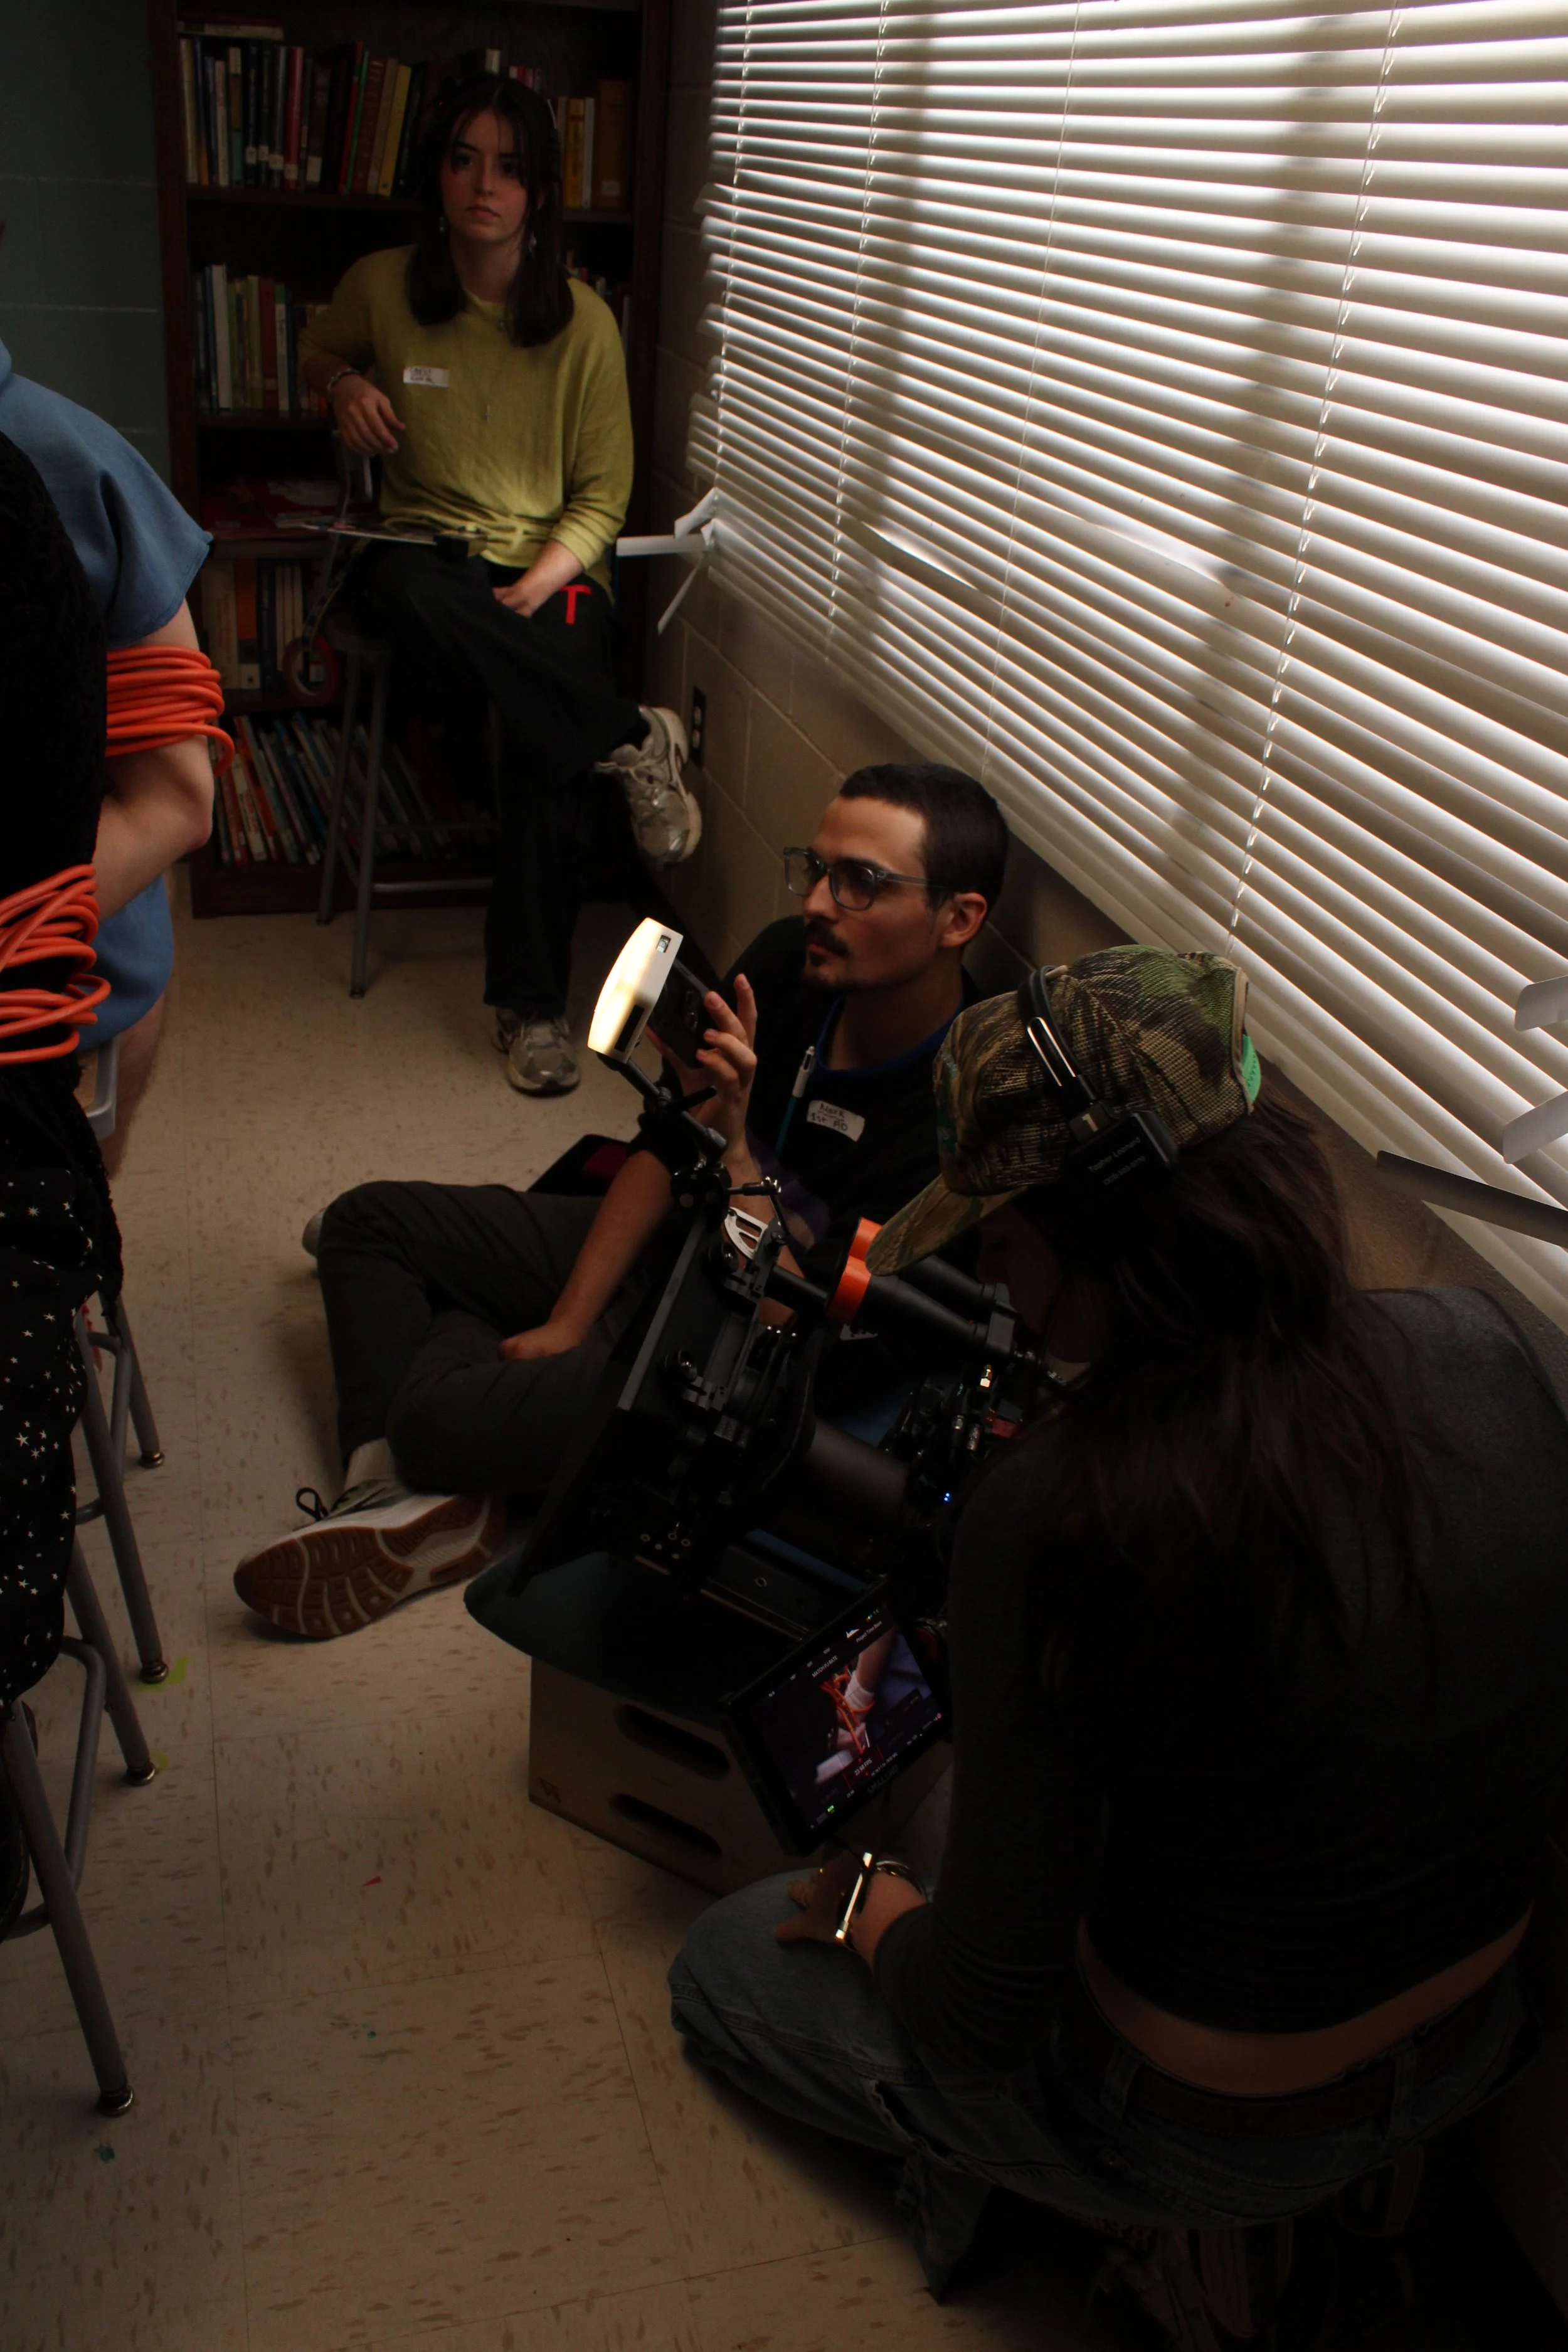
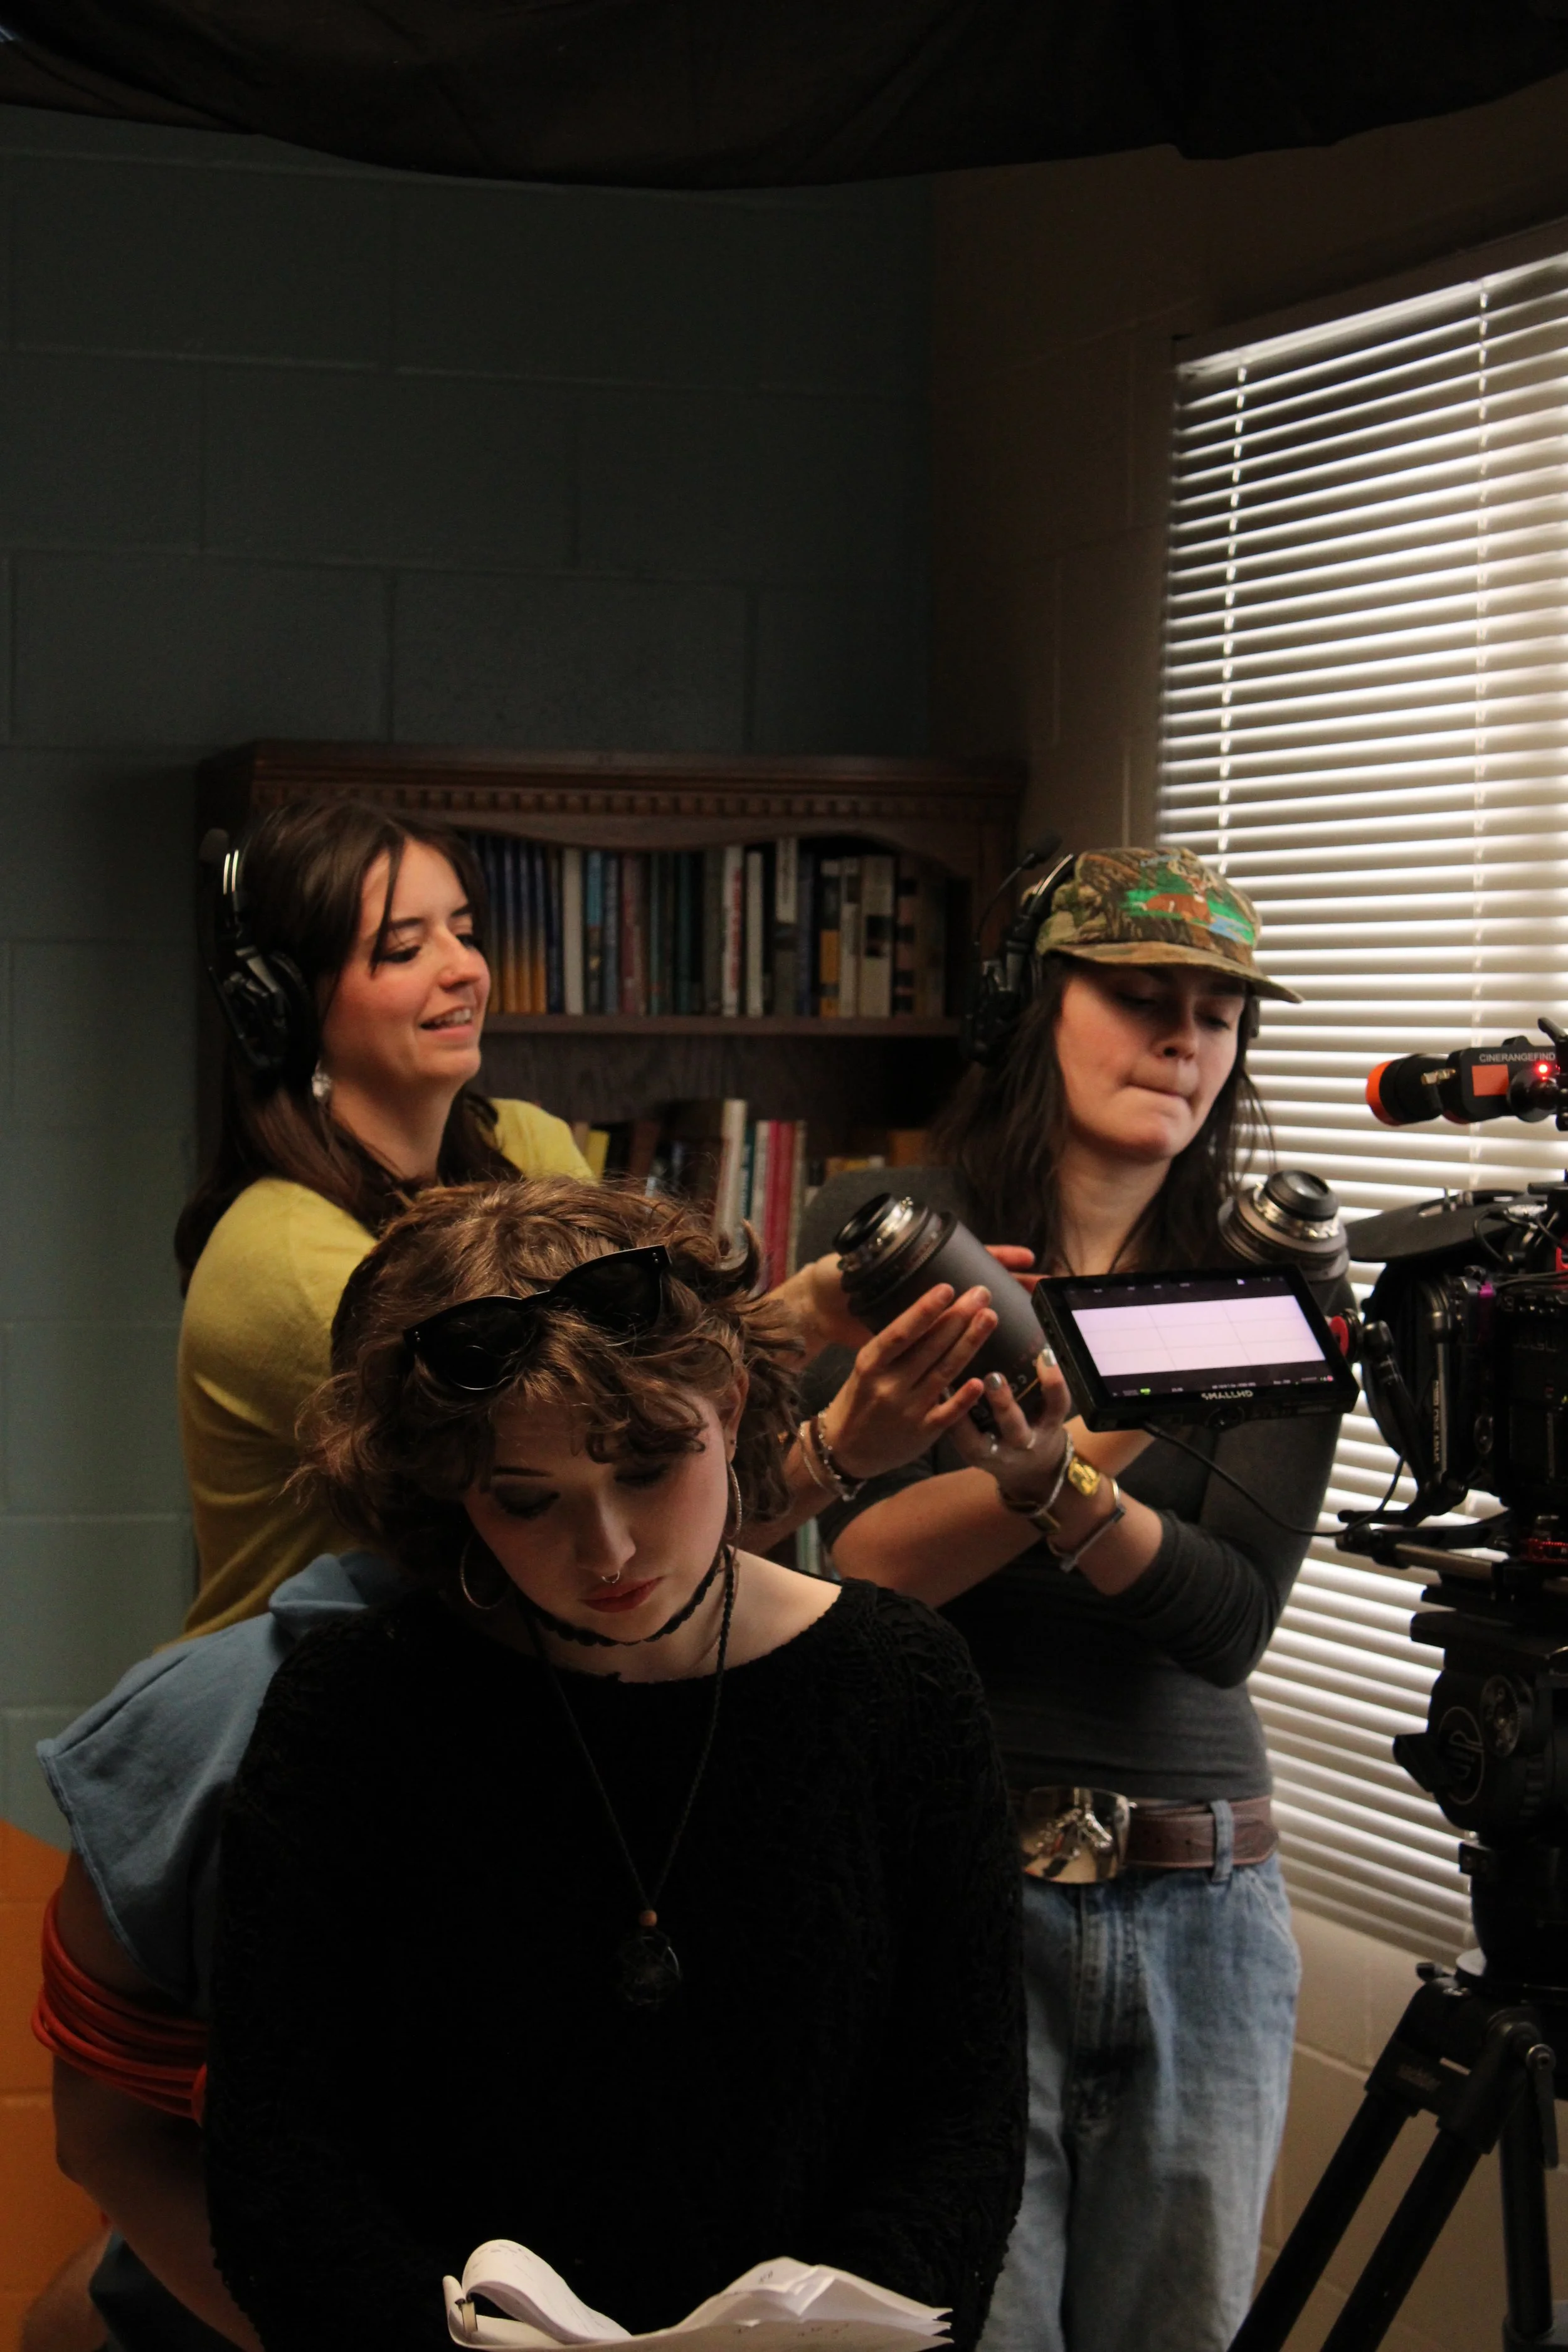
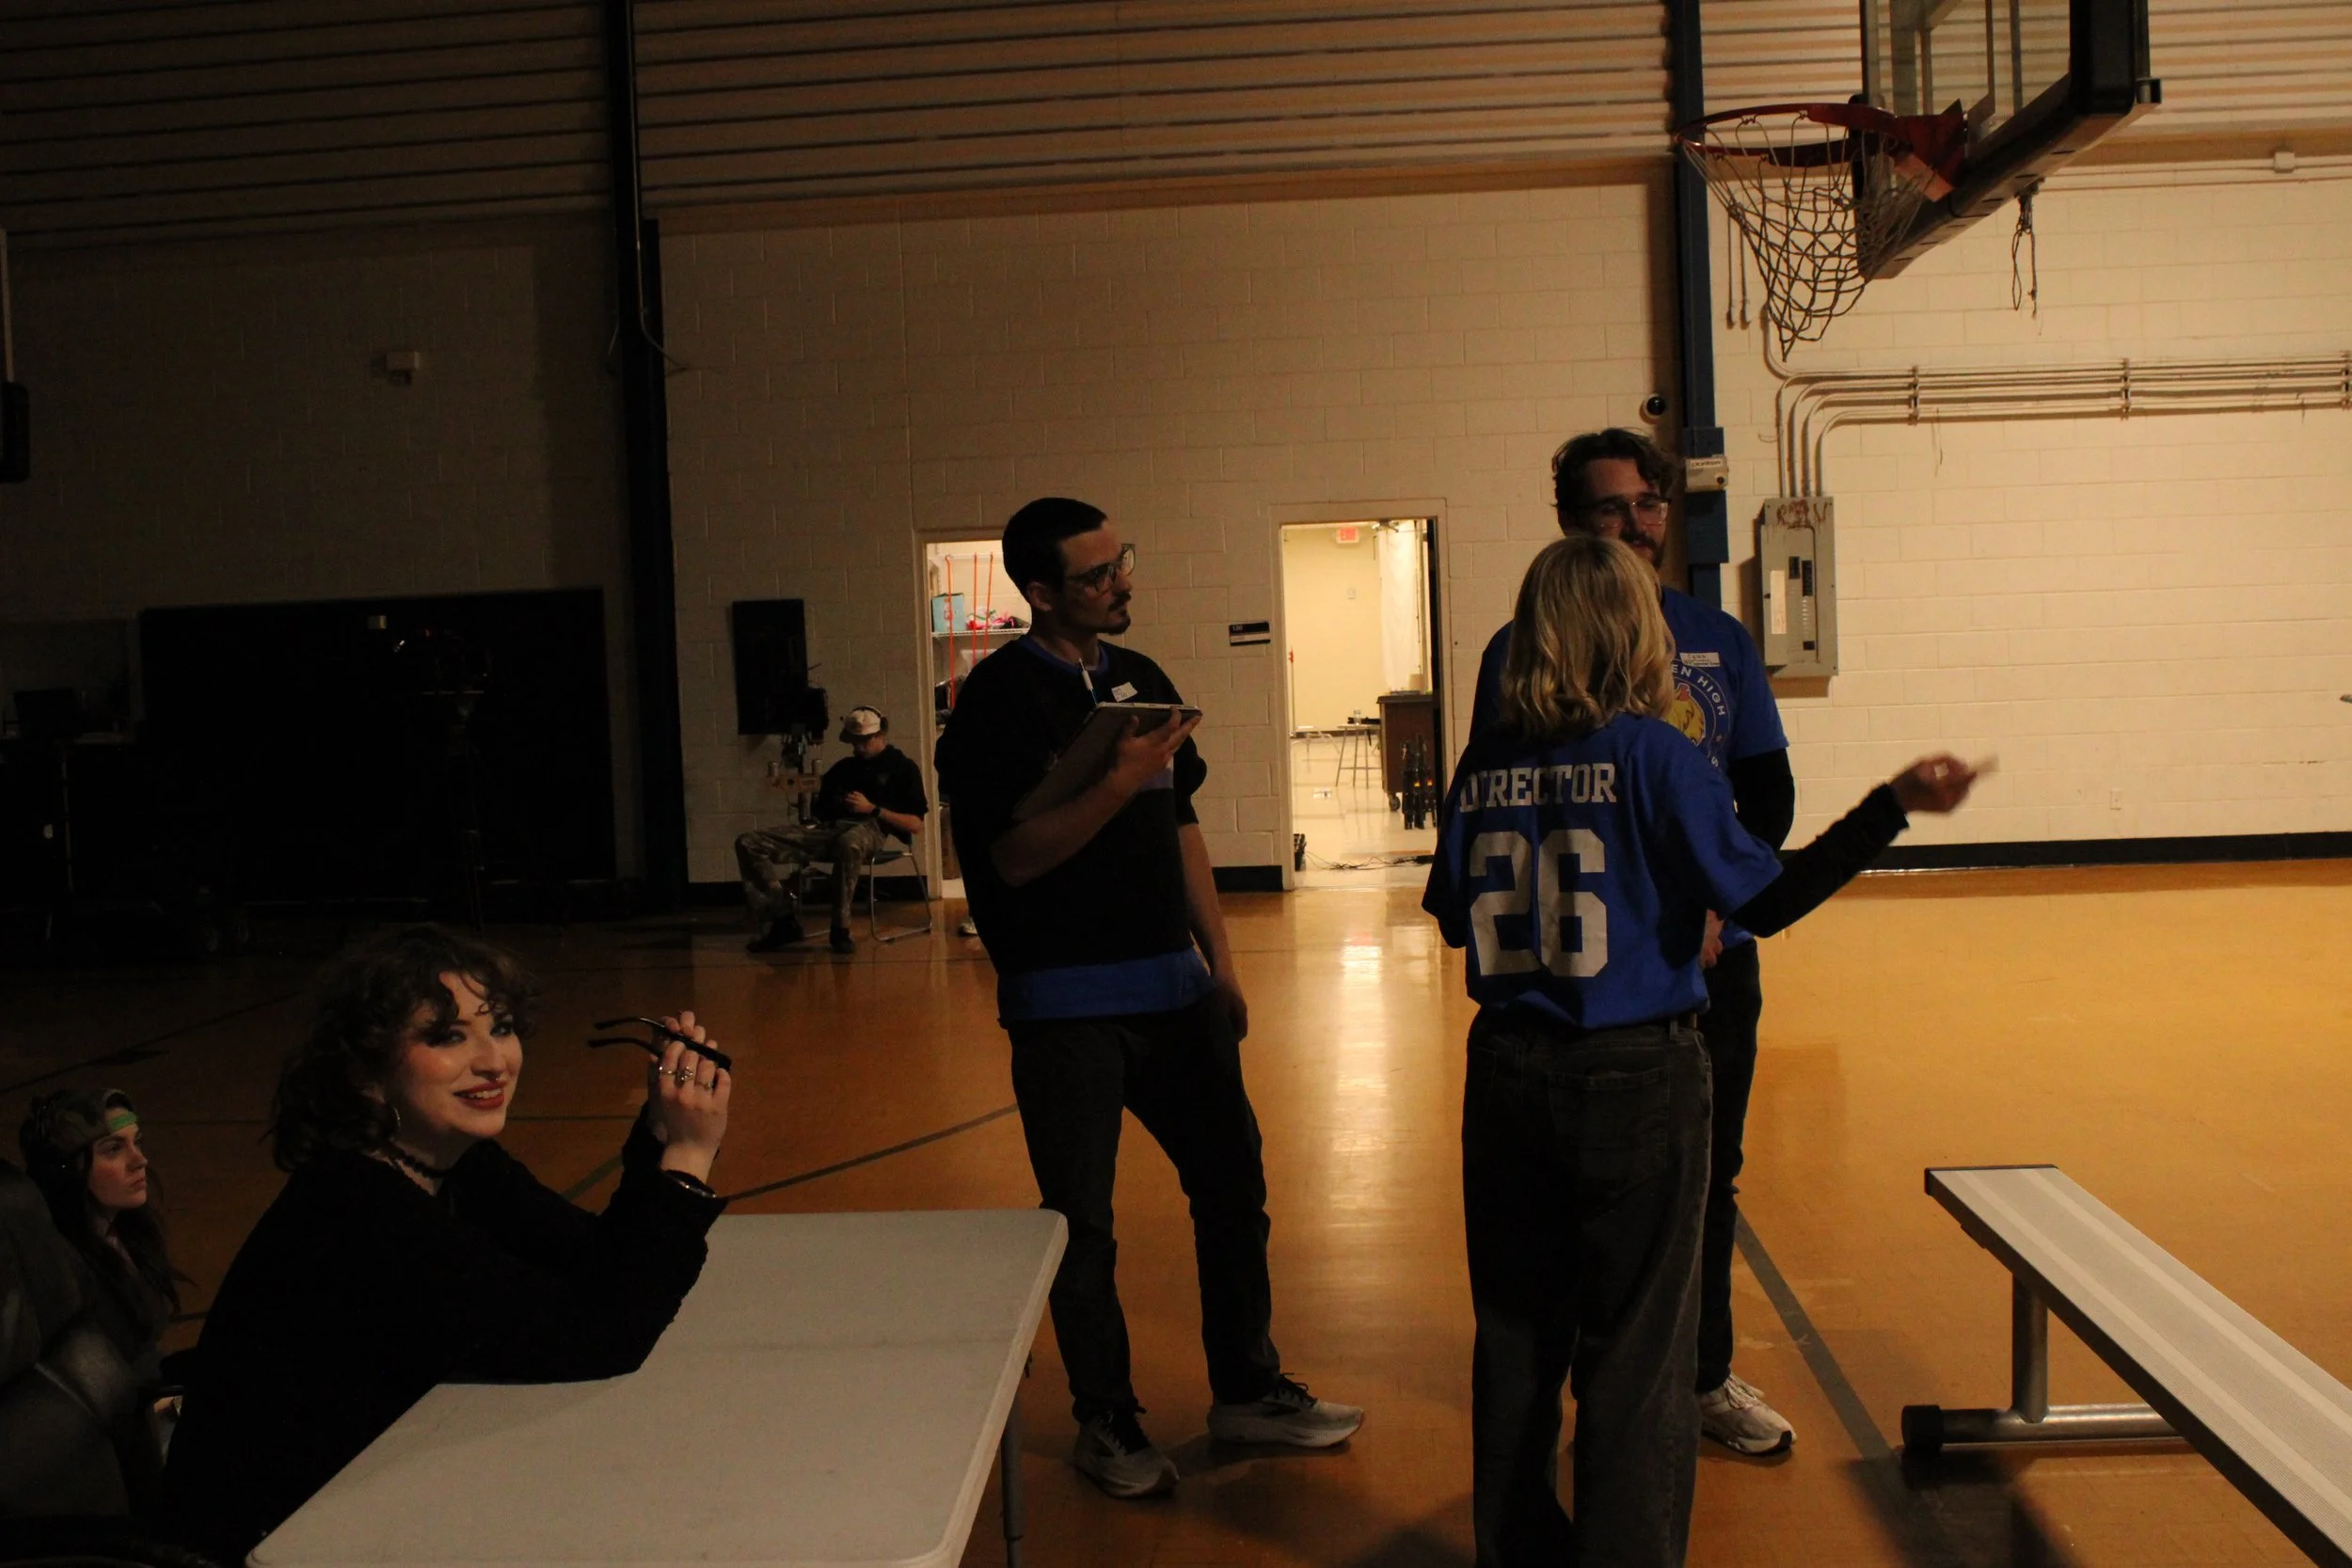
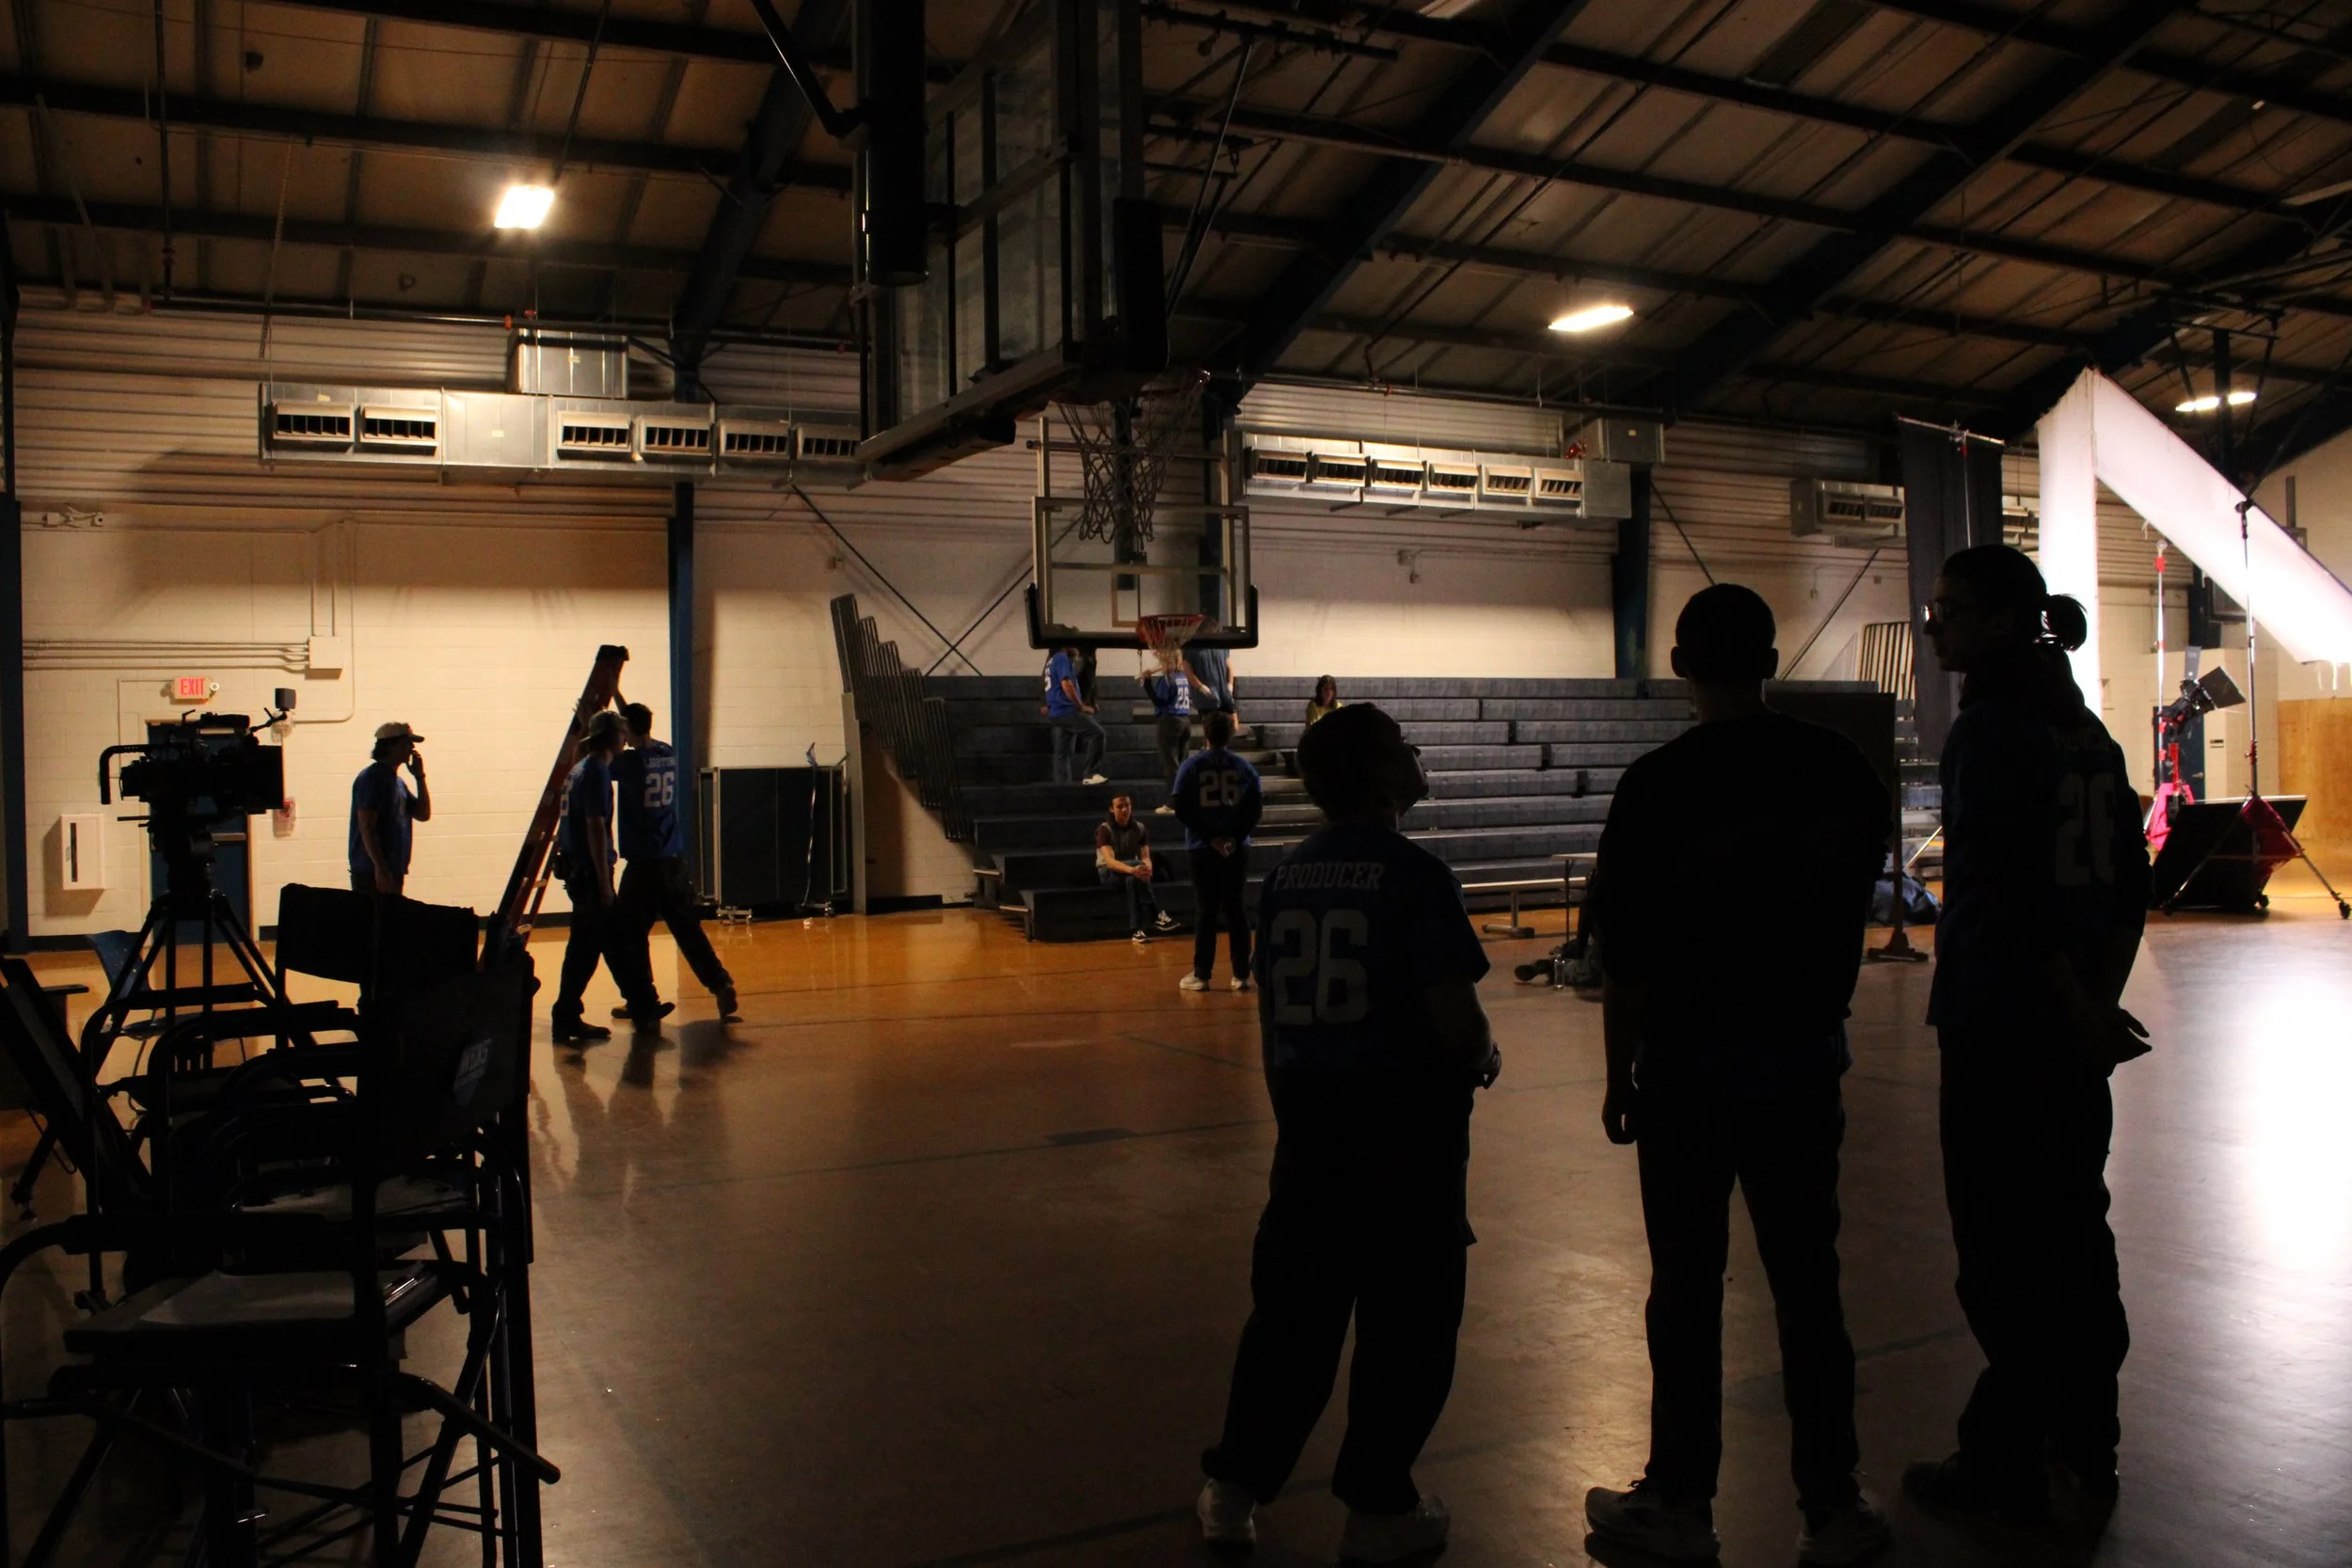
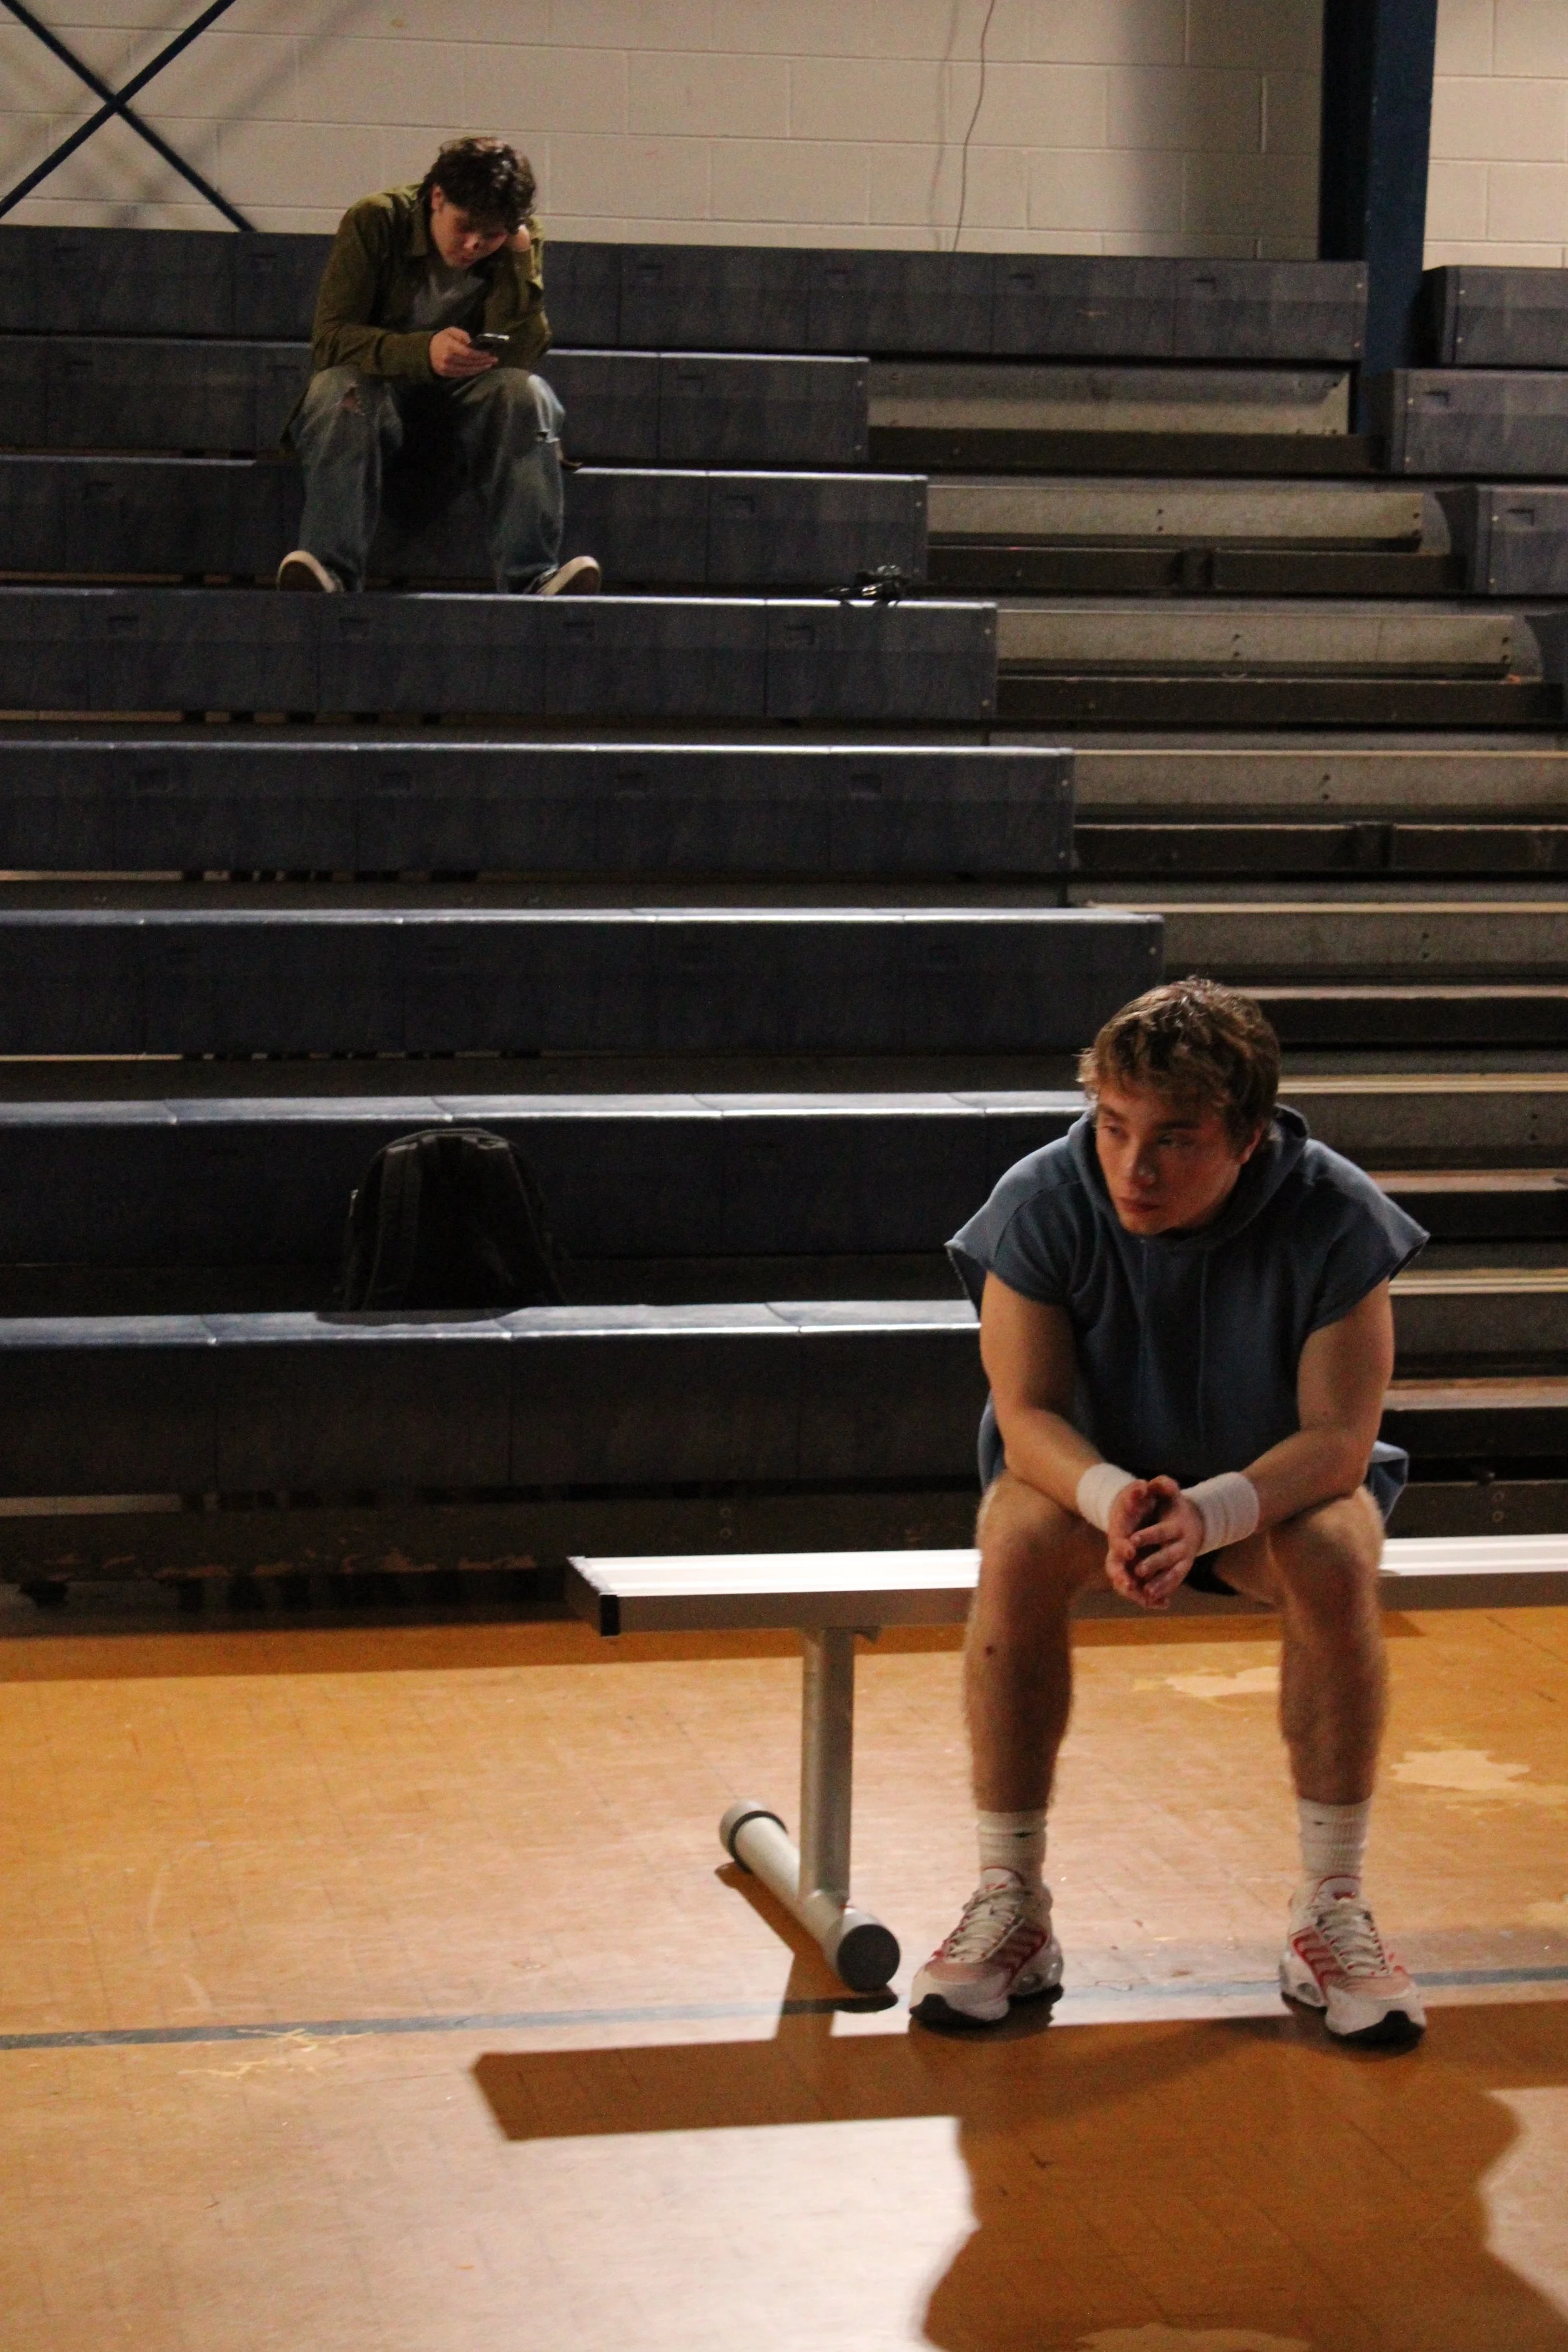
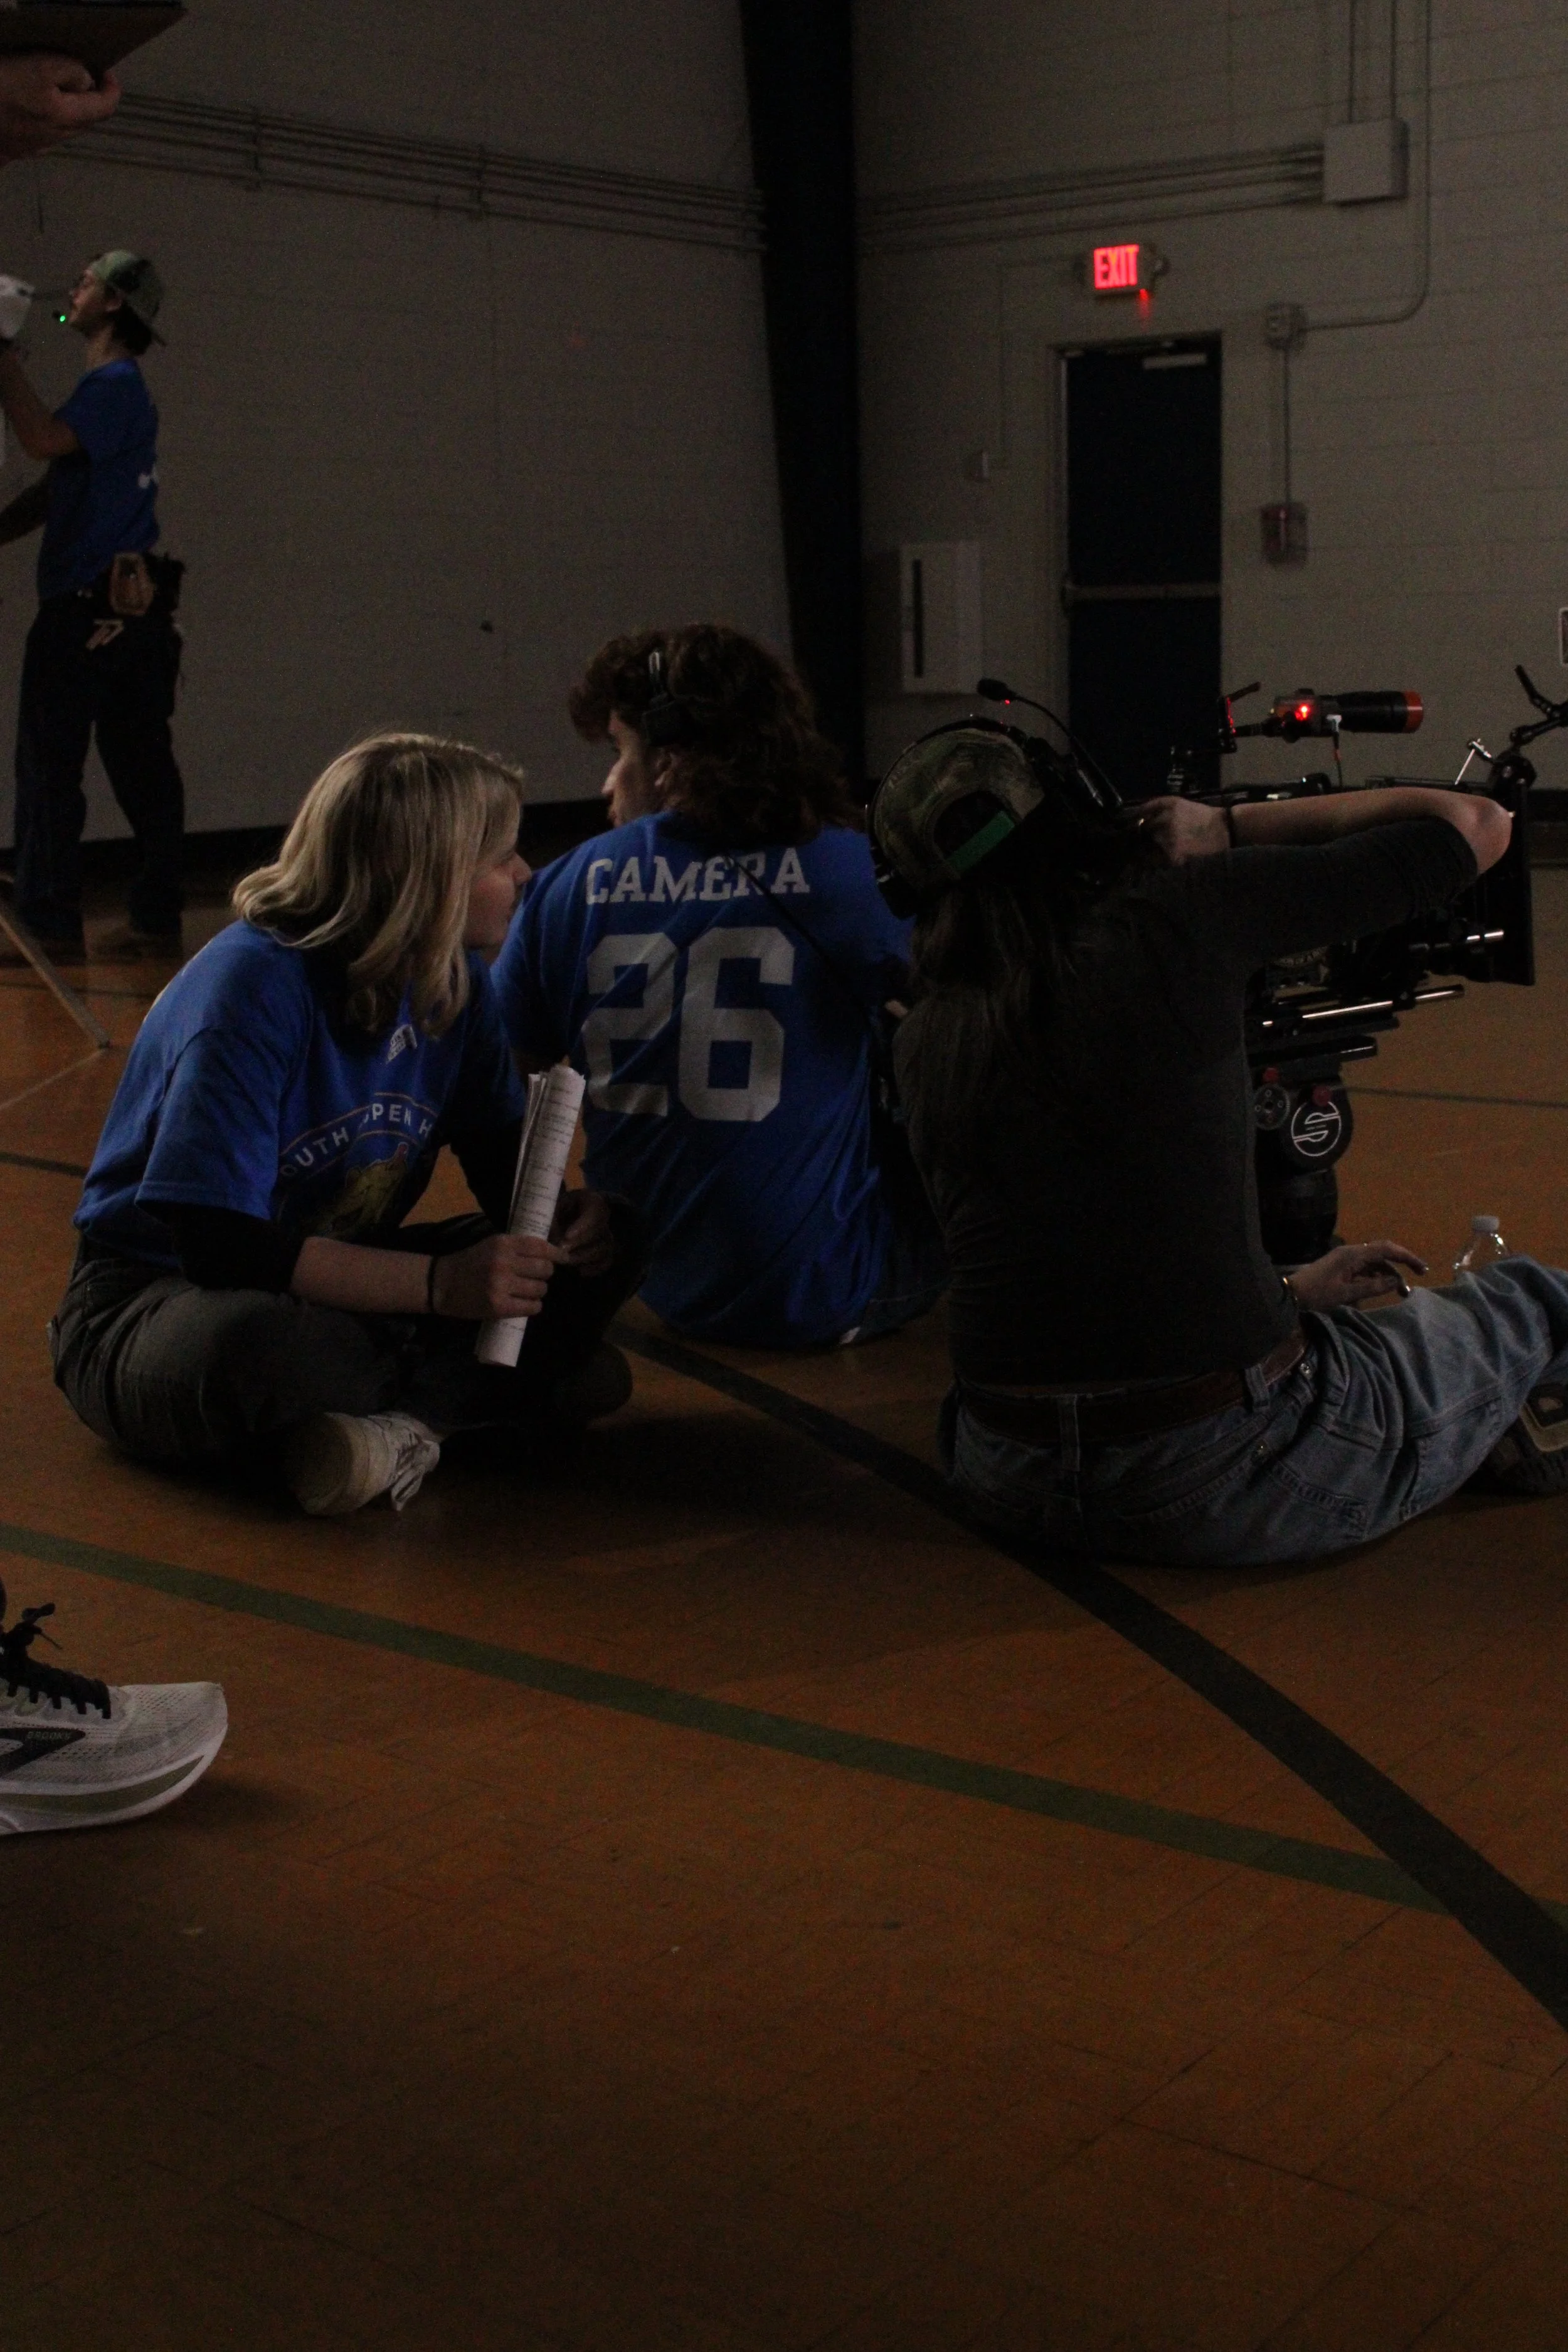
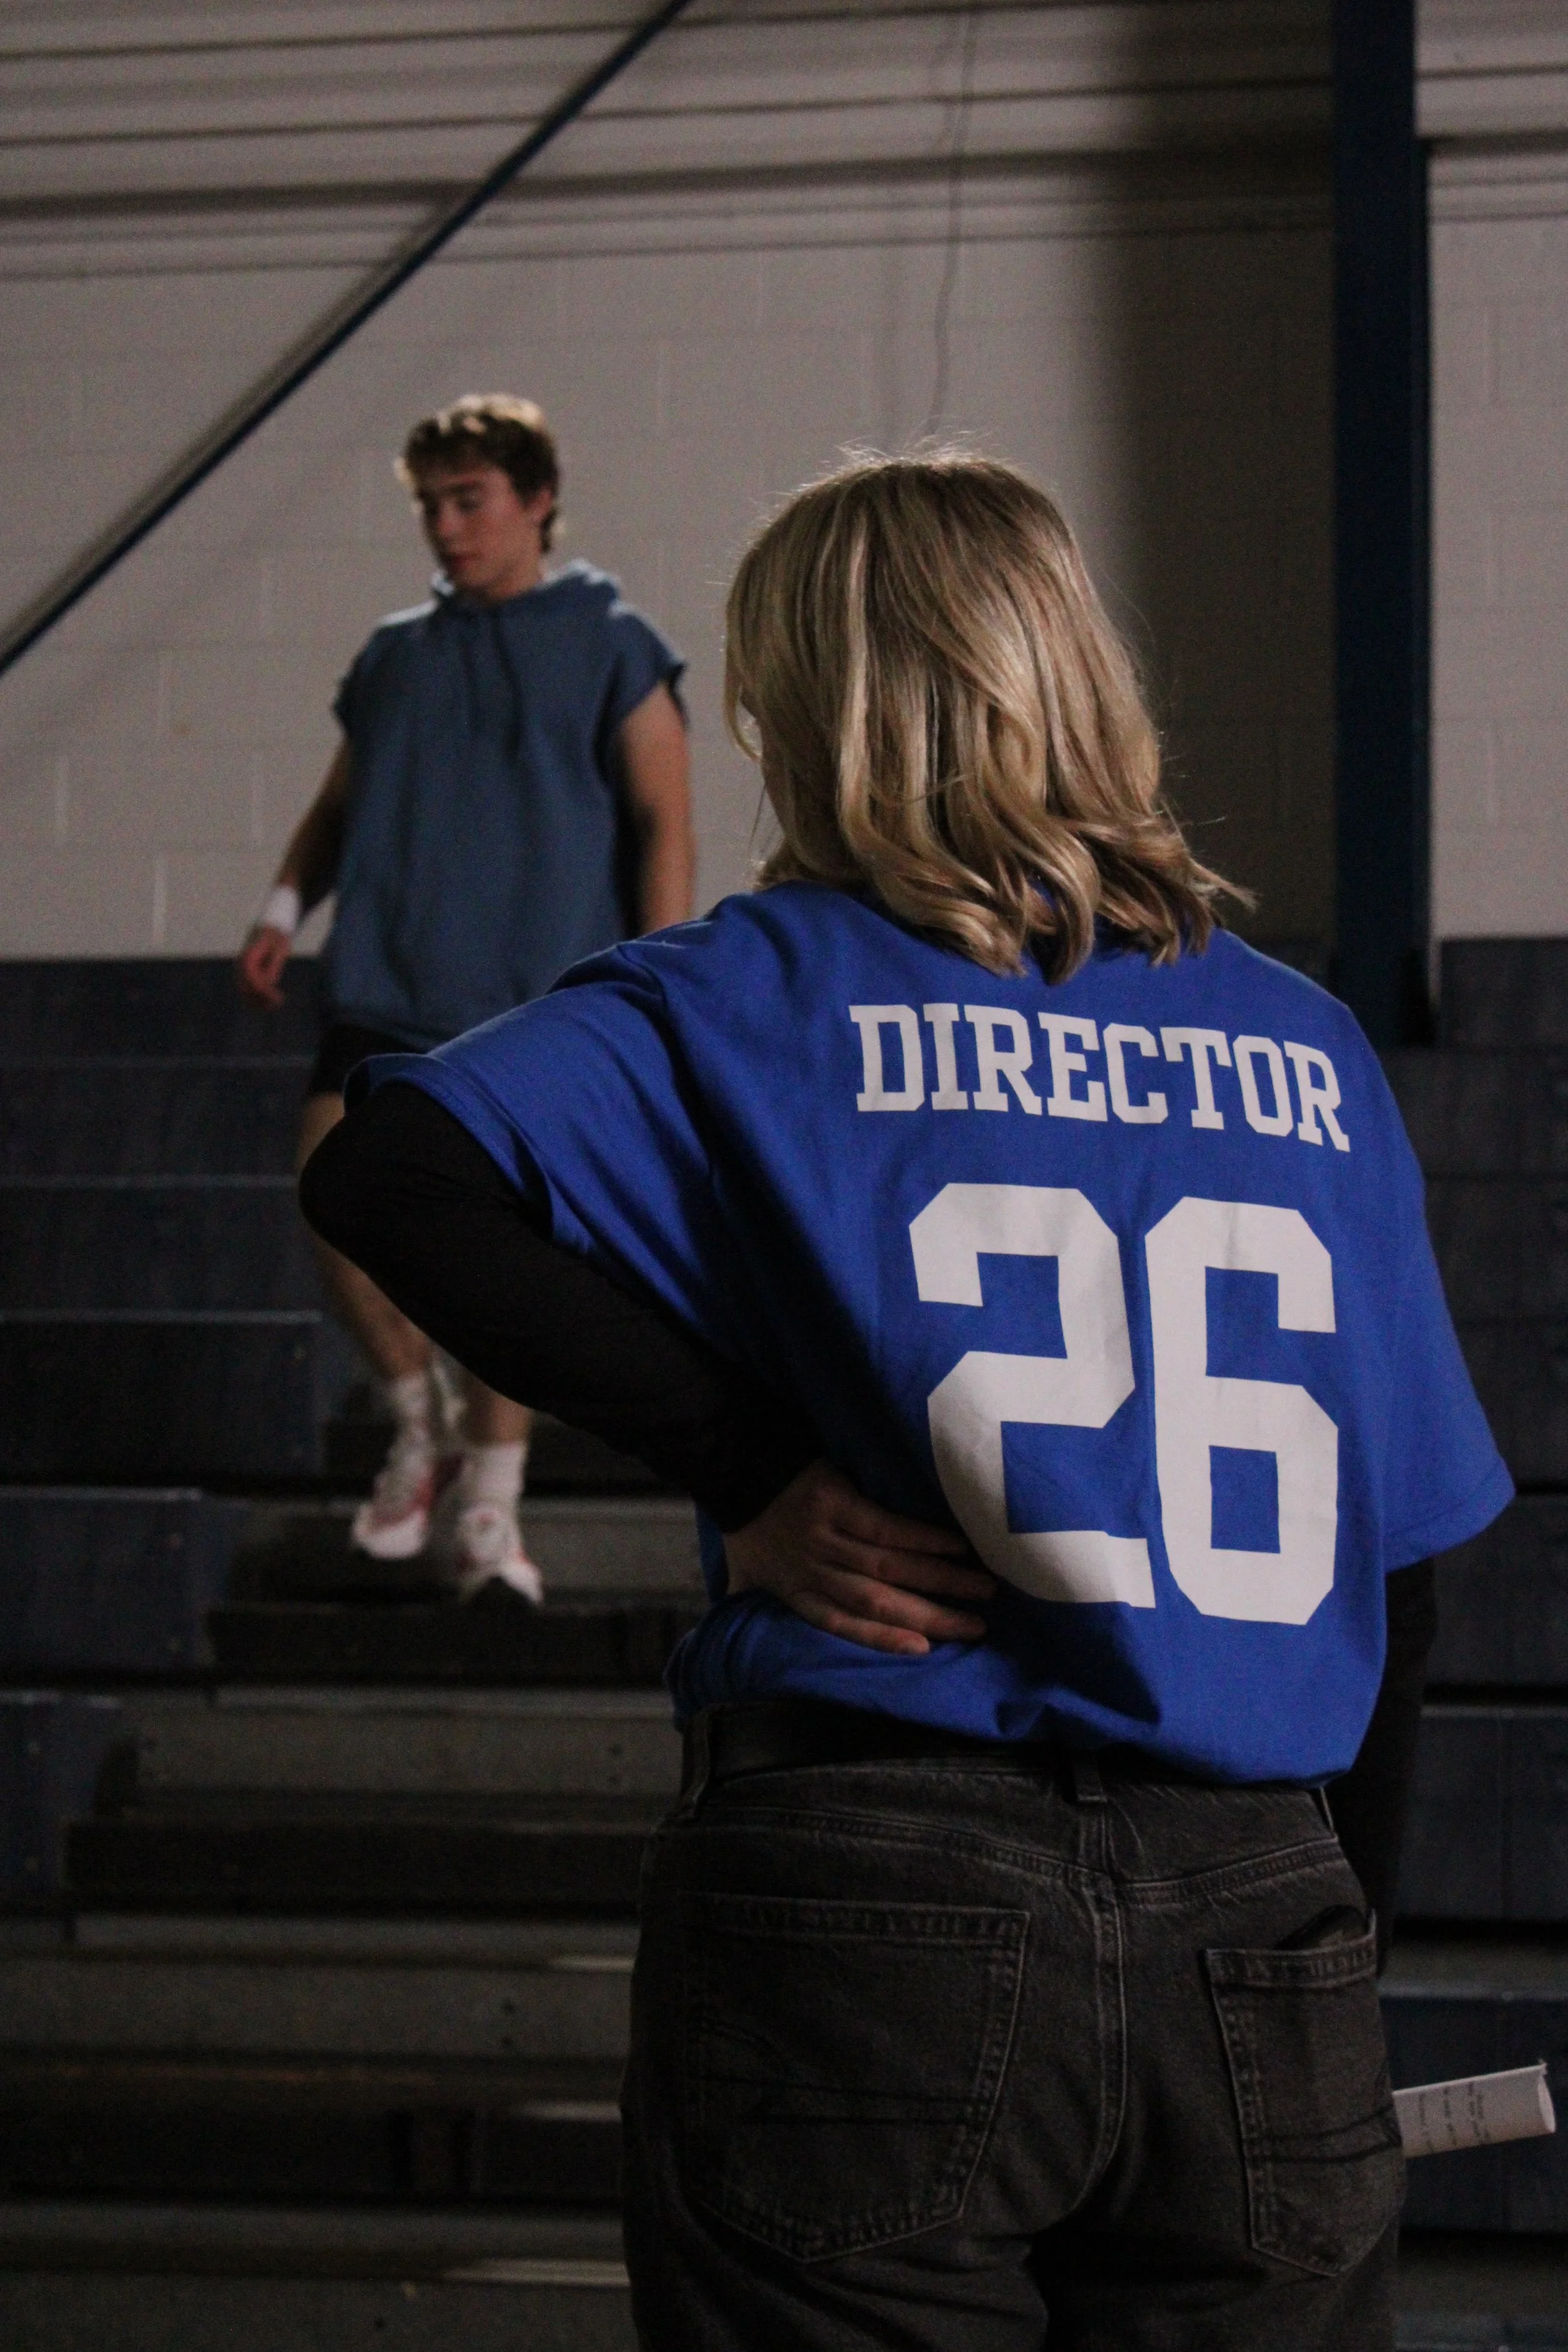
January 16th - 19th, 2026 - Production
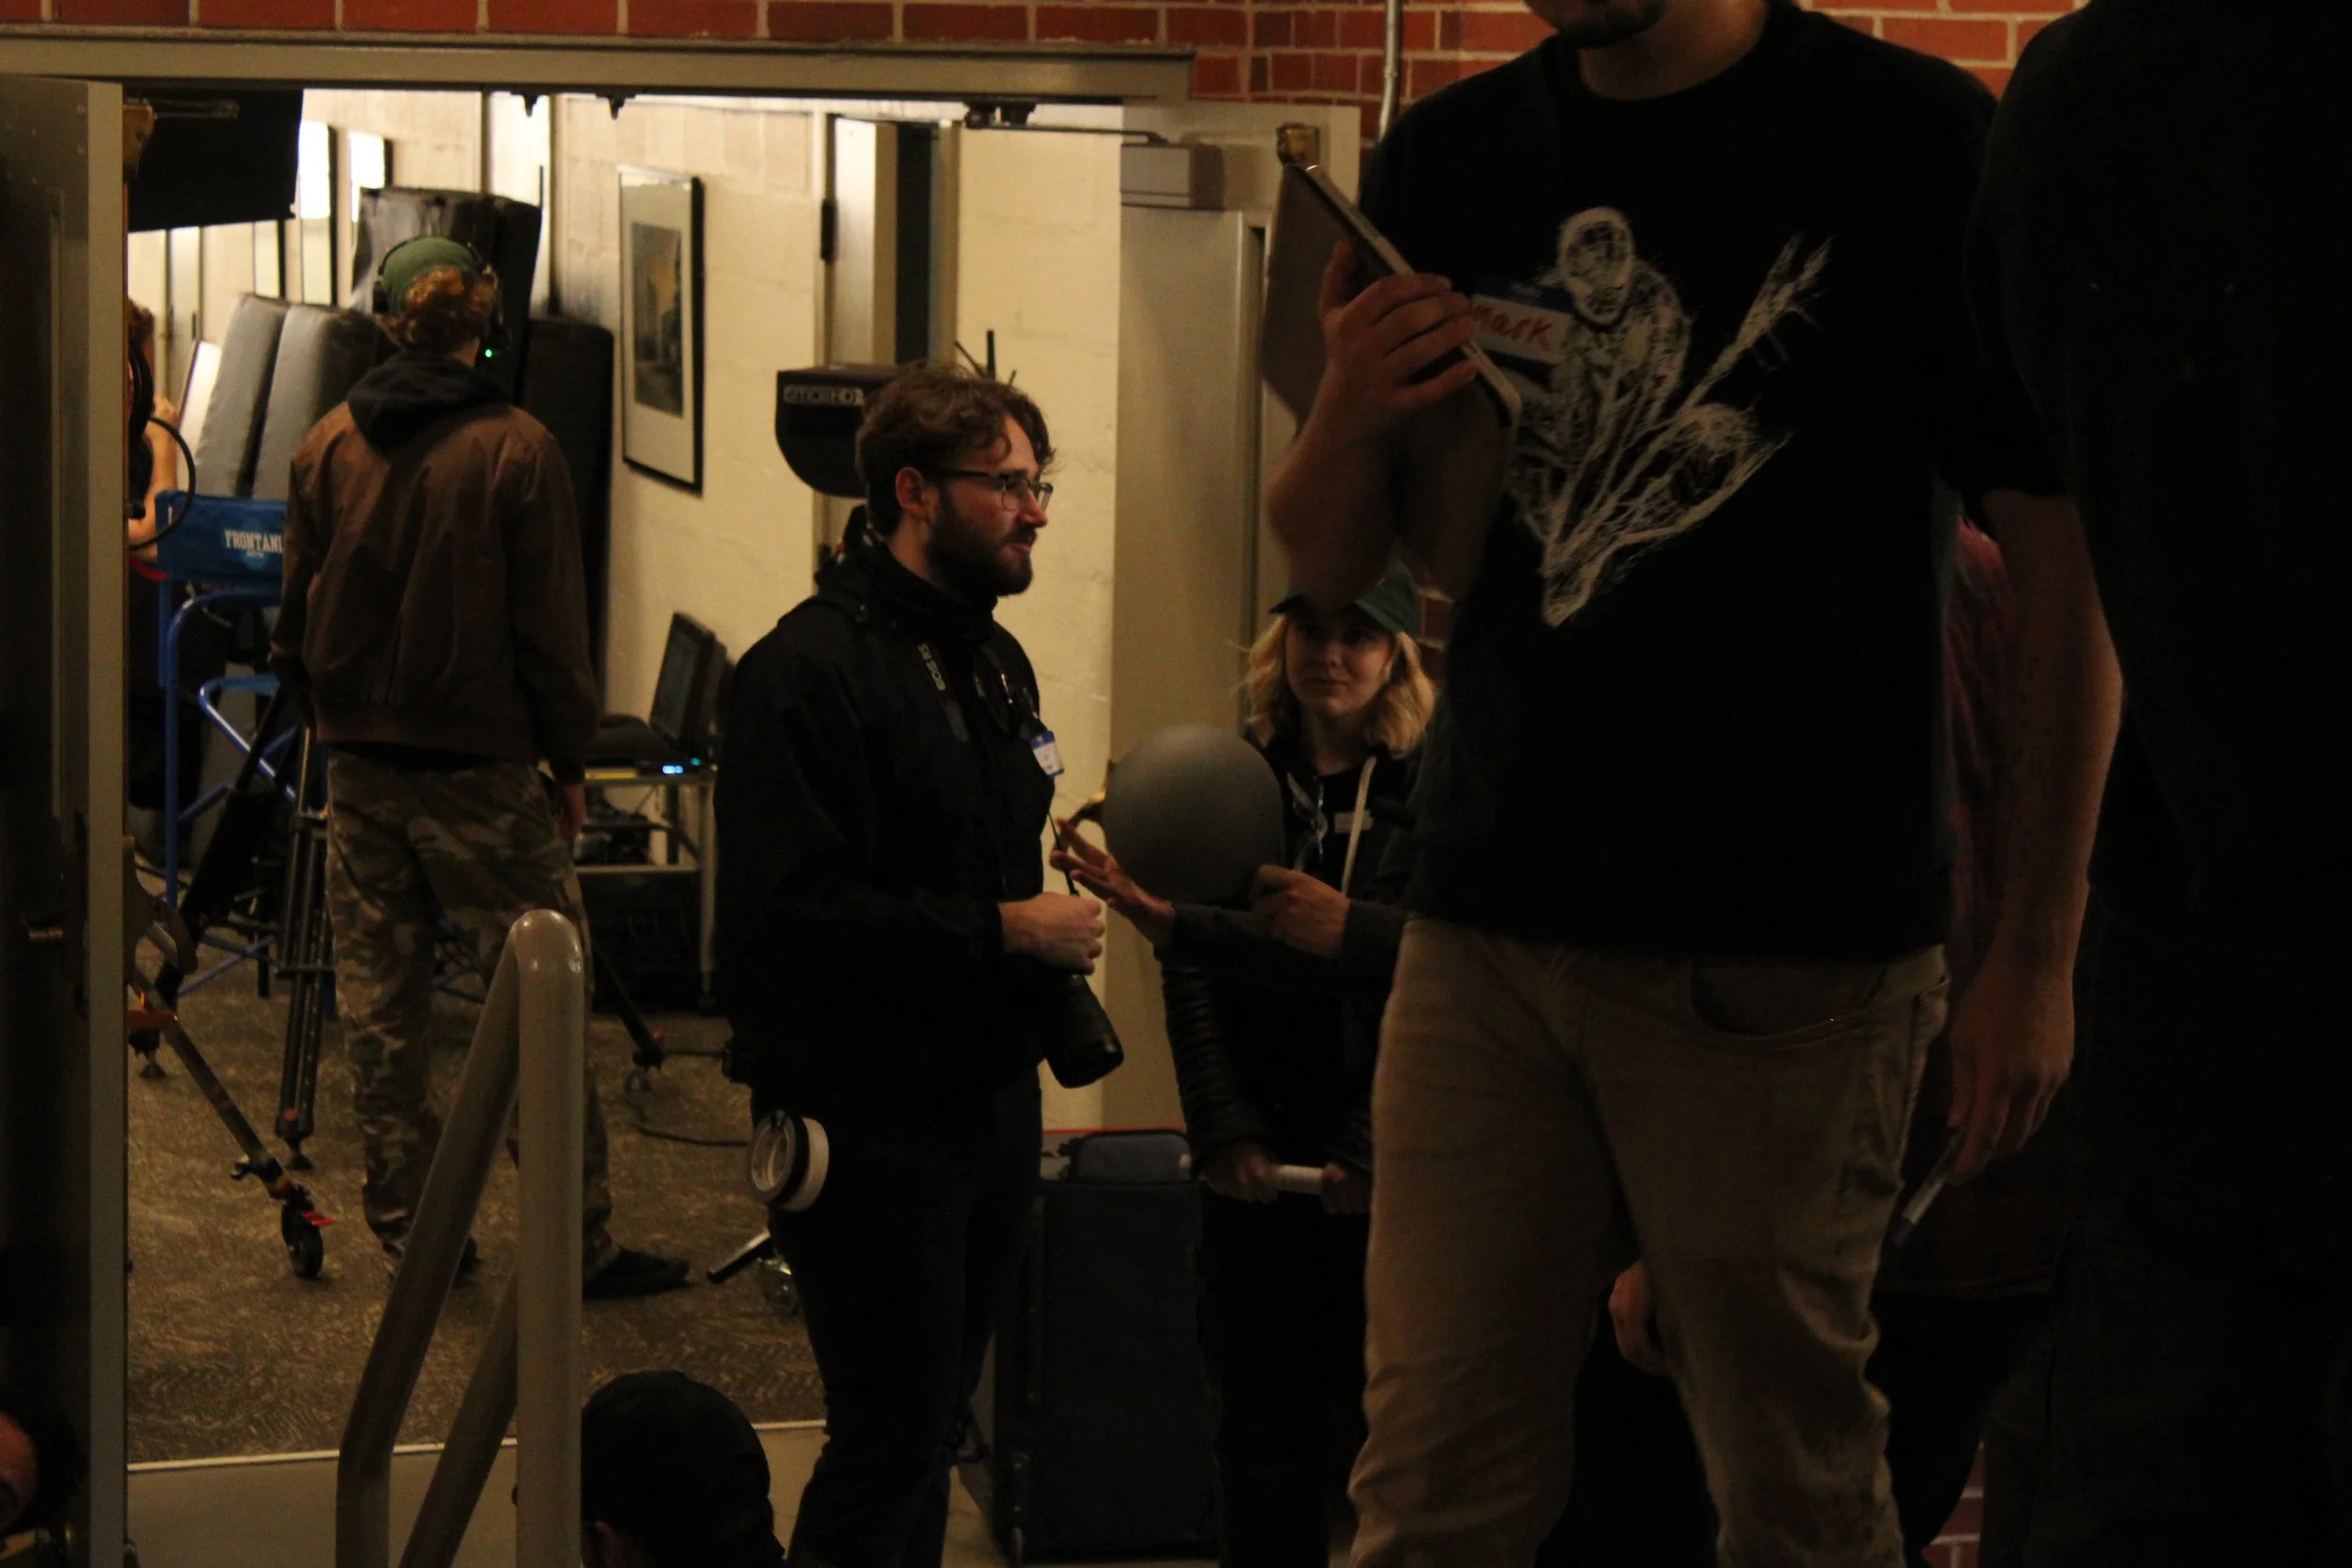
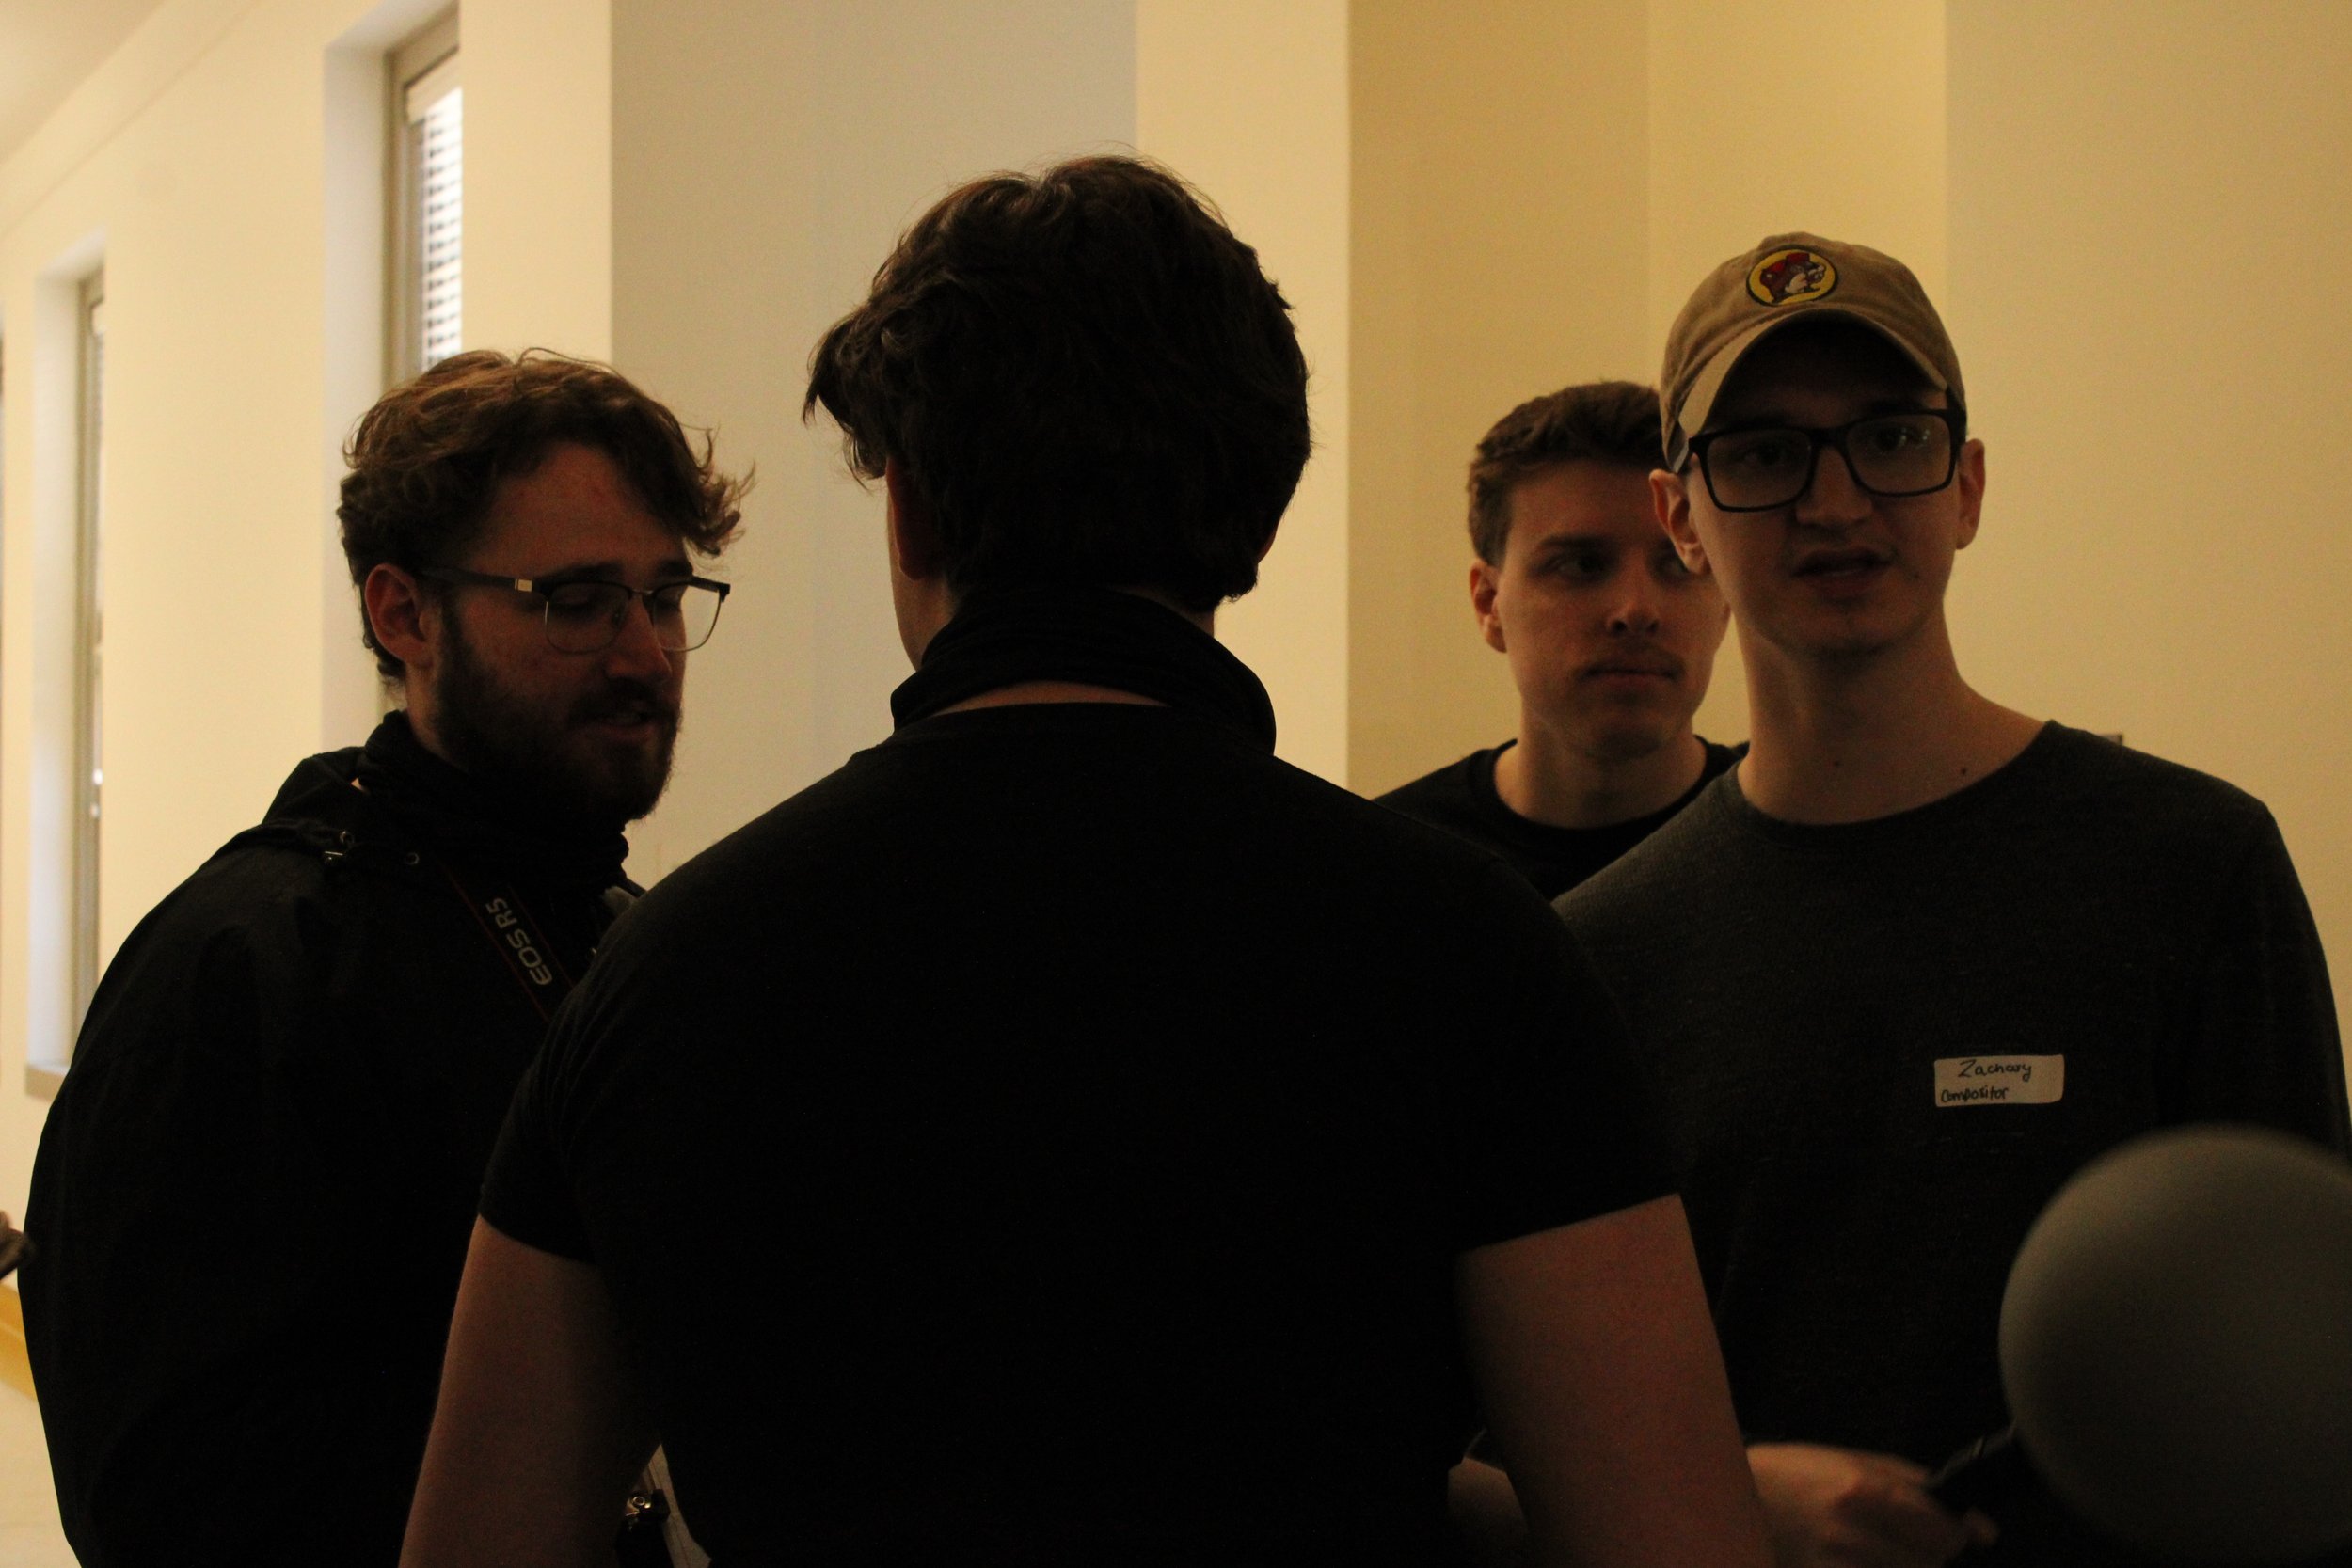
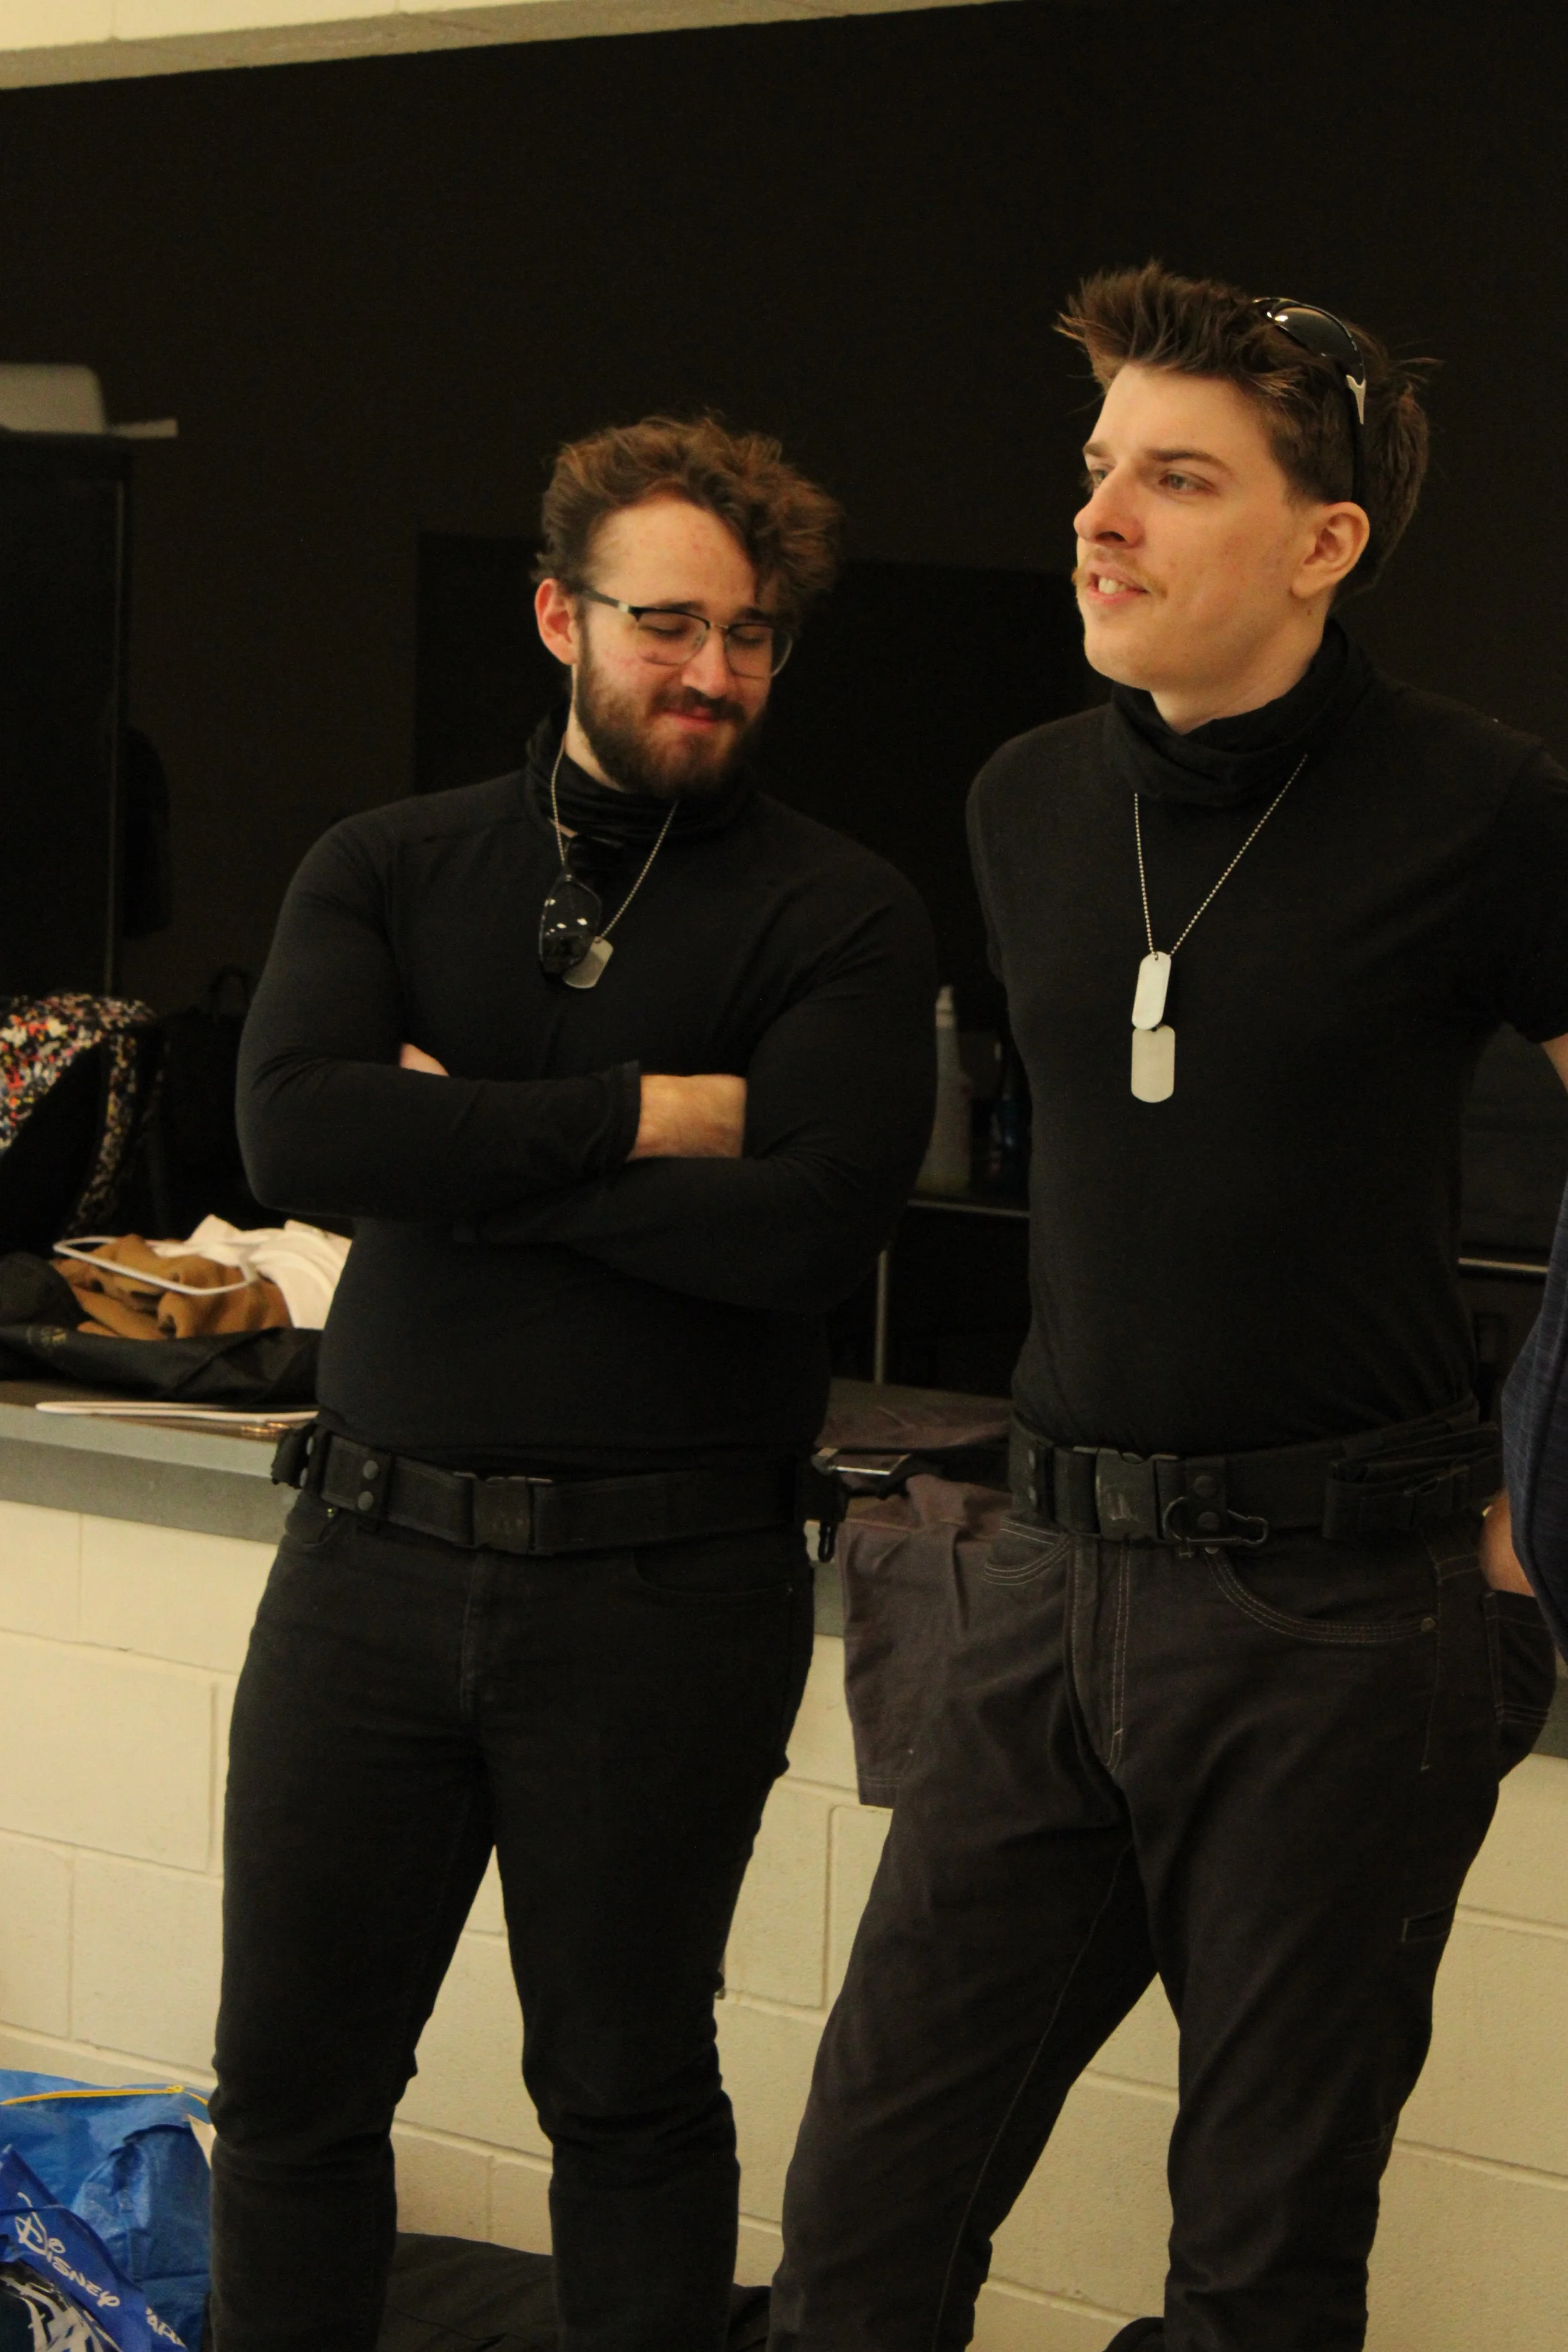
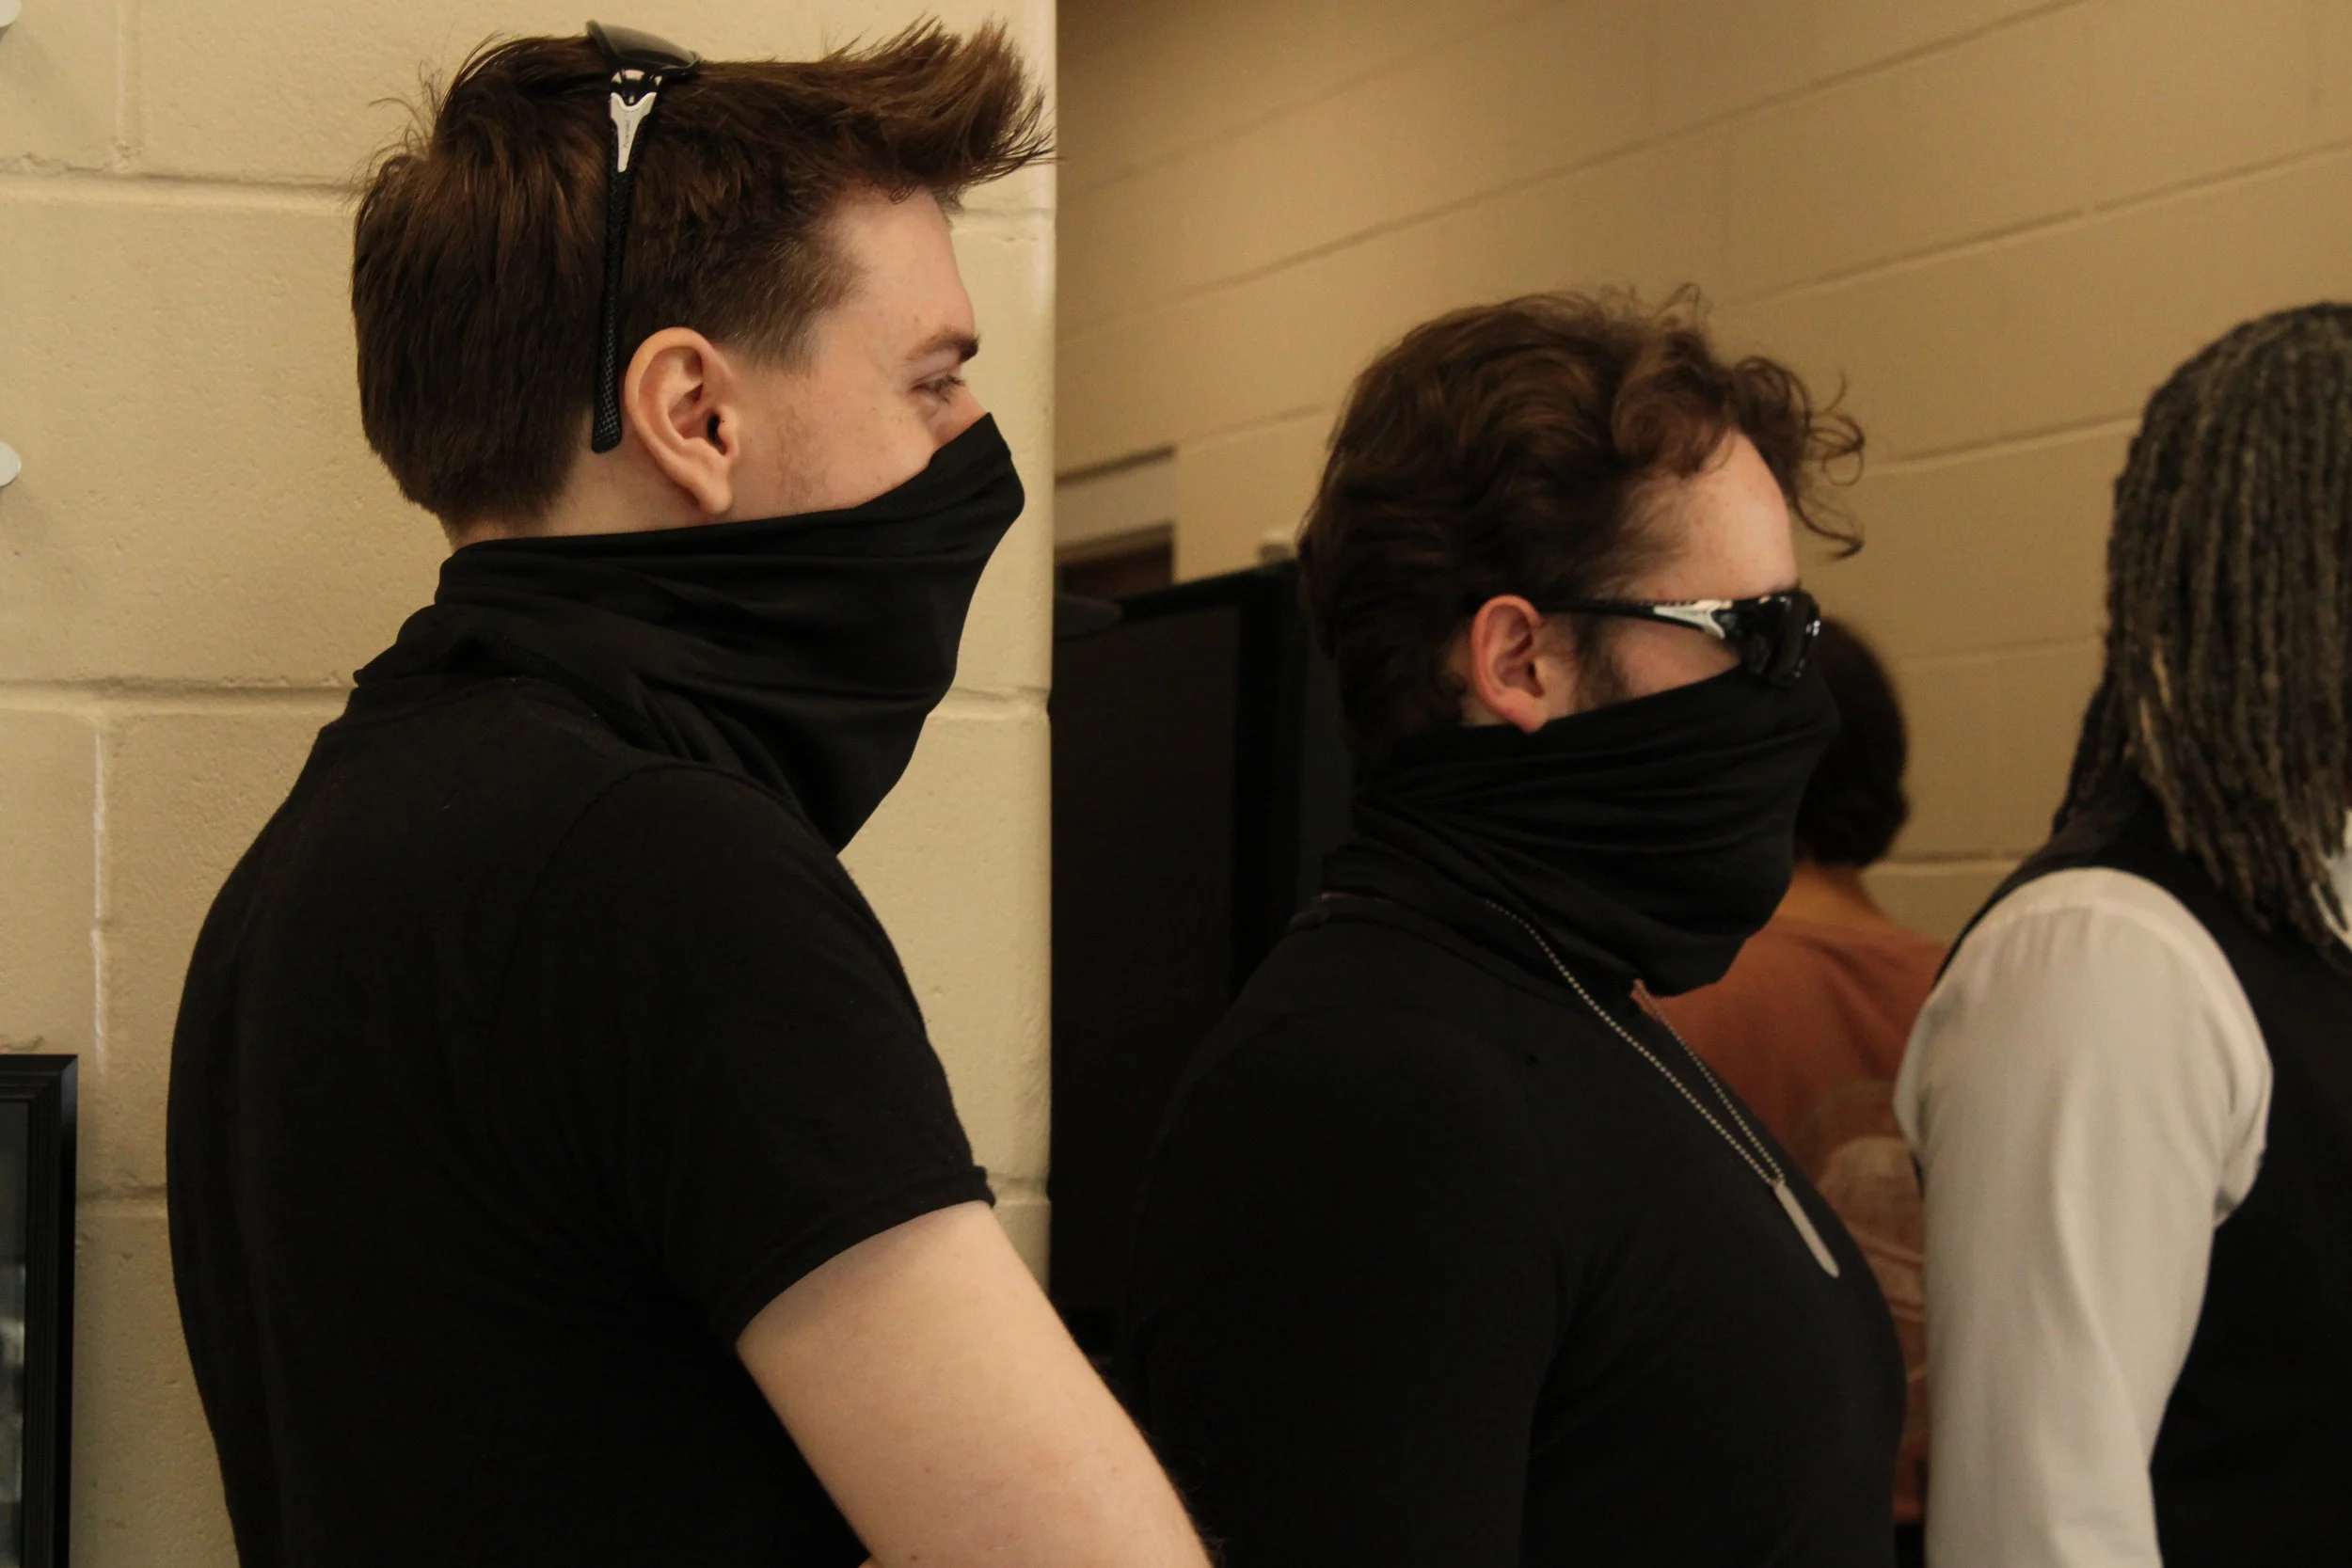
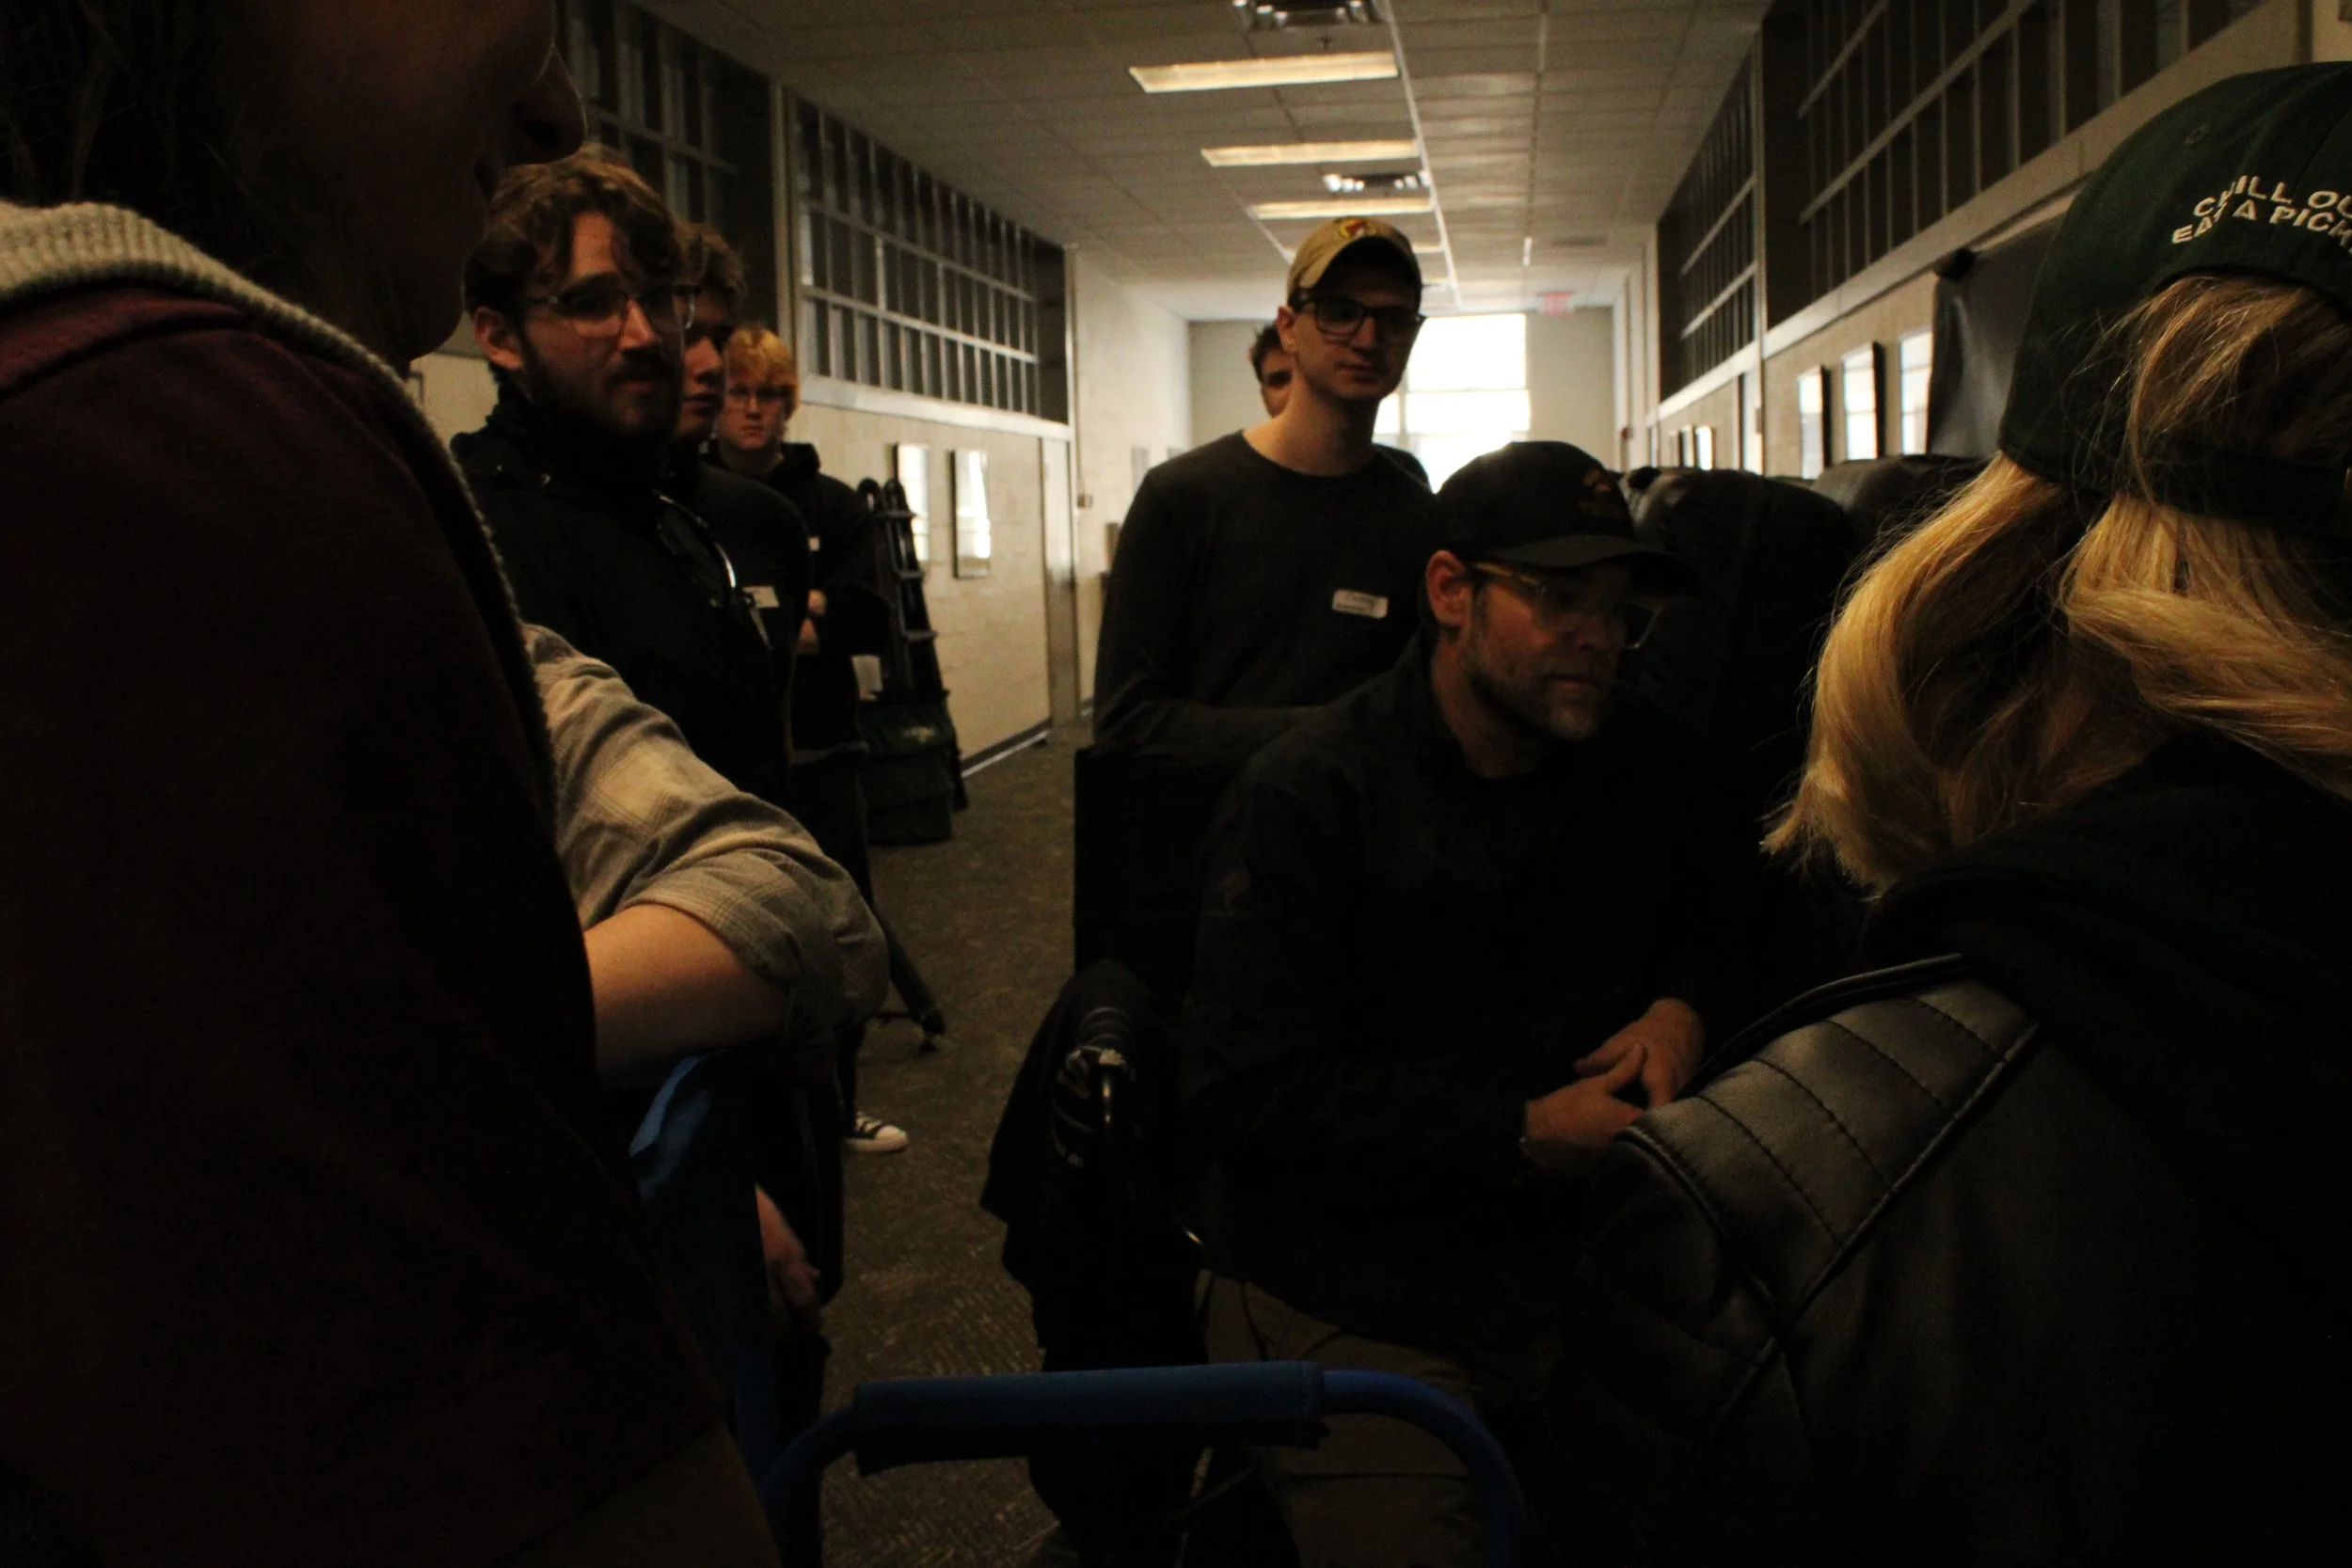
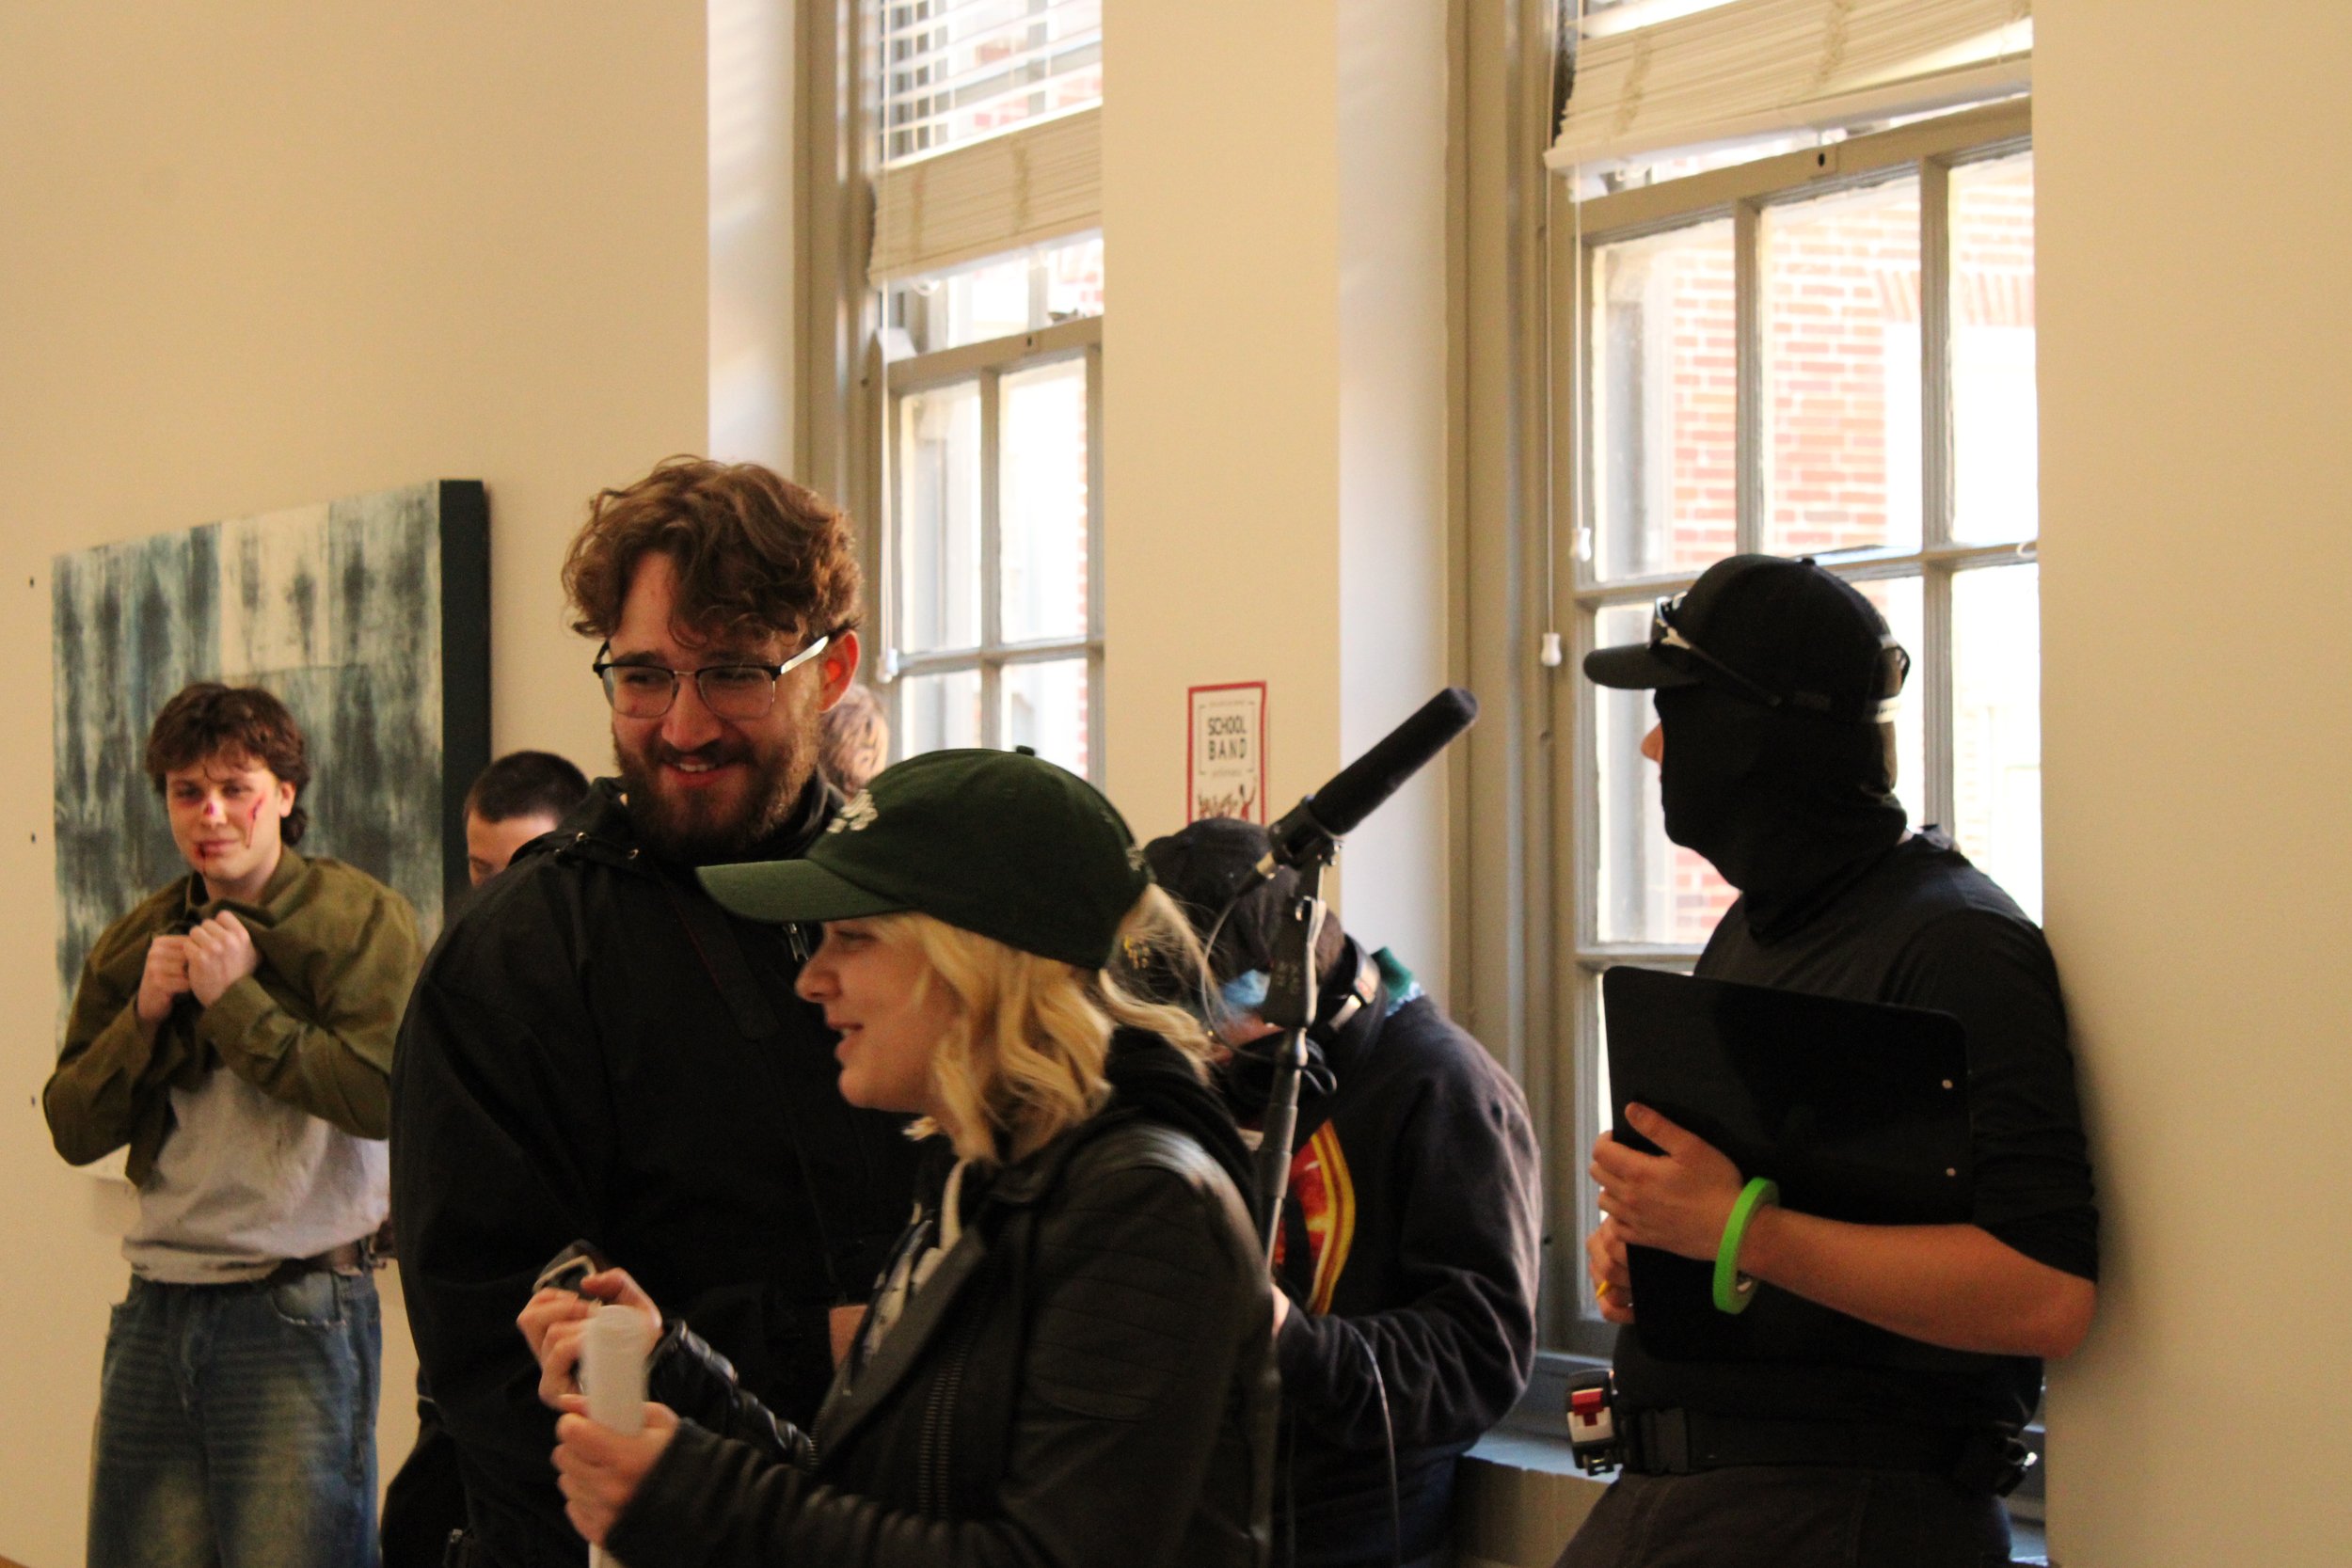
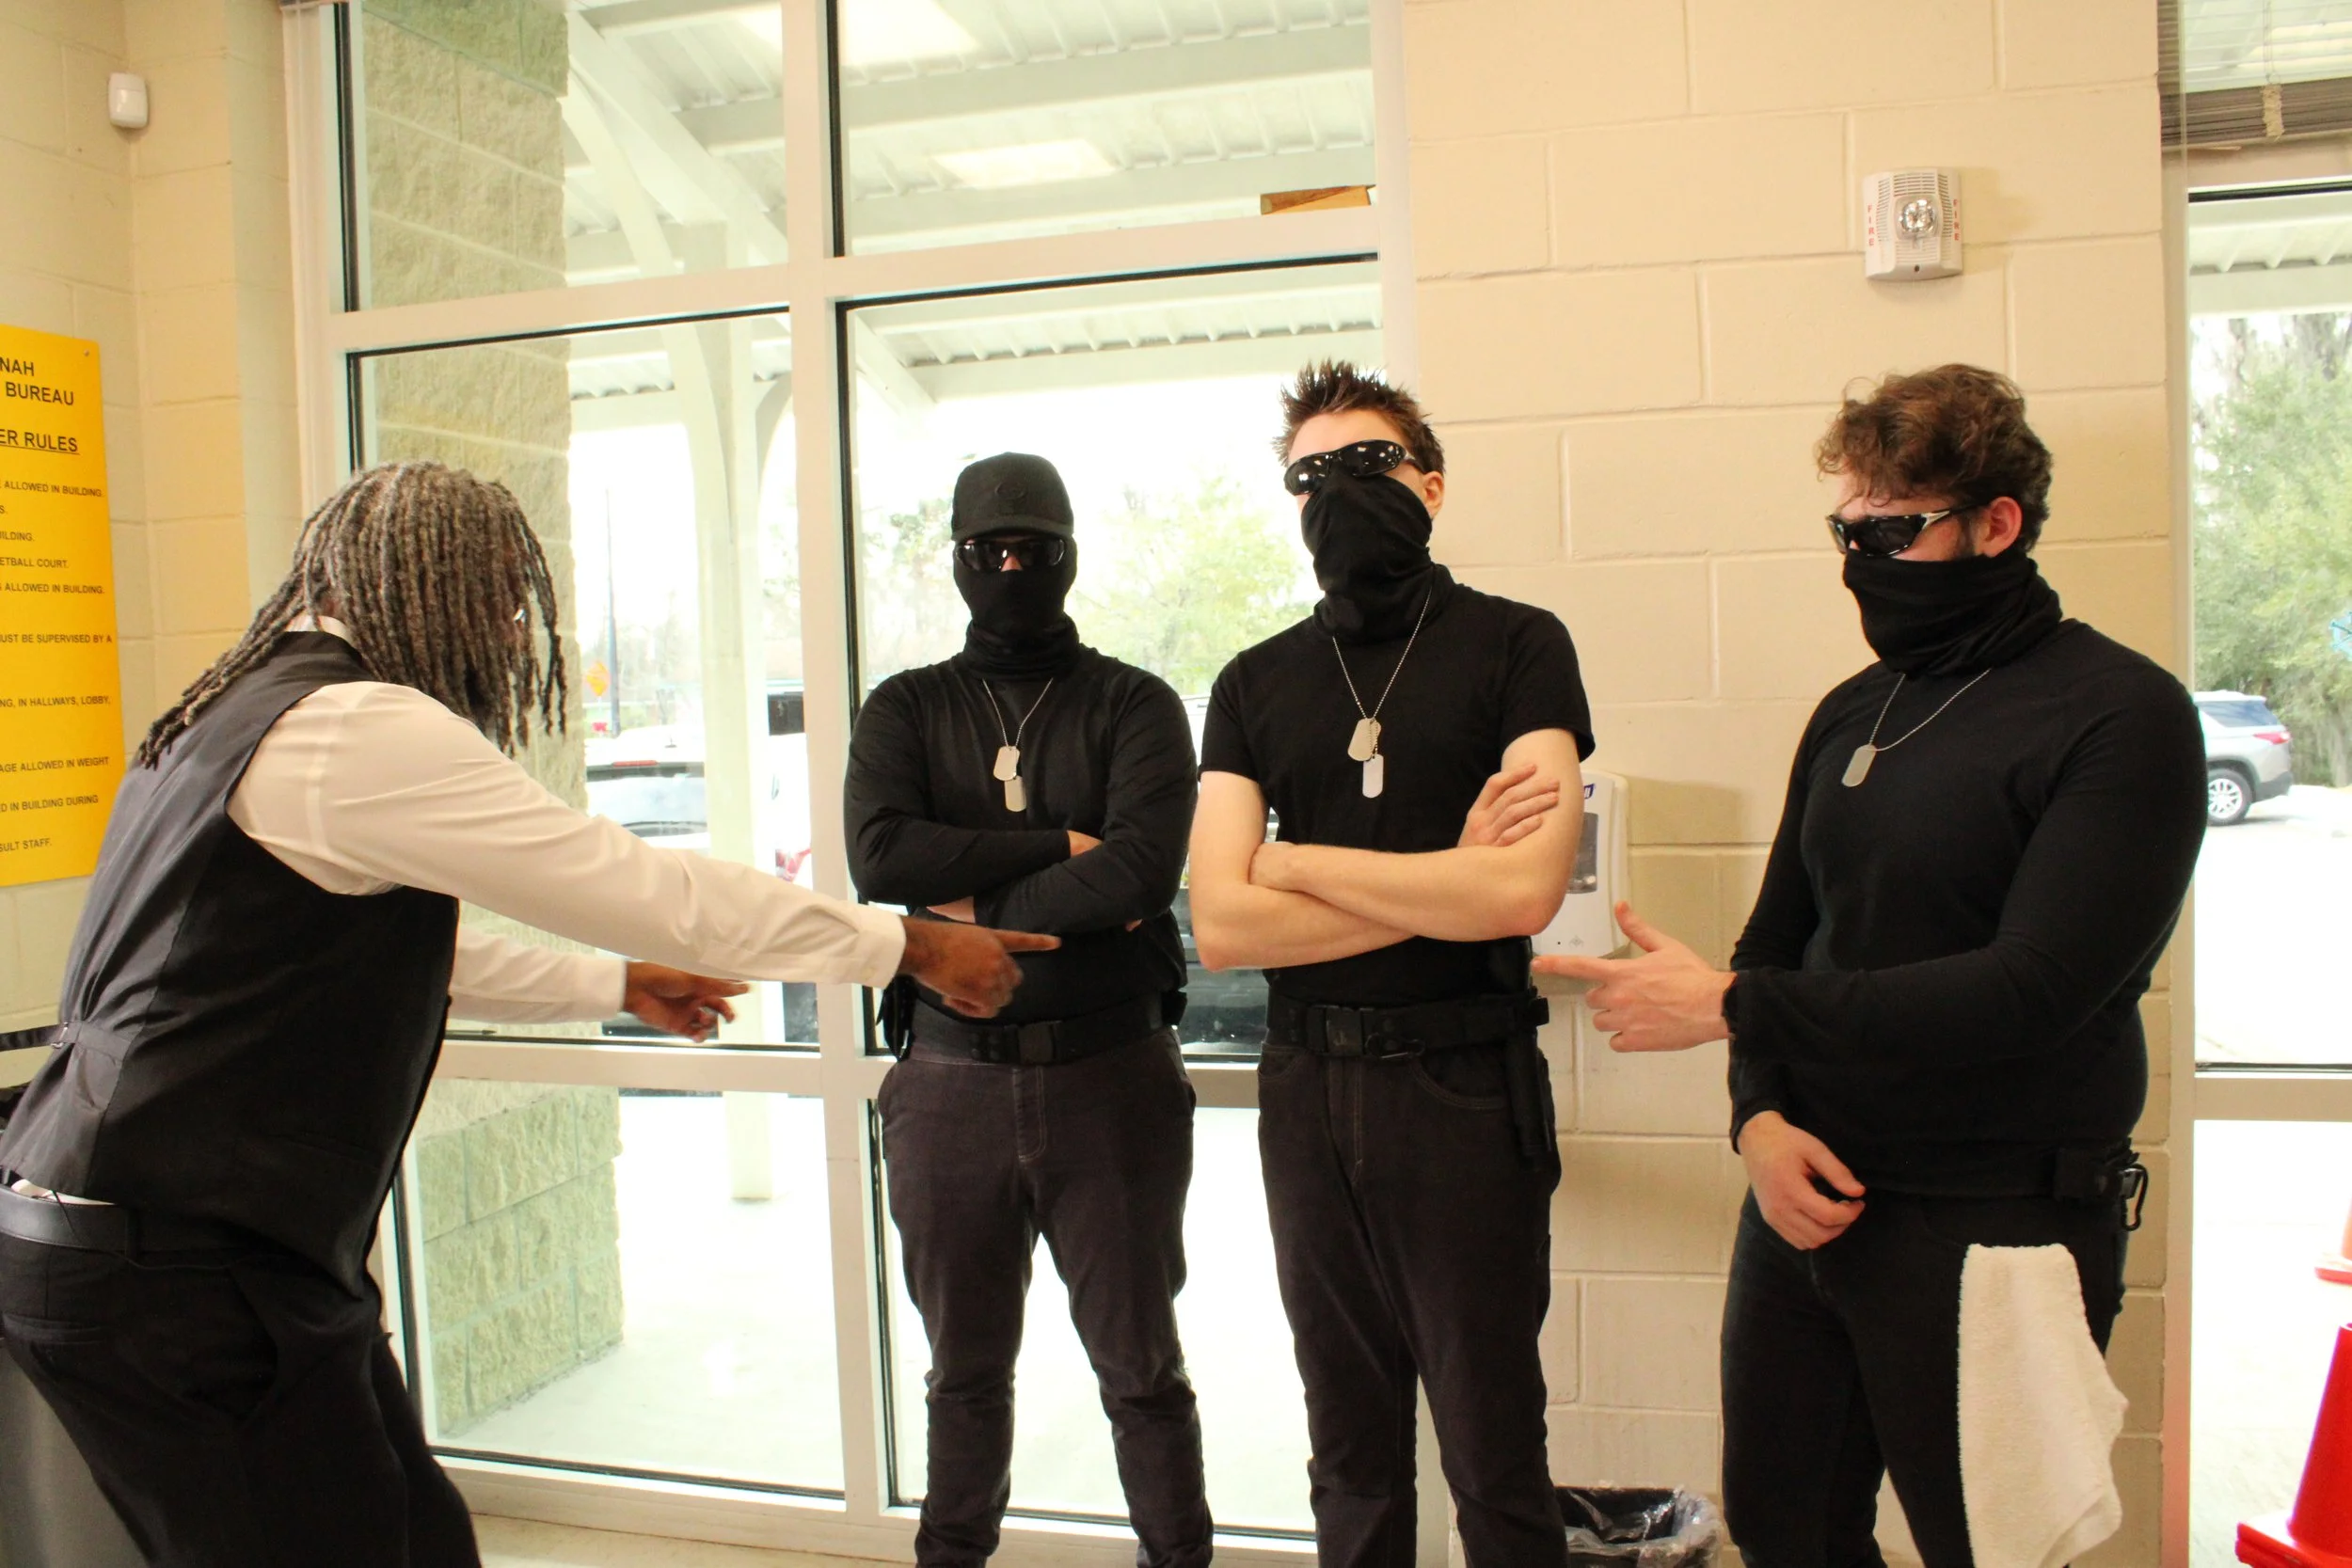
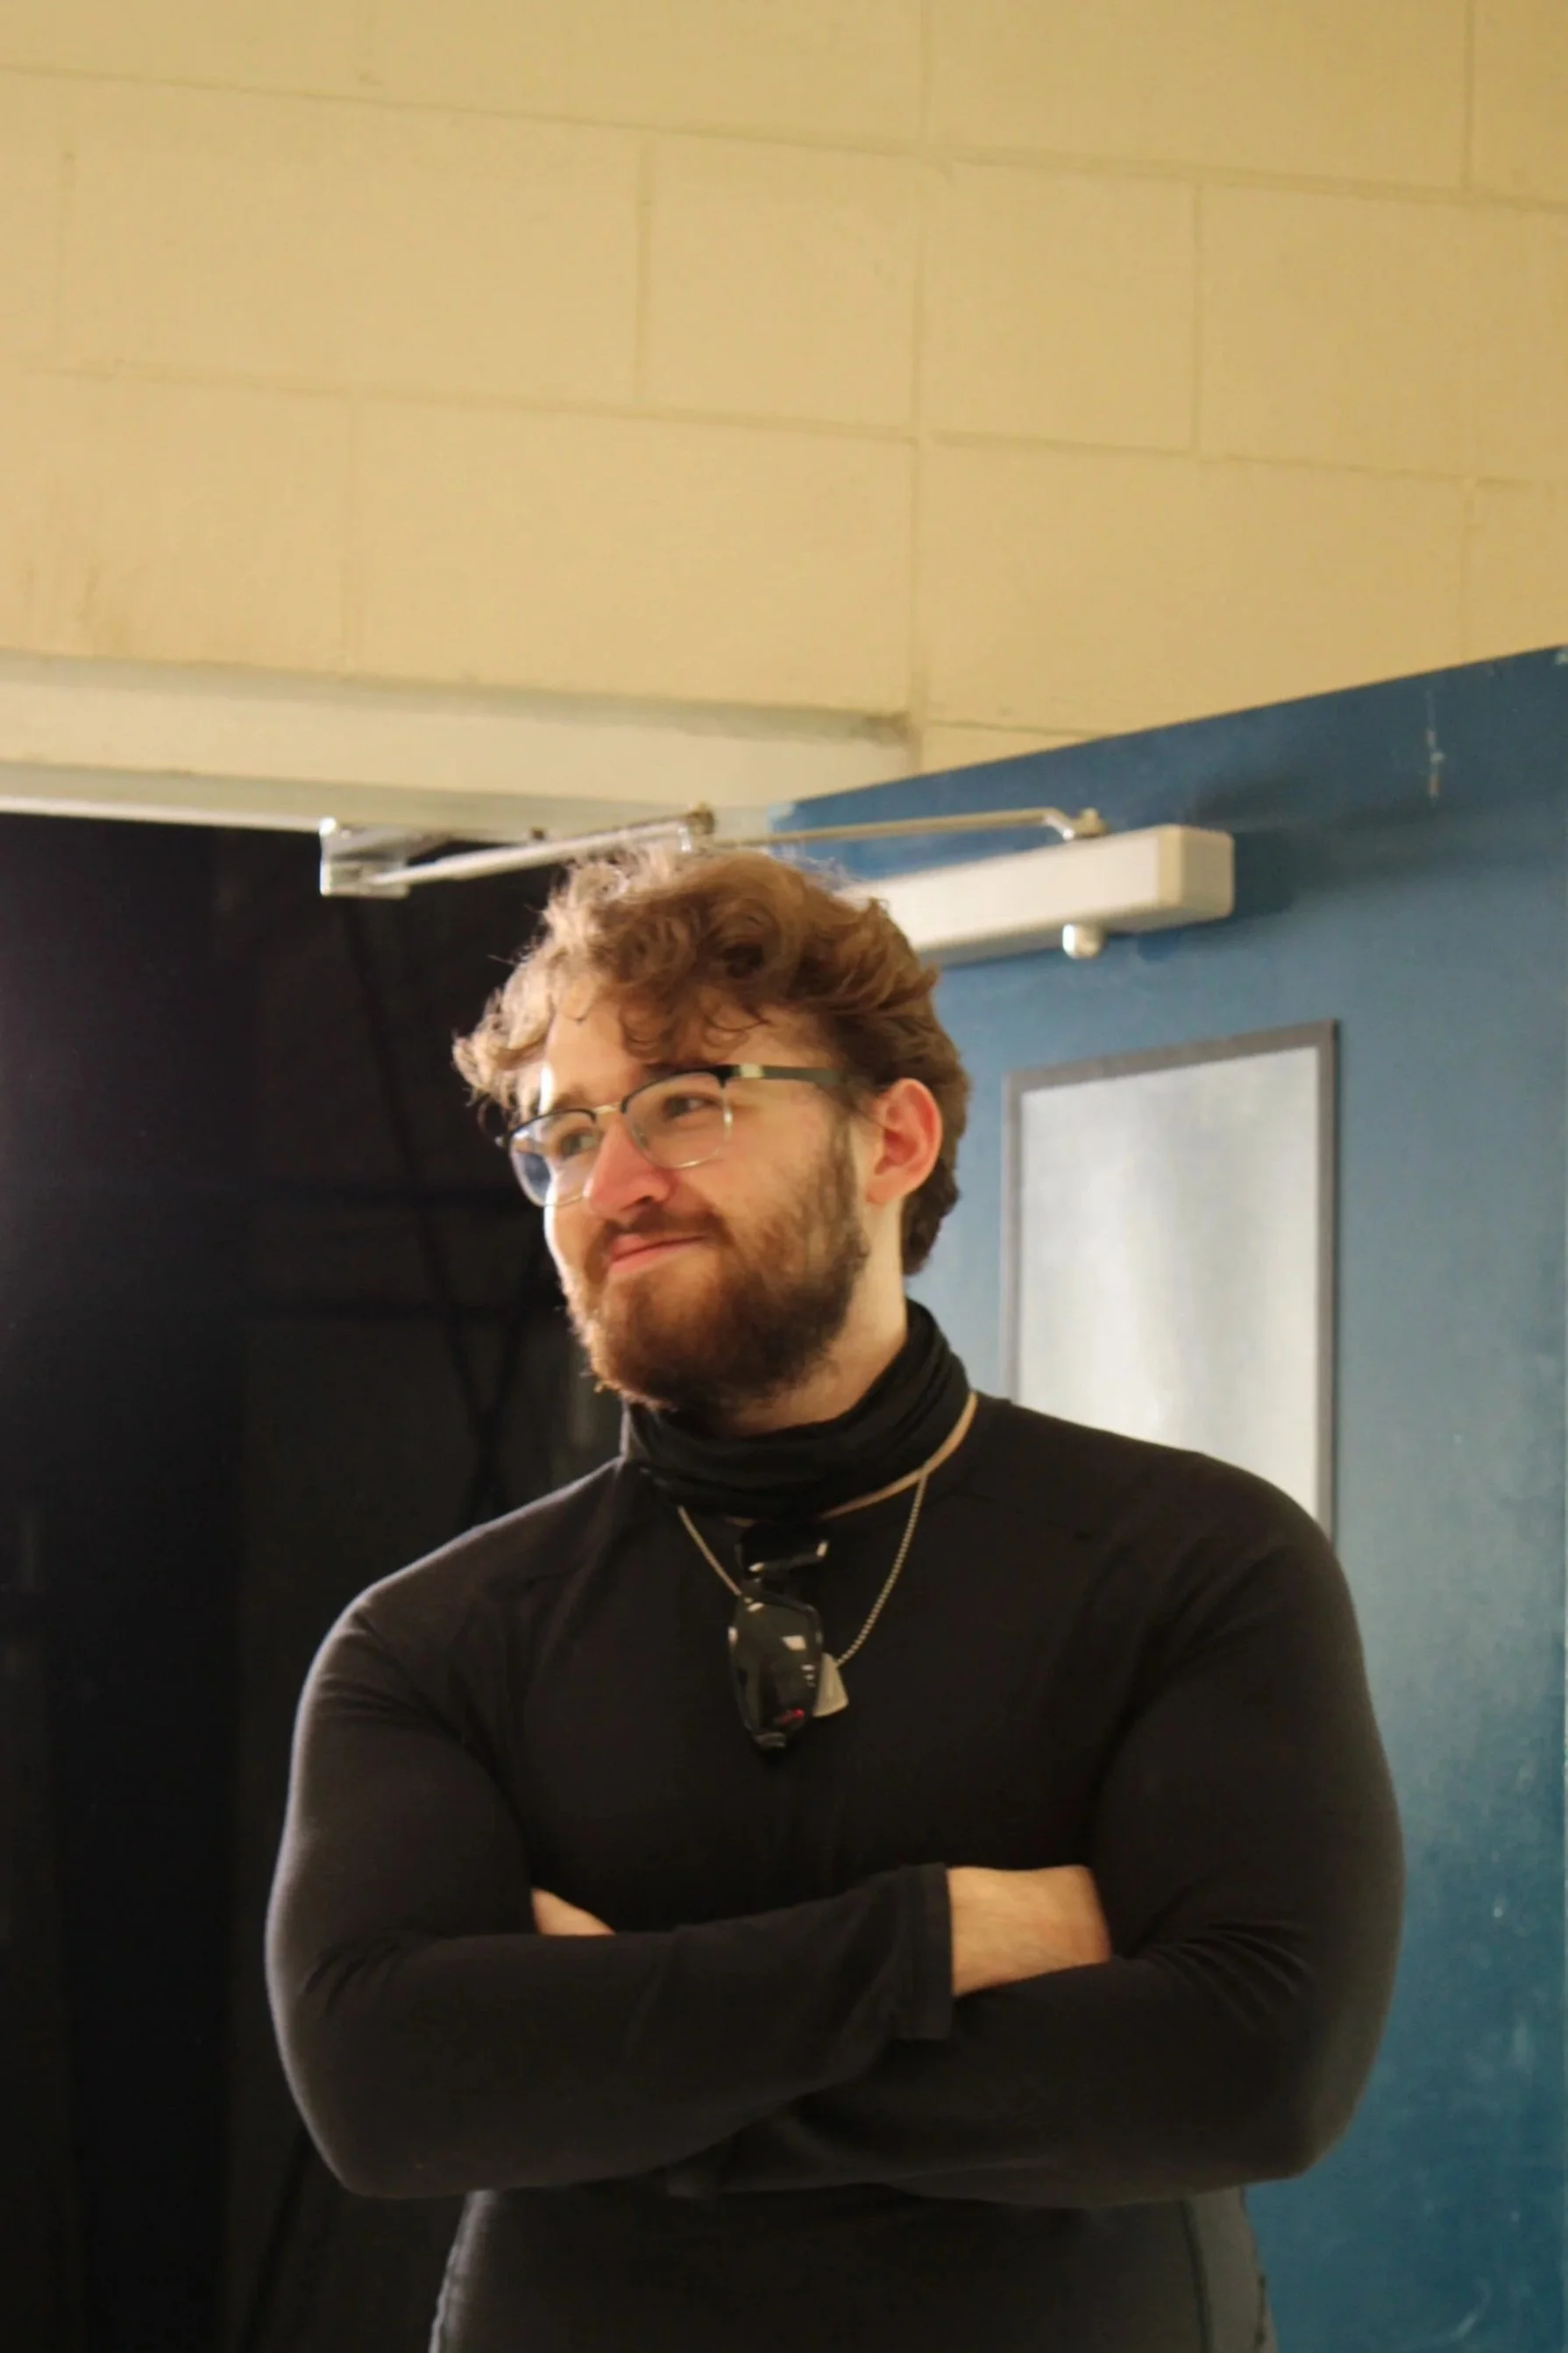
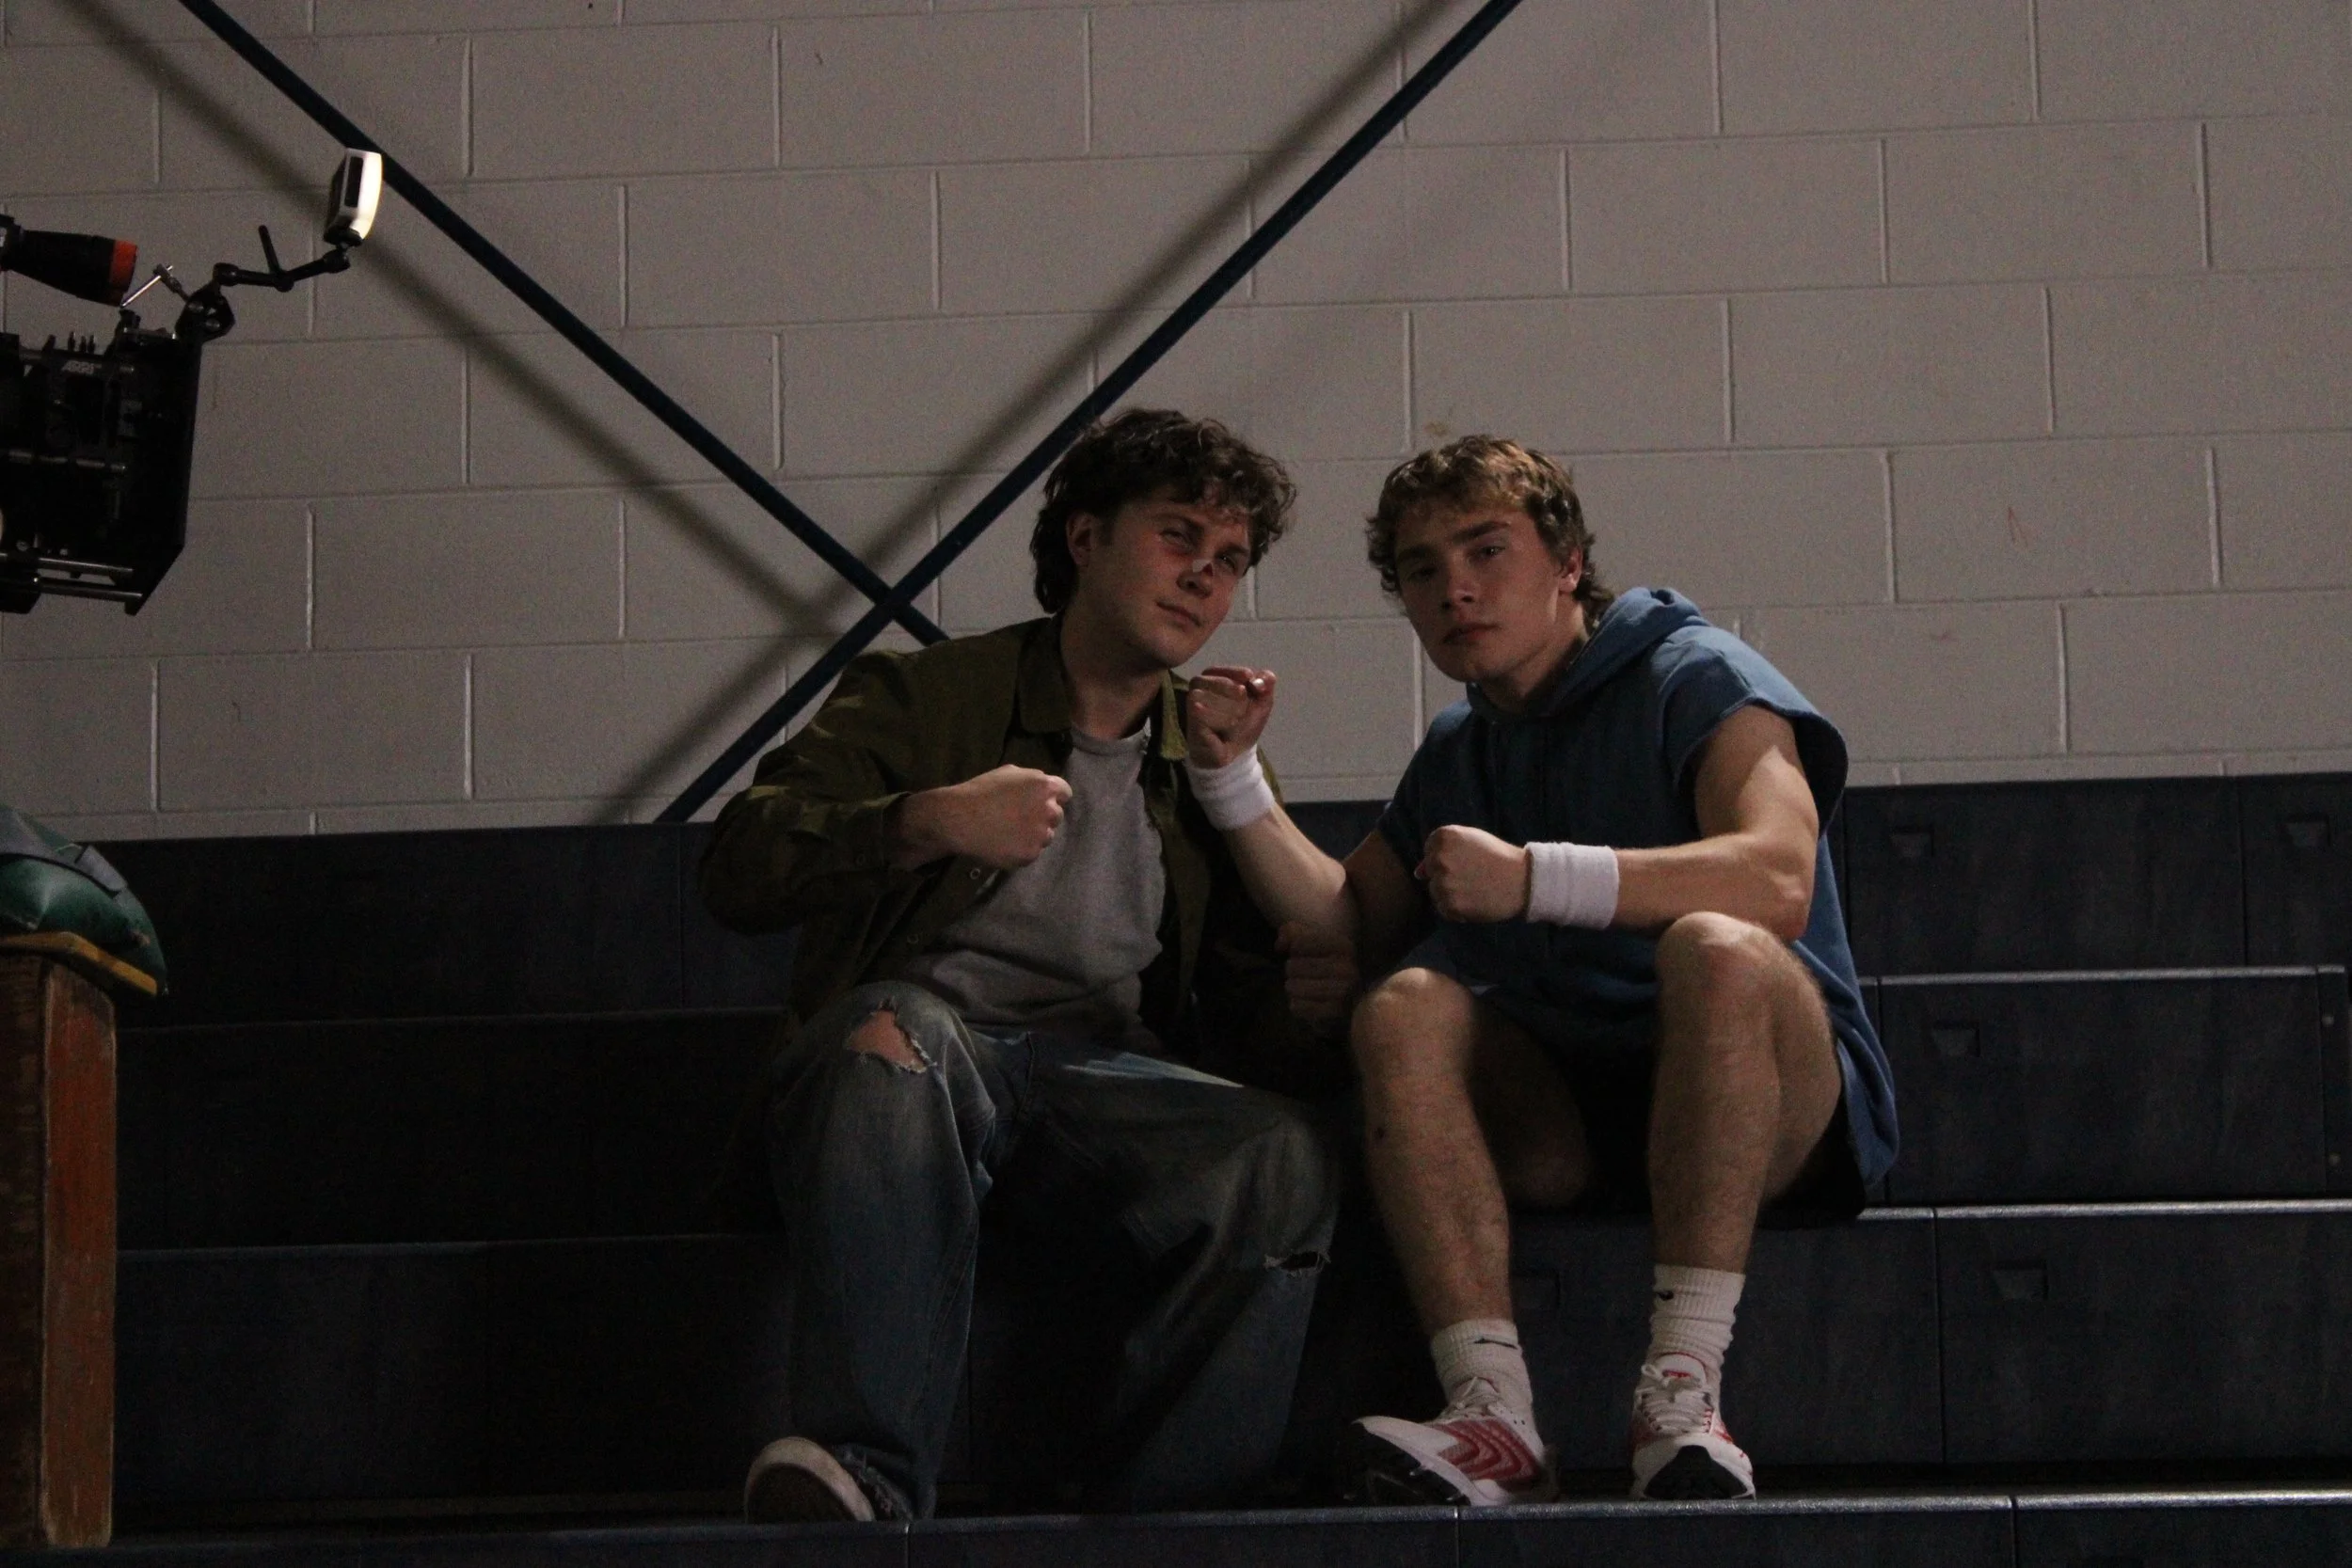
Our production of 4 Ways to Destroy South Aspen High was a resounding success!! It was an absolute blast to work with the best of the best here at SCAD. The Avengers of filmmakers were on this one, and we are incredibly proud. Here are a few BTS photos of our team in action! Now for us to do what we do best, and give this movie the best VFX possible.


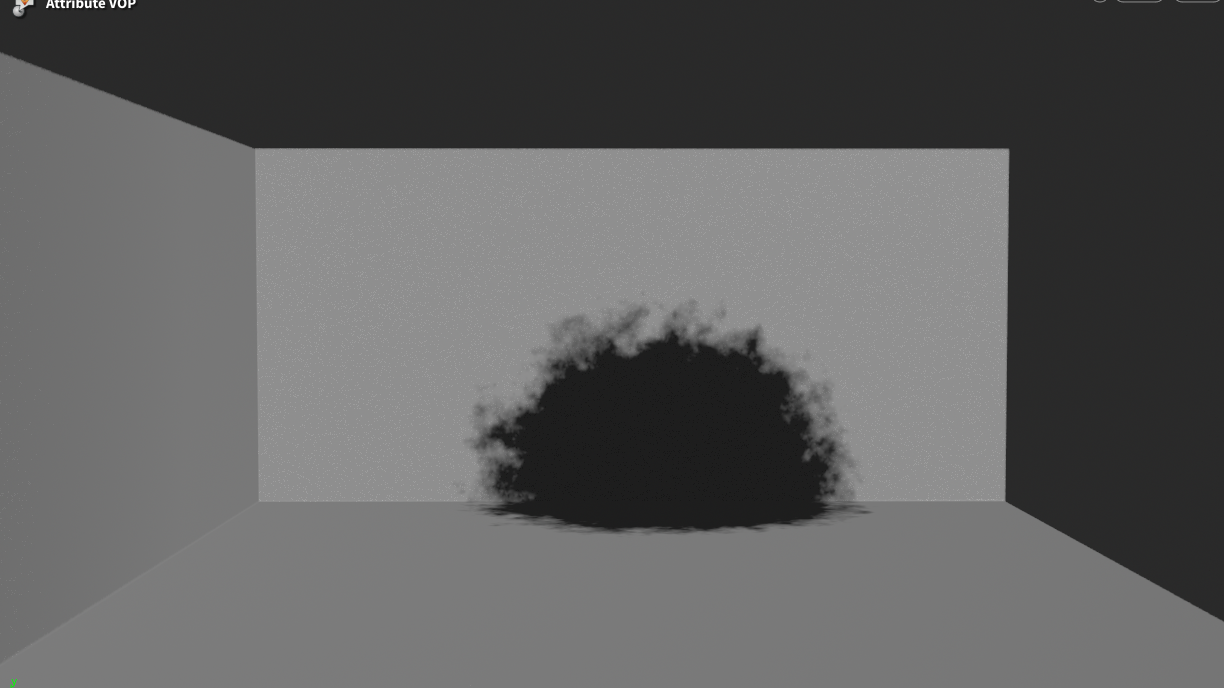
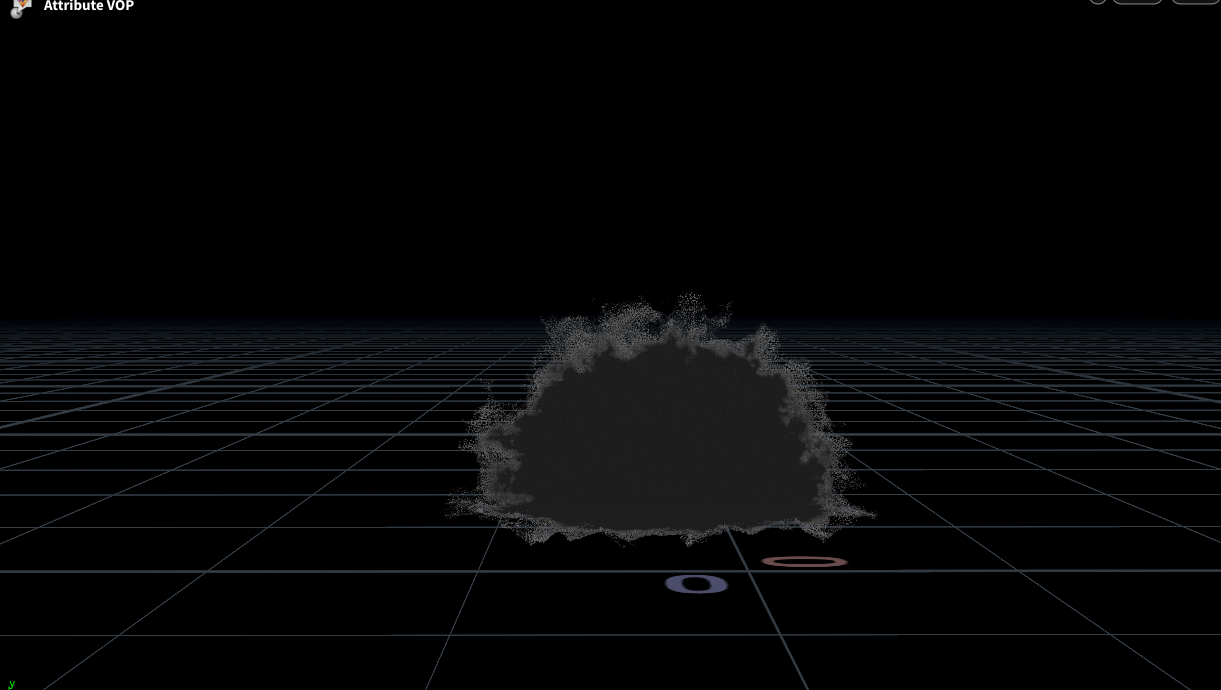
January 11th, 2026 - Void Growth and Veins
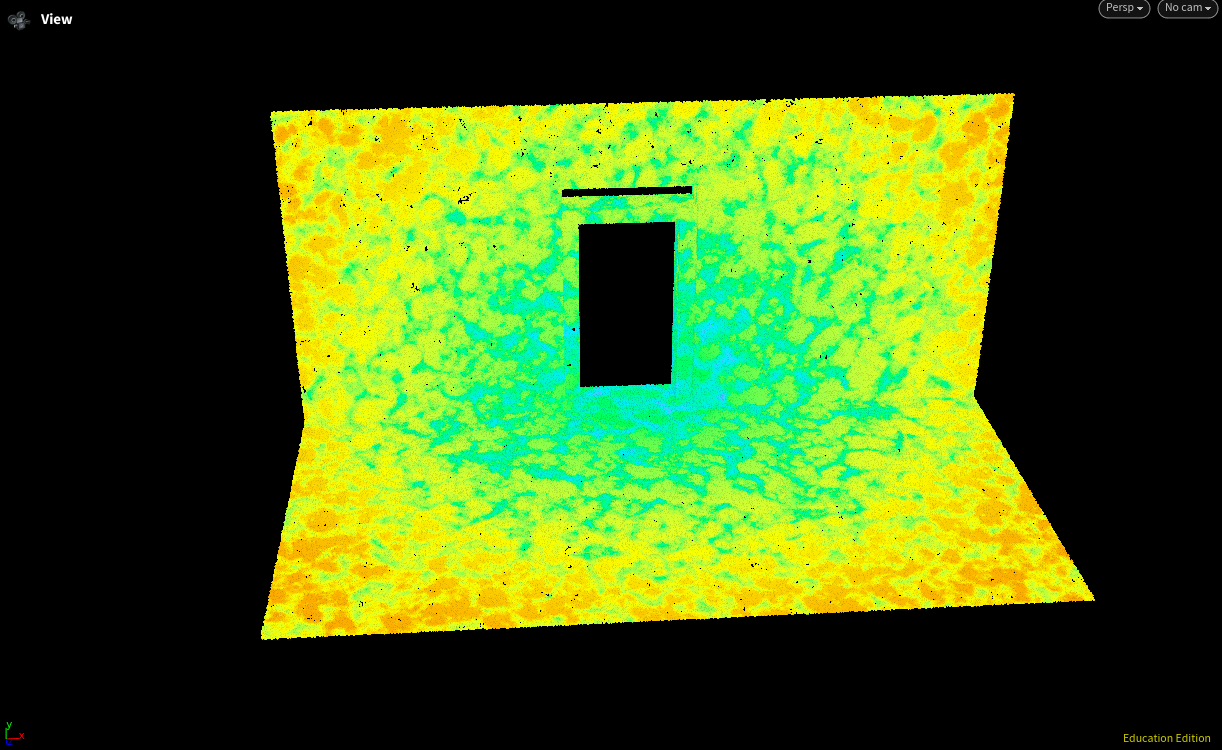
As we wait to film, I have been working on some void growth and shadow FX. Since we are switching away from shadow demons, I have been building a way t procedurally grow a void like growth from anywhere I choose. Here is the current effect that I created.
I also have been working on some Veins to add a little more depth than pure black. This will break up the darkness and add more gore/fear to the scene. These might not be used, but currently they work. There are some things, like these veins, that might be changed pending actually filming and messing with the plate. For instance, some void wisps or added effects might be added in comp rather than in render. For now, we roll on.
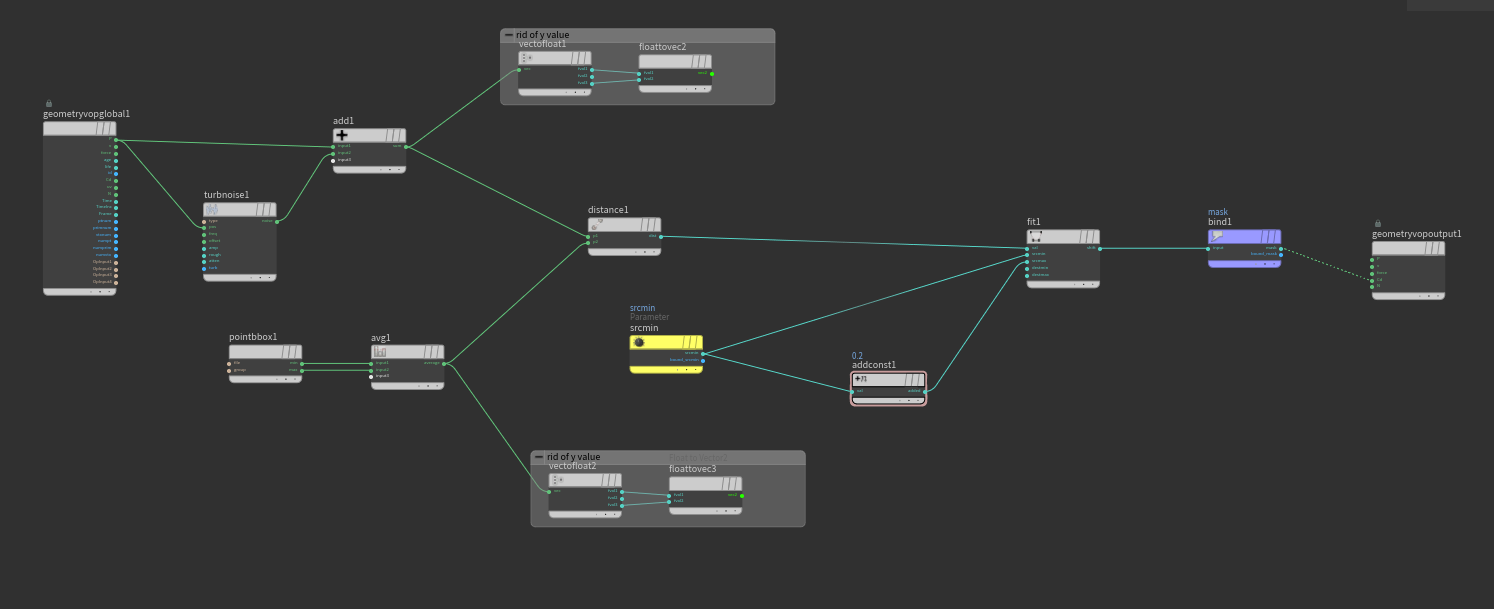
Here is the breakdown to how I achieved this result. I created a mask using a point and normalizing the distance between the point and the geometry. Adding some noise to break up the look. I then animate the distance to have it grow.
January 6th, 2026 - Social Media and Pipeline
Over our break at SCAD, me and my team have kept busy planning and building our pipeline. We held weekly meetings with the team, where were discussed timing, shotlists, and other things production day based. From the meetings we held as the VSFX team to the meetings we held with the director and producer, we were able to shift and break down the current shotlist to be clear what shots will require VSFX and which ones will not. Here is the look of that list. There is a current total of 119 shots.
From this I built us our shoot day list google sheets that contains all the information and notes we plan to take on the day of shooting. This is going to help keep us organized and out pipeline consistent. Here is that
Over the break, I also built a pipeline ready Nuke file that can create and build our whole shot file structure, directly into the collaborative space, based on the file name. So once we get our footage and normalize them to EXRs, we can create our shot project files. It will find the EXRs and all exports we do will be named and be easy to find in our collaborative space. This will speed up our file making process and increase our production. Here is a compressed version of the tree.

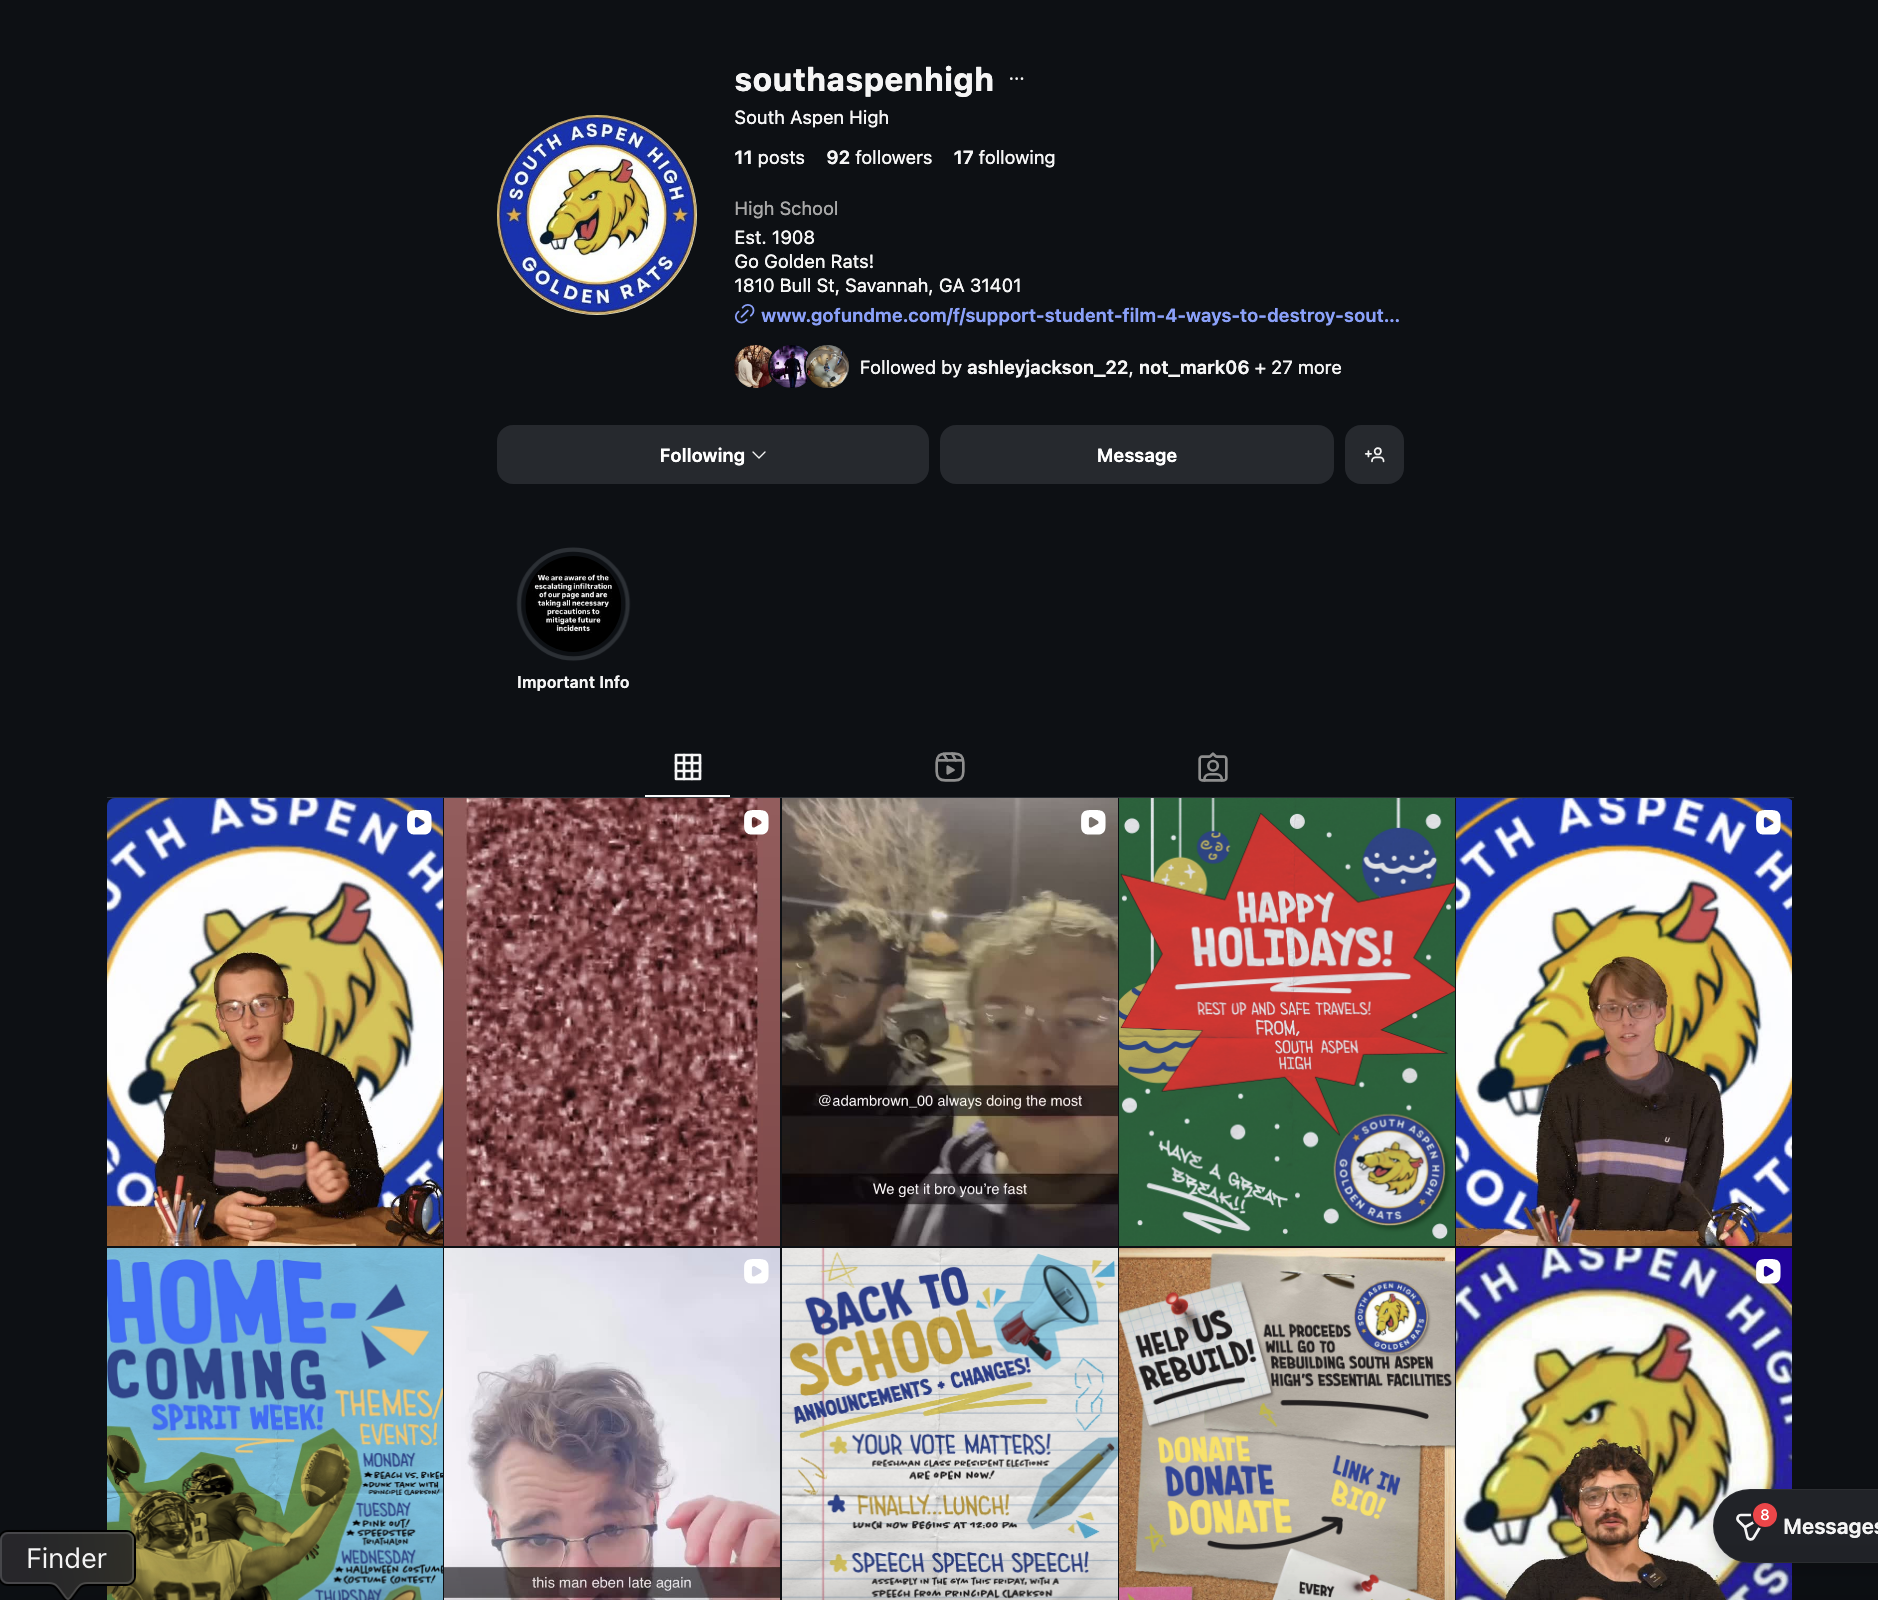
As well as this, we have also been working on our social media account, which we have posted two VSFX related posts, including super powered students, to build the world that South Aspen High is located in. Here are those two posts.
Only a bit of work still to do, but we are almost ready to go for shooting come January 16th!
November 9th, 2025 - Speed Trail Iteration Test Comps
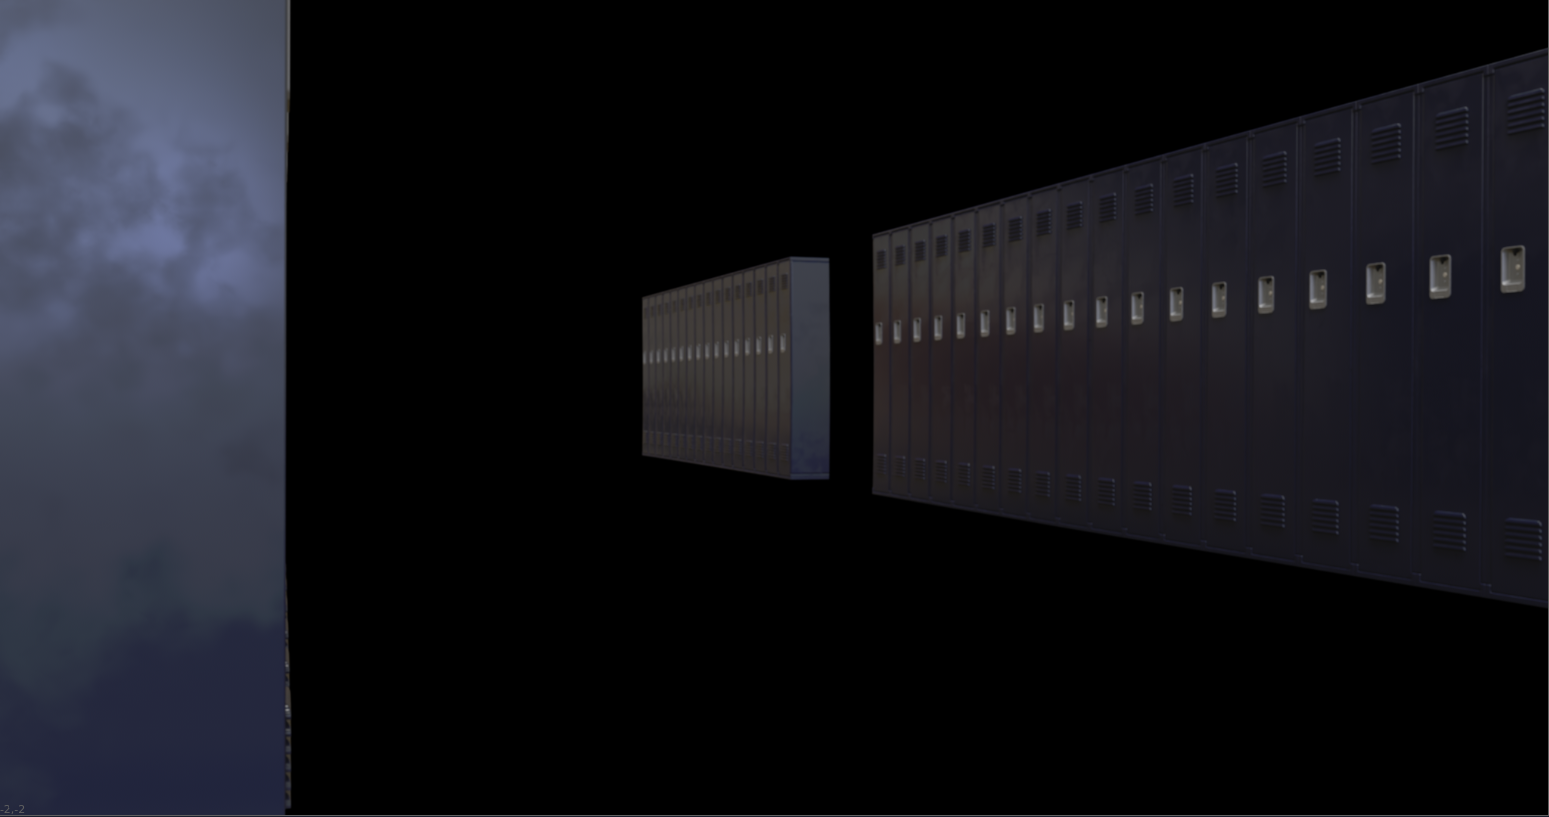
For this weekend, I did some new speed iterations down the hallway shot, as well as new compositing for the lockers. Here is the original design from two weeks ago as reference. The lockers aren’t fully there yet, so more texturing and lighting tests will be done before the real renders.
These two iterations are based off the Sonic running trail and the Mekkari running trail. One involving lightning and the other a simplistic trail. Neither of these will be the chose option as they are too basic and don’t give the feeling for the type of speed we want.
This trail is loosely based off the quicksilver trial and involved more distortion form the trail compared to other iterations. Not the final one chosen, but a good design nonetheless.
These two are further iterations of the original design, which was custom from the start. The main change was the strides taken by our speedster. The left has a quick running motion while the right as a more galloping approach.
Taking the longer strides, I did different rates of decay and noise to have the trail last longer but keeping the same speed rate consistent. Here is the light noise version that has a slower gradual decay.
This next version has the same decay rate, but more noise as the age of the trail increases. This version was the unanimous favorite between me, the director, and the producer of Four Ways. This will likely be close to the version we choose simulation wise.
This weekend I also took some time to do a test simulation and render of our laser vision we are adding to Dr. Fenster. Here is a render I did, involving fire spread from the beam onto a collision object.
November 2nd, 2025 - Speed Trail Variation
For this week, I wanted to do some speed variation tests, just to get some more options and gears turning for what we might like. These have some post comp work done, with glow and lens dirt, but nothing major. Below is the original design that I made.
These next three are different alterations of the trail. The first is one based on the sonic running trail from the movies. The second is more towards quick silver, though the sim force is quite high, and his is more distortion than anything. Then the last is more towards Mekkari style with single lines following the path, nothing super detailed.
Utilizing some cryptomatte post comp workflows, I was able to take the render and combine certain elements from the other renders without doing a whole new render. Here are the two other variations combine two of the tails together. Original with Lightning and Original with Mekkari.
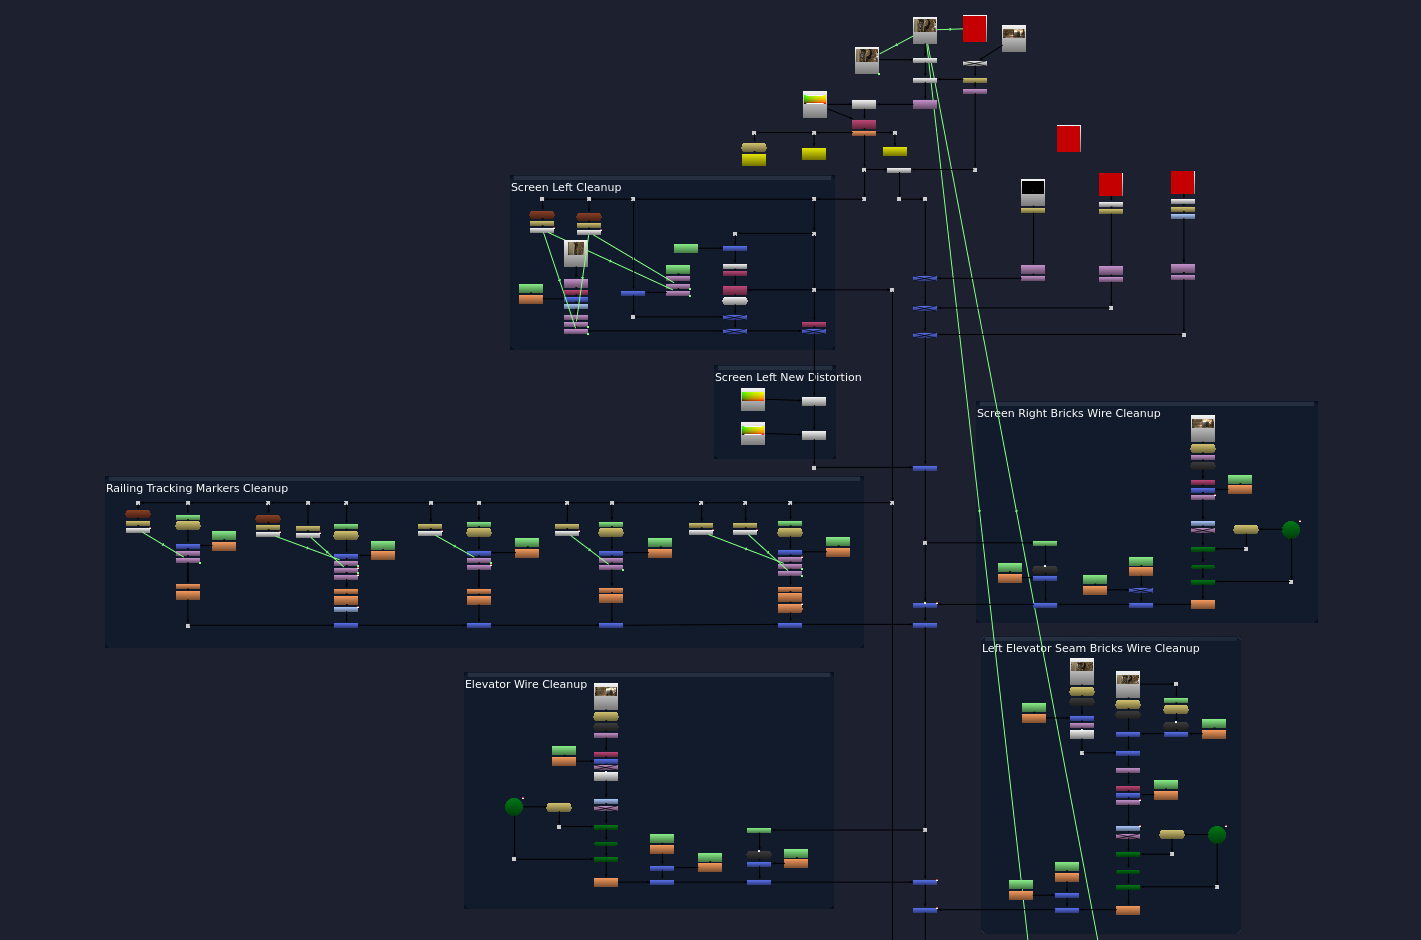
October 24th, 2025 - Set Extension Test Breakdown and Further Improvement
For this week, despite being sick, I was able to get a little bit for further development on this set extension speed shot. The main thing I added was a dust kick up trail behind the speed trial to add some more depth and realistic behavior on the environment. Firstly, here is a detailed breakdown and node tree of my current comp.


For the banner in the back, adding onto my clean plate, I took a online banner asset, combined and resized with our Rat logo to get the right placement. I then did a soft light of the background plate to get the right color and cast shadow from the lights onto the banner. I then added a drop shadow, using a gizmo, to add some depth. Below is the node graph for this setup.

For our lockers, Tripp is responsible for creating the model and textures we will be using in our extensions. The left is straight out of Karma, with a simple HDRI as the lighting. Since the texture isn’t progressed that far, I decided to add some post process scratches to it, as well as a drawn image of our logo. For getting our logo to look drawn, I leveraged Gemini for a quick recreation of our logo.


Here is the node setup for how I achieved this result in Nuke.


To give our lockers better depth, I rendered an AO pass outside of Karma, allowing me to control first hand, the amount of depth I want to give my lockers and ground. Here is the result of grading my object and ground based on the AO pass.


I then was able to add my simulation light, trail, and other post-process dirt that I have been using to achieve my speed effect.


Here is that node setup in Nuke.
My biggest change I added was a kick up dust trail following my speedster running down the hallway. Below is the process for how I achieved it. First I took my running character (same one used for the trail), then I used an attribute transfer to transfer the footstep to the ground plane. The result is shown below.


I then took this transfer, and using a SOP Solver was able to write a simple script to keep the transfer for the full running sequence. Then using another Solver, I was able to create a life attribute once it was created, allowing me to delete after any determined amount of time.

I then was able to create a POP simulation, which I could feed into my Pyro solver to ultimately get my kick up effect. Here are those results.
I sent this to the farm and got a good pass that I could then composite only my already made plate. Here is the final result with the dust trail added to my plate. I plan on refining this and using subtle bits of kick up for our speed trail to add some extra depth and realism to the scene.
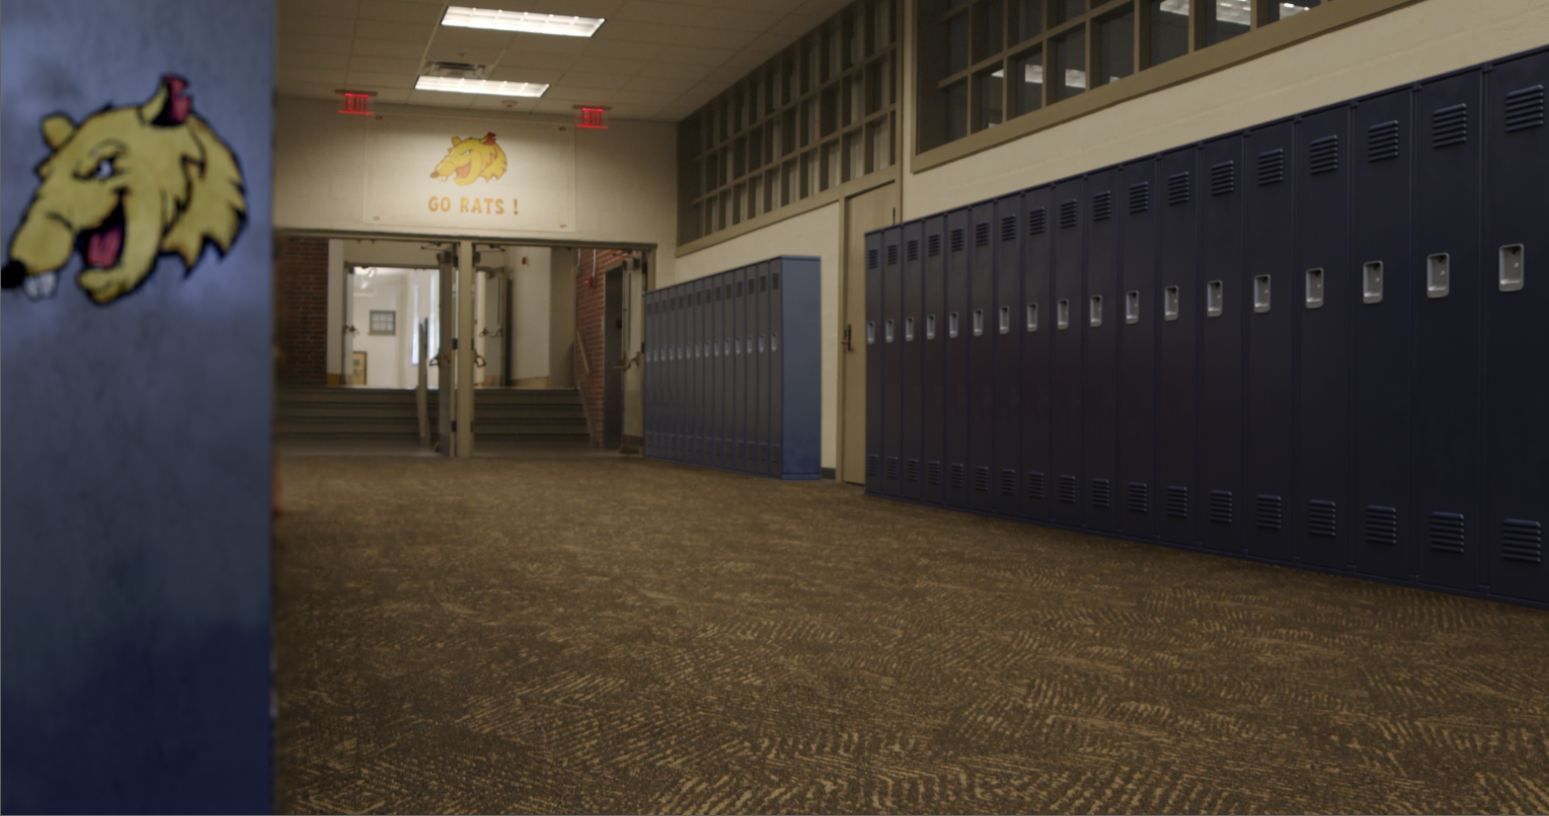
I also completed another test extensions, utilizing Syntheyes and Photoshop to clean up the scene and seamlessly add the lockers in. Here is the final export and breakdown. This is not a final pixel product, but gets the idea across nicely.
October 19th, 2025 - Set Extension Test
For this week, I focused on some tracking and set extensions, as well as some realistic footage of the speed trail in our comps. From the footage that Tripp and Zach gathered, I attempted to track this shot below. This experience and practice with SynthEyes taught me a lot about 3D tracking. I feel that I know my way around SynthEyes now and can confidently say I am ready to tackle any shots we take for our film.
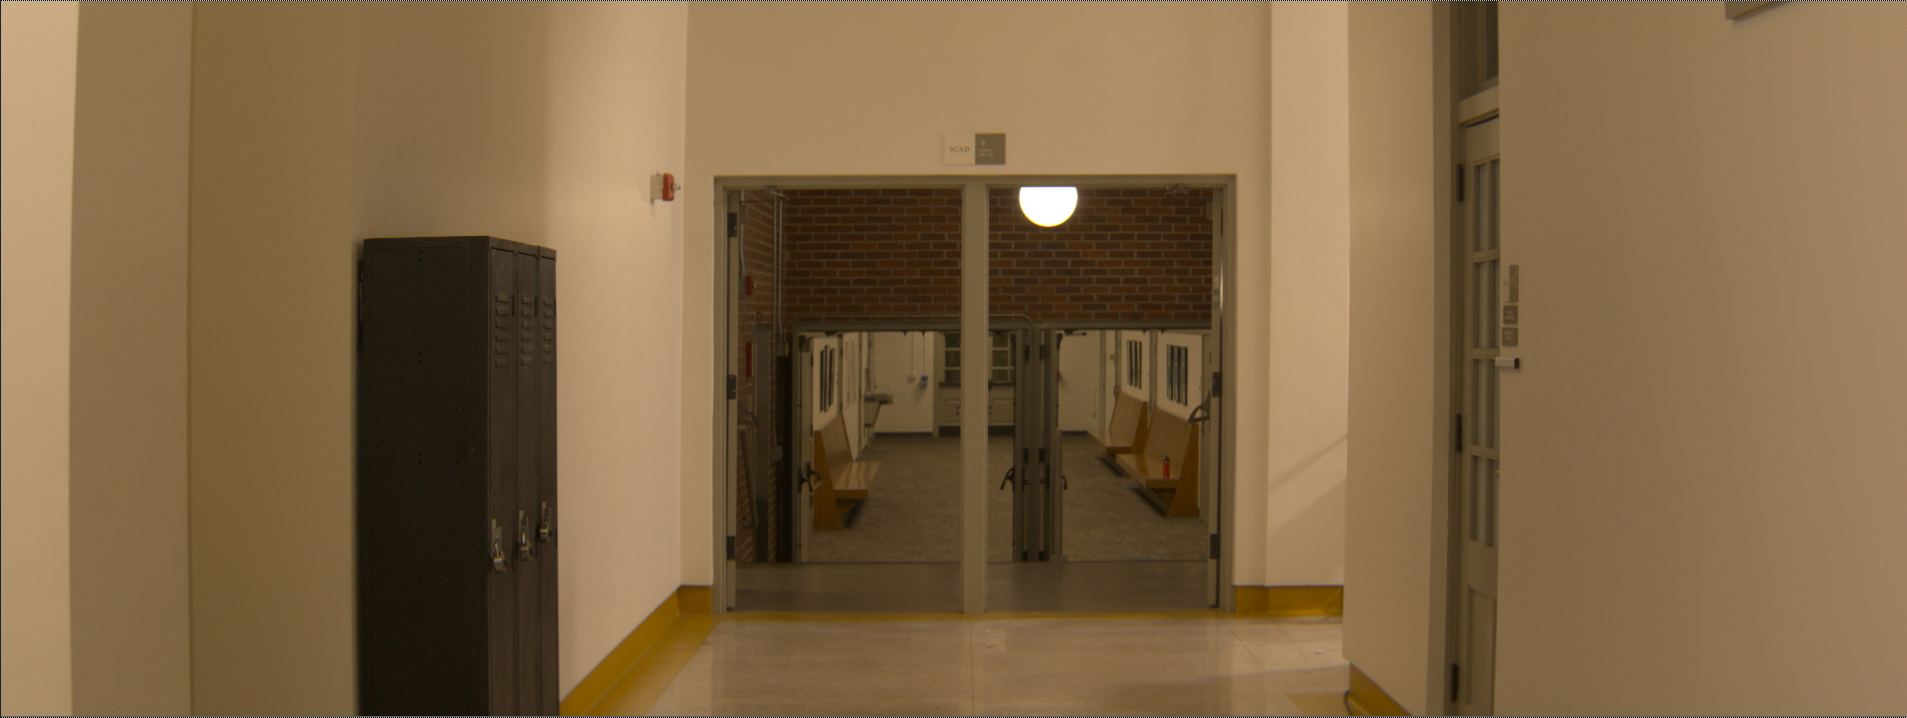
For this shot, I wanted to try some easy set extensions and alterations to our plates of Arnold. For our purpose, I decided to also do a clip with Aaron running down the hallway. Here is the original plate.
To start this comp, I took a still image, exported to photoshop, and using some cleanup tools, took out the paintings, signs and Tripp in the background. Using SynthEye’s auto/ML roto tool, i was able to get a decent alpha of Aaron, that I could cut out and put over the lockers. He is blurry with a lot of motion blur so the auto tool made quick work. Here is that cleanplate.

I then took Tripp’s Env that he made, including his lockers, and was able to render out the lockers to comp them in, as well as a light pass for the hallway interaction with the speed trail. Here is the final comp result.
Here is the full before and after for the whole comp. For this coming week, we are planning to meet with Marina and Chelsea and fully map out the layout of Arnold based on the story for our script, from this, Tripp will be able to fully mock up the environment. By that time, Felix should be casted, hopefully. I plan to further develop my kick-up pyro for the speed trail design, adding some subtle detail here and there for it.

October 13th - Shadow Pre-Vis and Test Shooting
For this week I focused on furthering some testing from previous weeks. This is the added trail and inkwash effect, fulling done in comp - nothing rendered.

I also added a small dust FX so my speed comp to add some depth.
We also went to Arnold and filmed some test footage, some of this will be reshot as there is a lot of motion blur currently.
Here is newer footage filmed with less motion blur.
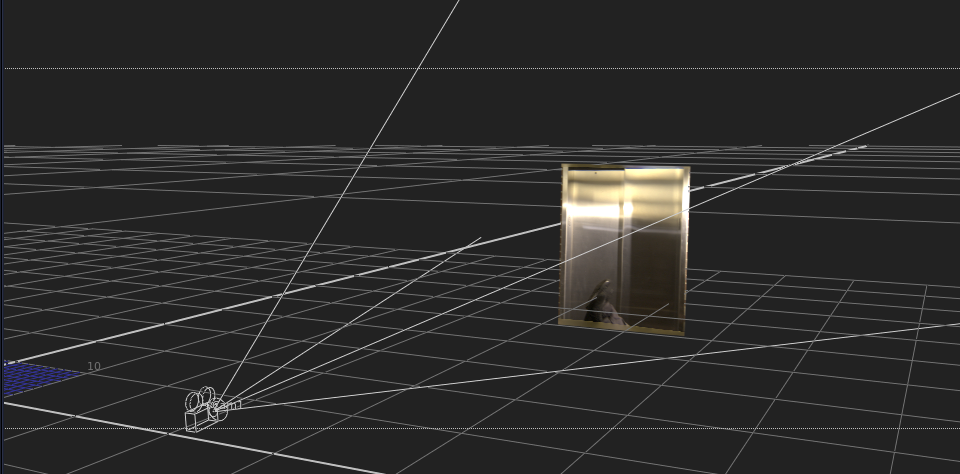
I also began tracking the first shot, I am doing this manually, so I have complete control of the tracking markers. Here is my track currently set. For the res of this week, I plan on doing some set extensions on this clip and altering it completely. We want to be able to shot Marina and Chelsea the extent of how much we can change.
October 3rd, 2025 - Speed Test Renders and New Animatic
For this week, we did some test filming and test composites for some FX we are doing. My two consisted of the speed trail and glowing skin. Here is the two speed test shots I composited.
Here are them seperated into single clips
For each shot, I had two render passes, including the speed trail and emission casting. For the casting, I set up geometry similar to that of the plate.
Here is the compositing node tree for the speed trail.


Here is the glowing skin test that we did. I plan on doing one with Tripp’s eyes glowing, but that will be tackled next week. Here is the skin test.
To accomplish this, I took a few different types of cracked surfaces and images, utilizing some comp tricks to have the “subsurface” effect on the skin. Here is the node tree.


This week, we also compiled a new animatic, only a few changes and more FX shown in this version.
September 28th, 2025 - Speed Trail Render (Version 01) and Test Shooting
Since last class, I have dome some Speed trail rendering, testing the trail in motion, as well as emission/glow.
Here is the 1x, normal speed
2x Speed
4x - Favorite Result
Glowing Skin and Eyes Test - Testing rendered eye inserts as well as glow amount.
We also did some test recording for various shots that will require VFX. Here are some of the main shots I will be testing some VFX for. Including the glowing skin and speed trial.
Here is the Speed Trail shots, this is after Eve uses her shadow powers to same both herself and Taylor.
I set up my camera, matching the perspective, using fSpy to help.

Here is my sped up plate, with the motion blur as well as my newly made simulation, now with slowly fading pieces, this will drive my opacity in my material to add to the fade.
We also recently launched out gofundme for our film. Here is the link for it - https://gofund.me/609c574b3

September 23rd, 2025 - Fresh Animatic and Speed Trail Test Render and Comp
Since my last post I have bee working on refining the speed trail as well as diving deeper into Karma rendering - utilizing the best practices for the best result and quickest renders.
Some changes to the Speed trail simulation were slight, but I ended up doing two simulations, a refined point specific one and a overall wave one. Here is a look in the viewport as well as my current Solaris tree.


I I then rendered some layers and attempted a test comp, utilizing AOVs and other various comp practices to mud the image up. Here is that test comp render.

My node tree wasn’t complex, though it might look it. I took my three layers and did some heatwave warping, color grading, and other muddy gizmos.


Here is a simple breakdown showing the build from base render to full comp.
As well as this, I took our most recent animatic, re-pacing it, getting it from 15 minutes down to 11.5. The flow is much better and has better attention to dialogue and timing with that in mind. Here is that animatic. It is going to be refined and adjusted further, as our shots will change in a few parts, but as far as story, this gets the point across rather well. Special thanks to our Director, Marina, and our Assistant Producer, Sky, for these wonderful boards.
September 16th, 2025 - Preliminary Shot List and 3D Plan

September 13th, 2025 - Animatic Pre-vis and AI Match Move
For this week, we focused on developing some pre-vis for our animatic, mainly shots that in cooperated a lot of VFX or heavy on VFX. Here is the new animatic with inset pre-vis that we made. This is not yet paced, that will be done later this week.
For my tripping sequence, I did some test renders in Karma to show the movement of the particles in light and space. Here are those test renders.
Below is the all the pre-vis I was responsible for this week as well as a description.
This pre-vis to towards the beginning of the film, where we are first getting introduced to the kids. Taylor, the cocky athlete, is bored and to pass the time decides to use their powers and run across the gym, but trips over Felix’s backpack. She reveals that she is very powerful, yet rather clumsy.
This shot directly follows the kids hearing Principal Clarkson dying and Dr. Fenster is coming after them. Taylor leave in a huff, seemingly out of fear.
This shot follows right after Taylor and Eve escape from Lamda, instead of sticking around and talking with Eve, she takes off mid sentence.
For this scene, Remy is backed into Lamda, but Taylor comes speeding and talked him out, trucking him to the ground. This scene is subject to change, as the and story board isn’t fully fleshed out just yet.
On top of the pre-vis, I decided to test out some AI Match Move for some early R&D. We will likely need match move in many parts of this film, so having an early test of it is crucial. Here is the results and the node tree of how mapped the rig in Houdini.

I used this same method on this stock video a man running and used my pop trail method as well. I tested a render and composited it on the clip. Here is the result. This will be the similar method we use for adding the trail.
September 9th, 2025 - Speed Trail Test and Quick Render
Over these days, I have worked a bit more on the simulation, testing different forces and controls to add a new look to the POPs. Here is a quick render test for the original set up of the POPs I had in the prior test.

I built a wedge cache chain in order to speed up the look process, allowing me to see multiple different forces and only having to cache once.
Currently, in these simulations, the particle distance is far and creates gaps in the smokey wisps I want for the render. To combat this, I am setting up my points and samples differently, using less simmed points, and some trail and jitter tricks. This is quicker as far as caching and simming goes. Here is the node set up.


I also decided this was a good time to test some renders in Karma. Coming into this year, I wanted to work within Redshift, however we didn’t get license for this year, so I am having to make Karma work. I wanted to use Redshift as I have grown quite fond of it over the years, and really like the interface, look dev/material builder capabilities, as well as the viewport speed. Here is my simple set up in Solaris to make it simple for a quick render.
Here is a quick render of the current sim test. Some slight post process motion blur added.
September 8th, 2025 - Rough Animatic and Storyboards
August 19th, 2025 - Shadow Monster and Speed Trail Previs/Proof of Concept
During my limited free time this summer I have been working on a few approaches and pre-visualization of both the speed trail effect and shadow monster comp.
Here are some references for our speed trail effect we have been gathering.


We especially liked this effect for quicksilver, where the trail is attached to where he has been with some subtle movement after its “emitted.” The trail isn’t heavy in geometry or overly complex, but the wave of heat and bending of light is something we really like as far as look.

Presented below is the tests I have done with pops to build a speed trail based on scattered points, attached to a mesh. This would be a similar approach we could use, not building a CG double. But if we have a animation (which we can take off mixamo), we can “mimic” the overall movement of running, and work some compositing tricks to add it to our shots.
Here is the first test using pops. Mimicking the trail described above, using points attached to a moving geometry.
I took these points attached to the geometry, blasting away the others and using these are my emitted for the pops.


To do this, I painted where I wanted my emitter to be, and scattered points based on the group. Deleting the non used points.
Here was the super simple POP set up, adding drag and a small amount of noise to force the particles sporadically.


I also tested the look of adding trails to the points and carving various distances. This gives a lot of control for life span of the trail and what gets carved. So if we want to combine a Flash like lightening and a quicksilver heatwave, we can combine the two.
I basically take a POP sim and add a trail, carving based on the connectivity of the trails. For the future, should we want lightning/noisy trails, we can use this setup and add and per trail adjustments within the for each.


Here is a visualized combination of the two, with a stylized trail that breaks at various points.
Here is that trail stand alone.
Furthermore, I did some work and proof of concept when it comes to our shadow monsters. Here is the references I have compiled for the concept we are wanting to achieve.


This is a super rough version where I casted a shadow from a GS card in Maya, rendered a shadow pass, and comped it in Nuke. For the real deal, there would be more care into the actual casting of the shadow and the light within it, but as for a visualization, I think it gets the idea across.
Here were the two plates I took, one on a blue screen, and another against a blank wall, with a harsh shadow.


I first took a key off the bluescreen, uploaded this to maya, and casted a shadow from a card geo.


Since the wall is flat, and my shadow isn’t moving, it was very similar to the regular plate, but if I were to add geo, like we will in reality, the result will be different. Here was the cast shadow layer and the way I composited within Nuke.


One challenge I know we will face is cinematography of these shots, and setting up the scene the way that would be best when it comes to adding this effect. We have talked with our DP and are getting an idea of justifying the light for our scene and the possibility of doing more GS work with CG environments, which Tripp would take control over.
Overall, we have a good start to the project, with both some previs and initial ideas/approaches for the super powers.
July 23, 2025 - Project Layout and Ideation
Welcome to my senior thesis build log. For my thesis, I am teaming up with a few other VFX Students and Film students to create the film - 4 Ways to Destroy South Aspen High. A story about 4 teenage high school students with super powers.
The current crew/department heads are as follows for this film:
Director - Marina Frontani - https://www.linkedin.com/in/marina-frontani-807586252/
Producer - Chelsea Nott - https://www.linkedin.com/in/chelsea-nott/
Writer - Nevin Allen - https://www.linkedin.com/in/nevin-allen-aa4340234/
VFX Supervisor - Caleb Stovall - https://www.linkedin.com/in/caleb-t-stovall/
Associate VFX Supervisor - Barry (Tripp) White - https://www.linkedin.com/in/barry-white-0298b01b5/
Associate VFX Supervisor - Zachary Malich - https://www.linkedin.com/in/zmalichvfx/
Associate VFX Supervisor - Aaron Linde - https://www.linkedin.com/in/aaron-linde-b2911b253/
Furthermore, For our project, we, as a team, have set up a Collaborative Space as well as a naming convention for our project. On top of this, I have started an organization project on “Monday,” a collaborative space designed to keep our project running smoothly but assigning shots, and keeping the current WIP for each one organized and in one place. This way there is no issues in miscommunication on who is work on what shot and what has been done/not done yet. Here is an example of a sepereate project, called Celestial Court, in which I set up the same approach for my team
